Direct Answer: How to Edge a Flower Bed
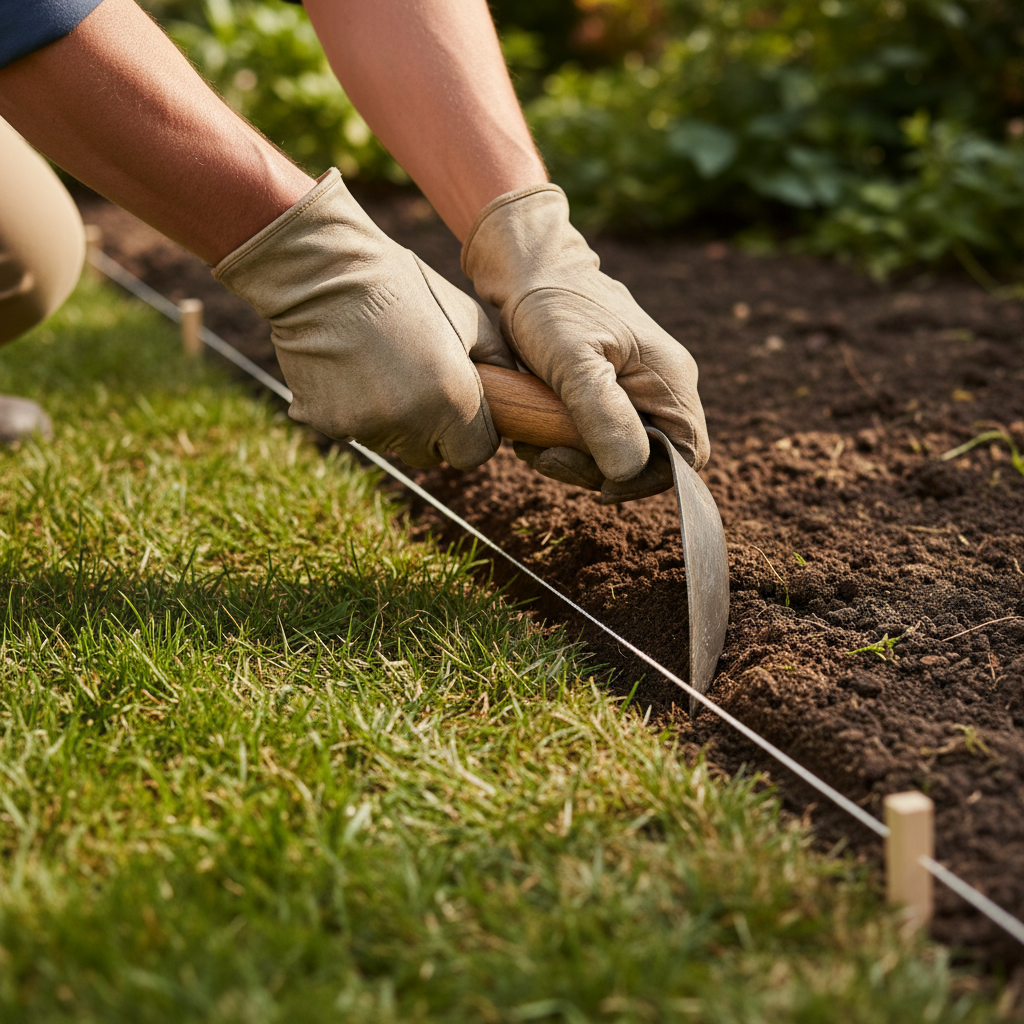
To edge a flower bed, first define a clear boundary line using a garden hose or string. Choose a tool like a spade, half-moon edger, or trenching shovel. Cut vertically along the line to a depth of 3–4 inches, then slice horizontally to remove excess soil and create a clean trench. For a finished look, consider adding decorative materials like stone, brick, or plastic edging. Regular maintenance involves re-cutting the edge annually and trimming overhanging grass.
What Does Edging a Flower Bed Accomplish?
Edging is one of those garden tasks that instantly transforms the look of your yard. A crisp, defined border between your lawn and flower beds makes everything look intentional, tidy, and professionally landscaped. But beyond appearances, edging serves several practical purposes that keep your garden healthy and easy to manage.
Why Edging Matters for a Flower Bed
A flower bed without a defined edge is a magnet for grass invasion. Lawn grasses send out runners and creeping rhizomes that quickly colonize open soil, competing with your flowers for water, nutrients, and sunlight. A clean vertical cut acts as a physical barrier that slows this encroachment and gives you a clear line to maintain.
Edging also solves the practical problem of mowing. When grass grows right up against plants, you either risk damaging flowers with the mower or leave ragged, unkempt strips of uncut grass. A defined edge lets you mow right along the border without stepping into the bed, saving time and protecting your plants.
Main Benefits of a Clean Garden Edge
- Prevents grass invasion — A vertical trench stops creeping grass and weeds from spreading into the bed.
- Improves curb appeal — Clean lines make the entire landscape look deliberate and well-maintained.
- Simplifies mowing — You can run the mower along the edge without scalping plants or leaving grass tufts.
- Keeps mulch in place — A defined border prevents mulch and soil from washing or spilling onto the lawn.
- Improves water efficiency — Water stays in the bed where it belongs instead of running off onto the grass.
- Makes weeding easier — A clear boundary gives you a visible line for hand-weeding and reduces the weed seed bank at the border.
How to Prepare and Mark the Edge Line
Before you make a single cut, you need a clear, accurate line to follow. This preparation step is the difference between a professional-looking edge and a wobbly, uneven one. Take your time here — it is much harder to fix a bad line after the cut is made.
Tools You Can Use to Mark a Straight Line
For straight edges, a taut string or rope is the simplest and most accurate tool. Drive two stakes at the ends of your intended line, tie a string between them, and pull it tight. You can also use a long straight board or a chalk line snapped onto the grass for a visible reference.
Many gardeners prefer a garden hose for marking because it is flexible, easy to reposition, and clearly visible against the lawn. Lay the hose along your intended boundary, step back, and adjust the curve until it looks right before committing to the cut.
How to Create a Curved Edge Design
Curved edges are popular for flower beds because they feel natural and soften the landscape. To design a curve, lay a garden hose or rope on the grass and shape it by eye. Walk around the bed and view it from different angles — what looks good from the house may look different from the driveway.
Keep curves gentle and sweeping rather than tight and wavy. A good rule of thumb is to avoid curves that are tighter than a 2-foot radius, as they are difficult to mow around and hard to maintain. Once you are happy with the shape, spray a line of marking paint or sprinkle flour along the hose to create a visible guide, then remove the hose.
What Are the Best Tools for Edging a Flower Bed?
The right tool depends on the size of your project, the condition of your soil, and how much effort you want to invest. Here is a comparison of the most common edging tools:
| Tool | Best For | Depth Control | Effort Level |
|---|---|---|---|
| Spade | General-purpose edging, cutting through roots | Good | Moderate |
| Half-moon edger | Clean, crisp vertical cuts in established lawn | Excellent | Moderate |
| Trenching shovel | Removing soil and creating deep trenches | Good | Moderate to high |
| Power edger | Long edges, hard or compacted soil | Adjustable | Low |
How to Use a Spade to Edge a Bed
A standard garden spade with a flat blade is the most versatile edging tool. To use it, place the blade vertically at your marked line and push it straight down with your foot to the full depth of the blade. Work in small sections, overlapping each cut slightly to keep the line continuous. The spade is ideal for cutting through thick grass roots and for slicing horizontally underneath the sod to lift it out.
What Is a Half-Moon Edger and When Should You Use It?
The half-moon edger, also called a crescent edger, has a curved, semicircular blade that is designed specifically for making clean vertical cuts. Its shape lets you rock the tool along the line, creating a crisp, uniform edge with less effort than a flat spade. It is the tool of choice for re-cutting an existing edge or for establishing a new edge in established turf.
Use the half-moon edger when you want a sharp, defined line with minimal disturbance to the surrounding lawn. It excels at cutting through grass and thin roots, though it is less effective in heavy, compacted soil or rocky ground.
Trenching vs. Using an Edging Tool
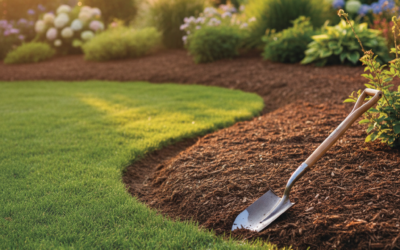
Trenching is a method, not a specific tool. It involves cutting a vertical line and then removing the soil on the bed side to create a small trench or channel. This trench visually separates the lawn from the bed and provides a recessed area where you can install edging materials like brick or stone.
Using an edging tool like a half-moon edger alone simply cuts the line without removing soil. For a basic, natural edge, the cut alone is often enough. For a deeper, more defined border or to install materials, you will need to follow the cut with a trenching shovel to excavate the soil.
Power Edgers and When They Make Sense
For very long edges or hard, compacted soil, a power edger with a rotating blade can save significant time and effort. These tools are especially useful for re-establishing an edge that has been swallowed by grass over several seasons. However, they require more skill to control, can be aggressive on curves, and are an unnecessary expense for a single small bed. For most home gardeners, a manual tool is perfectly adequate.
Step-by-Step Guide to Cutting the Edge
Once your line is marked and your tool is selected, it is time to make the cut. Follow these steps for a clean, professional result:
Step 1: Water the Area (Optional but Helpful)
If the soil is dry and hard, water the line a few hours before you start. Moist soil cuts far more easily and produces a cleaner edge. Avoid working in soaking-wet mud, which smears and collapses.
Step 2: Make the Vertical Cut
Position your spade or half-moon edger directly on the marked line, holding it perfectly vertical. Push it straight down with your foot to a depth of 3–4 inches. For a half-moon edger, rock the blade side to side to work it deeper. Overlap each cut by about an inch so the line stays continuous and there are no gaps or steps.
Step 3: Slice Horizontally to Free the Sod
After the vertical cut is complete, insert the spade horizontally at the base of the cut, angled slightly toward the bed. Push it under the sod to sever the grass roots. This horizontal slice is what creates the clean trench and prevents the grass from simply growing back across the cut.
Step 4: Remove the Excess Soil and Sod
Lift out the strips of sod and soil from the bed side of the cut. Shake off excess soil back into the bed, and compost the sod or discard it. You should now have a clean trench about 2–3 inches wide and 3–4 inches deep running along the entire border.
Step 5: Smooth and Finish the Trench
Use the back of a rake or your gloved hand to smooth the bed side of the trench. The goal is a gentle slope from the bed down into the trench, with the vertical lawn side left crisp and clean. Remove any loose soil from the lawn side so the edge looks sharp.
How Deep Should You Edge a Flower Bed?
A depth of 3–4 inches is the standard recommendation for most flower beds. This depth is deep enough to block most creeping grasses and to hold edging materials in place, but shallow enough to be practical to maintain. If you are installing brick or stone edging, you may need to go slightly deeper to accommodate the material plus a base layer of sand.
What Edging Materials Can I Add for a Finished Look?
Once your trench is cut, you have a choice: leave it as a natural edge or install a permanent material. Natural edges are low-cost and look great in informal, cottage-style gardens. Permanent materials add structure and require less frequent re-cutting, but they involve more upfront work and expense.
Stone and Brick Edging
Stone and brick are the most durable edging materials and can last for decades with minimal care. To install them, lay a 1-inch bed of sand or crushed stone in the bottom of your trench, then set each brick or stone level, tapping it into place. Use a rubber mallet and check each piece with a level as you go. For a curved line, use smaller stones or cut bricks to follow the arc.
Plastic and Metal Edging
Flexible plastic and metal edging strips are easy to install and follow curves naturally. They are installed by pressing or hammering them into the soil along the cut line, with the top edge left slightly above ground level. Plastic is inexpensive and simple, while metal (usually steel or aluminum) offers a sleeker look and greater durability. Both are nearly invisible from a distance, letting your plants take center stage.
Natural Trench Edging
Many gardeners prefer the simplicity of a natural trench edge, which is just the clean cut you made in the previous section. It costs nothing, looks organic, and is easy to refresh. The trade-off is maintenance: grass will slowly creep across the cut, so you will need to re-cut the edge once or twice a year to keep it sharp.
How Do I Maintain a Clean Edge Over Time?
A beautiful edge does not stay beautiful on its own. Regular, light maintenance is far easier than letting the edge disappear and tackling a big re-edging project every few years.
How Often Should You Re-Edge a Flower Bed?
Plan to re-cut the edge at least once a year, typically in early spring before the grass enters its rapid growth phase. If you have vigorous grass or a natural trench edge, you may need a second touch-up in midsummer. Beds with permanent edging materials may only need a trim of overhanging grass rather than a full re-cut.
Best Ways to Trim Grass Along the Edge
Between re-cutting sessions, keep the edge crisp by trimming overhanging grass with a string trimmer. Run the trimmer along the vertical face of the edge, holding it at the same angle as the cut so you do not gouge the soil. For a really sharp finish, some gardeners use a manual edge trimmer or a sharpened half-moon edger for a quick pass along the line.
Seasonal Edge Care Tips
- Spring: Re-cut the edge, remove winter debris, and refresh mulch up to the line.
- Summer: Trim grass every 2–3 weeks and touch up any areas where grass has jumped the line.
- Fall: Clean leaves out of the trench and top up edging materials if needed.
- Winter: Avoid walking on frozen edges, which can crack and crumble.
Frequently Asked Questions
What is the easiest way to edge a flower bed?
The easiest reliable method is to mark your line with a garden hose, cut it with a half-moon edger to a depth of 3–4 inches, and slice horizontally with a spade to remove the sod. This manual approach requires no power tools and gives you complete control over the shape and depth of the edge.
Should I edge before or after planting flowers?
Edge before planting. Establishing the border first lets you work freely around the bed without stepping on new plants, and it defines exactly where the bed begins so you can plan your planting layout. It also keeps mulch and soil contained from day one.
How do I keep grass from growing into my flower bed?
A clean vertical edge 3–4 inches deep is the first line of defense. For extra protection, install plastic or metal edging sunk into the trench, or lay a barrier of landscape fabric along the bed side before adding mulch. Re-cutting the edge annually and trimming overhanging grass regularly will keep the border effective.
Can I edge a flower bed without special tools?
Yes. A sharp flat spade is the only tool you truly need. Mark your line, cut vertically with the spade, then angle it horizontally to lift the sod. A half-moon edger makes the job easier and cleaner, but it is not strictly required for a good result.