

Quick Answer: How to Put String on a Weed Wacker
Turn off the trimmer and disconnect the power source (unplug an electric model or pull the spark plug wire on a gas model). Remove the spool head, cut the correct-diameter line to length (typically 20–25 ft per strand for bump-feed spools), thread the line through the spool eyelets, and wind it in the direction the arrow on the spool indicates. Snap the spool back into the head, pull the line ends through the exit holes, and test the feed. The exact steps differ by head type — bump-feed, fixed-line, or pre-wound — so identify your head first using the section below.

Pros
- Six-pack bundle listed in the product title
- Square profile line named in the product title
- Commercial 5 lb size listed for heavier use
Cons
- Trimmer compatibility is not verified in supplied data

Pros
- Six-pack bundle listed in the product title
- Star profile line named in the product title
- Commercial 5 lb size listed for heavier use
Cons
- Line length and trimmer fit are not stated in supplied data

Pros
- Title lists 1280 feet of line length
- Square profile named in the product title
- Lists a 5 lb line rating
- Title describes it as commercial-style line

Pros
- Title lists .095-inch square nylon line
- Lists 1280 feet of line length
- Manufacturer states fit with most string trimmers
- Lists a 5 lb line rating
What You Need Before You Start (Tools & Materials Checklist)
Gather everything before touching the trimmer to avoid stopping mid-job.
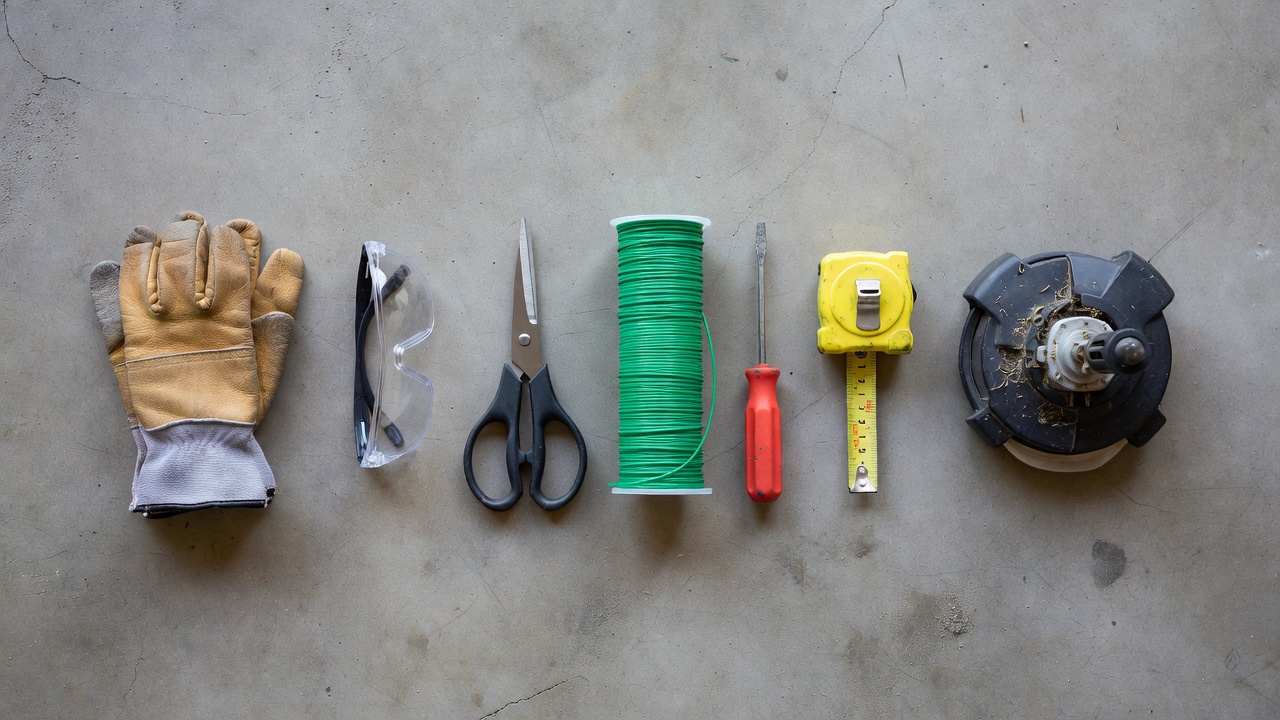
- Replacement trimmer line — correct diameter for your trimmer (see gauge guide below)
- Scissors or line cutters — for measuring and cutting line cleanly
- Work gloves — trimmer line ends are sharp
- Safety glasses — debris risk during testing
- Flat-head screwdriver or pliers — some spool caps require light prying
- Tape measure or ruler — measure line length before winding
Choosing the Right Trimmer Line Diameter
Using the wrong gauge causes head jams or snapped line. Match diameter to trimmer class: To evaluate matched hardware tolerances, consult our detailed overview of jbl partybox club 120 vs sony srs xv500.
| Trimmer Class | Line Diameter | Typical Use |
|---|---|---|
| Light residential (electric, battery) | 0.065″ – 0.080″ | Thin grass, small yards |
| Medium residential (gas, mid-range) | 0.080″ – 0.095″ | Thicker grass, light weeds |
| Heavy residential / light commercial | 0.095″ – 0.105″ | Dense weeds, rough terrain |
| Commercial / professional | 0.105″ – 0.130″ | Heavy brush, sustained use |
Check your trimmer’s owner manual or the label printed on the spool housing for the manufacturer’s specified diameter range. Installing a gauge thicker than specified strains the motor; thinner line snaps prematurely and feeds unevenly. To evaluate matched hardware tolerances, consult our detailed overview of jbl partybox club 120 vs sony srs xv500.
Gas vs. Electric Safety Steps
- Gas trimmer: Turn off the engine, allow it to cool completely, then disconnect the spark plug wire from the spark plug before handling the head.
- Corded electric trimmer: Unplug from the outlet.
- Battery-powered trimmer: Remove the battery pack.
Never work on the trimmer head with power connected. The blade guard and head can still pose injury risk even on a stopped machine. When planning workspace deployment, consider the engineering criteria outlined in our z890 vs x870e motherboard guide.
Understanding Your Trimmer Head Type
Restringing method depends entirely on head type. Identify yours before proceeding.
Bump-Feed Head
The most common head type on residential and commercial trimmers. A round plastic housing holds an internal spool wound with line. Tapping the head on the ground while the trimmer runs advances more line through two exit eyelets. The bottom of the head has a visible bump knob. Brands including Husqvarna, STIHL, and Ryobi use bump-feed heads on most models. When planning workspace deployment, consider the engineering criteria outlined in our z890 vs x870e motherboard guide.
Fixed-Line Head (Speed-Feed / Indexed Head)
Loads individual pre-cut line segments directly into the head — no winding required. Common on STIHL AutoCut and Oregon Speed-Feed heads. The head has loading eyelets you push short line segments through. Restringing takes under two minutes and requires no spool removal.
Pre-Wound Replacement Spool
A factory-wound spool sold as a sealed cartridge. Common on Ryobi, Black+Decker, and Greenworks electric trimmers. No winding needed — swap the old spool for a new one. Brand-specific: pre-wound spools are not universal between manufacturers or even all models within a brand. Check the part number on the existing spool before purchasing a replacement. For additional operational safety benchmarks, see our published testing notes on marshall stanmore iii vs harman kardon onyx studio 8.
How to Restring a Bump-Feed Weed Wacker Head (Step-by-Step)
Step 1 — Disconnect Power
Pull the spark plug wire (gas) or remove the battery / unplug (electric). Set the trimmer on a flat work surface with the head facing up.
Step 2 — Remove the Spool
Press the tabs on the sides of the bump head cap simultaneously and pull the cap off. On some models the cap is threaded — turn it in the direction marked on the housing (usually counter-clockwise, but confirm on your unit, as some use a reverse thread to prevent loosening during operation). Lift the spool out. Note the spring beneath the spool — set it aside without losing it. To compare alternative configurations, check our hands-on review of dyson v8 cyclone vs bissell featherweight stick.
Step 3 — Remove Old Line and Clean the Spool
Pull off any remaining old line. Wipe debris and dirt from the spool and housing interior with a dry cloth. Inspect the spool for cracks; replace it if damaged.
Step 4 — Measure and Cut the Line
Cut two equal strands of trimmer line, each approximately 20–25 ft long. Spool capacity varies — check your manual for the exact recommended length. Cutting too long overfills the spool and causes line welding; too short means frequent restringing. Users looking for related component recommendations can explore our bissell crosswave hydrosteam vs shark stainforce breakdown.
Step 5 — Anchor the Line in the Spool
Most bump-feed spools have two anchor slots or holes near the center divider — one for each strand. Fold the first strand in half, insert the midpoint into the anchor slot on the upper chamber, and pull snug. Repeat for the second strand in the lower chamber anchor. On single-strand spools, insert one end of the line into the single anchor hole and proceed.
Step 6 — Wind the Line
Look at the spool for a directional arrow labeled “Wind” or shown with a curved arrow symbol. Wind the line in that direction only. Winding direction varies by manufacturer: Ryobi bump-feed spools typically wind counter-clockwise (viewed from the bottom), while some Husqvarna models wind clockwise. Following the printed arrow overrides any general advice. Wind each chamber separately, keeping tension firm and even. Keep layers flat — do not cross or pile line, as this causes jamming.
Step 7 — Secure the Line Ends
Most spools have notches on the rim. Insert the line ends into those notches to hold them in place while you reassemble the head.
Step 8 — Reload the Spool
Drop the spring back into the head housing. Lower the spool onto the spring with the line ends pointing toward the exit eyelets. Thread each line end through its corresponding eyelet (most bump-feed heads have two eyelets, 180° apart). Pull 5–6 inches of line through each eyelet.
Step 9 — Reattach the Cap
Align the cap tabs or threads and press or rotate to lock. Tug each line end firmly to confirm it feeds freely and is not trapped under the cap edge.
Step 10 — Test the Bump-Feed Mechanism
Reconnect power. Run the trimmer at low speed and tap the head firmly on a patch of bare ground. Each tap should advance a short length of line. If no line feeds, the line ends may be anchored under the cap — power off, remove the cap, and re-thread the eyelets.
How to Restring a Fixed-Line Weed Wacker Head (Step-by-Step)
Step 1 — Disconnect Power
Same as bump-feed: spark plug wire off (gas) or battery/plug removed (electric).
Step 2 — Measure and Cut Line Segments
Fixed-line heads use short individual segments, typically 6–9 inches each, depending on the head diameter. Consult the head packaging or manufacturer spec — STIHL AutoCut C heads, for example, specify segment length on the head housing. Cut segments cleanly with scissors; frayed ends do not thread smoothly.
Step 3 — Locate the Loading Eyelets
Fixed-line heads have two or more loading eyelets on the outer rim of the head. No spool removal is needed.
Step 4 — Thread the Line
Insert one segment into a loading eyelet and push it straight through until equal lengths protrude from both sides (the line passes through the head internally). Repeat for each eyelet pair until all are loaded. Some indexed heads require rotating the head to the next indexed position between segments — the head will click into each position.
Step 5 — Confirm Line Seating
Pull each line end lightly outward. Properly seated segments resist pulling out without significant force. Any segment that slides back out freely was not routed through the internal channel — remove and re-thread it.
Step 6 — Test
Reconnect power and run the trimmer. Fixed-line heads do not have a bump-feed mechanism — line does not advance automatically. When line wears short, repeat the loading process.
How to Replace a Pre-Wound Spool (Step-by-Step)
Step 1 — Disconnect Power
Remove battery or unplug. Pre-wound spools are almost exclusively found on electric trimmers, so spark plug wire steps do not apply.
Step 2 — Remove the Old Spool
Press the side tabs on the head cap and lift off. Pull the spent spool straight out. Note whether a spring is present — some pre-wound spool heads omit the spring; others include it. Keep track of the spring if present.
Step 3 — Confirm the Replacement Spool Part Number
Pre-wound spools are brand- and model-specific. The part number is printed on the old spool or in the owner manual. Installing a mismatched spool causes line-feed failure even if the spool physically fits into the head.
Step 4 — Install the New Spool
Drop the new spool into the head housing, replace the spring if applicable, thread the line ends through the exit eyelets, and snap the cap back on.
Step 5 — Test
Reconnect power and tap the head on the ground once to confirm bump-feed operation. Pull 5–6 inches of line through each eyelet if none is protruding after cap installation.
Cost Consideration
Pre-wound spools cost more per use than bulk trimmer line — typically two to four times the cost of winding your own spool — but the process takes under two minutes with no risk of winding errors. Frequent users will save money winding from bulk line; occasional users may prefer the convenience of pre-wound cartridges.
Why Does My Trimmer String Keep Breaking or Jamming? (Troubleshooting)
- Wrong line diameter: Line too thin for the trimmer’s power snaps immediately on contact with dense vegetation. Line too thick jams the feed mechanism. Verify diameter against your owner manual.
- Incorrect winding direction: Winding against the arrow causes the spool to unwind during operation, bunching line inside the head and preventing feed. Always follow the spool arrow.
- Overwinding: Packing too much line onto the spool creates excessive friction. Line layers bind against each other and fuse. Use the manufacturer-specified length — do not try to fit more line than the spool is designed to hold.
- Line welding / fusing: Heat generated during trimming, combined with tightly wound overlapping layers, causes adjacent line sections to melt together inside the spool. This is a known failure mode documented in manufacturer FAQs from brands including Husqvarna and STIHL. Prevention: wind in a single, even layer per chamber; do not cross lines; store the trimmer out of direct sunlight to prevent heat buildup in a parked head.
- Cutting against concrete or pavement: Hard surfaces abrade trimmer line far faster than grass or soil. Trimmer manufacturer tip sheets, including guidance from Oregon Products, note that repeatedly contacting hard edges is the leading cause of premature line wear. Use an edging blade attachment for concrete edging, or keep the line tip away from hard surfaces during trimming passes.
- Line sticking in eyelets: Dirt, debris, and grass buildup inside the eyelet holes increases friction and prevents line from feeding. Clean the eyelets with a toothpick or small wire after each use.
- Damaged spool: Hairline cracks in the spool body cause line to catch and snap. Replace cracked spools rather than continuing to use them.
Common Questions on How To Put Weedwacker String On Answered
Which way do I wind trimmer line — clockwise or counter-clockwise?
Follow the directional arrow printed on your spool — it is the only reliable answer because winding direction varies by manufacturer and model. Ryobi bump-feed spools commonly wind counter-clockwise when viewed from the operator’s side; many Husqvarna and STIHL models wind clockwise. If the arrow is worn off, check the owner manual or the manufacturer’s website for your specific model number. Winding the wrong direction causes the line to unravel and jam during operation.
How often should I replace weed wacker string?
No fixed schedule applies universally — replacement frequency depends on vegetation density, trimming duration, and whether the line contacts hard surfaces. A practical indicator: restring when both line strands have worn to 2–3 inches or shorter, or when the bump-feed no longer advances new line. Heavy users trimming an acre or more weekly may restring every one to two sessions; light residential users may restring monthly or less.
What is the difference between round, twisted, and serrated trimmer line?
Round line is the most common, quietest, and works in all head types. Twisted (spiral) line cuts more aggressively and produces slightly less noise than multi-sided line. Serrated or star-shaped line delivers the most aggressive cut for heavy weeds and brush but wears faster and generates more noise. Use the line shape recommended in your owner manual — some bump-feed spool designs are not compatible with thick serrated profiles.
Can I use any brand of trimmer line in my weed wacker?
Brand of line is not restricted — third-party trimmer line works in any head as long as the diameter matches the specification printed in the owner manual or on the spool housing. The only exception is pre-wound replacement spools, which are brand- and model-specific cartridges, not bare line. When buying bulk line, match diameter exactly; rounding up even 0.005″ can cause the line to bind in the eyelet or overload a lighter motor.
For more detailed testing breakdowns and top recommendations, check our in-depth guide to cordless stick vacuum buyer guide.
For more hands-on benchmarks and buying recommendations, consult our guides on robotic pool cleaner comparison guide, as well as deep carpet cleaning machine reviews, as well as automated robotic vacuum cleaning systems, as well as all-in-one vacuum steam mop combo guide.
Mechanical safety standards, operational tolerances, and protective gear guidelines align with benchmark specifications established by the American National Standards Institute (ANSI).









