

Quick Answer: How To Put Trimmer Line On A Weed Wacker?
To put trimmer line on a weed wacker, shut the tool completely down and disconnect its power source, then identify whether you have a bump-feed spool, an easy-load through-the-head design, or a fixed pre-cut head. Use only the line diameter that head is built for. Remove leftover string, wind or lock the new line in the marked direction so both…

Pros
- Six-pack bundle listed in the product title
- Square profile line named in the product title
- Commercial 5 lb size listed for heavier use
Cons
- Trimmer compatibility is not verified in supplied data

Pros
- Six-pack bundle listed in the product title
- Star profile line named in the product title
- Commercial 5 lb size listed for heavier use
Cons
- Line length and trimmer fit are not stated in supplied data

Pros
- Title lists 1280 feet of line length
- Square profile named in the product title
- Lists a 5 lb line rating
- Title describes it as commercial-style line

Pros
- Title lists .095-inch square nylon line
- Lists 1280 feet of line length
- Manufacturer states fit with most string trimmers
- Lists a 5 lb line rating
A weed wacker and a string trimmer are the same class of consumer tool for this job: a spinning head that cuts with nylon line. The loading method depends on the head in your hand, not on the brand stamped on the shaft. Get the power-off step and the head type right first, and the rest is mechanical.
Shut the trimmer down before you touch the head
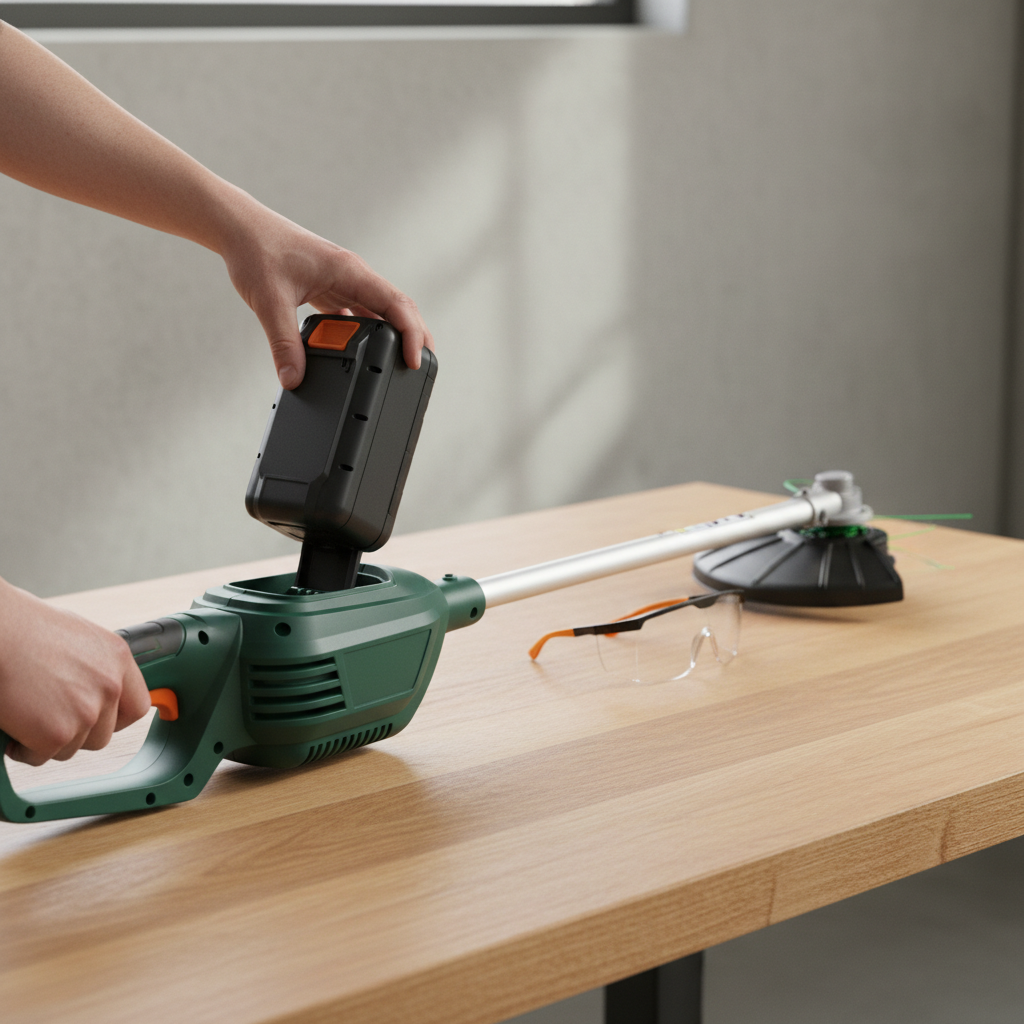
The cutting head can still spin, or start spinning, while you are holding line, a spring, or a loose cap. Treat the tool as live until you have removed its energy source and confirmed that the head is fully stopped.
On a battery model, switch the trimmer off and take the battery pack out of the tool. Do not leave the pack in the handle while the housing is open. On a corded electric unit, switch it off and unplug it from the outlet. Do not rely on a trigger lock alone. On a gas weed wacker, move the switch to off and keep the unit where it cannot be pull-started by accident. Do not treat a gas engine as safe just because it is quiet. If the manual for your model describes a throttle lock, stop switch, or other start-prevention step, follow that label rather than improvising.
Wait until the head has stopped completely. Set the tool on a stable surface so it cannot roll or tip while the cap is off. Keep the cutting guard pointed away from your face and from anyone nearby.
Wear eye protection. Line scraps, grit, and small parts can come off the head when you open it. Gloves help when you are pulling fused string through metal eyelets or handling a housing with sharp edges. Leftover line can slice skin. Eyelets and cracked plastic can do the same. A compressed spring under the spool can launch the cap when the cover comes free, so keep your face out of that path and cup the housing as you open it.
Do not start, spark, or energize the tool while the head is open or while your hands are on the line. That includes bumping the trigger “just to see if it feeds.” Finish the mechanical work first.
Identify what kind of trimmer head you have
Consumer trimmer heads are not all loaded the same way. Forcing a long winding job onto a head that takes short pieces, or trying to stuff pre-cut stubs into a through-the-hub design, is how people jam the spool or throw the cap. Look at the parts, not the logo on the shaft.
Bump-feed spool heads
A typical bump-feed head has a knob or button on the bottom. During use you tap that bump knob on the ground so stored line can pay out through the eyelets. Inside you will usually find a removable spool, a spring, and a cap or cover. Many housings also have molded arrows that show winding direction. This is the most common homeowner design, and it is the one that needs careful winding.
Easy-load or through-the-head systems
Some newer consumer heads never ask you to lift the spool out and wind it by hand. Instead you align marks on the housing, push one long piece of line straight through the hub until both sides are about equal, then twist the knob or housing to wind the line inside. The spool may stay in the head the whole time. If you see through-holes that line up across the hub and arrows that say to align before feeding, you are probably looking at this style.
Fixed-line or pre-cut heads
A fixed-line head does not store a long coil. It locks short pieces of line into slots, holes, or clamps around the rim. Some pieces are sold pre-cut. Others you cut yourself to match the existing stubs. There is no bump knob paying out reserve line. When a piece breaks, you replace that piece.
Automatic-feed heads exist too. They still use stored line, but they try to release it without a bump. The loading job is often similar to a bump-feed or through-the-head unit. Match the method to the parts you actually see: a removable spool and spring, a through-hub path, or short locking slots.
Head type matters more than brand. Aftermarket heads, dual-line and single-line hubs, and “easy load” housings all vary. If the parts in your hand do not match a video for a different model, follow the hardware, not the brand name.
Match line size and type to the head
Use the line diameter stamped on the head, the spool, or in the owner information for that model. That marking is the specification that matters. Do not guess from a neighbor’s trimmer or from a bulk spool that happens to be on the shelf.
Line that is much too thick can jam in the eyelets, keep the spool from turning, or make a small electric motor work harder than it should. Line that is much too thin may break often, slip through the feed path, or fail to bump out because it does not fill the channel the head was built around. Mixing leftover thin scraps with a new thicker piece on the same spool is a common way to get both problems at once: the thin stuff welds or slips, and the thick stuff binds.
If the manual is missing and nothing is stamped on the parts, compare the new line to a remaining piece that still fits the eyelet cleanly. Choose a diameter that passes through the eyelet without force and still has a little contact in the channel. When length is unknown, cut a manageable piece you can wind firmly without overflowing the spool flanges. Leave equal tails. It is better to load a bit less and add another piece later than to pack the spool so full it cannot turn.
Round, twisted, and multi-sided lines all load the same way. Shape is a cutting and feeding preference, not a different installation method. Stiffer or more angular line can be slightly harder to start through an eyelet, but you still follow the arrows, keep coils flat, and keep both sides even. Do not assume a specialty profile is required unless your owner information says so.
Wet, old, or brittle line breaks more easily after you load it. If the coil on the shelf is faded, cracked, or snaps when you flex it, replace the coil rather than winding it into a freshly cleaned head.
Open the head and clear leftover line
Most bump-feed covers come off in one of a few ways: squeeze the tabs on the sides and lift, unscrew the cover, or press and twist. Work over a bench or a clean patch of ground so a spring cannot disappear into the grass. Hold the housing as the cap releases. The spring often sits under the spool and will try to launch the cover.
Decide whether the spool needs to come out completely. For a classic bump-feed rewind, lift the spool out so you can see the split, the notches, and any remaining coils. For a through-the-head system you may only need to align the hub and pull the old line out through the eyelets. For a fixed-line head, you are usually just freeing the broken stubs from their slots.
Pull out leftover string. Short scraps, fused blobs, and tangled nests block the eyelets and keep new line from paying out. If the old line is welded to itself from heat, cut it free rather than yanking until the plastic hub cracks. Clear packed grass and dirt from the hub, the bump knob, and the eyelet holes. A dirty head can look exactly like a line problem.
Keep track of the small parts. Typical pieces are the cap, the spool, the spring, and sometimes a washer or retainer. Lay them out in the order they came off. If the housing is cracked, an eyelet is missing, or a tab is broken, stop. A missing eyelet will saw new line off as soon as the head spins. A cracked housing will not hold the cap. Those are replacement problems, not winding problems. Do not tape the cover or jam homemade fasteners into a spinning head.
Wind line on a typical bump-feed spool
Look at the spool before you cut anything. Many consumer spools are split: two chambers, two lines, two exits. Others take one long piece that feeds both sides, or a single line on a single-exit head. The molded wall down the middle of the spool, and the number of eyelets in the housing, tell you which pattern you have.
Split-spool, two-line winding
On a split spool, cut two pieces of the correct diameter, or cut one long piece and divide it later if the hub is designed that way. Anchor the inner end of each piece in the slot or hole in that half of the spool. Wind each side in the direction of the molded arrows. Keep the coils tight, stacked, and uncrossed. Do not let one side climb over the divider onto the other. Stop when the line is enough to feed but not proud of the spool flanges. Overfill is a common reason the spool will not turn after you put the cap back on.
Single long piece on a shared hub
Some hubs take one long piece folded or locked at the center so both tails wind outward. Hook the midpoint in the center slot if there is one, then wind both tails together in the marked direction, keeping the coils even. The goal is the same: flat layers, no crossings, both sides carrying about the same amount of line.
Direction, notches, and tails
Follow the winding arrows on the spool or housing. Those marks exist because the bump mechanism pays line out in one direction only. Winding against the arrows is one of the most common reasons bumping the head does nothing after a reload. If the marks are worn off, wind so the line will unwind when the bump knob is tapped toward the ground. If the first test after reassembly fails to feed, reverse the wind and try once more before you assume the head is bad.
Leave short tails parked in the spool notches or clips. Those notches are there so the line stays put while you drop the spool back into the housing. Align those tails with the eyelets as you lower the spool. Then pull the tails through the eyelets so they cannot slip back inside when the cap goes on.
Keep both sides roughly equal. An unbalanced head vibrates, cuts poorly, and can walk the remaining line back into the housing. If one tail is much longer, pull or rewind until they match.
Load an easy-feed or through-the-head system
Through-the-head designs skip the removable-spool rewind. The usual sequence is align, push through, center, then twist to wind. Not every “easy load” head works this way, so confirm you can see a clear path across the hub before you force line in from one side only.
Rotate the bump knob or inner hub until the arrows or marks on the housing line up. The through-holes in the hub should face the eyelets so a straight piece of line can pass from one side of the head to the other. If the path is blocked, the marks are not aligned yet.
Cut one piece of the correct diameter, long enough to give you working tails on both sides after winding, but not so long that you cannot control it. Push the line through until it comes out the opposite eyelet. Center the piece so both sides are roughly equal before you wind. If one side is much longer, slide the line until the tails match.
Hold the housing so the line cannot slip, then turn the knob or head in the direction of the wind marks. The line should draw into the hub in even coils. Stop when the line is snug and still able to move, with usable tails still outside the eyelets. Do not keep twisting until the hub binds. There is no universal click count or number of turns that fits every consumer head. If the knob gets hard to turn or the tails stop moving inward smoothly, stop and check for a crossed feed or an overfull hub.
If the line will not pass through at all, do not hammer it. Recheck alignment, confirm the diameter is not too large for the eyelet, and clear any leftover scrap from the tunnel.
Install pre-cut or fixed line pieces
On a fixed-line head, each piece is a separate cutter. Replace both sides at the same time when you can. Matching diameter and roughly equal length keep the head balanced. A long stub on one side and a nub on the other will shake the shaft and throw the remaining piece out.
Use the diameter the head is built for. The slots and locks are sized around that line. A piece that is too thin may not catch. A piece that is too thick will not seat and can fly out when the head spins.
Insert each piece along the molded path until it locks or seats fully. You should feel it catch in the clamp, fold, or channel the head uses. Give it a firm tug by hand before you reassemble anything else. If it slides back out, it is not locked. Do not treat a knot, a twist of tape, or a homemade crimp as a substitute for that lock. Those shortcuts can come apart at cutting speed.
If you are cutting your own pieces because factory pre-cuts are not on hand, match the length of a piece that was already seated correctly, or follow the length shown in your owner information. A homemade cut is not automatically as secure as a piece made for that lock. If the lock is worn and line will not stay put, replace the head rather than stacking workarounds on a spinning part.
Reassemble the head and set the line for first use
Put the parts back in the order they came off. On a bump-feed head that usually means spring first, then spool, then cap. Seat the spring in its pocket so it cannot cock sideways. Set the spool so the posts or notches face the eyelets and the parked tails can pass through those holes. Pull each tail through its eyelet before you commit the cap.
Latch or screw the cap until it is fully seated. Tabs should click into their windows, or the cover should bottom out on the threads without cross-threading. A cap that is only half on will throw itself, the spring, and the spool the first time the head spins. Turn the bump knob by hand if the design allows it. The spool should rotate inside the housing without grinding. If it will not turn, the spool is overfilled, a coil is crossed, or a tail is trapped under the cover. Open it and fix that before you use the tool.
Tails should be even and long enough to cut grass, not so long that they drag on the ground and snap on the first pass. Many cutting guards include a small cutoff blade that trims excess line on the first spin. That feature is common, not universal. If your guard has that blade, stay clear of it with your hands and let the spinning line meet the blade after the tool is started from a normal operating position. If your guard does not have a cutoff blade, trim the tails by hand to a practical working length before you start.
After the cap is on and the tool is fully reassembled, restore power the same way you removed it: battery in, cord plugged in, or gas unit ready according to its own starting instructions. Keep hands, feet, and bystanders away from the head. If you need more line after the first cuts, use the bump knob as designed: with the head spinning and the tool in a normal cutting stance, tap the knob on the ground. Do not hold the head and pull line while the tool is energized. On a through-the-head unit, you can also pull additional line by hand only after the tool is shut down and disconnected again.
Mistakes that keep the head from working
Most failed reloads are mechanical, not mysterious.
- Winding against the arrows stores line so the bump mechanism cannot pay it out. The knob clicks and nothing happens.
- Crossed or loose coils bind against each other and against the housing. The spool locks instead of turning.
- Overfilling the spool so line stands above the flanges keeps the cap from seating or keeps the spool from rotating.
- Mixing leftover thin line with new thicker line creates uneven coils and a feed path that jams or slips.
- Leaving fused scraps or packed grass in the eyelets stops new line at the hole, which looks like an empty spool.
- A missing eyelet or a sharp, worn hole saws the line off as soon as the head spins. That is wear, not a bad wind.
- Unequal tails unbalance the head and can walk one side back into the housing.
- A spring left out, put in upside down, or seated beside the spool lets the cap rattle off or keeps the bump knob from working.
Wrong diameter causes the same symptoms in general terms: oversized line stalls the feed or loads a small motor harder than it should, and undersized line breaks or fails to engage the bump path. None of that requires a special brand of line to prevent. Clean parts, the marked diameter, flat coils, and a latched cap solve most of it.
Do not keep forcing a cracked housing, a knob that will not move, or an eyelet that has worn into a knife edge. Those heads are worn out. Reloading them again will not restore the lock or the feed.
If the new line will not feed, stay put, or keeps breaking
If bumping does nothing after a clean reload, shut the tool down and open the head again. Check winding direction first. Then look for overfill, crossed coils, a tail trapped under the cap, and debris in the hub. Confirm the spring is present and seated. One careful reload after a cleanup is worth doing before you assume the part is bad.
Line that snaps at the eyelet often means the hole is worn sharp, the line is old and brittle, or the tails were so long they slapped the ground and the guard on every revolution. Line that welds itself into a lump inside the housing usually sat there under heat and friction, often because the coils were loose, the wrong diameter was forced through, or leftover scraps were left in the path. Pull the fused mass out, clean the hub, and start over with fresh line of the correct size.
A cap that pops off in use is almost never a line-brand issue. The cover was not fully latched, a tab is broken, the spring is misplaced, or the housing is cracked. Inspect those parts. Replace the head if the latch no longer holds.
Persistent feed failure after a correct reload, a cracked housing, a missing eyelet, or a bump knob that will not click are reasons to replace the head using the tool maker’s guidance for that model. Do not diagnose ignition, clutch, or battery faults from a line-feed symptom alone. If the motor or engine runs and the shaft turns but the head still will not pay out after you have cleared and rewound it, the head is the part to change.
When you install a replacement head, still use the line diameter specified for that head and still follow the same safety sequence: tool off, energy source removed, head stopped, eyes protected. The loading pattern will follow whichever design you bought: bump-feed spool, through-the-head feed, or fixed pre-cut pieces.
Putting trimmer line on a weed wacker is a parts-matching job. Disconnect the tool, identify the head, use the marked line size, wind or lock the string so both sides exit evenly, and latch the cap and spring before you restore power. Do that in order and the cutting head can feed again without a brand-specific service manual.









