

Quick Answer: How To Put Trimmer Line On?
Match the line diameter and head type to your string trimmer, then make the tool safe by unplugging it, removing the battery, or disconnecting the spark-plug wire. On a typical bump-feed head, open the cap, wind or insert the line in the direction marked on the spool, thread the ends through the eyelets, reassemble, and test the feed. Quick-load heads…

Pros
- Six-pack bundle listed in the product title
- Square profile line named in the product title
- Commercial 5 lb size listed for heavier use
Cons
- Trimmer compatibility is not verified in supplied data

Pros
- Six-pack bundle listed in the product title
- Star profile line named in the product title
- Commercial 5 lb size listed for heavier use
Cons
- Line length and trimmer fit are not stated in supplied data

Pros
- Title lists 1280 feet of line length
- Square profile named in the product title
- Lists a 5 lb line rating
- Title describes it as commercial-style line

Pros
- Title lists .095-inch square nylon line
- Lists 1280 feet of line length
- Manufacturer states fit with most string trimmers
- Lists a 5 lb line rating
Identify the head type and the correct line
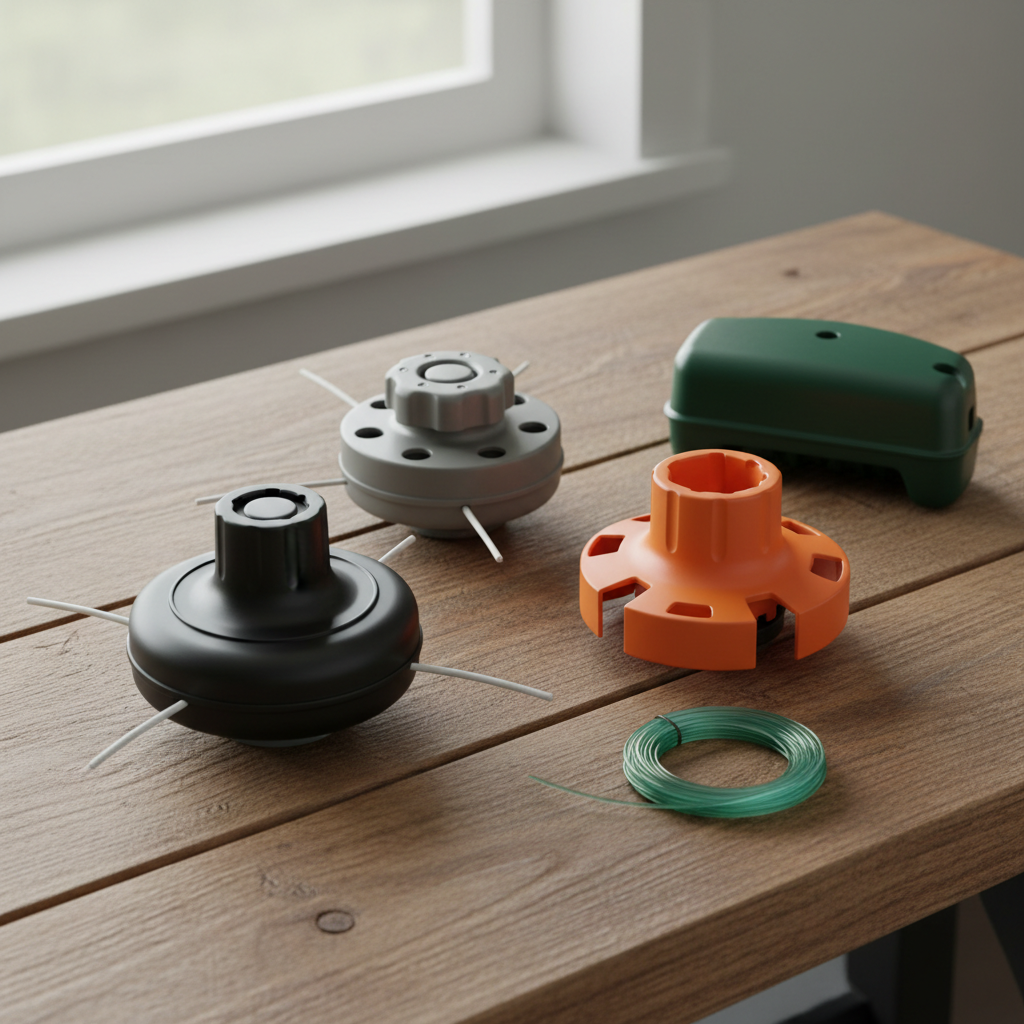
Putting trimmer line on a weed eater is not one universal trick. Consumer string trimmers—corded, battery, and gas—use several trimmer head designs, and the loading method has to match the head you actually have. Before you cut a length of cutting line or buy a replacement spool, look at the housing, the bump knob (if there is one), and any markings on the cap or spool. Those marks, plus the tool’s owner information, are the authority for line diameter and how much the head can hold.
Most homeowner heads fall into a few families:
- Bump-feed head. The most common consumer design. A spring sits under a spool, and a bump knob or button on the bottom lets you tap the head on the ground so more line can slip out through one or two eyelets. The cap usually twists, snaps, or unscrews so you can wind loose line or drop in a pre-wound spool.
- Automatic-feed head. Still uses a spool in many cases, but the head meters line out as it spins or as the remaining stubs get short. You may not bump it, yet diameter and winding direction still matter.
- Quick-load head. Often has two aligned eyelets and a knob or a head you turn by hand. You feed one straight length of line through the housing until it is roughly centered, then wind both sides at once. You usually do not remove a conventional split spool.
- Fixed-line head. No long wound spool. Short pre-cut pieces lock into slots, pins, or clamps until they click or seat. When a piece wears down, you pull it out and insert a new one.
You can often tell these apart without a model-specific manual. A springy tap button on the bottom and a removable cap almost always mean bump-feed. A large winding knob and a through-hole from one side of the housing to the other usually mean quick-load. Visible slots around the rim, with no long stored coil inside, point to a fixed-line head. A sealed cartridge that only comes off as a unit is a pre-wound replacement, not something you are meant to rewind with loose line.
Line diameter, length, and pre-wound versus loose line
Line diameter is usually stamped or molded on the head, the spool flange, the cap, or listed in the owner information. Using line that is too thick is a common way to jam eyelets, stall a small motor, or keep the spool from turning when you bump the head. Line that is much too thin may feed too freely, break sooner, or fail to stay seated in notches. There is no single “correct” inch or millimeter size for every string trimmer, so treat any size printed on a package as a match only if it agrees with your head.
Capacity is also head-specific. Some heads state a maximum length; others simply run out of room between the spool flanges. If the head does not list a maximum, start with a conservative length that you can wind evenly below the rims rather than forcing a long coil into a small spool. Overfilling is one of the main reasons bump-feed stops working. When in doubt, check the head or manual instead of assuming a universal foot or meter count.
Use a pre-wound spool when the head is designed for that cartridge, when you want a faster swap, or when the original spool is cracked. Use loose trimmer line when the head is a rewindable bump-feed or quick-load design and you already have the correct diameter. Loose line is also the usual choice if you only need to replace what broke and the spool itself is still sound. Do not mix a random aftermarket cartridge into a head that only accepts the matching shape, and do not assume every dual-line spool will drop into every dual-line housing.
Shape (round, twisted, multi-sided) is a preference and a compatibility question, not a ranking. Stay with a nylon cutting line the head is built for. Skip metal or wire-reinforced products unless the head and tool information clearly allow them; those products can be more hazardous and can damage a consumer housing.
Make the trimmer safe to work on
A string trimmer can start if the switch is bumped while you have your hands in the head. Isolate power before you open anything:
- Unplug a corded trimmer at the tool or the outlet so the cord cannot be reconnected by accident.
- Remove the battery pack from a cordless trimmer and keep it away from the tool until the head is fully back together.
- On a gas model, switch the engine off and disconnect the spark-plug wire so a pull on the starter or a jostled switch cannot fire the engine. Wait if the muffler, gear case, or head is hot.
Lay the tool on a stable, level surface so it cannot roll. If it is a gas unit, keep it oriented the way you normally store it so fuel does not leak from the cap or carburetor. You do not need a formal lockout procedure for a typical homeowner reload, but you do need the cutting head still and the power source removed. Letting a hot engine cool is common sense, not an invitation to drain the tank or service the fuel system.
Wear eye protection while you handle leftover line and debris packed in the eyelets. Gloves help with sharp housing edges, broken nylon stubs, and grit. Keep fingers off the cutting path and off any leftover line that is still under tension in a jammed eyelet. Do not service a head that is still spinning, and do not defeat the guard to make the job “easier.”
Open a typical bump-feed spool or cap
Most bump-feed heads come apart in one of a few ways. Look first instead of prying:
- Arrows or an “open” mark on the cap that tell you which way to twist.
- Squeeze tabs on opposite sides of the cover.
- A center screw or retaining knob that holds the bump button and cap.
Support the housing so you are not twisting against the shaft. Turn or release only as far as the marks allow. If the cap is a sealed cartridge or the head uses a through-bolt unique to that model, follow those markings rather than forcing a generic teardown.
Keep the parts in order as they come off. A typical stack is the cap, the spool, a spring under the spool, and sometimes a washer or the bump knob as a separate piece. The spring is easy to lose in grass. Set the parts in a tray in the same sequence you removed them so reassembly is obvious.
Pull leftover line out of the eyelets before you lift the spool. Old nylon can weld itself into a metal or plastic eyelet after heat and friction. If a stub is stuck, work it out from the outside rather than yanking the spool sideways and cracking a tab. Debris packed around the spring or under the cap is normal; brush it out so the spool can sit flat later. If the cap will not budge, stop and look again for a hidden tab or screw. Forcing a stuck cover is how bump-feed housings crack.
Wind single-line and dual-line bump-feed spools
Winding direction is not universal. Many spools and some inner housings have arrows or text such as “wind this way.” Follow those marks. Winding the opposite way is a frequent reason the bump feed will not release line: the coil tightens on itself or the inner end cannot slip when you tap the knob.
If you are installing a pre-wound spool, skip the winding and go to seating the ends in the eyelets. If you are using loose line, cut a length that will fill the spool without stacking above the flanges. Capacity is limited by those flanges and by whatever maximum the head states. A long leftover coil that stands proud of the rim will rub the housing and lock the spool.
Single-line spools
A single-line head has one path for line and usually one eyelet, or two holes that still feed a single stored coil. Anchor the inner end in the hole or slot in the hub, then wind tightly and evenly in the marked direction. Keep each wrap beside the last rather than crossing into a tangle. Leave enough free end to reach through the eyelet and still have a working length outside the housing after the cap is on. Many spools have a notch on the flange; park the free end in that notch so the coil cannot unwind while you handle the spool.
Dual-line spools
A dual-line head typically has two chambers or a divider and two eyelets. Load each side as its own coil, or follow the split-spool path molded into that particular spool. Do not assume every dual-line design uses the same pattern. Anchor each inner end in its hub slot if the spool provides one, wind both sides in the direction of the arrows, and keep the two coils from climbing over the divider. Leave two free ends, each long enough to pass through its own eyelet. Park those ends in the holding notches so they stay put during reassembly.
In both single-line and dual-line setups, tension matters more than speed. Slack wraps shift, overlap, and then lock when the head spins. Overfilling—line stacked above the spool rim or jammed against the cap—stops the spool from moving on the spring when you bump the knob. If the last wraps will not sit below the flanges, remove line rather than forcing the cap down.
Thread the eyelets, reassemble, and set the working length
Put the spring back on the hub first unless your head clearly stacks parts in another order. The spool must sit on that spring (or on the matching hub feature) so it can slide when the bump knob is tapped. An inverted or missing spring is a common “it will not feed” problem that looks like a line issue.
Before the cap goes on, pass each free end out through its eyelet. On a dual-line head that means one end through each eyelet. Do not trap the ends inside the housing and hope they find the holes later. If the spool has holding notches, keep the ends in those notches until the line is started through the eyelets, then pull the slack through so the coil cannot jump. The line should exit cleanly without folding back under the spool or pinching between the cap and the housing.
Seat the cap the way it came off: twist to the lock marks, snap the tabs, or refit the retaining screw or knob. The cap should sit flush. If it will not close, the spool is overfilled, a wrap is sitting on the rim, the spring is cocked, or a tab is not aligned. Do not hammer it on.
Trim the exposed ends so they clear the guard and are short enough to start without slapping the shield. On a dual-line head, keep the two ends similar in length so the head is balanced enough to run. There is no single correct cutoff in inches or centimeters for every guard; the shield and the head determine how much can stay outside. Leave enough to cut, not long loops that can weld in the eyelets on the first spin.
Turn the head by hand with power still isolated. It should rotate without grinding, the bump knob should have a little spring travel, and the line should not disappear back inside. If the spool binds, the cap walks off, or the spring feels dead, open it and restack the parts before you restore power.
Quick-load, automatic-feed, and fixed-line heads
If your head is not a rewindable bump-feed spool, do not force the steps above. The families below cover the other common consumer designs. Model-specific fasteners, alignment marks, and cartridge part numbers belong on the head or in the manufacturer information, not in a generic sequence.
Quick-load or knob-wind heads
Many quick-load heads align two eyelets across the housing. Cut one straight piece of the correct diameter—long enough to reach through and still leave working ends, short enough that the knob can wind it without burying the last wraps against the cover. Push the line through until the two outside lengths are roughly equal. Then rotate the knob or the head in the direction marked so both sides wind at once. Stop when the remaining stubs are a sensible working length outside the eyelets. If the knob will not turn, the line is too thick, not centered, or already stacked against a wall of the chamber.
Automatic-feed heads that still use a spool
Some automatic-feed heads still hide a conventional spool. You load diameter and direction the same way you would on a bump-feed unit, even if you never tap a button. Others meter line with a different inner mechanism. If the head opens like a bump-feed, treat winding, eyelets, and the spring as above. If it does not open, or if it only accepts a factory cartridge, replace the cartridge rather than prying.
Fixed-line and pin-style heads
Fixed-line heads use equal pre-cut pieces pressed or locked into slots until they click or seat. Match the length and diameter the head is built for. Insert each piece fully; a half-seated strand can fly out when the head spins. Replace worn pieces in pairs or in a balanced set if the head uses more than two so the rotating mass stays reasonably even. There is no winding direction because there is no coil.
When to replace the whole pre-wound cartridge
Replace the cartridge when the head is sold as a sealed unit, when the original spool is cracked or the hub is stripped, or when the inner end of the line has pulled out of the anchor so the coil cannot feed. Winding loose line onto a damaged spool wastes time and usually repeats the jam.
Test the feed and fix common loading problems
Restore power only after the head is fully assembled and the guard is in place. Keep bystanders away. Wear eye and face protection; broken line and debris leave the head at speed. Start on a clear surface, not in gravel aimed at windows or people.
For a bump-feed test, run the trimmer briefly, then tap the bump knob on bare soil or another surface the tool is meant to bump on. Avoid rock and pavement when that is likely to shatter line or the button. You should see a short additional length come out, then the cutter on the guard (if the head has one) should trim the excess. For a quick-load head, confirm both ends are present and that a brief run does not immediately suck the line back in. For a fixed-line head, confirm every piece is still locked after a short run at normal speed. Do not run the head above the speed the tool is designed for, and do not remove the guard to “see the feed better.”
Why line will not advance
These are usual causes, not a complete diagnosis of every head:
- Line wound against the arrows, so the coil tightens instead of releasing.
- Line stacked above the spool rim or pressed against the cap (overfill).
- Wrong diameter jammed in the eyelets.
- Ends never passed through the eyelets, or they slipped back inside before the cap locked.
- Missing, inverted, or unseated spring, so the spool cannot move when bumped.
- Old nylon fused in an eyelet from heat, or line that has gone brittle in storage.
- Cracked cap tabs, a cap that is not fully seated, or a spool that cannot turn on the hub.
Line that breaks immediately after a reload is often the wrong diameter, a nick from a sharp eyelet, a start with ends so long they slap the guard, or line that was already weathered. Line that welds in the eyelets is often too much length outside the head, a stall against a hard surface, or leftover melted nylon that was never cleared.
When the head is worn rather than loaded wrong
Rounded eyelets saw the line in half. Broken tabs will not keep a cap on. A weak or missing spring will not bump-feed no matter how neatly you wind. A stripped hub or a shattered housing will not stay assembled. If those parts are damaged, replace the head rather than forcing another coil of line into it. Replacing a spring can restore feed when the spring is the only fault; it will not fix rounded eyelets or a cracked cover.
Safety, line choice, and when to stop
Once the cutting line is live again, treat the head as a spinning cutter. Flying line and debris can injure eyes and face. Never reach into a spinning head, and never service the tool with the battery installed, the cord plugged in, or the spark-plug wire connected. Keep the guard on. If the housing starts to come apart in use, shut the tool down and isolate power before you inspect it.
Do not install line thicker than the head allows. A heavier diameter is not a shortcut to more cutting power on a consumer string trimmer; it is a way to overload the head, the shaft, or a small electric motor. Metal or wire-reinforced cutting line can throw more hazardous fragments and may be restricted on some consumer heads—follow the head and tool information. Line shape is optional within what the eyelets can pass; it is not a reason to ignore diameter limits.
Replace the head instead of reloading it when the housing is cracked, the bump button has failed, the tabs will not lock, the hub is stripped, or the eyelets are worn into sharp grooves. A head that will not stay assembled is done. Reloading will not repair that.
Some jobs do not belong on heavier line. Thick brush, small saplings, and work against fences, stone, and wire eat nylon and can shatter a light head. A blade or a different tool may be the right choice for that material, but attachment rules vary by tool and by local rules. Follow the manual and the labels on the machine; do not assume a line head can be converted to a blade, and do not remove safety devices to mount something the guard was not built for.
If the head uses an unusual fastener, a sealed cartridge you cannot identify, or damage around the shaft and clutch, stop and use the manufacturer information or a qualified repair shop. Reloading trimmer line is a consumer maintenance job. Repairing a bent shaft, a failed clutch, or a cracked gearbox is not.
Quick checklist
Use this as a recap after you have identified the head, not as a substitute for the matching method:
- Confirm bump-feed, quick-load, automatic-feed, fixed-line, or a sealed pre-wound cartridge.
- Match line diameter (and any stated maximum length) to the head, spool, or owner information.
- Unplug the cord, remove the battery, or disconnect the spark-plug wire. Let hot parts cool.
- Open the cap only the way the marks, tabs, or screw indicate. Keep the spring.
- Wind in the marked direction, evenly, below the flanges—or feed a straight length on a quick-load head, or lock pre-cut pieces in a fixed-line head.
- Send every free end through its eyelet, reassemble the spring, spool, and cap, and equalize dual-line ends.
- Restore power, wear eye and face protection, and test feed on a clear surface. If nothing advances, check direction, fill level, diameter, eyelets, and the spring before you assume the head is defective.
Done in that order, putting trimmer line on a string trimmer is a matching problem first and a winding problem second. The head design tells you the method. The markings tell you diameter and direction. Power isolation and a seated spring and cap are what keep the job from becoming an injury or a jammed spool.









