How to Replace a Riding Lawn Mower Blade: Step-by-Step Safety Guide
To replace a riding lawn mower blade, you must first disconnect the spark plug wire and securely raise the mower using ramps or jack stands. Then, access the cutting deck, remove the blade bolt with the correct socket, install the new blade with the cutting edges facing the correct direction, and torque the bolt to the manufacturer’s specification, typically 70–90 ft-lbs.
Understanding Riding Lawn Mower Blade Replacement
Replacing the blade on a riding lawn mower is essential maintenance for maintaining a clean, healthy cut. A dull or damaged blade tears grass rather than cutting it cleanly, leading to brown tips and increased susceptibility to disease. This guide provides a universal procedure applicable to most lawn tractors and zero-turn mowers.
How is a riding mower blade different from a push mower blade?
Riding mower blades are generally longer, heavier, and often have a specific “air-lift” wing design to create a vacuum effect that stands grass up for cutting. The mounting hardware and torque requirements are also significantly higher than on walk-behind mowers.
How often should riding mower blades be replaced?
Most manufacturers recommend inspecting blades every 25 hours of use. Depending on your mowing conditions and frequency, a full replacement is typically needed once per season or whenever you notice significant nicks, bends, or uneven wear.
Tools and Supplies You’ll Need
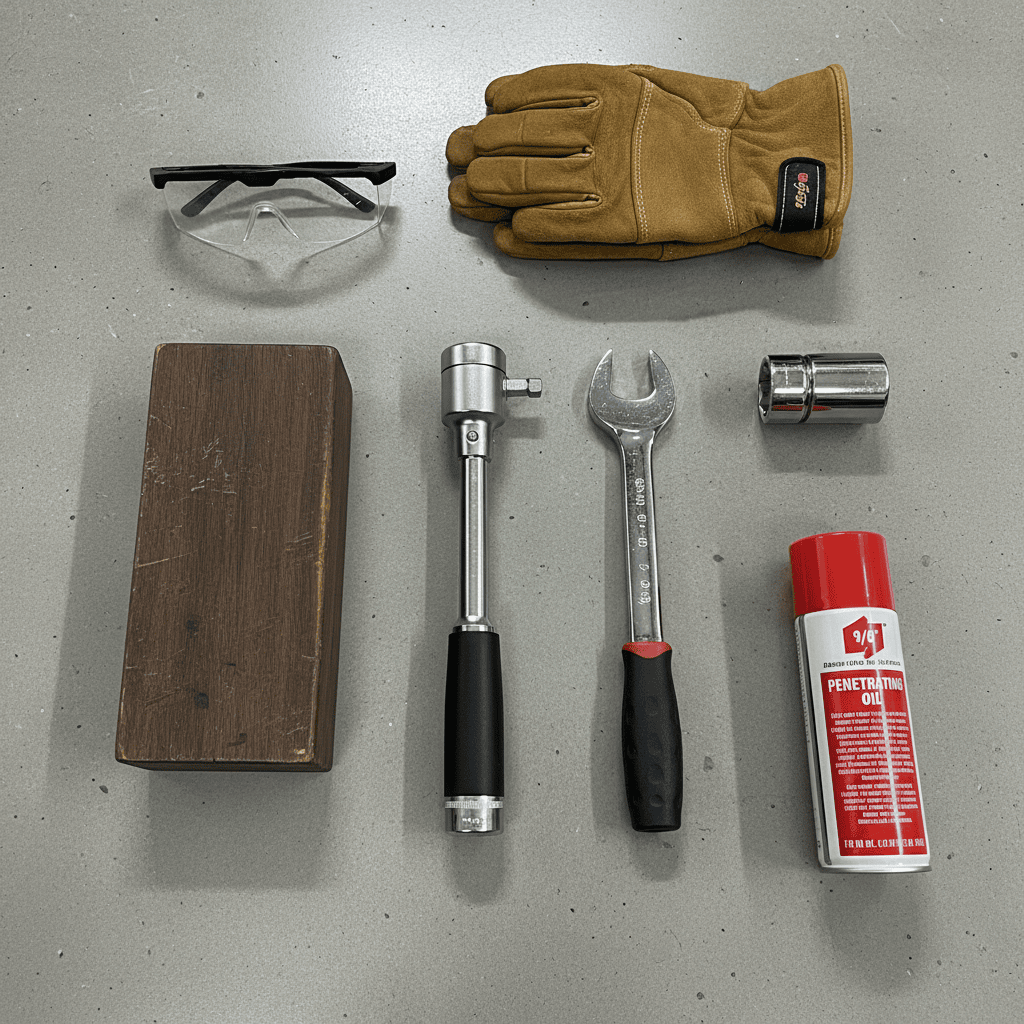
Gather all necessary tools before lifting the mower to ensure a smooth and safe process.
- Safety Gear: Heavy work gloves and safety glasses.
- Socket Wrench Set: Most riding mower blade bolts require a 15/16″ or 5/8″ socket. Always check your specific model’s manual.
- Torque Wrench: Essential for tightening the new blade to the correct specification (typically 70–90 ft-lbs).
- Blade Holder Tool or Wood Block: Used to stop the blade from spinning while you loosen or tighten the bolt.
- Jack Stands or Ramps: Never rely on a hydraulic jack alone. Use rated jack stands or sturdy ramps to support the mower’s weight.
- Penetrating Oil: Useful if the blade bolt is rusted or seized.
Preparing the Mower Safely Before You Start
Safety is the absolute priority when working under any machinery. Follow these steps to secure the machine.
- Park on Level Ground: Ensure the mower is on a flat, paved surface.
- Engage Parking Brake: Set the brake firmly and remove the ignition key.
- Disconnect Spark Plug: Pull the spark plug wire off the plug to prevent the engine from accidentally starting.
- Secure the Mower: Drive the front wheels onto ramps or use a floor jack to lift the front end, then immediately place jack stands under the frame. Never work under a mower supported only by a jack or hydraulic lift.
Step-by-Step Guide to Removing the Old Blade
Once the mower is secure, you can proceed with removing the old blade.
- Access the Deck: Depending on your model, you may need to remove the cutting deck entirely or simply tilt the mower to one side to access the underside. Consult your owner’s manual for the best method.
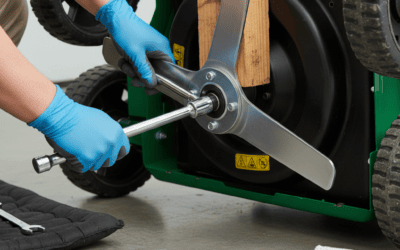
- Block the Blade: Insert a block of wood between the blade and the deck housing to prevent the blade from spinning.
- Loosen the Bolt: Using your socket wrench, turn the center blade bolt counter-clockwise to remove it.
- Remove Hardware: Carefully remove the bolt, any washers, and the old blade. Note the order of the hardware for reassembly.
Installing the New Blade: Orientation, Bolt Order, and Torque
Installing the blade correctly is critical for safety and performance.
- Check Orientation: The new blade must be installed with the cutting edges facing up toward the deck. The stamped part number or “air-lift” wing should also face up. Installing it upside down will result in poor cutting performance.
- Reassemble Hardware: Place the blade and washers back onto the spindle in the exact reverse order they were removed.
- Tighten to Spec: Use a torque wrench to tighten the bolt to the manufacturer’s specification, usually 70–90 ft-lbs. Do not guess; over-tightening can strip threads, while under-tightening can lead to the blade flying off.
Reassembly, Final Checks, and Testing
Before you start mowing, perform these final checks.
- Reconnect Spark Plug: Firmly reattach the spark plug wire.
- Lower the Mower: Carefully remove jack stands and lower the mower to the ground.
- Visual Inspection: Ensure the blade is secure and spins freely without hitting the deck.
- Test Run: Start the mower briefly and listen for any unusual vibrations or noises that might indicate an imbalance or loose hardware.
Lawn Tractor vs. Zero-Turn vs. Push Mower Differences
While the core procedure is similar, access varies by mower type. Zero-turn mowers often have easier deck access, while garden tractors may require more extensive deck removal. Always verify your specific model’s requirements in the manual.
Frequently Asked Questions
Can I use a regular wrench instead of a torque wrench?
While you can use a breaker bar or regular wrench to loosen the bolt, you should always use a torque wrench for installation. Proper torque ensures the blade is secure without damaging the spindle threads.
What should I do if the blade bolt is stuck?
Apply a penetrating oil like PB Blaster and let it sit for 15–20 minutes. You can also use a breaker bar for extra leverage. Ensure the blade is still blocked with wood to prevent it from spinning.
Which direction do I turn the blade bolt to remove it?
Most riding mower blade bolts are standard right-hand threads, meaning you turn them counter-clockwise to loosen and clockwise to tighten. Always check your manual to confirm, as some models may have left-hand threads.
How do I know if I installed the blade upside down?
The cutting edge (the sharpened side) should always face up toward the mower deck. If the blade is installed upside down, the mower will not cut effectively and may leave a ragged, uneven finish on the grass.