To sharpen a typical walk-behind rotary push mower, disable the machine so it cannot start, remove the blade, inspect it, restore the existing cutting bevel with a file or grinder without overheating the steel, check balance, then reinstall the blade in the correct orientation and tighten the hardware securely. Replace the blade instead if it is bent, cracked, badly gouged, or worn too thin to hold a safe edge.
When a push mower blade needs sharpening
A walk-behind rotary mower cuts with a spinning steel blade under the deck. When that edge is sharp and even, it slices grass. When the edge is dull, nicked, or rounded over, the blade tears the leaf instead of cutting it. Torn grass often looks ragged right after mowing, then turns brown or gray at the tips as the shredded ends dry out. Clippings may come out long and stringy rather than short and even. The engine or motor can sound as if it is working harder than usual in ordinary turf, and the lawn may look fuzzy or uneven even when the wheels are set to the same height.
Those signs are not the same as every other mowing problem. Wet, lush grass will clump and smear whether the blade is sharp or not. A deck set too low can scalp high spots and leave brown patches. Packed clippings on the underside of the deck stop the blade from lifting and discharging grass. A bent deck, a missing wheel adjuster, or one side sitting higher than the other leaves a step in the cut. If the mower is otherwise clean, set at a sensible height, and used on reasonably dry grass, a torn, browning finish is a strong clue that the rotary lawn-mower blade is dull or damaged.
Sharpening is enough when the blade is still straight, the center hole is sound, and the cutting portion still has enough steel to hold a bevel. It will not fix a bent blade, a cracked blade, or a blade worn paper-thin at the edge or around the mounting hole. It also will not turn a rotary walk-behind mower into a reel mower. Reel mowers use a scissor action between a spinning cylinder and a bedknife; that is a different machine and a different service job. Riding mowers and robotic mowers have their own decks, spindles, and safety interlocks. The steps below are for a typical single-blade rotary push mower.
Mulching blades and high-lift blades are sharpened on the same idea: restore the cutting bevel on the leading edges and leave the rest of the profile alone. A mulching blade usually has extra cutting surfaces or a more complex curve so clippings stay under the deck longer. A high-lift blade has more pronounced lifting sails, or wings, that pull air and clippings upward toward the discharge chute or bag. Do not grind those sails into a new shape. Copy the factory geometry that is already on the steel.
Safety first: disable the mower before you touch the blade
The most serious risk is not a dull edge. It is a blade that starts spinning while your hands are under the deck, or a still-sharp blade that cuts deeply when you grab it. Wear sturdy gloves and safety glasses before you tip the mower or reach underneath. Closed-toe shoes help. If you will use a grinder, add hearing protection and keep loose clothing, hair, and jewelry away from the wheel.
Do not rely on the bail handle, control bar, or an “off” switch alone. Those controls can fail, bounce, or be bumped. Disable the power source so the machine cannot start.
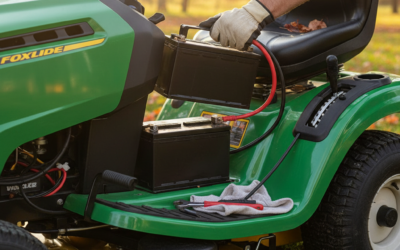
Gasoline walk-behind mowers
- Park on a level, stable surface and wait until the muffler, engine, and deck have cooled.
- Disconnect the spark-plug boot and position the wire so it cannot spring back onto the plug terminal.
- If you must tip the mower, tip it with the spark-plug side facing up so oil and fuel are less likely to run into the air filter or carburetor. If the owner’s manual describes a preferred tipping direction, follow that.
- Some people drain a little fuel or run the mower until it is nearly empty before tipping. That reduces spills, but removing the spark-plug boot is still required.
Battery and corded electric push mowers
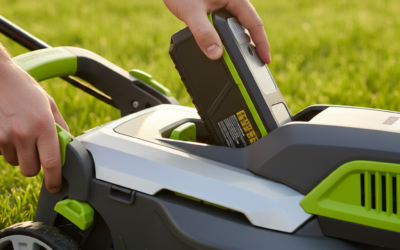
On a battery model, remove the battery pack and keep it away from the machine until the blade is back on and tools are clear of the deck. On a corded model, unplug the cord at the mower, not only at the wall, so a bump cannot restore power.
If your machine has unusual interlocks, a key, or a manufacturer-specific disable step, use the owner’s manual. The goal is simple: the engine or motor must not be able to start while anyone is under the deck.
Tools and protective gear you will need
You do not need a full shop. You do need a way to stop the blade from spinning, a way to restore the existing bevel, and a way to check that both ends still weigh about the same. Choose the sharpening method you can control.
Protective gear
- Sturdy work gloves that still let you hold a wrench
- Safety glasses, because filings and rust flakes travel
- Hearing protection if you use a bench grinder or angle grinder
- Closed-toe shoes
Removal and cleanup
- A block of wood or a blade-holding fixture to keep the blade from turning
- A socket or combination wrench that fits the blade bolt
- Penetrating oil if the bolt is rusted in place
- A scraper or putty knife for caked grass under the deck
- A camera or marker so you can record which face of the blade was up
Sharpening and balance
- A metal hand file and a vise if you want the slower, more controllable method
- A bench grinder or angle grinder if you want speed and accept more risk of overheating or removing too much steel
- A cone-style blade balancer, or a simple check using a nail, dowel, or screwdriver shank through the center hole
- A torque wrench if you have one and the manual lists a value
- Replacement hardware if the bolt, lock washer, or blade adapter is damaged
A hand file is slower and easier to keep on the existing cutting bevel. A grinder is faster and easier to overheat or overgrind. Neither tool is universally best. Use the one you can keep under control, and stop if the steel starts to discolor from heat.
Remove the blade without damaging the bolt or deck
Scrape packed grass off the underside of the deck first so you can see the blade, the blade bolt, and any washers or adapters. Photograph the assembly from underneath. Mark the top face of the blade and the direction of the lifting sails with a paint pen or a strip of tape. Many rotary blades have a cutting edge that leads in the direction of rotation and a slightly cupped or winged back that throws clippings. Installing the blade upside down is a common and dangerous mistake: the edge will not cut properly, and the sails may drive debris downward instead of lifting it.
Access the underside by tipping the mower as described earlier, or by raising it only if you have a stable, intended support. Do not crawl under a mower that is balanced on a jack or propped on a wobbly object.
To loosen the center bolt, brace the blade with a wood block against the deck so the blade cannot spin. Do not hold the cutting edge with your bare hand, and do not jam a screwdriver through a hole in a way that can slip into the edge. Most consumer walk-behind blade bolts loosen counterclockwise, like ordinary right-hand threads, but that is not a universal rule. If the manual shows the opposite, follow the manual.
Keep the bolt, any lock washer, flat washer, blade adapter, or star insert in the order they came off. Those parts locate the blade on the crankshaft. If the bolt will not budge, apply penetrating oil, wait, and try again with a snug-fitting socket. Avoid hammering an impact tool in a way that can strip the crankshaft end or shear the bolt. If the head rounds off, or the shaft seems to turn independently of the blade, stop and get help rather than forcing it.
Inspect the blade: sharpen or replace
Clean the blade with a scraper and a wire brush or solvent so cracks and thinning are visible. Look along both cutting ends, around the center hole, and across the body. Normal use leaves small nicks from twigs and pebbles. Structural damage is different.
Replacement is the better choice if you find any of the following:
- A bend or twist in the body
- Cracks, especially near the center hole or at the root of a deep nick
- Large missing chunks
- An edge or body worn very thin
- A center hole that is egg-shaped, wallowed, or no longer fits the adapter tightly
- Widespread heat discoloration from a previous grinding job
Minor nicks can often be dressed out while you restore the bevel. A bent blade is unsafe even if you can make the edge sharp again. It will not track in a flat plane, it is hard to balance, and the vibration can loosen hardware and stress the crankshaft or motor shaft. A structurally weak blade can fail in use. If you are unsure whether a mark is a surface nick or a crack, replacement is the conservative choice.
Do not treat a leftover width or thickness as a universal discard limit. If the blade maker prints a wear mark or a minimum dimension, use that specification. Otherwise, if the steel looks too thin to hold a safe edge or the mounting hole no longer locates the blade firmly, buy a new blade.
Sharpen the cutting edge without changing the factory bevel
The cutting portion is the beveled leading edge on each end of a typical rotary blade. The lifting sail or wing on the trailing side of each end moves air and clippings. The center area mounts to the adapter. File or grind only the cutting bevel. Do not reshape the sails, thin the center, or turn the trailing edge into a second knife.
Match the existing factory bevel. Blade angles vary by design, so copying the bevel already on the steel is more reliable than chasing a single number in degrees. Keep that angle consistent along the cutting portion, and remove similar amounts of metal from both ends so balance is easier later.
Hand-file method
Clamp the blade in a vise with the bevel facing up and accessible. Push a metal file along the bevel in smooth strokes, following the original angle. Work the full cutting portion, not just the tip. Repeat on the other end, aiming for the same amount of metal removal. Lightly deburr the back of the edge so you do not leave a wire that folds over on the first mow. A file is slower than a grinder, but it is easier to keep from overheating the steel or changing the factory shape.
Bench grinder or angle grinder
If you use a bench grinder or angle grinder, make light passes and keep the blade moving. Do not park the steel on the wheel. Wear eye protection, and keep gloves and clothing clear of the wheel. If the metal starts to discolor from heat, stop and let it cool. Brief cooling in water can help control heat during light grinding, but sudden cooling after a heavy grind is not a reliable way to undo overheating. Widespread blueing or other heat color can mean the temper is damaged: the edge may not last, or the steel may be more brittle. If that happens over a large area, replacement is safer than putting the blade back in service.
There is no single wheel grit, speed, or quench method that applies to every home shop and every blade. Use light pressure, watch the color of the steel, and stop while you still have a controlled bevel.
How sharp is sharp enough
A lawn-mower blade needs a clean, even edge that will slice grass, not a polished razor like a kitchen knife or a chisel. A slightly blunt, uniform edge holds up better against dirt and small debris than a wire-thin edge that folds on the first pass. You can check by seeing whether the edge will nick a piece of paper or cleanly cut a blade of grass. You do not need a mirror finish.
Check blade balance after sharpening
An unbalanced rotary blade shakes the whole machine. Vibration can loosen the blade bolt, wear the blade adapter, and stress the crankshaft on a gas mower or the motor shaft on an electric model. Hardware that backs off under a spinning blade is a serious hazard.
Support the blade horizontally at the center hole on a cone balancer, or on a level nail, dowel, or screwdriver shank clamped in a vise. The heavy end drops. Remove a little metal from that heavy end, preferably from the back or from an unsharpened area rather than by aggressively shortening one cutting edge. Recheck. Repeat in small steps until the blade stays roughly level.
A homemade center-support check is not as precise as a shop spinner, and it does not need to be. If one end keeps diving and you cannot bring the blade close to level without ruining the edge or the sails, replace the blade.
Reinstall the blade and secure the hardware
Clean the crankshaft adapter, the blade’s mounting faces, and the bolt threads so packed grass is not trapped between parts. Debris under the blade can tilt it and undo the balance work.
Reinstall in the original orientation. The cutting edges should lead in the direction of rotation. The lifting sails should sit as they did from the factory, usually so they throw clippings upward and outward, not downward into the turf. Use your photo and marks. If the blade has a stamp or other cue for the grass side, follow it.
Replace a damaged bolt, lock washer, or adapter rather than reusing hardware that is stretched, rounded, or cracked. Some manuals call for specific replacement hardware; follow that when it is listed. Thread locker is not a universal requirement. Use it only if the manufacturer specifies it.
Tighten the blade bolt firmly while the blade is blocked with the wood again. If the owner’s manual lists a torque value, use a torque wrench and that value. There is no single tightness that fits every walk-behind mower. If you do not have a published spec or a torque wrench, tighten securely with the correct-size wrench so the blade cannot slip on the adapter, then recheck the bolt after a short mowing session.
Restore the discharge chute, mulch plug, or side guard before you use the mower. Clear tools from under the deck. Only then reconnect the spark-plug lead, reinstall the battery, or plug the cord back in.
Before the first full pass, start the mower from a normal operating position, listen for unusual vibration or scraping, and stop immediately if something sounds wrong. Recheck that guards are in place and that the cut looks cleaner than it did with the dull blade.
Common mistakes and when to stop and get help
The mistakes that cause the most harm are working under a deck that can still start, holding a blade by the edge, installing the blade upside down, leaving the bolt loose, grinding away the lifting sails, overheating the steel, sharpening only one end, and putting a cracked or bent blade back on the mower. An impact tool used carelessly can also strip the crankshaft or shear the bolt.
If the lawn still looks torn after a careful sharpening, look beyond the edge. Check cutting height, whether the deck is level side to side, whether the underside is packed with clippings, and whether the grass was wet. A crankshaft or motor shaft bent from an earlier impact can make even a sharp, balanced blade wobble. If the blade tip traces an uneven path, or if the mower vibrates hard with a newly balanced blade, stop and have the machine inspected.
Professional sharpening or a new blade is the better use of time when you cannot hold the blade securely, the bolt or adapter is damaged, the blade will not balance, you overheated a large area of steel, or you suspect a bent shaft. A replacement blade for a common single-blade rotary push mower is often simpler than trying to rescue a blade that has already lost its shape. If the hardware, deck, or shaft looks wrong and the manual does not make the next step clear, take the mower to a qualified shop rather than forcing the parts back together.