

Quick Answer: How To Sharpen A Push Mower?
On a typical walk-behind rotary push mower, you sharpen the metal blade under the deck, not the mower itself. Isolate power so the machine cannot start, remove the blade after marking which way it faces, restore an even cutting edge on both ends with a file or a careful light grind, check balance, then reinstall it in the original orientation….

Pros
- Large-size design named in product title
- Sharpening and balancing functions listed
- Listed as a new upgraded version

Pros
- Adjustable 15-to-45-degree range in title
- Sharpening and balancing functions listed
Pros
- Includes replacement gaskets and a 98079-55846 spark plug
- Matches Honda HRR216 and HRS216 lawn mower models
- Designed around the 16100-Z8B-901 carburetor specification
Cons
- Restricted to select Honda GCV160 mower applications
- Installation requires basic mechanical tools and skills
What you are actually sharpening
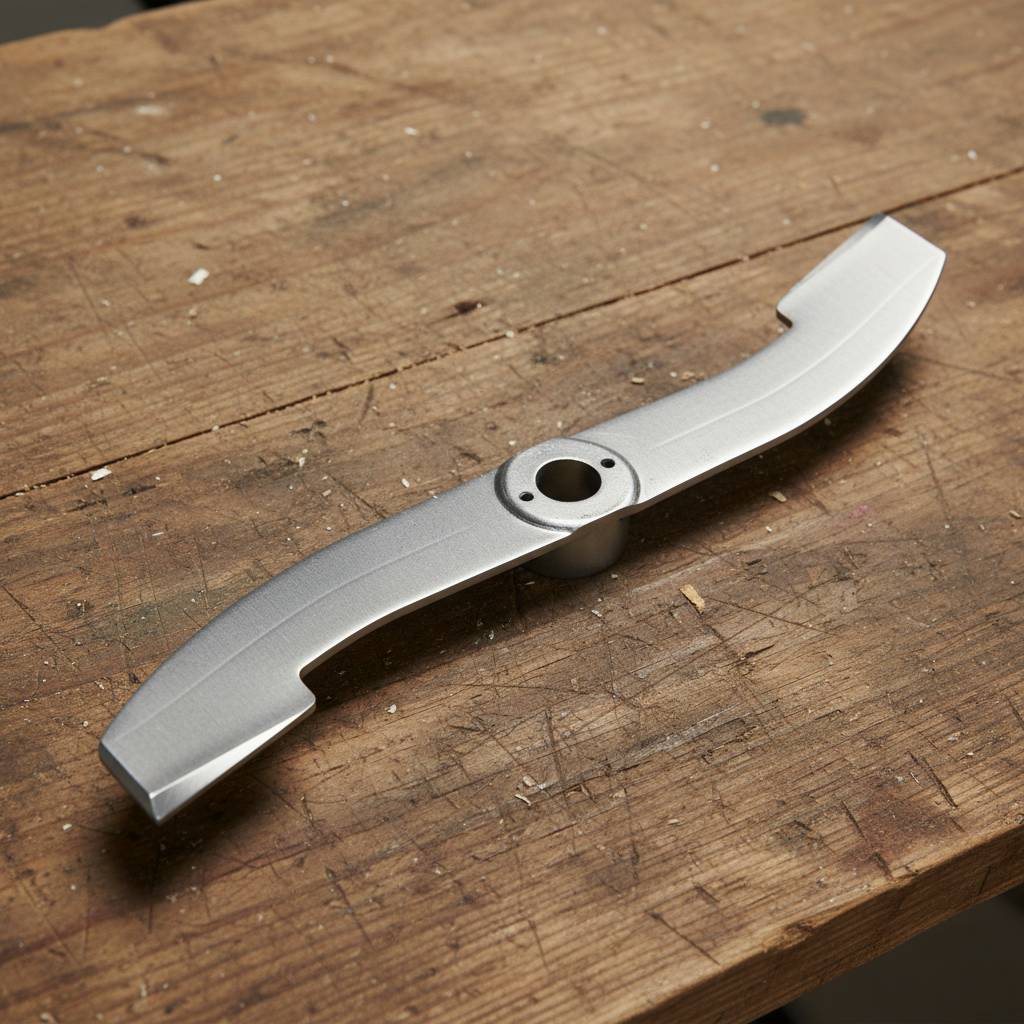
Most people who want to know how to sharpen a push mower are really asking how to restore the rotary blade. That blade is the spinning steel bar under the mower deck. On a common walk-behind rotary mower it is a bar-style blade with two cutting ends. Each end has a beveled cutting edge. Behind that edge, many blades include a raised lift or sail that helps move clippings into a bag, out a side chute, or back onto the lawn.
You are not grinding the deck, the engine, or the wheels. Those parts do not create the cut. A dull or damaged rotary blade tends to tear grass instead of slicing it cleanly. After a pass, leaf tips often look shredded or frayed. The lawn can take on a brownish cast as those torn tips dry. The mower may also sound more strained, and wet or thick grass can clog the deck more easily. Sharpening can restore a cleaner slice. It does not promise a particular lawn color or a show-quality finish.
This process applies to a typical rotary walk-behind mower, whether the machine is gasoline, corded electric, or battery powered. The power source changes how you isolate the machine. It does not change the basic job: take the blade off, restore the existing bevels evenly, check balance, and put the blade back the same way it came off.
A reel or cylinder mower is a different tool. Those machines use a spinning reel of helical blades that shear grass against a fixed bed knife. They are sharpened with a different process and should not follow these steps. If you are not sure which type you have, look under the deck. A single long bar with two cutting tips is rotary. A cylindrical reel with several spiral blades is not.
Mulching, bagging, and high-lift blades can look slightly different from one another. For a homeowner, the task is still the same: refresh the existing cutting edges without inventing a new shape. You do not need a specific brand of blade or a shop-only machine when a standard rotary blade is still structurally sound.
Safety steps before you touch the blade
Two hazards matter more than anything else. The blade can cut you even when the mower is off. The engine or motor can also start while your hands are under the deck if power is still connected. Isolate the machine first. Then let hot parts cool. Then set up a stable place to work.
Isolate power by mower type
How you isolate power depends on the mower you have. These methods are not interchangeable, so match the step to the machine.
For a gasoline mower, pull the spark-plug boot off the spark plug and keep the boot away from the plug so it cannot snap back into place. That disconnect is the usual way to reduce the chance of an accidental start. Some manuals add another lockout, such as removing the plug. Those extra steps are not required on every machine, so follow the instructions that came with your mower when they differ.
For a corded electric mower, unplug the power cord from the outlet and from the mower if the cord detaches. Do not rely on a handle switch alone.
For a battery mower, remove the battery pack and set it aside, well away from the machine. Confirm that no second pack is still seated in the mower.
Protect yourself and stabilize the machine
Wait until the engine, muffler, deck, and blade are cool enough to touch. A recently used gas mower can burn skin even after it has been shut off. There is no single wait time that fits every engine and every day, so use temperature, not a clock, as your guide.
Work on a level, firm surface. Chock the wheels or otherwise brace the mower so it cannot roll when you lift a side or reach under the deck. Keep children and pets out of the work area. Wear sturdy gloves and eye protection. The cutting edge may already be sharp in spots, and metal filings can fly once you start filing or grinding.
Do not reach under the deck until power is isolated. Do not test the starter, pull the recoil cord, or squeeze the bail while the blade is off or while your hands are under the housing. If the mower feels unstable, or if you cannot isolate power with confidence, stop and have a qualified small-engine shop handle the blade.
Tools and a conservative setup
A basic homeowner kit is enough for a blade that is dull but not damaged. You do not need a professional sharpener for a standard rotary blade in decent condition.
Useful items include:
- Work gloves and eye protection
- A block of wood to brace the blade while you loosen or tighten the fastener
- The socket or wrench that fits the blade bolt
- A marker or a short strip of tape to record blade orientation
- A metal file or a whetstone
- A vise or a sturdy clamp to hold the blade
- An optional bench grinder or angle grinder
- A commercial blade balancer, or a nail or screwdriver for a simple hang test
A hand file is the more conservative method. It removes steel slowly, keeps heat down, and makes it easier to stay on the original bevel. A power grinder is faster, but it is also easier to overheat the steel, change the angle, or thin the cutting area until the blade is unsafe. If you have not used a grinder on a mower blade before, start with a file.
You do not need a particular brand of file, a required grit, or a shop certification for this job. Skip any tool that would let you grind out a bend or a crack. Those blades should be replaced, not repaired at home.
Remove the blade without losing orientation
Mark orientation first
Before a wrench touches the blade bolt, record how the blade sits. Photograph the underside of the mower deck. Mark the deck-facing side of the blade with a marker or tape. Note the order of the bolt, any washer or adapter, and the blade itself. Blade orientation is easy to lose once the parts are in your hand. A blade installed backward or upside down will not cut well and can leave a ragged lawn even if the edge is sharp.
Access the deck and loosen the bolt
How you access the deck depends on the mower. Follow the machine’s own instructions when you have them. Some walk-behind mowers can be tipped or stood in a way the manufacturer allows. For many gasoline mowers, the usual caution is to avoid tipping the machine so that fuel or oil can run into the air filter or carburetor. If you must raise one side, keep the carburetor and air filter side higher when that is the guidance in your manual. If the manual is missing, keep the tilt modest, work slowly, and do not drain or add fluids unless you know the correct procedure for that mower.
Brace the blade with a block of wood so it cannot spin while you loosen the fastener. Never hold the blade with a bare hand. Some blade bolts loosen in the direction you expect. Others are reverse-thread. There is no universal thread direction that applies to every push mower. Notice how the fastener begins to turn. If it will not loosen with reasonable force, stop and check the manual rather than applying heat, an impact gun, or improvised leverage that can round the bolt or damage the crankshaft.
Keep every washer, spacer, and adapter together and in order. Those small parts control how the blade seats on the shaft. Set the blade on a bench once it is free and inspect it before you sharpen. Look for bends, cracks, deep notches, and thinning at the ends. If the blade is already unsafe, skip sharpening and replace it.
Restore an even cutting edge
Stay on the factory bevel
Sharpen only the existing beveled cutting edges. On a typical rotary blade those are the leading edges of both wings. Leave the lift or sail alone except for a light cleanup of burrs. Do not file the flat trailing face into a new knife edge, and do not try to create a different angle than the factory bevel.
Match the bevel that is already there. There is no single degree measurement that is correct for every push-mower blade, so copying the existing slope is safer than guessing an angle. Work both ends the same way and remove about the same amount of metal from each cutting edge. Uneven work is the usual reason a freshly sharpened blade ends up out of balance.
Keep heat and metal removal in check
If you are using a file, clamp the blade in a vise with the bevel facing up. Use steady strokes along the bevel, pushing the file so it cuts rather than sawing back and forth at random. Keep the file flat on the existing angle. Continue until the dull, rounded edge is gone and you have a clean, even line. Repeat on the other end. A few light strokes on the back of the edge can knock off a wire burr. Stop while the edge still looks like a sturdy chisel, not a paper-thin knife.
If you use a grinder, take light passes only. Keep the blade moving so one spot does not sit in the spark stream. Pause often so the steel can cool. If the metal begins to discolor from heat, you are removing material too aggressively. Overheating can weaken the blade. Over-thinning the cutting area can make it chip or crack later. A grinder is a time saver, not a requirement, and it is the easier way to ruin a blade that was still usable.
Do not grind out large bends, deep notches, or cracks. Those are replacement conditions, not sharpening problems. Do not chase a razor finish. A rotary mower blade needs a clean, even edge that can stand up to grass, soil, and the occasional twig. When both ends look similar and the bevels are consistent, stop and check balance.
Check balance before the blade goes back on
A blade with one heavy end can shake the whole machine. That vibration can loosen the blade bolt, wear the mower deck, and put extra stress on the engine or motor. Balance is not a nicety after sharpening. It is part of making the blade safe to run.
A commercial blade balancer holds the blade horizontally on a small cone or pivot. If one side dips, that side is heavier. If you do not have a balancer, a simple hang test is enough to show a clear imbalance. Slide a nail, a screwdriver, or a similar smooth rod through the center hole and hold it level. Let the blade settle. If one end drops, that end is heavier.
When one end is heavy, remove a little more metal from that cutting edge and check again. Take off a small amount at a time. The goal is a blade that hangs close to level, not a laboratory result. A homemade hang test is useful, but it is not as precise as shop equipment. If the blade is bent, or if it still will not hang reasonably level after conservative, even work, replace it. Do not keep grinding in search of a weight tolerance you cannot measure at home.
While the blade is off, sight along its length. A twist or a banana-shaped bend will keep it from running true even if the two ends weigh about the same. A bent blade belongs in the scrap pile.
Reinstall the blade and do a cautious first run
Face the blade the right way
Put the blade back in the marked orientation. On a typical rotary blade, the cutting edges lead in the direction of rotation, and the lift or sail generally faces the deck. If your marks and photos disagree with a guess, trust the marks. A blade installed upside down or backward will not lift clippings the way it should and may leave a ragged cut.
Tighten, reconnect, then test
Seat every washer or adapter in the original order. Start the blade bolt by hand so you do not cross-thread it. Tighten the fastener firmly. If your manual lists a torque value, use that value and a torque wrench. There is no single foot-pound number that is safe to invent for every mower. A loose blade is dangerous. A wildly overtightened bolt can damage threads or make the next removal difficult.
Only after the blade is secure should you reconnect power. Push the spark-plug boot fully onto the plug, reseat the battery pack, or plug the cord back in. Clear tools, wood blocks, and loose gloves away from the deck. Start the mower on level ground with your feet well clear of the housing.
Listen and watch for a few seconds before you start mowing. Stop immediately if you feel heavy vibration, hear unusual noise, or suspect the blade is loose. Shut the mower down, isolate power again, and recheck the fastener, the adapter stack, and the blade itself. Do not keep running a machine that shakes hard. A first run after sharpening should sound familiar and feel smooth. It will not automatically produce a perfect cut height or a particular lawn appearance.
When to replace the blade instead of sharpening
Sharpening restores an edge. It does not repair structural damage. Replace the blade rather than sharpen it if you find any of the following:
- The blade is bent or twisted.
- You can see a crack, including a small crack near the center hole or at a cutting end.
- A large chunk is missing, or a notch is deep enough that filing it out would change the blade’s shape.
- The cutting area looks thin, or the ends are much shorter than they were when the blade was new.
- The blade will not come close to balance after light, even sharpening.
Hitting rocks, roots, sprinkler heads, or hard edging is a reason to inspect carefully before you reuse the blade. A single hard impact can bend the steel or start a crack that is easy to miss if you only look at the edge.
There is no reliable remaining-width measurement or maximum number of sharpenings that applies to every blade. When in doubt, a new blade is the safer choice. Aftermarket and original-equipment blades can both work when they are the correct size and mounting style for the mower. Neither type is automatically better in every case. Match the blade to the machine, install it in the correct orientation, and keep it balanced.
A badly out-of-balance blade is not worth saving. Grinding more and more steel to chase balance usually leaves you with a thin, weak cutter. Replace it.
If the lawn still looks ragged after sharpening
A newly sharpened blade should slice more cleanly than a rounded one, but a ragged lawn after the job does not always mean the edge failed. Check the simple causes first.
The two cutting edges may still be uneven. The blade may be installed upside down or backward. A leftover imbalance or a loose blade bolt can shake the cut. Grass that is wet, overly long, or mowed too short for the turf can tear even when the edge is decent. A clogged mower deck keeps clippings packed around the blade so the cut cannot stay clean. Isolate power, clear the underside of the deck, confirm blade orientation, and try again on dry grass at a more suitable height.
If vibration continues after you have confirmed that the blade is undamaged, reasonably balanced, and securely installed in the right direction, stop mowing. Isolate power and inspect the hardware, the deck, and the blade again. Persistent shaking can come from a missing washer, a cracked adapter, a bent blade you overlooked, or debris packed on one wing. Do not keep using the mower while you guess. Vibration alone is not proof of engine failure or hidden structural damage. If a careful recheck does not find an obvious cause, a qualified shop should look at the machine.
Reel and cylinder mowers, badly damaged rotary blades, and any job you cannot isolate safely are better handed to a professional. For a typical walk-behind rotary push mower with a sound blade, the homeowner path is straightforward. Disconnect power, mark and remove the blade, restore both bevels evenly, confirm balance, and reinstall the blade so it cannot come loose.









