

Quick Answer: How To String Trimmer Line?
Stringing a trimmer means loading fresh monofilament cutting line onto the head so the exposed tips can cut grass and weeds. On a typical consumer bump-feed spool head, isolate power, open the housing, clear old line, wind the correct diameter in the marked direction, then reassemble so the ends exit the eyelets and advance when you bump the head. Line…

Pros
- Six-pack bundle listed in the product title
- Square profile line named in the product title
- Commercial 5 lb size listed for heavier use
Cons
- Trimmer compatibility is not verified in supplied data

Pros
- Six-pack bundle listed in the product title
- Star profile line named in the product title
- Commercial 5 lb size listed for heavier use
Cons
- Line length and trimmer fit are not stated in supplied data

Pros
- Title lists 1280 feet of line length
- Square profile named in the product title
- Lists a 5 lb line rating
- Title describes it as commercial-style line

Pros
- Title lists .095-inch square nylon line
- Lists 1280 feet of line length
- Manufacturer states fit with most string trimmers
- Lists a 5 lb line rating
What stringing a trimmer means
To string, restring, or reload a string trimmer is to install cutting line on the trimmer head. The line is almost always nylon monofilament. Once the ends stick out through the head, those tips do the cutting. The rest of the line stays stored on a spool inside the housing until you advance more.
That job is not the same as choosing which line to buy, starting the engine or motor, or replacing a cracked head. It is also not the same as swapping a ready-made prewound spool or cassette, which some heads accept without hand-winding. Fixed-line and some quick-load heads do not use a long wound coil at all; they take short pre-cut pieces pushed through slots or holes.
You usually need this task when the exposed tips are worn to the eyelets, the spool is empty, leftover line is welded or brittle, or the line will not advance no matter how you bump the head. If the shaft will not spin, the motor or engine will not run, or the housing is broken, restringing will not fix the tool. In those cases the problem is elsewhere.
Safety before you open the head
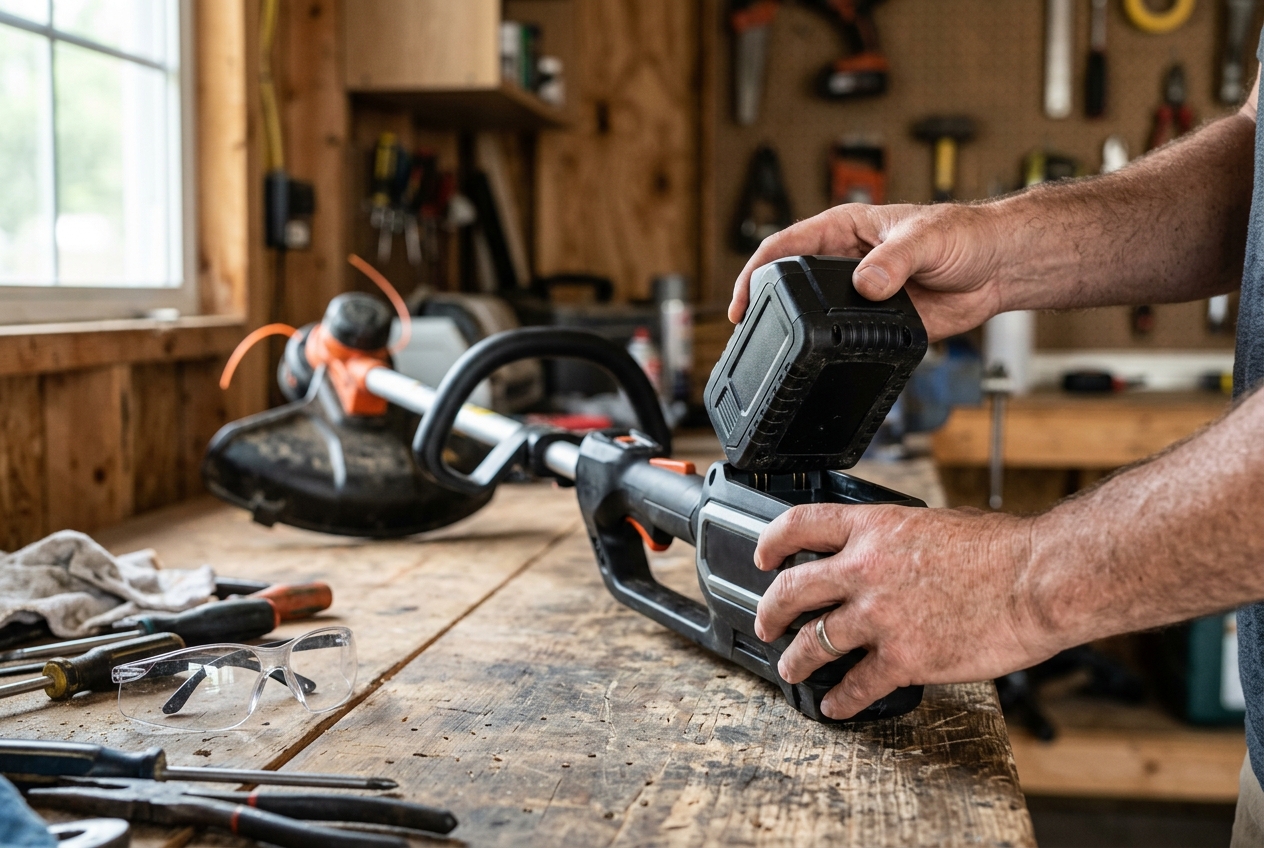
Treat the head as able to start or store energy even when the tool looks off. A bump-feed head can still hold spring tension. Never service a running trimmer, and do not put a hand near the line while the head can still spin.
Isolate power before any hand is near the head:
- On a gas trimmer, disconnect the spark-plug boot so the engine cannot fire.
- On a corded electric model, unplug the power cord from the outlet.
- On a cordless model, remove the battery completely rather than relying on the trigger switch.
Wait until the head has stopped completely. Set the tool on a stable surface so the housing cannot roll or drop while the cover is off. Wear eye protection; leftover line, grit, and plastic fragments can snap or fly when you pull old line or later test the feed. Gloves help if the line has sharp, melted ends.
Exact lockout, fuel-handling, and battery procedures belong in the tool manual for your model. Follow those instructions when they are more specific than this overview. Do not work with the guard removed as a shortcut, and do not defeat safety features to make the head easier to open.
How trimmer head type changes the method
Consumer string trimmers use several head designs. The loading method depends on the design you actually have. A winding sequence that works on a dual-line bump-feed spool will not fit a fixed-line head, and a “feed the line through the eyelets without opening” shortcut only works on heads built for that method.
Bump-feed spool heads
A bump-feed head is the usual homeowner design. A spool sits inside a housing. Line exits through one or two eyelets. More line is released when you tap the bump knob on the ground while the head is spinning. After you isolate power, you typically open the cover, lift out the spool, wind new line, route the ends through the eyelets, and latch the cover again. That is the method the rest of this article describes in detail.
Auto-feed, fixed-line, and prewound designs
An auto-feed head advances line without a bump, often by centrifugal action or an internal mechanism. You may still wind a spool, but the advance test is different, and some auto-feed units are meant to take a replacement cassette rather than a hand-wound coil.
A fixed-line head, and many “quick-load” or “speed-feed” style heads, uses pre-cut pieces. You push a length through a slot or hole until it locks, then trim the ends. There is no long winding job and often no removable spool in the bump-feed sense.
Some heads accept a prewound spool or cassette. You discard or recycle the empty unit and drop in a matching replacement. That is faster than winding, but the cassette must match the head. Do not force an unrelated spool into a housing that was not made for it.
Single-line and dual-line
A single-line head has one exit. A dual-line head has two eyelets and usually cuts a wider path with better balance. Dual-line spools may take one piece folded in half or two separate lengths, each anchored in its own notch or hole. Count the exits and look at the spool before you cut line.
Winding direction, whether the spool comes out, how the spring sits, and how many ends you feed are model-specific. If the head does not match a simple open-and-wind bump-feed layout, stop following a generic method. Use the arrows or “wind this way” marks on the spool and the manufacturer instructions for that head.
Match line size and type to the tool
Line diameter is the first compatibility check. Get it from the marking on the trimmer or head, the owner’s manual, or the old line only if you know that line was the specified size. Do not guess from a neighbor’s tool or from a bulk spool that happens to be on the shelf.
Thicker monofilament line generally resists wear better on tougher weeds and light brush, but it may not pass the eyelets and can overload a small motor if the head was rated for a thinner size. Thinner line feeds more easily and is gentler on compact trimmers, but it breaks sooner and may slip or weld if you wind too much of it. Never force oversized line into a head rated for a smaller diameter.
Round line is the common general-purpose shape and is what most consumer heads were designed around. Other shapes exist and can change how the tip feels against grass, but no shape is universally faster or easier on the motor. Material blends also vary; stay with line sold for string trimmers rather than improvised cord or wire. Metal cutting line and other substitutes the head was not designed for can damage the tool and throw debris.
If the packaging and the tool disagree, the tool wins. A bulk spool is only useful when its diameter matches the head.
Open the head and remove old line
Most consumer bump-feed housings come apart at the bump knob or a snap-on cover. Before you pull anything, look at how the cap is retained. Some covers unscrew. Others have tabs you press inward. A few use a retainer that stays with the knob. There is no single universal release, so do not pry blindly.
A practical sequence for a typical removable-spool head:
- Confirm power is isolated and the head is still.
- Note or photograph the orientation of the cover, bump knob, spring, and any washer before parts leave the housing.
- Release the cover the way that head is designed—press the tabs or unscrew—then lift it off.
- Lift out the spool. Watch for a spring under or around the spool; it can jump free.
- Pull remaining line off the spool. Do not leave fused blobs in the grooves.
Brush grass, dirt, sap, and melted fragments out of the eyelets and the spool cavity. Line will not slide if the exits are packed. Check the spool for cracked flanges, stripped anchor slots, and grooves worn so deep that new line will slip. Check the bump knob and housing for cracks.
Discard line that is brittle, flattened, welded, heat-glazed, or too short to reach the eyelets with a useful working end. Fresh-looking leftover line can be reused only if it is still round, flexible, and the correct diameter. Do not reuse a tangled nest that already bound up in the housing.
Do not lose the spring. Do not lever plastic tabs with a screwdriver hard enough to break them. If the cover will not release after a reasonable attempt, check the manual for that head rather than forcing it.
Cut, insert, and wind new line
Length is model-specific. Use the length printed on the spool, head, or manual when it is there. If it is not, cut a manageable piece that will fill the spool without stacking above the flanges or jamming against the cover. Do not treat any single footage as correct for every trimmer. It is better to wind a bit less and add another piece later than to overfill the housing.
Anchor the line
Two patterns are common:
- Many dual-line spools take one piece folded in half. The fold seats in a center slot; each half winds in its own half of the spool.
- Other dual-line and most single-line spools take one or two separate pieces. Each end is pushed through an anchor hole or pressed into a notch before you wind.
Seat the line in the spool’s anchor slot or hole first. If it is not locked there, the first bump can pull the coil off the drum and jam the head.
Wind in the marked direction
Wind in the direction of the arrow or the “wind this way” mark on the spool. If there is no mark, follow the manual rather than guessing. Wrong winding direction is one of the most common reasons new line will not feed.
Keep coils neat, side by side, and firm. Do not stretch the line so tight that it digs in, flattens, or welds to itself. Do not let later turns cross earlier ones; crossed coils bind when you try to bump. On a divided dual-line spool, keep each half on its own side of the divider.
Leave enough free end to reach through each eyelet with a little extra to hold. If the spool has holding notches on the flanges, park the ends there so the coil cannot unwind while you carry the spool back to the housing.
Some heads let you feed a long piece through both eyelets and wind without fully removing the spool. That shortcut is head-specific. Use it only when the head and manual describe it. Forcing line through a design that was meant to be opened will kink the line and score the eyelets.
Reassemble the head and feed the line
Route each free end through the matching eyelet before you drop the spool fully home. The left coil should exit the left eyelet and the right coil the right eyelet on a dual-line head; crossed ends will fight each other. Seat the spool so it can rotate on its post. Replace the spring and any washer in the same order you photographed. The spring usually sits under the spool or between the spool and the bump knob, depending on the head—do not invert it.
Set the cover on and snap or thread it until it is fully locked. A cover that is only partly seated can fly off when the head spins, or it can pinch the line so nothing advances. Tug each exposed end gently to confirm it can slide a little. Trim the protruding ends to a short working length that will not slap the guard. There is no single correct trim length for every model; stay inside the guard and long enough to cut.
Restore power only when the head is clear of people, pets, and loose debris. Then use the tool’s normal advance method:
- On a bump-feed head, start the trimmer and tap the bump knob on a paved or other firm surface while the head is spinning. The first advance may need a firm bump or a brief run-up after a fresh wind.
- On an auto-feed head, follow that head’s advance method rather than pounding the knob.
- On a fixed-line head, there is nothing to bump; the pre-cut pieces should already be locked at working length.
If line comes out smoothly and the cover stays put, the restringing job is done. If nothing moves, isolate power again and use the checks below before you assume the motor or shaft is at fault.
If the line will not feed
Newly installed line that refuses to come out of the eyelets is usually a winding or assembly problem, not an engine or battery problem. Reopen the head and look for these issues first:
- Line wound against the marked winding direction.
- Overlapping or crossed coils that lock when the spool tries to turn.
- Too much line, so the coil rubs the housing or cover.
- Wrong line diameter for the eyelets or spool.
- Coils welded or fused from heat, old nylon, or winding stretched too tight.
- Line never seated in the anchor hole or notch.
- Ends not actually through the eyelets, or ends crossed to the wrong exits.
- Missing, inverted, or unseated spring.
- Cover not fully latched, pinching the spool.
- Eyelets clogged with sap, grass, or melted nylon.
- Worn bump knob, rounded drive features, or a cracked spool that cannot turn with the knob.
Rewind neatly in the marked direction before you chase electrical or engine faults. Old line that sat in a hot vehicle, or line that has become chalky and brittle, often snaps at the eyelet as soon as it flexes. Replace that line rather than trying to salvage it.
A cracked housing, broken spring, melted spool, or destroyed bump knob is a replacement issue. Forcing a damaged head to accept more line can throw parts when the tool runs. Use a matching head or manufacturer-compatible parts when the housing is damaged. This article is not a diagnosis of ignition, carburetor, or battery-pack failures; if the shaft will not turn with the head removed, stop and consult the manual or a qualified repair shop.
Habits that help line last and feed more reliably
Store spare trimmer line dry and out of prolonged sun and extreme heat. Nylon that has baked in a shed window or a vehicle often becomes brittle and then welds inside the head. Some homeowners briefly soak very dry nylon line in water to restore a little flexibility. Treat that as an informal tip, not a measured lab method, and do not expect a guaranteed gain in life or feed.
Keep the guard in place. Cut with the tips of the line rather than jamming the whole head into thick brush, fences, or dirt. Forcing the head into heavy growth overheats the line, glazes the coil, and can stall a small motor. Clear wrap from the shaft and from behind the head so the assembly can spin freely. Grass packed around the housing also blocks the bump knob.
A spare prewound spool is useful if your head accepts one and you want faster changes during a long session. It does not replace the need for the correct diameter and a fully latched cover. Aftermarket tricks matter less than three basics: the line diameter the tool was built for, winding in the marked direction with neat coils, and a head that is complete, clean, and locked before you restore power.
Quick recap
Stringing a trimmer is installing monofilament line so the exposed tips can cut. Identify the head first. Isolate the spark-plug boot, the cord, or the battery. Open a typical bump-feed housing, clean it, and discard bad leftover line. Cut a length that fits your spool, anchor it, and wind in the marked direction. Route the ends through the eyelets, reassemble in the original order, and advance line with the method that head uses. If nothing feeds, rewind before you blame the motor. When the housing, spring, or spool is broken, replace the part instead of forcing another coil into a damaged head.









