Quick Answer: How to Use an Edger
To use a power lawn edger, fuel the machine (if gas-powered), adjust the cutting depth to ¼ inch, and put on safety gear including goggles and closed-toe shoes. Guide the edger along garden beds, driveways, and walkways with steady, overlapping passes, keeping the blade vertical and moving at a controlled pace. Let the tool do the cutting—don’t force it—and never reach near the blade while running. For manual edgers, step on the footrest and rock the handle back and forth; for concrete edgers, apply consistent downward pressure with a wheeled blade. Always read your specific tool’s manual before starting.
What Types of Edgers Are There?
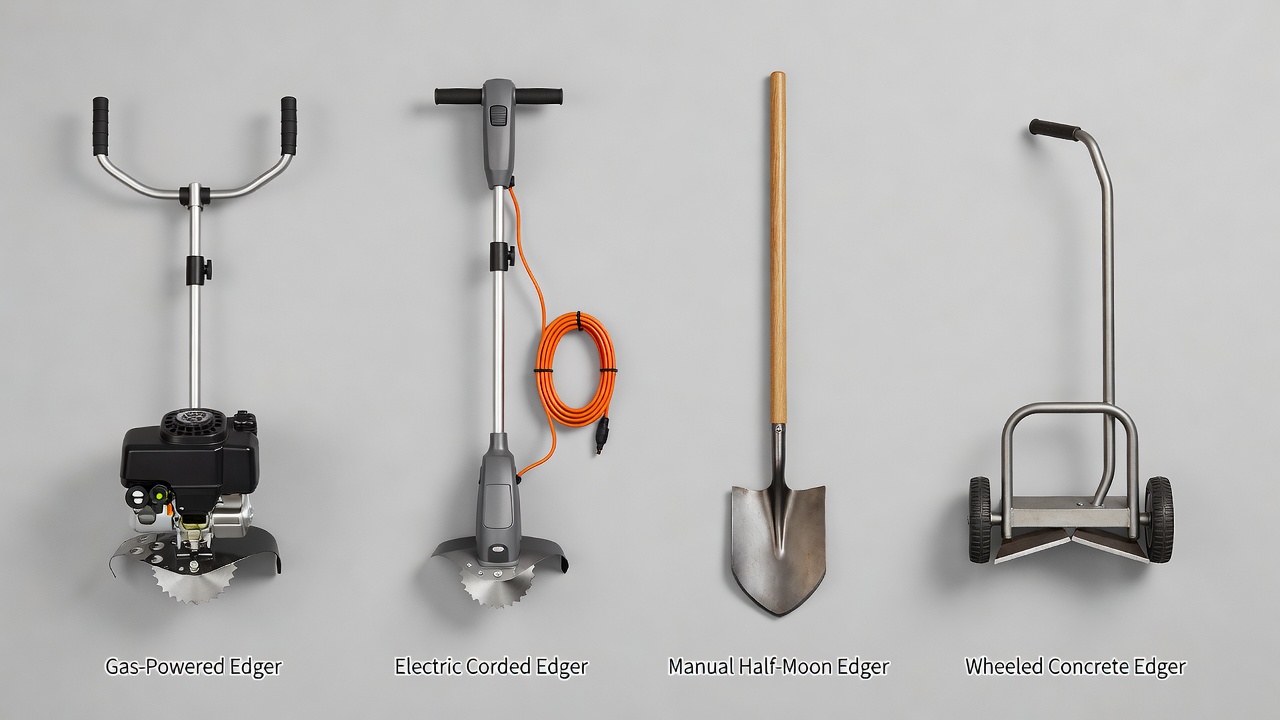
Understanding your edger type is essential because operation varies significantly:
- Power Lawn Edgers (Gas or Electric): The most common type for homeowners. These use a vertical spinning blade to cut a clean line between lawn and garden beds or hardscape. Gas models offer more power and mobility; electric models are quieter and lower-maintenance.
- Manual Edgers (Half-Moon or Spade-Style): Non-motorized tools with a sharp, curved blade. Best for small areas, edging along existing borders, or refreshing edges that have grown over. Require physical effort but offer precision control.
- String Trimmers (Weed Whackers): Often confused with edgers, string trimmers use spinning nylon line for general trimming. They can edge, but lack the clean, precise cut of a dedicated edger.
- Concrete Edgers: Wheeled tools with a vertical or angled blade for cutting clean edges into freshly poured concrete. Different from lawn edgers and used primarily during concrete work.
This guide focuses on power lawn edgers, the most widely used type, with notes on manual alternatives.
Pre-Use Checklist: Before You Start
Fuel and Oil (Gas Edgers Only): Check your owner’s manual for the correct fuel type—many gas edgers require a fuel-oil mixture (typically 50:1 or 40:1 ratio). Do not use straight gasoline, as this will damage the engine. Verify the oil level in the fuel tank before each use.
Inspect for Damage: Walk around the edger and check the blade guard for cracks or loose parts. Ensure the blade spins freely when you turn it by hand (engine off). Look for fuel leaks, loose bolts, or frayed power cords (electric models).
Adjust Cutting Depth: Most power edgers have a depth adjustment wheel or lever. The standard cutting depth is ¼ inch—deep enough to create a clean separation between lawn and bed, but not so deep that you damage underground utilities or create a tripping hazard. Adjust before starting the engine. If you’re unsure about your lawn’s depth, check your manual or start shallow and increase gradually.
Prepare Your Safety Gear: Wear the following every time you edge:
- Safety glasses or goggles to protect eyes from ejected debris
- Closed-toe shoes (boots preferred) to protect feet from the blade
- Long pants to protect legs from flying debris
- Hearing protection if using a gas edger (80+ decibels)
- Heavy-duty gloves (optional but recommended)
Clear the Work Area: Walk the path you plan to edge and remove stones, sticks, toys, and other debris. These can be ejected by the blade or cause the edger to bounce.
Step-by-Step Operation Guide
Starting Your Power Edger
Gas Edgers: Place the edger on flat, level ground. Locate the choke lever (if your model has one) and set it to the cold-start position. Prime the fuel pump if your model has one by pressing the primer button 2–3 times. Set the throttle to mid-position. Grip the starter cord firmly and pull with a quick, deliberate motion. You may need to pull 1–3 times before it catches. Once the engine starts, gradually move the choke to the run position and let it warm up for 30 seconds.
Electric Edgers: Plug the edger into a GFCI-protected outlet (or use an extension cord rated for outdoor use). Flip the power switch to the on position. Most will start immediately.
Grip and Stance
Stand with your feet shoulder-width apart, positioned slightly behind the edger. Grip the handle firmly with both hands, keeping your arms relaxed. Your body should face the direction the edger is moving, not perpendicular to it. This gives you better control and balance. Keep your eyes on the blade area and the line you’re cutting, but maintain awareness of obstacles around you.
Moving the Edger
Once the engine is running and warmed up, guide the edger forward at a steady walking pace—roughly 2–3 mph. Do not rush. The blade cuts more cleanly when you move deliberately. The edger should glide along the edge; if it’s jumping or bouncing, you’re moving too fast or the depth is too deep.
Let the spinning blade do the cutting. Do not press down hard on the handle. Excessive downward pressure will slow the blade and create an uneven cut. Instead, let the weight of the edger and the blade’s rotation handle the work.
Following the Edge
Start along a straight section (like the edge of a driveway) to get a feel for the tool. Guide the blade along the existing grass-to-hardscape or grass-to-bed line. You can use the driveway edge itself as a visual guide. Keep the blade perpendicular to the ground for a clean, vertical cut.
Make overlapping passes for consistent results. Each pass should slightly overlap the previous one, ensuring no strips of uncut grass remain. This is especially important on your first pass through a season; if the edge has grown over, you may need 2–3 passes to create a sharp line.
Handling Corners and Curves
For corners and tight areas, reduce your speed and make shallow turns. Do not spin the edger sharply while the blade is engaged—this can cause the blade to catch and bounce. Instead, slow down, guide it gently around the corner, then resume speed once you’re on the next straightaway.
For curved garden beds, follow the curve line with steady, gentle steering. Make multiple passes if needed to achieve a smooth curve rather than trying to cut it perfectly in one go.
Key Techniques for Better Results
Overlapping Passes: This is the most important technique for a professional look. Each pass should cover the ground the blade just cut, plus a small strip beyond. This ensures continuity and eliminates missed grass.
Maintain Consistent Speed: Varying speed creates uneven cuts. Move at a steady, moderate pace. If you slow down significantly in one area, that section may have a rougher cut.
Prevent Scalping: Scalping occurs when the edger cuts into the soil, leaving bare patches or dips. This happens when the depth is set too deep or when you’re working on uneven ground. Adjust depth to ¼ inch and avoid forcing the edger over bumps.
Edge in Both Directions: On your second pass along the same edge, move in the opposite direction. This helps catch any grass missed on the first pass and ensures an even cut from both sides.
Work When Soil is Slightly Moist: The best time to edge is 1–2 days after rain or light watering. Wet soil is too soft and can cause the edger to sink; dry soil is hard and resists the blade. Slightly moist soil provides the ideal balance.
For Manual Edgers: Position your feet on either side of the footrest. Step down firmly on the footrest with one foot while rocking the handle back and forth in a rhythmic motion. The blade will gradually cut into the soil with each rock. Once you’ve worked your way along the edge with this rocking motion, you can lever the tool back to extract a clean cut.
Safety Warnings and Best Practices
Never Reach Near the Blade: Even when the engine is off, never put your hands or feet near the blade. Always wait until the blade has come to a complete stop before inspecting the edger or clearing blockages.
Turn Off Before Adjusting: If you need to adjust depth, change direction sharply, or troubleshoot, turn off the engine and wait for the blade to stop completely. Do not adjust anything while the engine is running.
Use Proper Refueling Procedure: Allow gas edgers to cool for at least 5 minutes before refueling. Never refuel while the engine is running or warm. Spilled fuel on a hot engine can ignite.
Edge Away from People and Pets: Ensure no children, pets, or bystanders are within 10 feet of the edging area. Debris can be ejected and cause injury. Ask people to stay inside until you’ve finished.
Avoid Edging Wet Grass Immediately After Rain: While slightly moist soil is ideal, freshly rain-soaked grass clogs the blade and makes control difficult. Wait a few hours for surface moisture to dry.
Check for Underground Utilities: Before edging a new area or near structures, call 811 (in the U.S.) or your local utility locator service to identify buried gas, electric, or water lines. Always assume something is underground if you’re unsure.
Troubleshooting Common Problems
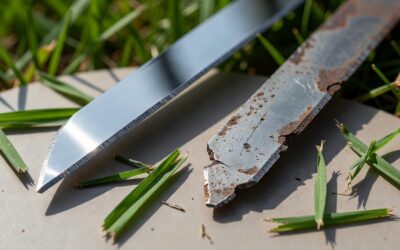
Uneven or Ragged Cut: This usually means the blade is dull or damaged. Inspect the blade for nicks, bends, or a worn edge. If dull, have it professionally sharpened or replace it. Also check that you’re moving at a steady pace and not pushing the edger too hard.
Blade Bogging Down or Stalling: The edger is working too hard. Causes include depth set too deep, wet grass or soil clogging the blade, or the blade hitting a rock or root. Stop the edger, check for obstacles, reduce cutting depth, and allow the soil to dry slightly before trying again.
Blade Won’t Spin (Gas Edgers): Check that the engine is actually running—you should hear it and feel vibration. If the engine runs but the blade doesn’t spin, the drive belt may be broken or disconnected. Consult your manual or contact the manufacturer.
Edger Won’t Start: For gas models, verify you have fuel (check the tank), the choke is set to cold-start, and the spark plug isn’t fouled. Try pulling the cord 3–5 times. If it still won’t start, change the spark plug or consult a small-engine repair shop. For electric models, check that the outlet works (plug a lamp into it), inspect the cord for damage, and verify the power switch is on.
Blade Jumping or Bouncing: This usually indicates you’re moving too fast or the depth is too aggressive. Reduce speed, check that you’re on relatively level ground, and lower the cutting depth by ¼ inch.
Frequently Asked Questions
How Often Should You Edge Your Lawn?
During the active growing season (spring and early summer), edge every 2–4 weeks to maintain a clean border and prevent the grass from creeping into beds and hardscape. In mid-to-late summer and fall, you can edge less frequently as growth slows. Year-round, edge as often as needed to keep edges looking sharp—this is typically 4–6 times per season for most homeowners.
Can You Use an Edger on Wet Grass?
It’s not ideal. Wet grass clogs the blade, reduces cutting efficiency, and makes the edger harder to control. The best time to edge is 1–2 days after rain when the soil is moist but the surface grass is dry. If you must edge wet grass, work slowly and expect to clear the blade more frequently.
What’s the Difference Between Edging and Trimming?
Edging cuts a clean vertical line between lawn and beds or hardscape, creating a defined border. Trimming (with a string trimmer or weed whacker) cuts grass and weeds flush at ground level but doesn’t create a defined edge or separate lawn from bed. Many people do both: edge first for a clean border, then trim to tidy up tall grass edges.
How Do You Maintain an Edger Between Uses?
After each use, allow the edger to cool, then wipe away grass clippings and soil with a dry cloth. For gas edgers, drain the fuel tank or run it dry before storing for the winter to prevent fuel from gumming up the carburetor. Clean or replace the air filter annually and sharpen or replace the blade annually or as needed. Store the edger in a dry location.