

Direct Answer: Cut the correct length of monofilament line for your spool type, feed it through the eyelet(s), wind it firmly in the direction shown by the arrow on the spool, secure the ends in the retaining notches, then snap the cover back on and thread the tails through the exit holes. The exact steps depend on whether you have a bump-feed single-line spool, a bump-feed dual-line spool, or a fixed-line head.

Pros
- Six-pack bundle listed in the product title
- Square profile line named in the product title
- Commercial 5 lb size listed for heavier use
Cons
- Trimmer compatibility is not verified in supplied data

Pros
- Six-pack bundle listed in the product title
- Star profile line named in the product title
- Commercial 5 lb size listed for heavier use
Cons
- Line length and trimmer fit are not stated in supplied data

Pros
- Title lists 1280 feet of line length
- Square profile named in the product title
- Lists a 5 lb line rating
- Title describes it as commercial-style line

Pros
- Title lists .095-inch square nylon line
- Lists 1280 feet of line length
- Manufacturer states fit with most string trimmers
- Lists a 5 lb line rating
What You Need Before You Start
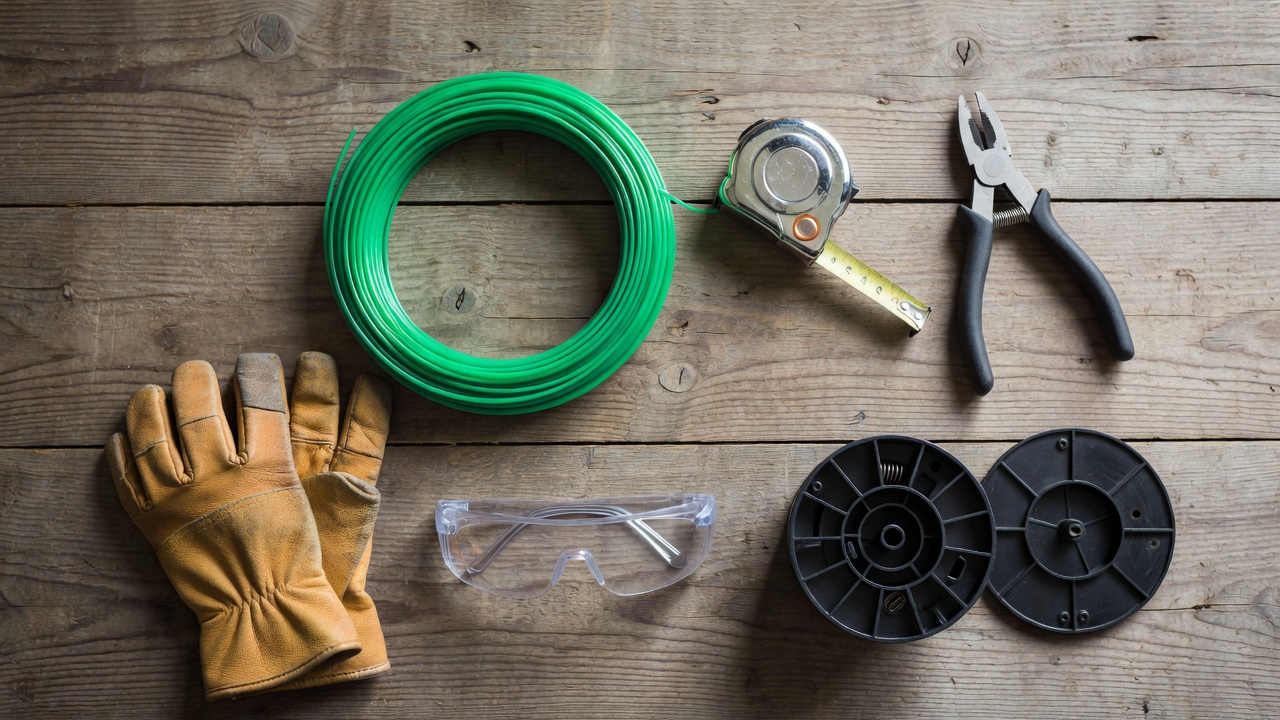
Gathering the right materials before disassembling the trimmer head prevents mid-task delays and the most common failure points: wrong line diameter, cut lengths that are too short, and skipped safety steps.
Tools and Materials
- Replacement trimmer line — correct diameter for your model (see the size guide section below)
- Scissors or wire cutters — to cut clean, square line ends; diagonal cuts make feeding through eyelets harder
- Tape measure or ruler — line length matters; guessing short wastes material and means rewinding sooner
- Work gloves — cut line ends are sharp; gloves also protect against the spool spring if it ejects unexpectedly
- Safety glasses — recommended when handling and testing trimmer line; occupational safety guidance (HSE, UK; OSHA, US) lists eye protection as standard PPE when operating or maintaining string trimmers
- Owner’s manual or manufacturer spool diagram — winding direction (clockwise vs. counter-clockwise) is model-specific; the manual or the moulded arrow on the spool is the only reliable reference
Line Diameter: Choose Before You Cut
Fitting the wrong diameter damages the spool housing and causes constant line breakage. Check the label on the spool cover, the owner’s manual, or the manufacturer’s website. As a general guide based on typical manufacturer specifications: For broader ecosystem context, read through our operational guide on jbl partybox club 120 vs sony srs xv500.
| Trimmer Class | Typical Line Diameter | Common Power Source |
|---|---|---|
| Light domestic | 1.2 mm – 1.5 mm | Corded electric, small battery |
| Mid-range domestic | 1.6 mm – 2.0 mm | Battery (36 V–56 V), mid corded |
| Heavy domestic / semi-pro | 2.0 mm – 2.4 mm | High-voltage battery, light petrol |
| Commercial / petrol strimmer | 2.4 mm – 3.3 mm | Petrol (25 cc – 50 cc+) |
Note: Always verify against your model’s specifications. Diameter ranges vary by brand and are not universal. For broader ecosystem context, read through our operational guide on jbl partybox club 120 vs sony srs xv500.
Line Cross-Section Shapes
- Round — most widely compatible, quieter, suits bump-feed spools; lower cutting aggression
- Twisted / spiral — reduced air resistance and noise; suits mid-range trimmers; not compatible with all fixed-line heads
- Star / multi-sided — sharper cutting edges for thick grass and light scrub; generates more noise and wears faster; check spool compatibility before use
How to Identify Your Spool Type Before Winding
Spool type determines every downstream winding step. Applying single-line steps to a dual-line spool — or either to a fixed-line head — results in jams, uneven line length, or a trimmer that won’t advance line at all. For troubleshooting and reliability insights, consult our in-depth z890 vs x870e motherboard report.
Bump-Feed Spool (Single or Dual Line)
The most common consumer configuration. The trimmer head contains a plastic spool around which monofilament line is wound. Tapping the bump knob on the ground while the head spins releases a measured amount of line through the exit eyelet(s). Look for a bump knob protruding from the base of the trimmer head. If the head has one exit eyelet, it is a single-line bump-feed spool. If it has two exit eyelets set opposite each other, it is a dual-line bump-feed spool.
Fixed-Line Head (Speed-Feed Head)
No winding on a spool core. Instead, individual pre-cut line segments are pushed straight through pre-formed channels in the head. Common on commercial trimmers and increasingly found on premium battery models. Identified by a head that has no bump knob and instead features open channels or a rapid-load mechanism around the head body. No disassembly is required to load line. For troubleshooting and reliability insights, consult our in-depth z890 vs x870e motherboard report.
Pre-Wound Replacement Spool
A factory-wound spool sold as a drop-in replacement. No winding required — remove the old spool, clip in the new one, and thread the tails through the eyelets. Convenient but more expensive per metre of line than bulk line. If your spool type supports a pre-wound replacement, this is a valid alternative to manual winding.
How to Wind a Bump-Feed Single-Line Spool
This sequence covers the most common consumer trimmer configuration: one exit eyelet, one winding chamber, one line. Readers comparing setup options can review our technical analysis on marshall stanmore iii vs harman kardon onyx studio 8.
- Disconnect power. Remove the battery pack or unplug the corded trimmer. For a petrol strimmer, disconnect the spark plug lead. This step is not optional.
- Remove the spool cover. Most covers unscrew counter-clockwise (some brands reverse this — check the directional arrows moulded into the cover). Press the tabs on the sides of the head while turning if the cover is a twist-lock type. Remove the spool and the spring beneath it; note the spring orientation so you reassemble it the same way.
- Clear old line. Pull off any remaining line from the spool core. Clean debris from the spool and housing.
- Cut the line. Check your owner’s manual for the maximum line length the spool accommodates — this varies by model and spool capacity. A typical single-line domestic spool holds 5 m – 9 m of line at standard diameter; consult your manual rather than estimating. Cut a single length to the specified maximum or to the length that fills the spool chamber without overlapping the retaining walls.
- Feed the line through the anchor hole or tie it. The inner spool core has either a small anchor hole or a clip. Push one end of the line through the anchor hole and pull it through until approximately 5 cm protrudes — this locks it in place. If the spool uses a centre clip, loop the line around the clip.
- Find the winding direction arrow. Look at the top or side face of the spool. The moulded arrow indicates the correct winding direction. Winding against this arrow causes the line to loosen and unwind during use because trimmer head rotation works against a reverse-wound spool.
- Wind the line. Hold the free end of the line taut and wind it in the direction of the arrow, keeping each pass tight and flat against the previous one. Avoid crossing passes — crossed line tangles inside the spool and prevents bump-feed advancement. Wind until approximately 15 cm – 20 cm of line remains unwound.
- Secure the tail in the retaining notch. The spool rim has one or two notches. Hook the remaining tail into a notch to prevent the line unravelling while you reassemble the head.
- Reassemble the head. Place the spring back in the correct orientation, fit the spool into the housing, then thread the line tail through the exit eyelet from inside the head. Release the tail from the retaining notch as you press the spool down. Align the spool cover and twist it to lock (usually clockwise). Pull the line tail to check it feeds freely — it should extend 10 cm – 15 cm from the exit eyelet.
How to Wind a Bump-Feed Dual-Line Spool
Dual-line spools have two exit eyelets set 180° apart. Some have two separate winding chambers divided by a central rib; others use a single chamber with two anchor points. Steps 1–3 (disconnect, disassemble, clear) are identical to single-line above.
- Determine your spool’s line-loading method. Inspect the inner spool core. If it has one anchor hole with a dividing rib, you use a single length of line split into two equal halves wound in the same direction on either side of the rib. If it has two separate anchor holes, you use two separate equal-length pieces of line.
- Cut the line. For a single-piece method: cut one length to double the capacity of one chamber (check your manual). For a two-piece method: cut two equal lengths, each matching one chamber’s capacity.
- Anchor the line(s). For the single-piece method: fold the line in half to find its midpoint, then hook the midpoint over the central anchor pin or through the centre slot. For the two-piece method: insert one end of each piece into its respective anchor hole.
- Check both winding direction arrows. On most dual-line spools, both chambers wind in the same direction — but verify this on your spool’s arrows before winding. Winding one chamber in reverse causes that side to unwind and jam.
- Wind both sides simultaneously. Hold both tails and wind both chambers in the correct direction at the same rate. Keeping them even prevents one side running longer than the other, which unbalances the cutting arc and increases vibration.
- Do not cross the lines inside the spool. If the dividing rib is present, each line must stay on its designated side. Crossed lines jam the spool and prevent bump-feed advancement.
- Secure both tails in the retaining notches, one tail per notch.
- Reassemble. Thread each tail through its corresponding exit eyelet, release from notches, press the spool down, lock the cover, and pull both tails to confirm free movement. Both tails should be equal in length — trim to match if one is longer.
How to Replace Line on a Fixed-Line or Speed-Feed Trimmer Head
Fixed-line heads do not use a wound spool. Individual line segments — typically 15 cm – 25 cm each, though length varies by head model; check the manufacturer’s specification — are pushed through pre-formed channels in the head body. The head retains each segment at its midpoint so two equal tails protrude. For complementary field maintenance guidelines, examine our breakdown of dyson v8 cyclone vs bissell featherweight stick.
- Disconnect power as above.
- Identify the number of line channels. Most fixed-line heads take 2, 4, or 6 individual segments (4 or 8 tails exiting the head). Check the head body or manual.
- Cut line segments. Cut each segment to the length specified for your head model. Segments that are too long prevent the channel from closing; segments that are too short fly out on first use.
- Insert each segment. Push one segment through a channel until equal lengths protrude on both sides. On speed-feed heads, rotate the head collar while pressing the line in — the collar advances the line into the channel automatically.
- Repeat for each channel. Work around the head systematically. No winding, no cover removal, no spring management required.
- Confirm all segments are seated. Tug each tail gently — properly seated segments resist pulling. If a segment slides out easily, the channel is not engaged; reinsert and rotate the collar again.
Why does fixed line fly out during use? The two most common causes are segments cut shorter than specified and channels not fully engaged before use. Always verify seating before powering the trimmer on.
Common Winding Mistakes and How to Fix Them
Line Tangling or Balling Up Inside the Spool
Caused by crossed winding passes or line wound too loosely. Prevention: keep each pass tight and flat, never let the line spiral over itself. If tangling has already occurred, remove the spool, pull all line off, and rewind from scratch with deliberate, even tension. To evaluate matched hardware tolerances, consult our detailed overview of bissell crosswave hydrosteam vs shark stainforce.
Bump-Feed Not Advancing Line
Four causes: (1) line wound in the wrong direction — the rotation of the head tightens rather than releases the line; rewind in the correct arrow direction. (2) Line crossed inside the spool — rewind. (3) Exit eyelet blocked by debris — clear with a thin wire. (4) Bump knob spring missing or inverted — disassemble and check spring orientation.
Line Breaking Immediately on First Use
Usually signals the wrong diameter — line too thin for the trimmer’s power output — or line that has become brittle from UV exposure or age. Replace with fresh line of the correct diameter. Some manufacturers recommend storing spare line in a sealed bag away from direct sunlight to slow UV degradation; check your line manufacturer’s storage guidance before following any soaking advice, as water-soaking recommendations are not universally endorsed by manufacturers.
Line Fusing Together (Welding)
High-speed friction generates heat. If line is wound with overlapping crosses, adjacent passes abrade and melt together, preventing feed. Wind in flat, parallel layers. Commercial operators running petrol strimmers in hot conditions sometimes use line with a harder outer coating specifically to resist heat fusion — check the line manufacturer’s product specifications.
Winding Two Different Diameters on One Spool
Do not mix diameters on the same spool. Different diameters create uneven tension layers and cause unpredictable breakage and feed failure. Use a single consistent diameter throughout.
Trimmer Line Size and Type Selection Guide
Selecting the right line before winding eliminates the most common post-winding failures. The table in the prerequisites section provides diameter ranges by trimmer class. To find the specification for your exact model:
- Check the label moulded into the spool cover — most manufacturers print the accepted diameter range directly on the cover
- Consult the owner’s manual under ‘Accessories’ or ‘Replacement Parts’
- Search the manufacturer’s website using your model number — most publish a compatible accessories list
Cross-Section Shape Guidance
- Round line: best default choice; compatible with virtually all bump-feed spools and most fixed-line heads; quieter operation
- Twisted / spiral line: reduces aerodynamic drag and noise by 5–10% compared to round line of the same diameter (figures vary by brand); suitable where noise is a concern; verify compatibility with your spool type
- Star / square / multi-sided line: delivers more aggressive cutting against thick grass, weeds, and light scrub; wears faster than round; generates more noise; not suitable for all spool types — confirm with your spool’s maximum accepted diameter, as the effective diameter of star line at its widest point exceeds its nominal rating
Does Line Colour Indicate Quality?
No. Colour is a branding and product-differentiation choice by manufacturers, not a standardised indicator of thickness, material quality, or cutting performance. Diameter and cross-section shape are the only specification-relevant attributes. Always buy by diameter and cross-section, not colour.
Buyer FAQs: How To Wind Grass Trimmer Line Solved
How long should trimmer line be when I cut it for winding?
Line length depends on your spool’s capacity, which is model-specific. Check the owner’s manual or the label on the spool cover for the maximum recommended length — forcing more line than the spool is designed to hold causes tangles and prevents the bump-feed from advancing. As a reference point, typical domestic bump-feed spools accommodate 5 m – 9 m of line at standard diameter, but this range is not universal and your manual is the only reliable source for your model.
Which direction do I wind trimmer line — clockwise or counter-clockwise?
It depends entirely on your specific trimmer model. The correct direction is marked by a moulded arrow on the spool itself — this is the only reliable guide. Winding against the arrow direction causes the line to loosen and unwind during use because the trimmer head’s rotation works against a reverse-wound spool. If the arrow is worn off, consult your owner’s manual or the manufacturer’s website using your model number.
Why does my trimmer line keep breaking straight after I wind it?
The three most common causes are: (1) line diameter too thin for your trimmer’s power output — fit the manufacturer-specified diameter; (2) old or UV-degraded line that has become brittle — replace with fresh line stored away from direct sunlight; (3) line wound with crossed passes creating stress points — rewind in flat, parallel layers. If breakage persists after correcting all three, confirm the trimmer head guards are not trimmed back, as operating without the correct guard allows the cutting blade on the guard to trim line to the wrong length.
Can I use a pre-wound spool instead of winding line myself?
Yes, if a pre-wound replacement spool is available for your trimmer model. Pre-wound spools are drop-in replacements — remove the old spool, clip in the new one, thread the tails through the exit eyelets, and refit the cover. The trade-off is cost: pre-wound spools cost significantly more per metre of usable line than bulk line. For high-frequency users, learning to wind bulk line onto the original spool is the more economical long-term approach.
For more detailed testing breakdowns and top recommendations, check our in-depth guide to cordless stick vacuum buyer guide.
For more hands-on benchmarks and buying recommendations, consult our guides on robotic pool cleaner comparison guide, as well as deep carpet cleaning machine reviews, as well as automated robotic vacuum cleaning systems, as well as all-in-one vacuum steam mop combo guide.
Mechanical safety standards, operational tolerances, and protective gear guidelines align with benchmark specifications established by the American National Standards Institute (ANSI).









