

Quick Answer: How To Take The Blade Off A Lawn Mower?
To remove a lawn mower blade safely, first disconnect the spark plug wire (or remove the battery on electric models) so the engine cannot accidentally start. Next, tilt the mower onto its side with the carburetor and air filter facing upward to prevent oil and fuel leaks, and secure it so it cannot tip. Use a socket wrench to loosen…
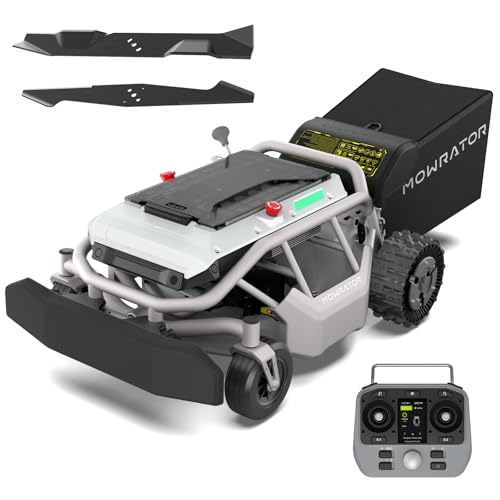
Pros
- Strong dual-motor 2WD system with upgraded tires for reliable performance on inclines up to 24 degrees.
- Versatile 21-inch blade setup includes both standard mowing and mulching options for year-round tasks.
- Automotive-grade LiFePO4 battery offers extended life and fast 70-minute charging for efficient sessions.
- Simple out-of-box remote operation with no RTK setup or apps required.
- Built-in safety sensors and compact agile design support family-friendly mowing near gardens and play areas.
Cons
- Operates only via remote control rather than fully autonomous navigation, requiring continuous user presence.
- Maximum 0.75-acre coverage per charge limits suitability for larger properties.
- 2WD configuration prioritizes simplicity and may need more careful path planning on highly uneven terrain.
The Mowrator S1 2WD remote control lawn mower features a robust steel deck, dual high-torque rear motors, and upgraded soft-compound grip tread tires with weighted metal hubcaps. Its compact and agile build gives an immediate sense of durability suited for residential yards while supporting multi-season tasks.
Performance centers on the 1985.6 W motor driving a 21-inch steel blade that switches easily between standard mowing for thick grass and the included mulching blade for leaf shredding. It maintains steady power on slopes up to 24 degrees (45 percent gradient), covers up to 0.75 acres on a 56V 12Ah LiFePO4 battery with 1.5-hour runtime, and recharges fully in 70 minutes via the 600W charger. Five cutting heights from 1.8 to 4.6 inches plus ultrasonic sensors and emergency stop complete a practical safety package.
Key considerations include the need for active remote operation instead of hands-free autonomy, a coverage limit of 0.75 acres that may require multiple charges on bigger lawns, and the 2WD layout that works well on moderate slopes yet benefits from attentive handling on irregular ground.
This model delivers strong value for homeowners with medium-sized yards, seniors, or anyone seeking to reduce physical strain. It stands out for users wanting reliable slope capability, mulching versatility, and straightforward controls without complex setup.

Pros
- Completely wire-free installation with fast one-tap auto mapping
- Stable dual LiDAR-vision navigation that functions day or night without satellites
- Strong 45 percent slope capability supported by off-road wheels and electronic stability control
- Accurate AI obstacle detection covering more than 200 types plus multi-zone GeoSketch mapping
- Full smart-home integration with voice assistants and advanced security features
Cons
- Garage accessory is shipped separately and must be obtained for complete docking functionality
- Maximum coverage limited to 0.37 acres making it unsuitable for larger properties
- Cutting height adjustment range restricted to only 2-4 inches
The NAVIMOW i215 LiDAR Robot Lawn Mower is a wire-free robotic mower built for homeowners who want efficient lawn care without installing boundary wires. Its robust chassis with off-road wheels and solid construction gives an immediate premium feel suitable for medium yards covering up to 0.37 acres.
Performance centers on solid-state LiDAR paired with vision sensors for satellite-free navigation that remains stable day or night with full 3D awareness. A 100W motor driving a 6-blade disc provides a 7.1 inch cutting width and adjustable heights from 2 to 4 inches while AI VisionFence detects over 200 obstacles at 0.4 inch accuracy. Auto mapping, up to 20 editable zones, EdgeSense edge cutting, Alexa and Google Home voice control, and app tools for custom patterns plus weather auto-docking make daily use highly convenient. The unit also manages slopes up to 45 percent with electronic stability control.
Considerations include the garage being shipped separately so full docking requires an extra purchase. Coverage is capped at 0.37 acres which excludes larger lawns, and the cutting height range of 2-4 inches may feel limited for certain grass types or seasonal needs.
The NAVIMOW i215 delivers strong value for owners of smaller to medium residential lawns who prioritize wire-free convenience, advanced dual-sensor navigation, and smart security features. Users with bigger properties or wider cutting height requirements should verify the specifications match their specific yard conditions before purchase.

Pros
- Wire-free setup with one-tap auto mapping enables true drop-and-mow convenience.
- LiDAR and vision dual fusion delivers reliable day-night navigation without satellites.
- Strong 45 percent slope capability with off-road wheels and electronic stability control.
- AI obstacle detection of 200-plus types plus multi-zone app editing for precise control.
- Quiet 59 dB(A) operation combined with voice control and advanced security features.
Cons
- Coverage limited to a maximum of 0.37 acres, making it unsuitable for larger properties.
- Cutting height adjustment restricted to the 2-4 inch range only.
- 7.1 inch cutting width may require additional passes even within the supported area.
The NAVIMOW i215 is a wire-free robotic lawn mower designed for residential yards up to 0.37 acres. It presents a capable build with off-road wheels, a 100W motor driving a 6-blade disc, and solid-state LiDAR combined with vision sensors, giving an immediate impression of advanced satellite-free navigation ready for varied home terrains.
Performance centers on true drop-and-mow convenience with one-tap auto mapping and no boundary wires required. The LiDAR and vision dual fusion ensures stable 3D navigation day or night, while AI VisionFence detects over 200 obstacle types at 0.4 inch accuracy. It manages slopes up to 45 percent via electronic stability control, delivers a 7.1 inch cutting width with 2-4 inch height adjustment, and runs quietly at 59 dB(A). App tools support up to 20 mowing zones, GeoSketch editing, EdgeSense precision along fences, custom Doodle patterns, Alexa and Google Home voice control, plus GPS geo-fence and Apple Find My security. The unit also auto-docks in extreme weather.
Considerations include the hard coverage limit of 0.37 acres that excludes larger lawns. The cutting height stays fixed between only 2 and 4 inches, and the relatively narrow 7.1 inch width can increase total mowing duration. Full customization depends on the companion app for zone and pattern features.
The NAVIMOW i215 offers excellent value for homeowners with compact to mid-size properties that include slopes or intricate layouts who want quiet, wire-free robotic mowing with precise obstacle avoidance and smart integrations. Tech-comfortable users seeking reduced manual labor will benefit most from its mapping accuracy and hands-free controls.
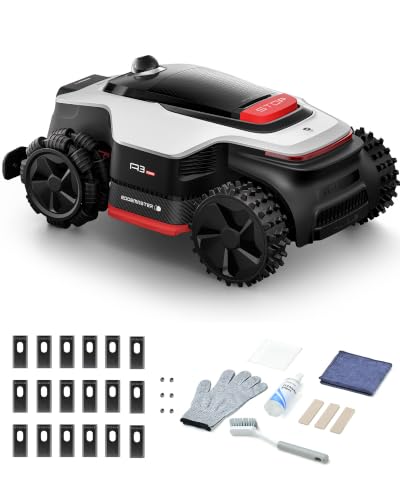
Pros
- AWD hub motors, rated by the maker for 80% (38.7°) slopes
- Wire-free setup using 360° LiDAR and binocular AI vision
- Manufacturer-claimed 45-minute recharge with included 5A adapter
- Night mowing mode, described by the maker as whisper-quiet
- Dreamehome app control with 4G module and HDR camera
Cons
- Edge trimmer module is sold separately
- Manufacturer rates coverage at 0.25-0.5 acre
- No customer reviews available to verify performance
Understanding the Question: Why and When You Need to Remove a Mower Blade
Removing the blade from your lawn mower is a fundamental maintenance task that every owner should know. The primary reasons for blade removal include routine sharpening to ensure a clean cut, replacing a damaged or worn blade, or performing a thorough cleaning of the mower deck. A dull or damaged blade tears grass rather than cutting it, leading to a ragged lawn appearance and increased stress on the mower’s engine.
You should inspect your blade at least once per mowing season. Signs that indicate immediate removal and attention are visible nicks, bends, or cracks in the blade, excessive vibration during operation, or a noticeably poor quality of cut. The core removal process is similar whether you are performing routine maintenance or replacing a damaged blade, though a damaged blade may require more care during handling.
Key Factors to Consider Before Removing the Blade
Before you begin, gather the correct tools and assess your specific mower type. The essential tools typically include a socket wrench or a breaker bar with the correct socket size, a block of wood for securing the blade, and penetrating oil for stubborn bolts. Wearing work gloves and safety glasses is strongly recommended for protection.
The size of the blade bolt varies by mower model. Common sizes are 5/8-inch, 3/4-inch, or 13/16-inch. Consult your owner’s manual or test a few sockets to find the correct fit. The removal process can differ significantly between mower types: standard walk-behind gas mowers are the most straightforward, electric mowers require disconnecting the battery, and riding mowers often have more complex blade adapter systems that may require special tools.
Step-by-Step Guide: How to Safely Remove the Blade
Follow these sequential steps for a standard walk-behind gas lawn mower:
- Disconnect the Spark Plug: This is the most critical safety step. Pull the rubber boot off the spark plug terminal to ensure the engine cannot start while you are working near the blade.
- Prepare and Tilt the Mower: Empty the gas tank or ensure it is less than half full to minimize spillage. Tilt the mower onto its side, making sure the air filter and carburetor are facing upward. This orientation prevents oil from flooding the air filter and carburetor.
- Secure the Mower: Place the mower on a flat, stable surface. You can use a block of wood or a specialized mower stand to keep it securely tilted and prevent it from tipping over.
- Lock the Blade: To stop the blade from spinning while you loosen the bolt, wedge a sturdy block of wood between the blade and the inner wall of the mower deck.
- Loosen the Blade Bolt: Using your socket wrench, turn the center blade bolt counterclockwise. Apply steady pressure. If the bolt is rusted or seized, spray it with penetrating oil, let it soak for 15-20 minutes, and try again.
- Remove the Blade and Hardware: Once the bolt is loose, remove it completely by hand. Carefully slide the blade off the crankshaft. Pay close attention to the order of any washers, spacers, or adapter plates. Take a photo or make a diagram to ensure correct reinstallation.
Common Variations and Troubleshooting
Riding Mowers: The process is similar but often more involved. You may need to remove a deck cover or use a special blade removal tool to hold the blade adapter while loosening the bolt. Consult your owner’s manual for specific instructions. For broader ecosystem context, read through our operational guide on z890 vs x870e motherboard.
Electric Mowers: Instead of disconnecting a spark plug, you must remove the battery or unplug the mower from its power source to ensure it cannot start.
Blade Adapters: Some mowers use an adapter that connects the blade to the crankshaft. If you cannot remove the blade bolt, the adapter itself may need to be removed, which might require a puller tool. For troubleshooting and reliability insights, consult our in-depth marshall stanmore iii vs harman kardon onyx studio 8 report.
Stripped or Seized Bolts: If a bolt is rounded off, you may need a bolt extractor socket. For a blade seized onto the crankshaft due to rust, applying penetrating oil and gently tapping the blade’s center hub with a rubber mallet can help break it free.
After the Blade Is Off: Maintenance, Sharpening, and Reinstallation
With the blade removed, clean the underside of the mower deck to remove built-up grass clippings and debris. Inspect the blade for cracks or excessive wear. You can sharpen the blade using a metal file, a bench grinder, or a sharpening kit, ensuring you maintain the original angle and balance. A balanced blade is crucial to prevent mower vibration. You can check balance by hanging the blade on a nail through its center hole; it should hang level. Readers comparing setup options can review our technical analysis on dyson v8 cyclone vs bissell featherweight stick.
To reinstall, reverse the removal process. Place the blade on the crankshaft with the cutting edge facing the correct direction (usually marked “Grass Side” or with an arrow). Replace any washers or adapters in the exact order they were removed. Hand-tighten the bolt, then use a torque wrench to tighten it to the manufacturer’s specified torque (commonly 30-50 ft-lbs for walk-behind mowers). Finally, reconnect the spark plug wire or battery.
Everything You Need to Know: How To Take The Blade Off Of A Lawn Mower FAQ
What size socket do I need to remove a lawn mower blade?
The most common blade bolt sizes for walk-behind mowers are 5/8-inch, 3/4-inch, and 13/16-inch. Check your owner’s manual for the exact specification. If you don’t have the manual, try a few sockets from your set to see which fits the bolt head snugly. For complementary field maintenance guidelines, examine our breakdown of bissell crosswave hydrosteam vs shark stainforce.
Which direction do I turn the bolt to remove the blade?
For the vast majority of lawn mowers, the blade bolt loosens by turning it counterclockwise when you are looking at it from underneath the mower deck (the “lefty-loosey” rule). Always verify this, as some older or specialized models may have reverse threads.
Can I remove the blade without tilting the mower?
While it is theoretically possible to use a mower lift or jack, tilting the mower onto its side is the standard, recommended method for walk-behind mowers. It provides safe, stable access to the blade and deck. Always ensure the carburetor and air filter side is facing up to prevent fluid leaks.
How do I know if my blade is installed correctly after reinstallation?
The correct orientation is critical. Most blades have markings like “Grass Side” or “Deck Side” to indicate which way they should face. The cutting edges should be on the bottom, positioned to cut grass as the blade spins. If the blade is installed upside down, it will not cut effectively and can damage the mower.
Safety Notes for Deck Work
Turn off the mower and disconnect the spark plug before tipping it or removing the deck cover. Gloves and sturdy shoes add a useful layer of protection. Wider safety information on garden machinery is available at American National Standards Institute (ANSI).









