Direct Answer: How to Sharpen a Lawn Mower Blade
To sharpen a lawn mower blade, first disconnect the spark plug wires for safety, then secure the mower. Use a metal file or angle grinder to sharpen the blade at a 30-45 degree angle, matching the existing bevel and working from underneath. After making 10-15 passes per side, check the blade balance using a blade balancer or by hanging it on a nail. Sharpen blades every 20-40 hours of mowing or when you notice uneven cutting, ragged grass tips, or pulling to one side.
Signs Your Lawn Mower Blade Needs Sharpening
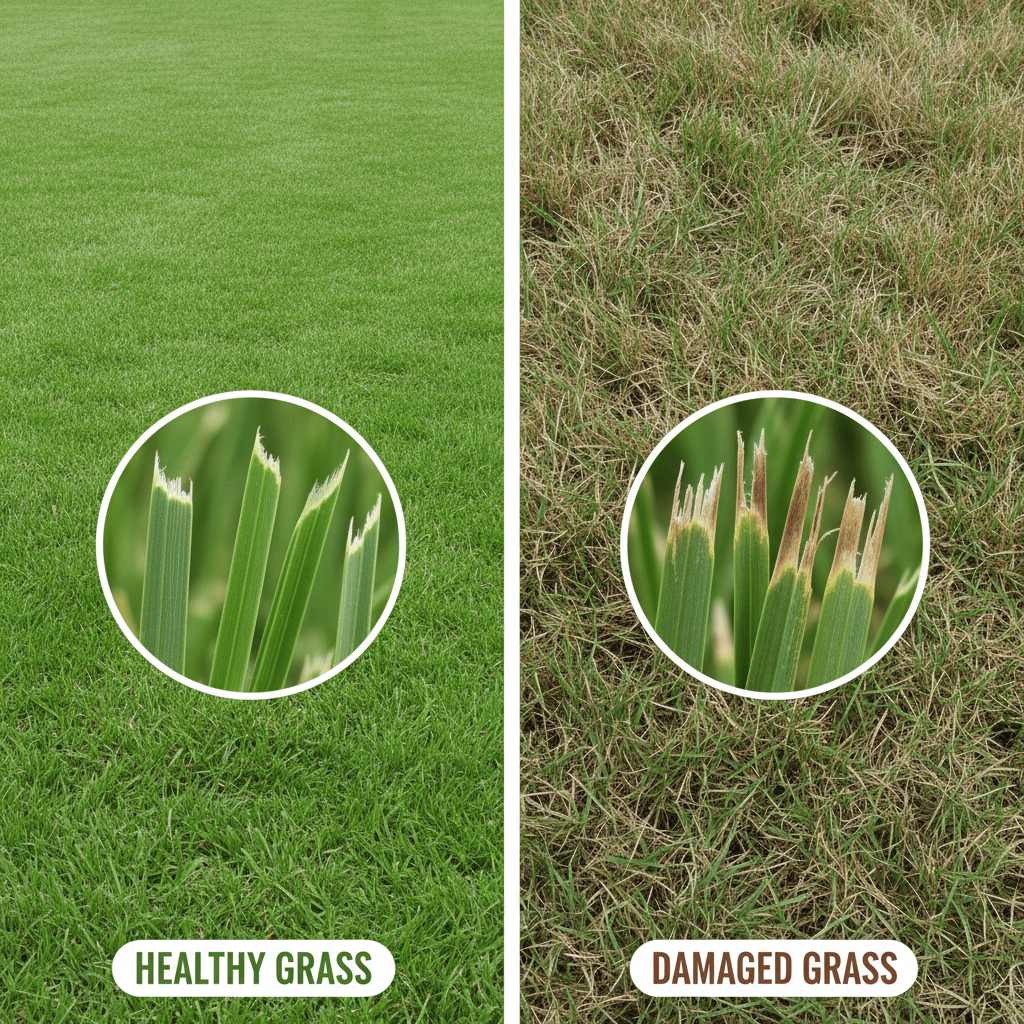
Recognizing when your blade has dulled helps you maintain a healthy lawn and prevents unnecessary mower strain. A dull blade doesn’t cut grass cleanly—it tears and shreds the grass tips, leaving brown, ragged edges that damage the plant and create entry points for disease.
- Ragged grass edges: The most obvious sign of a dull blade is grass that looks torn or frayed at the tips rather than neatly cut.
- Uneven cutting: Your mower leaves strips of longer grass, indicating uneven blade wear or balance issues.
- Mower pulling to one side: An imbalanced or unevenly dulled blade causes the mower to drift during operation.
- Increased vibration: Dull or damaged blades create noticeable shaking and vibration, stressing the engine.
- Grass discoloration: Lawn appears stressed or takes on a brownish tint from blade damage rather than clean cuts.
- Higher fuel consumption: A dull blade forces the engine to work harder, reducing efficiency.
For most homeowners, sharpening every 20-40 hours of mowing maintains optimal cutting performance. This typically translates to 1-2 times per mowing season for residential use.
Essential Safety Precautions Before You Start
Lawn mower blade sharpening carries serious injury risks. Follow these safety steps religiously before touching the blade:
- Disconnect spark plug wires: Remove the spark plug wire(s) completely—don’t just turn off the engine. This prevents accidental starting if someone bumps the ignition or pull cord. Some mowers have two spark plugs, so disconnect both.
- Wear cut-resistant gloves: Heavy-duty work gloves protect against sharp blade edges and provide grip when handling the blade.
- Use safety glasses: Metal filings and grinding debris can fly into your eyes during sharpening.
- Secure the mower: Place the mower on a flat, stable surface. For rotary mowers, tip the mower on its side (air filter side up to prevent oil from leaking into the carburetor), then secure it with clamps or against a wall.
- Work in good lighting: A well-lit workspace helps you see the blade angle clearly and avoid mistakes.
- Never run the mower during sharpening: Even with the spark plug disconnected, keep your hands clear of the blade path.
- Wait after operation: Let the mower cool completely before handling the blade if you’ve recently used it.
Tools and Equipment You’ll Need
Your tool choice depends on your comfort level, budget, and the blade’s condition. Each method has advantages for different situations.
Hand File (Most Common DIY Method)
- Affordable and requires no power source
- Gives you precise control over the sharpening angle
- Requires more physical effort than powered tools
- A 10-inch mill bastard file or similar metal file works best
- Best for maintenance sharpening of slightly dull blades
Angle Grinder (Fastest Method)
- Quickly removes dull metal and restores a sharp edge
- Requires practice to maintain the correct angle
- Creates sparks and hot metal fragments—requires safety glasses and caution
- Can overheat the blade edge if not used carefully, affecting metal hardness
- Best for significantly dulled blades when you have experience
Whetstone or Sharpening Stone
- Very precise control and a gentler approach to the blade edge
- Takes longer than other methods
- Works best as a maintenance tool for frequently sharpened blades
Additional Essential Equipment
- Blade balancer: A specialized tool that hangs the blade on a central spindle to detect balance problems. Basic models cost $10-25 and are invaluable for preventing vibration and mower damage.
- Metal ruler or angle gauge: Helps you maintain a consistent 30-45 degree sharpening angle.
- Marker or chalk: Marks the blade’s top side so you can track which side you’re sharpening and maintain even passes on both ends.
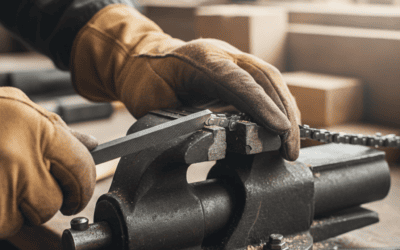
- Work clamps or vise: Holds the mower securely while you work.
- Nail or blade balancing nail: A simple alternative to a blade balancer for checking balance.
Step-by-Step Process for Sharpening a Rotary Mower Blade
Rotary blades are the most common type on residential push and riding mowers. This process works for most standard rotary mower designs.
Step 1: Prepare the Mower and Workspace
- Disconnect both spark plug wires from the spark plugs.
- Place the mower on a flat, level surface.
- For push mowers, tip the unit on its side with the air filter facing upward (preventing oil from entering the carburetor through the air intake).
- Secure the mower with clamps so it won’t shift during work.
- Set up your sharpening tools within easy reach.
Step 2: Inspect the Blade
- Look for deep cracks, large dents, or areas where metal has broken off.
- Measure the blade thickness at its thinnest point. If it’s significantly thinner than when new, replacement may be more cost-effective than sharpening.
- Mark the top side of the blade with a marker or chalk so you know which side faces the deck during operation.
- Note any uneven wear between the two blade tips.
Step 3: Establish the Correct Sharpening Angle
Most rotary lawn mower blades have an existing bevel angle between 30-45 degrees. Your goal is to match this angle rather than create a new one.
- Look at the blade’s cutting edge closely to see the existing angle.
- Position your file or grinder to match this angle—typically around 30-45 degrees from horizontal.
- If the blade is significantly damaged, you may need to gradually recreate the edge at this angle, which takes more passes.
Step 4: Sharpen the Blade Using a Hand File
- Position the blade so one cutting edge faces you.
- Hold the file at the correct angle (matching the blade’s bevel).
- Push the file forward across the cutting edge with steady, even pressure—don’t saw back and forth.
- Make 10-15 passes along one side of the blade tip, working from the top of the blade downward.
- Move the mower or reposition to access the other cutting edge.
- Make the same number of passes on the opposite side, using the same angle and pressure.
- Work on the second blade tip (the opposite end of the blade) in the same manner, making an equal number of passes on each edge.
- Check your progress by looking at the cutting edge—you should see a shiny, sharp edge developing.
Step 5: Sharpen Using an Angle Grinder (If Using This Method)
- Wear safety glasses and work gloves.
- Hold the grinder so the wheel contacts the blade edge at 30-45 degrees.
- Use light pressure and multiple short passes rather than pressing hard—this prevents overheating the blade edge.
- Work from underneath the blade, moving toward the cutting edge.
- Make equal passes on both blade ends to maintain balance.
- Let the blade cool between passes if it becomes too hot to touch (the metal will turn blue or black when overheated).
Step 6: Verify Even Sharpening
- Inspect both cutting edges—they should have the same shiny appearance and sharpness.
- Run your finger lightly along the edge (carefully) to confirm sharpness. A properly sharpened blade should feel much sharper than when you started.
- If one side appears duller or less sharp, make a few additional passes to match the other side.
How to Check and Restore Blade Balance
A balanced blade is critical for mower performance and longevity. An unbalanced blade creates vibration that damages the crankshaft, bearings, and deck over time, eventually causing expensive engine failure.
Why Balance Matters
When a blade is heavier on one end, it creates centrifugal force during rotation. This force pulls the mower, causes vibration, increases fuel consumption, and puts stress on the engine. A properly balanced blade rotates smoothly without vibration.
Method 1: Using a Blade Balancer
- Purchase a blade balancer (typically $15-30) from a lawn mower supplier or online.
- Insert the blade into the balancer’s center spindle.
- If the blade is balanced, it will stay level. If it tilts to one side, that side is heavier.
- Make a few light passes with your file on the heavier side’s cutting edge to remove metal and reduce weight.
- Recheck balance frequently—small adjustments make a big difference.
Method 2: Hanging on a Nail (Simple Alternative)
- Drive a large nail horizontally into a board or wall at shoulder height.
- Carefully hang the blade’s center hole on the nail.
- If the blade is balanced, it stays level. If one end dips down, that side is heavier.
- File the heavier side’s edge to remove weight.
- This method is less precise but works for a basic balance check.
Adjusting an Unbalanced Blade
If sharpening created an imbalance (one side is now sharper and removed more metal), make corrective passes on the lighter side. These corrective passes don’t need to sharpen—they just remove weight. Work gradually and recheck balance frequently.
Sharpening Reel Mower Blades: Key Differences
Reel mowers use a different blade design that requires different sharpening techniques. Reel blades consist of 4-6 spiral blades rotating against a fixed bedknife. Rather than sharpening these blades yourself, professional reel mower service is typically recommended because:
- The spiral blade geometry requires specialized equipment to maintain the correct angle
- The bedknife also requires professional adjustment and sharpening
- Improper reel blade sharpening creates uneven cutting worse than a dull blade
- Professional shops have specialized reel blade sharpening equipment
If your reel mower is cutting unevenly, contact a local lawn mower repair shop rather than attempting DIY sharpening.
When to Replace Your Blade Instead of Sharpening
Some blade damage makes replacement the better choice than sharpening. Replacement typically costs $15-50 and takes 10 minutes, making it practical when:
- Deep cracks or breaks: Cracks in the blade metal will worsen and eventually cause blade failure during mowing.
- Large dents or warping: Severe dents prevent proper balance and cannot be removed by sharpening.
- Blade worn to minimum thickness: Most manufacturers specify a minimum blade thickness (typically around 1/8 inch or 3mm). Blades thinner than this are too structurally weak to be safe.
- Bent blade: A bent blade will vibrate excessively even after sharpening and balancing.
- Damaged or broken fastener holes: If the center hole is damaged or enlarged, the blade won’t mount securely.
- Multiple areas of severe wear: If more than one section of the blade edge is missing or severely worn, replacement is more time-efficient.
Replacement is especially cost-effective if your blade is very old or heavily used. New blades are engineered to modern safety standards and often perform better than a blade that’s been sharpened multiple times.
Maintenance Schedule and Best Practices
Establishing a regular maintenance routine prevents unnecessary blade dulling and lawn damage.
Recommended Sharpening Frequency
- Every 20-40 hours of mowing: This is the general recommendation for most residential lawns.
- Adjustments based on usage: Heavy-use properties (commercial applications, very large lawns) may need sharpening every 15-20 hours. Light residential use might stretch to 50+ hours.
- Seasonal approach: Many homeowners sharpen at the start of the mowing season and once or twice mid-season.
- Inspection-based approach: Sharpen whenever you notice the signs of dulling mentioned earlier rather than following a strict schedule.
Factors That Increase Blade Dulling
- Frequent mowing of very tall, thick grass
- Cutting wet grass (moisture increases friction and dulling)
- Mowing in sandy or dusty conditions (abrasive particles dull blades faster)
- Accidentally hitting stones, sticks, or debris
- Mowing overgrown areas or fields rather than maintained lawns
Complementary Maintenance Steps
- Clean the mower deck: After each mowing session, remove grass clippings, dirt, and debris from the deck. Buildup increases blade dulling and promotes rust.
- Check fasteners: Ensure the blade mounting bolts are tight. A loose blade can slip and cause uneven cutting.
- Inspect the deck: Look for dents, damage, or buildup that affects blade clearance.
- Store properly: Keep the mower in a dry location. Exposure to moisture causes rust and corrosion on the blade.
- Keep a maintenance log: Track when you sharpen, how many hours between sharpening, and any issues you notice. This helps you establish the right schedule for your specific usage.
Frequently Asked Questions
How long does it take to sharpen a lawn mower blade?
Sharpening a rotary blade typically takes 15-30 minutes for someone familiar with the process. This includes disconnecting the spark plugs, securing the mower, sharpening both blade tips (four edges total), checking balance, and reinstalling. First-time sharpening may take 45-60 minutes as you work more carefully and learn the process.
Can you sharpen a lawn mower blade without removing it?
While some people sharpen without removing the blade, removing it makes the work safer and easier. You have better access to all blade edges, can position it more comfortably, and can use a blade balancer to check balance afterward. Removal typically requires a wrench or socket to loosen one bolt and takes less than 5 minutes.
What’s the best sharpening angle for a lawn mower blade?
Most lawn mower blades have an existing bevel angle between 30-45 degrees. Rather than selecting a new angle, match the existing angle on your blade. This angle balances cutting efficiency with edge durability. If your blade’s bevel is badly damaged, 35-40 degrees is a standard middle-ground angle.
How do you know if a lawn mower blade is balanced?
A balanced blade stays level when hung on a nail or inserted into a blade balancer without tilting to either side. If one end dips down after sharpening, that side is heavier and needs a few corrective passes with your sharpening tool to remove weight. Testing balance after sharpening prevents vibration problems and potential engine damage.
Is it better to sharpen or replace a dull blade?
Sharpen if the blade has no cracks, is not bent, and is thicker than the manufacturer’s minimum thickness (usually around 1/8 inch). Sharpening costs minimal time and money. Replace if the blade is cracked, bent, warped, or too thin. Replacement (typically $15-50) takes just 10 minutes and ensures optimal performance and safety.