Direct Answer: How to Put String on a Weed Eater
To put string on a weed eater, remove the trimmer head cover, take out the spool, clean away old line debris, measure and cut new trimmer line to the correct length (typically 20–30 feet), wind it tightly onto the spool following the directional arrows, thread the ends through the eyelets, and reassemble the head. The exact process varies by trimmer type—bump-feed, manual-wind, and automatic-feed designs each have slightly different mechanisms, but the core winding technique remains the same across most models.
Understanding Your Weed Eater’s String System
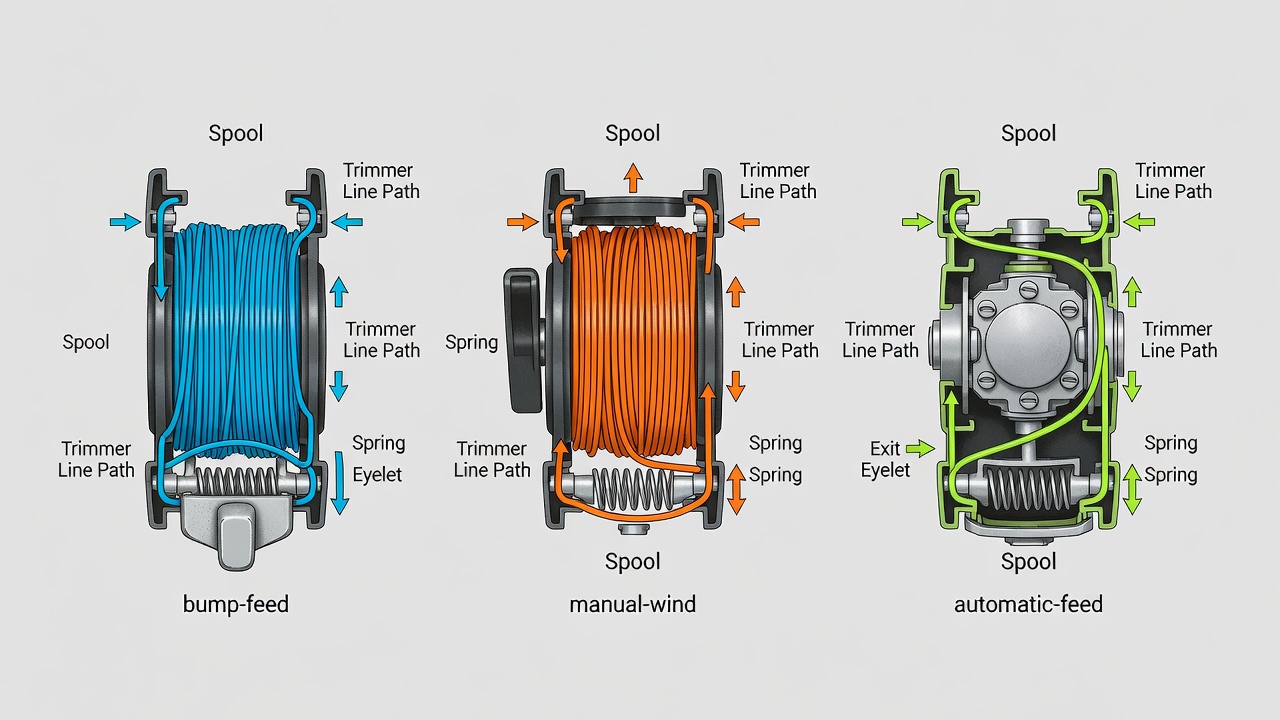
Before you begin, it helps to understand what type of trimmer head your weed eater uses. Most residential string trimmers fall into three categories:
- Bump-Feed Trimmers: You wind the line manually onto a fixed spool, then tap the trimmer head on the ground to advance fresh line. This is the most common design.
- Manual-Wind Trimmers: Similar to bump-feed but requires you to manually pull line through an eyelet to advance it, rather than using the bump mechanism.
- Automatic-Feed Trimmers: The spool advances line automatically as you use the trimmer, requiring less manual intervention. Semi-automatic designs bump-feed on demand.
You’ll also need to match your trimmer line diameter to your specific model. Most residential trimmers use 0.065-inch, 0.080-inch, or 0.095-inch diameter line. Check your trimmer’s manual or the spool itself—the diameter is usually printed on it. Using the wrong diameter can prevent proper feeding or cause the line to break prematurely.
Tools and Materials You’ll Need
Gather these items before you start:
- Replacement trimmer line (the correct diameter for your model)
- Scissors or a utility knife to cut the line cleanly
- A small flathead screwdriver (if your trimmer head is held together with screws)
- Clean cloth or brush to remove old line debris
- Your trimmer’s user manual (helpful for model-specific details)
Trimmer line is inexpensive and widely available at hardware stores, garden centers, and online retailers. A standard 0.080-inch diameter line is compatible with most popular brands including Ryobi, DeWalt, Black+Decker, and Makita residential models.
Accessing and Removing the Spool
Step 1: Disconnect the Power
If your weed eater is electric (corded or cordless), unplug it or remove the battery. For gas-powered trimmers, ensure the engine is off and cool before proceeding.
Step 2: Remove the Trimmer Head Cover
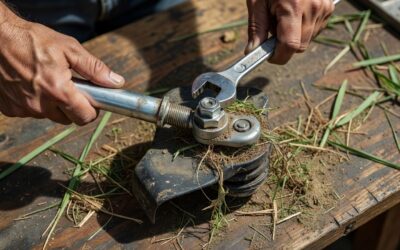
Most trimmer heads have a plastic cover or cap held on by one central bolt or by a simple twist-lock design. If it’s a bolt, use your screwdriver to loosen it. If it’s a twist-lock, turn it counterclockwise by hand. Set the cover aside in a safe place.
Step 3: Remove the Spool
The spool sits on a center arbor (the shaft in the middle of the trimmer head). Depending on your model, the spool may twist off, slide off, or be held by a clip. Check your manual if you’re unsure, but most spools simply rotate counterclockwise to loosen and pull straight out.
Step 4: Clean Out Old String Debris
Use your cloth or brush to remove any old line fragments, dirt, or grass from inside the trimmer head. This prevents tangles and ensures smooth line feeding when you reassemble everything.
Measuring, Cutting, and Preparing New Line
How Much Line Do You Need?
The amount of line varies by spool size, but most residential bump-feed spools hold 20–30 feet of line. The correct length is usually printed on the spool itself or in your manual. If you’re unsure, start with 25 feet—you can always trim it down if needed. Having a bit extra is better than running short mid-installation.
Cutting the Line Cleanly
Use sharp scissors or a utility knife to cut a clean, straight edge on both ends of your line. Jagged or frayed edges can cause feeding problems. If you’re cutting from a large spool of bulk trimmer line, cut the line to length before you begin winding.
Why Length Matters
If your line is too short, you won’t fill the spool properly, and the trimmer will run out of line quickly during use. If it’s too long, it may bunch up or tangle during winding, or it won’t fit properly in the spool cavity. Stick to the manufacturer’s recommended length.
Winding String onto the Spool
Step 1: Locate the Anchor Point
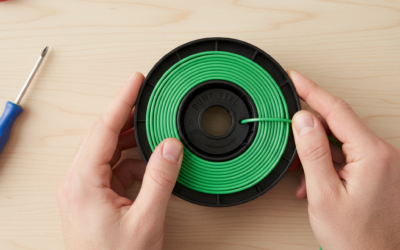
Most spools have a small notch, hook, or slot near the outer edge where you anchor one end of the line. Look for this feature on your spool—it’s usually clearly marked or indented. Insert one end of your trimmer line into this anchor point and hold it firmly.
Step 2: Wind in the Correct Direction
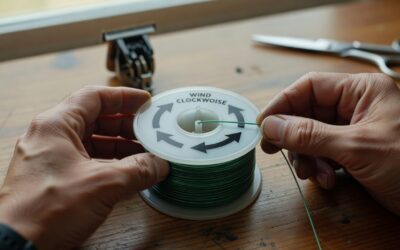
This is critical. Look for arrows printed on the spool showing the winding direction—almost always counterclockwise when you’re looking down at the spool from above. Wind the line tightly and neatly in this direction, keeping tension on the line as you wrap it. Loose or haphazard winding causes tangles and feeding failures.
Step 3: Keep It Tight and Neat
As you wind, maintain steady tension so each wrap sits snugly against the previous one. Overlapping layers or gaps in the winding pattern will cause the line to jam or tangle when the spool rotates. Aim for a firm, evenly distributed spiral pattern that fills the spool without bulging.
Step 4: Wind Until the Spool Is Full
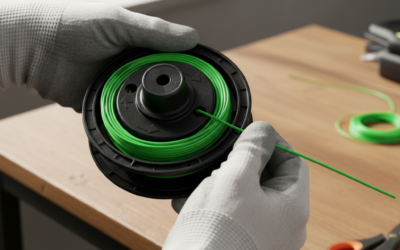
Continue winding until you’ve wound nearly all your line onto the spool. Leave about 4–6 inches of line unwound. This excess line will be used to thread through the eyelets in the next step.
Threading and Reassembling the Trimmer Head
Step 1: Thread the Line Through the Eyelets
Most trimmer heads have two small eyelets (holes) on opposite sides of the head where the trimmer line exits. With your excess line still unwound, thread one end through one eyelet and the other end through the other eyelet. Pull gently so both ends protrude equally from the head.
Step 2: Reposition the Spool
Slide the spool back onto the center arbor and twist it clockwise until it’s snug. Make sure the line paths through the eyelets are clear and not pinched.
Step 3: Replace the Trimmer Head Cover
Align the cover with the head and twist it clockwise (or reinstall the bolt) until it’s tight. The eyelets should align with small notches or gaps in the cover so the line can feed out freely.
Step 4: Verify Proper Installation
Gently tug on both ends of the line protruding from the eyelets. They should feel secure and not pull through. The line should be even in length on both sides. If it’s lopsided or loose, remove the cover and adjust the spool positioning.
Differences by Trimmer Type
Bump-Feed Trimmers (Most Common)
Bump-feed trimmers are the standard for residential use. After you’ve wound and reassembled the spool as described above, the trimmer is ready to use. During operation, tap the trimmer head gently on the ground to advance fresh line automatically. Each bump rotates the spool slightly, feeding out new line to replace what’s been worn away.
Manual-Wind Trimmers
Manual-wind spools work similarly to bump-feed in terms of winding, but instead of tapping the head on the ground, you manually pull the line through an eyelet or trigger mechanism to advance it. The winding process is identical; only the line-advance method differs during use.
Automatic and Semi-Automatic Trimmers
Fully automatic trimmers have a spring-loaded spool mechanism that advances line as the trimmer runs without any user action. Semi-automatic designs combine bump-feed with some automatic features. The winding process is the same, but consult your manual for any specific spool-loading instructions, as some automatic designs have a slightly different arbor or spool design.
Brand-Specific Notes
Ryobi, DeWalt, Black+Decker, Makita, and other major brands generally follow the same winding principles. However, some models feature proprietary spool designs or color-coded arrows to indicate winding direction. Always defer to your specific model’s manual if instructions seem to conflict with these general guidelines.
Troubleshooting Common Problems
The Line Won’t Come Out When I Bump the Trimmer
This usually means the spool is wound too tightly or the line is jammed. Remove the trimmer head cover, check that the line paths through the eyelets cleanly, and ensure the spool rotates freely by hand. If the line is tangled, unwind it slightly and rewind more loosely.
The String Is Tangled or Bunching Up
Tangling occurs when the line is wound unevenly, overlaps itself, or is wound in the wrong direction. Unwind the spool, inspect the winding pattern, and rewind more carefully. Ensure you’re winding in the direction indicated by the spool arrows (almost always counterclockwise).
The Line Breaks Frequently During Use
Frequent breakage can result from using the wrong line diameter for your trimmer, winding it too tightly, or hitting hard objects frequently. Verify the correct diameter for your model, wind with moderate tension, and be mindful of what you’re trimming. Rocks and thick branches will break any line eventually.
The Line Won’t Feed or Advances Inconsistently
Check that both ends of the line protrude equally from the eyelets and that the spool rotates freely. If one end is too short or the spool binds, the feeding mechanism won’t work. Reinstall the line if necessary.
The Trimmer Head Feels Loose or Unstable
Ensure the trimmer head cover is tight and the spool is seated fully on the arbor. A loose cover can allow the spool to wobble, causing feeding problems and safety issues. Tighten firmly but do not overtighten, as plastic spools and covers can crack.
Maintenance Tips for Longer Line Life
Trim mainly grass and light vegetation rather than woody stems or debris whenever possible. Hard materials dull and break line faster. Store your weed eater in a dry place to prevent rust and spool degradation. Periodically inspect the eyelets for cracks or rough spots that might fray the line. If an eyelet is damaged, it should be replaced; rough edges will degrade new line quickly. Finally, reload your trimmer before a long project—running out of line mid-session is frustrating, and it’s better to have fresh line installed and ready.
Frequently Asked Questions
What is the most common trimmer line diameter?
The most common diameter for residential weed eaters is 0.080 inch (also written as 0.08 in. or 80 mil). This size works with most bump-feed and manual-wind trimmers from major manufacturers. Check your trimmer’s manual or the spool itself to confirm the correct diameter for your specific model before purchasing replacement line.
Can I use any brand of trimmer line?
Yes, as long as the line diameter matches your trimmer specification. Trimmer line is a commodity product—there’s no fundamental difference between premium and budget brands if they’re the same diameter and material (usually nylon). Some users prefer heavier-duty commercial-grade line for tougher jobs, but standard residential line works fine for most homeowners.
How often should I replace my trimmer line?
Line life depends on how often and what you trim. Light residential use (once a week for small yards) might require a new line every 2–4 weeks. Frequent or heavy use could exhaust a full spool in a few days. You’ll know it’s time to reload when the line becomes too short to reach the ground or stops cutting effectively.
Why is my line winding in the wrong direction?
If you’re winding counterclockwise but the arrows on your spool point clockwise, double-check that you’re looking at the spool from the correct angle. Spools are marked to be viewed from the top (the side facing up when installed in the trimmer head). If arrows still don’t match, consult your manual—some specialty or commercial designs may differ from standard residential models.