

Direct Answer: How to Replace String Trimmer Line
To replace string trimmer line, first turn off the trimmer and let it cool completely. Remove the trimmer head cover by twisting or pressing the release tabs (design varies by model). Take out the old spool, remove remaining line, and clean debris from the spool. Load new line of the correct gauge (typically 0.065″, 0.080″, or 0.095″ for residential trimmers) into the spool slots, following the directional arrows molded into the spool. Reassemble the head cover and test the trimmer on a small area. The exact procedure depends on whether your trimmer uses a bump-feed head, automatic feed system, or fixed spool, but these foundational steps apply universally.

Pros
- 271 ft donut spool of .095" line
- High-strength nylon copolymer blend
- Round profile designed for snag-free feeding
- Includes a heavy-duty cutting tool
- High-visibility orange color
Cons
- Round shape is less aggressive on woody weeds
- Requires manual spool winding

Pros
- Heavy-duty .095" nylon construction is built for tougher trimming tasks.
- Square shape can improve cutting efficiency and edging precision.
- Long 330-foot spool reduces the need for frequent replacement.
- Compatible with many trimmer types that use .095" line.
Cons
- May be less suitable for very light-duty trimming where a thinner line could be easier on smaller trimmers.
- No included trimmer head or additional accessories are listed in the product data.
- Performance can vary by trimmer power and the type of vegetation being cut.
Overview & Design: The VIABRICO .095" Weed Eater String is a square-profile trimmer line made from premium nylon-based material for general lawn care and heavier edging tasks. The orange color makes the spool easy to identify, and the 330-foot length is useful for users who go through line regularly.
Performance & Key Features: Its square shape is designed to create sharper cutting edges and a larger cutting surface than standard round line, which can help improve trimming speed and edge definition. The line is also advertised as abrasion resistant, crack resistant, and highly impact resistant, with a precision-wound spool intended to reduce tangling, misfeeds, and jams.
Drawbacks & Considerations: This is a .095" heavy-duty line, so it may be more than some lightweight trimmers need. The product data does not include accessories, and real-world results will still depend on the power of the trimmer and the type of weeds or terrain being handled.
Verdict: This VIABRICO trimmer line is a solid fit for homeowners and frequent yard-maintenance users who want a durable .095" line with better cutting performance than basic round string. It is especially relevant for edging, thicker weeds, and rougher terrain where wear resistance matters.

Pros
- Long 200-foot supply supports repeated reloading
- Universal fit increases compatibility with many gas string trimmers
- 0.095-inch thickness is suitable for tougher trimming than lighter-duty line
Cons
- Compatibility still depends on the trimmer's required line diameter and head design
- The commercial-grade 0.095-inch line may be more than some light-duty trimmers need
- No detailed performance specs such as shape profile or break resistance are provided
Overview & Design: The Arnold Maxi-Edge .095-Inch x 200-Foot Commercial Grade String Trimmer Line is a replacement line for string trimmers. It is designed as a universal option for most gas string trimmers and comes in a large 200-foot supply with 10 refills.
Performance & Key Features: With a .095-inch diameter, this line is built for trimming grass and light vegetation with more durability than thinner lines. The commercial-grade specification makes it a practical choice for routine yard work where a stronger cutting line is preferred.
Drawbacks & Considerations: The main limitation is compatibility, since trimmer line must match the tool's required diameter and head design. It is also better suited to users who need a sturdier line, which may be unnecessary for very light trimming jobs.
Verdict: This Arnold trimmer line is a solid option for homeowners and maintenance users who want a universal .095-inch replacement line with a generous supply. It offers a straightforward, no-frills choice for keeping a gas trimmer ready for regular cutting tasks.

Pros
- Long 440-foot length supports multiple trimming sessions before replacement.
- Hexagonal design can improve cutting performance versus basic round line.
- Compatible with a wide range of gas and electric trimmers using .065-inch line.
Cons
- Compatibility depends on your trimmer's required line diameter and spool setup.
- The product data does not include an exact trimmer brand compatibility list.
- There are no customer review details provided in the manufacturer listing to verify long-term performance.
Overview: The Sialvnd 065 String Trimmer Line is a .065-inch hexagonal trimmer line sold in a 440-foot length. It is made for use with many gas and electric trimmers and is positioned as a durable replacement line for routine yard work.
Performance: The hexagonal shape is intended to improve cutting efficiency compared with round line, which can help when trimming grass and light weeds. The premium-grade nylon construction is also designed to resist wear and reduce breakage during normal use.
Considerations: As with any trimmer line, fit depends on the tool's required line diameter and spool compatibility. The available product data does not list a full compatibility chart, and there are no customer review details included here to confirm real-world longevity.
Verdict: This is a practical option for homeowners and DIY users who need a long spool of .065-inch line for everyday trimming. It is best suited to buyers who want an efficient, straightforward replacement line without extra features.
Pros
- Common .065-inch round line size improves compatibility with many trimmer models.
- Long 328-foot spool supports multiple refills from one package.
- Nylon material is positioned as a budget-friendly option for basic lawn maintenance.
- Useful for light trimming and edging around typical residential yards.
Cons
- Round .065-inch line is designed for light trimming, so it is not ideal for heavy weeds or thick overgrowth.
- Compatibility is broad but not universal, so users still need to confirm their trimmer calls for .065-inch line.
- No extra accessories or prewound spool system are included in the product information provided.
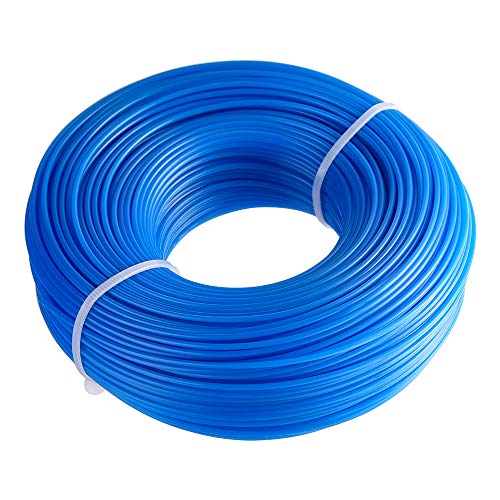
Overview: The FEPITO Round .065-Inch String Trimmer Line is a nylon replacement line designed for garden string trimmers and edgers. It is positioned as a straightforward, economical option for routine home yard maintenance.
Performance: With a 0.065-inch round profile and 328 feet of total line, this spool is meant for light trimming of small to medium grass. The longer length can provide around 16 refills, which is useful for users who want a supply that lasts through repeated mowing and edging sessions.
Drawbacks: This is not a heavy-duty trimmer line, so it may be less effective on thick weeds, dense brush, or tougher landscaping jobs. Buyers also need to check compatibility, since it is only suitable for trimmers that specifically call for .065-inch round line.
Verdict: The best value will be for homeowners who need a basic, budget-conscious replacement line for regular light trimming. If your yard work is mostly routine edging and grass cleanup, this FEPITO spool is a practical fit.
Understanding Your Trimmer Head Type
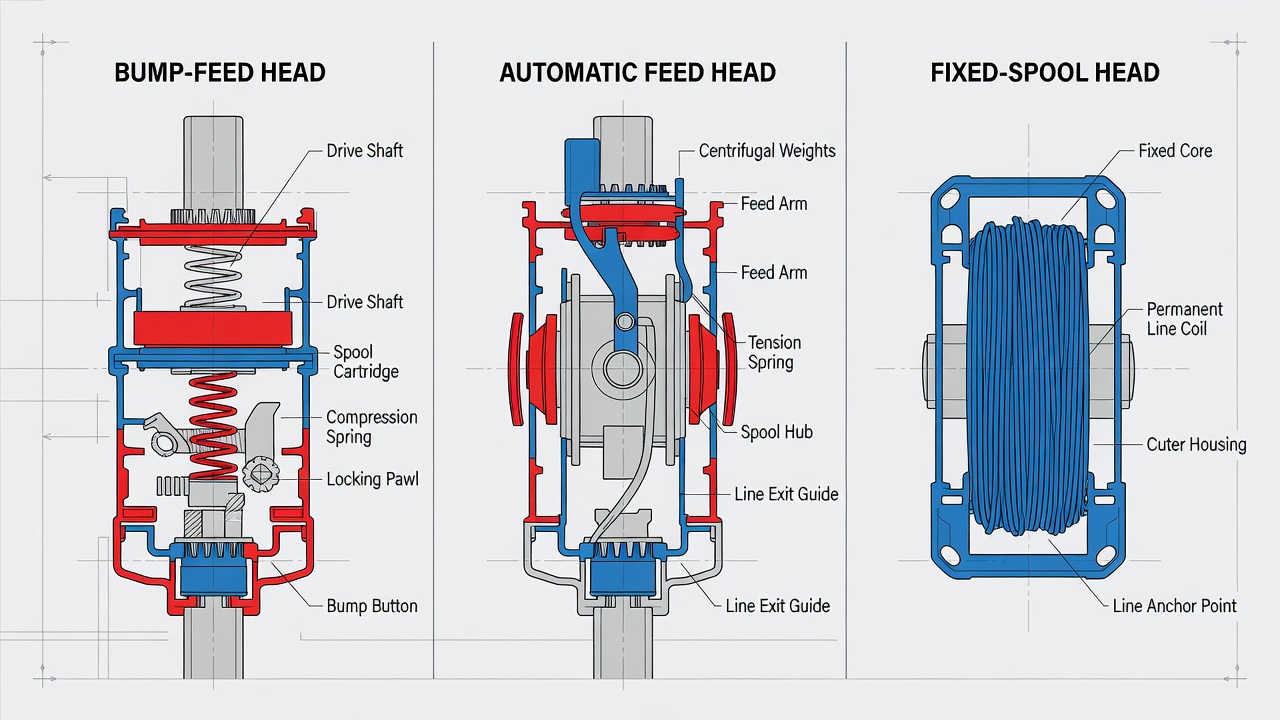
Before you begin, identify which type of trimmer head you have, this determines the replacement procedure and how often you’ll need to service it.
Bump-Feed Trimmer Heads (Most Common)
Bump-feed heads are the standard on residential string trimmers. They feature a rotating spool inside a fixed head cover. When you tap the trimmer head against the ground during use, a spring-loaded mechanism automatically bumps out a small amount of fresh line to replace worn portions. This design is user-friendly because you rarely need to manually replace the entire line, simply load a fresh spool when the line runs out. Bump-feed heads are typically found on affordable gas and electric trimmers.
Automatic Feed Heads
Automatic feed heads use a centrifugal mechanism that advances line as it wears, eliminating the need to bump the trimmer. These heads feed line continuously during operation, which reduces downtime but can consume line faster than bump-feed systems. Automatic heads are common on mid-range and professional-grade trimmers. Line replacement follows a similar process to bump-feed, but you won’t need to tap the trimmer to advance line during use.
Fixed-Spool Trimmers
Fixed-spool heads have a permanent, non-removable spool with line pre-wound at the factory. When line wears out, you manually wind new line onto the fixed spool using a hand-crank or other method, or replace the entire head assembly. These are less common on residential models but appear on some commercial-grade trimmers and older equipment. They require more manual labor but offer durability for heavy-use environments.
Choosing the Right Replacement Line
Selecting the correct line gauge and material is critical for trimmer performance and safety. Before finalizing equipment decisions, refer to our comprehensive z890 vs x870e motherboard comparison.
Line Gauge Sizes
String trimmer line comes in standardized diameters. The most common residential sizes are:
- 0.065 inch (1.65 mm): Lightest gauge; best for light grass and weeds, electric trimmers, and smaller engines. Cuts less aggressively and uses less fuel.
- 0.080 inch (2.0 mm): Medium gauge; versatile for most residential lawns. Works on both gas and electric trimmers. Balances cutting power with line longevity.
- 0.095 inch (2.4 mm): Heavier gauge; designed for gas-powered trimmers and thicker weeds. More durable and cuts more aggressively but requires more engine power.
Check your trimmer‘s manual or the head housing for the manufacturer’s recommended gauge. Using line thicker than recommended can strain the engine or motor; using line thinner than recommended reduces cutting effectiveness and wastes line.
Line Material
Most trimmer line is made from nylon. Two primary types exist: For broader ecosystem context, read through our operational guide on marshall stanmore iii vs harman kardon onyx studio 8.
- Virgin Nylon: Standard composition offering good durability and affordability. Suitable for general lawn maintenance.
- Reinforced Nylon (Serrated or Twisted): Enhanced with twisted fibers or serrated edges for cutting tougher vegetation like woody weeds and light brush. Costs more but lasts longer in demanding conditions.
Premium lines may include coatings to reduce noise and vibration. Choose reinforced line if you frequently trim thick weeds; standard nylon works for regular maintenance.
Safety Precautions Before Starting
Always follow these safety measures before replacing trimmer line: For troubleshooting and reliability insights, consult our in-depth dyson v8 cyclone vs bissell featherweight stick report.
- Disconnect the power source: For electric trimmers, unplug the unit from the outlet. For cordless trimmers, remove or fully discharge the battery. For gas trimmers, disconnect the spark plug wire.
- Allow the trimmer to cool: Gas-powered trimmers generate heat during operation. Wait 10 to 15 minutes after stopping before handling the trimmer head.
- Wear protective equipment: Use work gloves to protect your hands from sharp line edges and metal parts. Safety glasses protect against debris.
- Work on a stable surface: Place the trimmer on a flat, secure workbench or ground area to prevent it from tipping during disassembly.
- Never force components: If a cover or spool won’t budge, check for hidden fasteners (screws or clips) rather than applying excessive force, which can break plastic parts.
How to Replace Line on a Bump-Feed Trimmer (Step-by-Step)
Bump-feed trimmers are the most common residential type. Follow these detailed steps:
Step 1: Access the Trimmer Head
Locate the trimmer head cover, the cylindrical plastic housing at the bottom of the trimmer shaft. Most covers secure via one of two methods:
- Twist-off covers: Grip the cover firmly and twist counterclockwise (or clockwise, depending on the model). Continue twisting until the cover separates from the head. Some models have grip ridges or tabs to aid removal.
- Tab-release covers: Look for small plastic tabs or buttons on the cover sides. Press or squeeze these tabs inward while gently pulling the cover away from the head. Release tabs usually appear in pairs on opposite sides.
If the cover is stubborn, apply a small amount of penetrating oil around the seam and wait a few minutes before trying again.
Step 2: Remove the Old Spool
Once the cover is off, you’ll see the spool, a plastic bobbin that holds the line. Some spools pull straight out; others have a retaining bolt or nut in the center. If your spool has a center bolt:
- Hold the spool steady and use an appropriately sized wrench or socket to loosen the bolt by turning counterclockwise.
- Remove the bolt and any washers underneath.
- Gently pull the spool upward and out of the head housing.
If the spool pulls straight out, simply grip it and pull firmly upward.
Step 3: Clean the Spool and Head
Before loading new line, remove debris from the spool and head interior:
- Use a dry cloth or soft brush to wipe away grass clippings, dirt, and old line fragments from the spool surface and the head housing.
- Inspect the eyelet (the opening where line exits the head) for cracks or damage. A damaged eyelet will cause line to fray prematurely.
- Check for any hardened line or adhesive residue and gently pick it away with a plastic tool or old credit card, avoid metal tools that could scratch the spool.
Step 4: Load the New Line
This is the most critical step. Examine the spool for directional arrows or slot indicators molded into the plastic, these show which direction to wind the line.
- Cut a length of new line (typically 15 to 20 feet, depending on spool capacity; the package usually specifies this).
- Locate the small notch or anchor point near the spool’s center. Insert one end of the line into this notch and hold it firmly in place.
- Following the directional arrows, wind the line tightly and evenly around the spool in a single layer. Keep tension on the line as you wind to prevent loose coils.
- Wind until approximately 3 to 4 inches of line remains. This remainder will thread through the eyelets later.
- Locate the small retention slots on the spool edge (usually two slots positioned opposite each other). Insert the end of the wound line into one of these slots to hold it in place temporarily.
If your spool has two separate chambers (common on newer bump-feed designs), repeat this process for the second chamber with a separate line piece.
Step 5: Reassemble the Head
Carefully reverse the disassembly process:
- Guide the wound spool back into the head housing. If your spool has a center bolt, reinsert the bolt and tighten it firmly (but not excessively) by turning clockwise.
- Pull the retention slot-held line ends free so they dangle from the eyelets.
- Check that the lines are roughly equal in length (each should be 6 to 8 inches or as specified by your trimmer manual).
- Reattach the cover by twisting clockwise or pressing the tab-release tabs until you hear a click. Twist-on covers should feel snug but not overly tight.
Step 6: Test the Trimmer
Before trimming your lawn, perform a brief test:
- Connect the power source and turn on the trimmer (keep hands clear of the cutting head).
- Run the trimmer at low speed for 5 to 10 seconds in an open area, listening for unusual vibration or sounds.
- Stop the trimmer and visually inspect the cutting head. Line should appear even and balanced.
- If the trimmer vibrates excessively, stop immediately and recheck that the spool is seated correctly and the cover is properly secured.
Replacing Line on Automatic and Fixed-Spool Trimmers
Automatic Feed Heads
The replacement process for automatic heads mirrors bump-feed steps 1 to 5, with these differences:
- Automatic heads typically have a single, larger spool chamber rather than two separate sections.
- Load line in a continuous spiral (rather than layered winds) following the directional arrows. This allows the centrifugal mechanism to feed line smoothly during operation.
- Wind line more loosely than on bump-feed spools, excessive tension can jam the automatic feed system.
- After reassembly, run the trimmer briefly (without cutting) to allow the automatic mechanism to advance and seat the line properly.
Fixed-Spool Trimmers
Fixed-spool systems vary widely, but the general approach is:
- Remove any guide eyelets or guards securing the old line to the permanent spool.
- Carefully unwind or cut away old line from the spool barrel.
- Clean the spool surface thoroughly of old line residue.
- Insert the new line end into the spool’s starting notch and hand-wind the line tightly around the barrel in neat, overlapping rows.
- Secure the line end in a retention slot or with a small plastic clamp (some models include these).
- Replace any eyelets or guards and test the trimmer.
If the fixed spool is severely damaged or has deep grooves that prevent even line winding, replacement of the entire head assembly may be more practical than attempting to rewind the existing spool.
Troubleshooting Common Issues During Replacement
Line Won’t Feed or Exits the Eyelets Unevenly
Cause: Line ends may be twisted, tangled, or not fully seated in retention slots.
Solution: Remove the cover, unwind the line slightly, straighten both ends, and rewind, ensuring they’re firmly locked in the retention slots. Check that the eyelets are aligned and unobstructed.
Trimmer Head Vibrates or Rattles After Replacement
Cause: The spool may not be fully seated, the center bolt is loose, or the cover isn’t secured properly.
Solution: Stop the trimmer, disconnect power, and verify that the spool is fully inserted into the housing. Tighten the center bolt (if present) and ensure the cover is snapped or twisted on securely. Retest at low speed.
Line Breaks Frequently or Wears Unevenly
Cause: Wrong gauge for your trimmer, damaged eyelet, debris in the cutting head, or excessive tension during winding.
Solution: Check the trimmer manual to confirm the correct gauge. Inspect the eyelet for cracks or burrs and smooth them gently with fine sandpaper if needed. Remove any debris from the head. When rewinding, use firm but not excessive tension.
Old Line Tangles or Jams Inside the Head
Cause: Line fragments were not fully removed during disassembly, or old line wrapped around internal components.
Solution: Disassemble the head again and carefully inspect the interior with a flashlight. Use needle-nose pliers to gently remove any tangled fragments. Clean thoroughly with a dry cloth before reloading new line.
Maintenance Tips to Extend Line Life
What Causes Trimmer Line to Wear Out?
String trimmer line degrades through several mechanisms:
- Friction: Contact with grass, weeds, soil, rocks, and concrete causes abrasion and fraying.
- UV exposure: Sunlight breaks down nylon over time, making line brittle.
- Heat: Running the trimmer continuously without breaks generates friction heat that weakens nylon.
- Impact: Striking hard objects (rocks, fence posts, tree branches) snaps line or creates weak points.
Storage Best Practices
Proper storage preserves line quality between uses:
- Keep line indoors: Store trimmer line in a cool, dry location away from direct sunlight. UV rays degrade nylon even when line is not in use.
- Maintain moderate humidity: Very dry environments can make nylon brittle; very humid environments can encourage mold. Aim for 40 to 60% relative humidity.
- Use original packaging: Trimmer line packages are designed to protect nylon from light and moisture. Keep line in these packages until use.
- Avoid high temperatures: Store line away from heaters, furnaces, and hot water heaters. Temperatures above 85°F can soften nylon and cause it to deform or fuse.
How Often Should You Replace Line?
Replacement frequency depends on use:
- Light residential use (1 to 2 hours weekly): Replace line 2 to 3 times per mowing season or annually.
- Moderate residential use (3 to 5 hours weekly): Replace line every 4 to 6 weeks during the mowing season.
- Heavy residential or semi-commercial use (5+ hours weekly): Replace line weekly or as needed.
- Signs you need replacement now: Visible fraying, thin or weak sections, frequent breakage, or inability to cut cleanly through grass.
Additional Maintenance
Beyond line replacement, these practices extend trimmer lifespan:
- Clean the cutting head after each use to prevent debris buildup and corrosion.
- Inspect eyelets monthly for damage and repair or replace if cracked.
- Check that the head cover is secure before each use to prevent line from tangling.
- Run the trimmer at appropriate throttle levels, excessive speed wears line faster.
- Avoid hitting hard surfaces. Trim grass and soft weeds; avoid rocks, metal objects, and tree trunks.
Buyer FAQs: How To Replace String Trimmer Line Solved
Q: Can I use any brand of trimmer line on my trimmer?
A: Yes, in most cases. Trimmer line is standardized by gauge (diameter), and any 0.065″, 0.080″, or 0.095″ line will fit a trimmer designed for that gauge, regardless of brand. However, always check your trimmer manual to confirm the correct gauge for your specific model. Using the wrong gauge can damage the trimmer or reduce cutting efficiency. Premium or reinforced lines from any reputable manufacturer will work, though they may cost more than generic options.
Q: How long does new trimmer line typically last?
A: Longevity depends on use intensity and conditions. With light residential use (1 to 2 hours per week), a full spool typically lasts 4 to 8 weeks. With moderate use (3 to 5 hours weekly), expect 2 to 4 weeks. Heavy use or frequent contact with hard surfaces (rocks, concrete) can deplete a spool in just a few days. Reinforced or premium line generally outlasts standard nylon by 20 to 50%, making it cost-effective for frequent users despite higher upfront cost.
Q: Is it normal for the trimmer to vibrate after loading new line?
A: Slight vibration is normal when first running the trimmer with a fresh spool, as the line settles and balances. However, excessive or persistent vibration indicates a problem. Check that the spool is fully seated in the head, the center bolt (if present) is tight, and the cover is securely attached. If vibration continues after these checks, the spool may be damaged or warped and may need replacement.
Q: Can I rewind and reuse an old spool instead of buying a new one?
A: Yes. Many trimmer owners save money by rewinding old spools with new line instead of purchasing pre-wound replacement spools. The process is identical to the initial loading procedure, simply clean the old spool, wind fresh line onto it, and reinstall. Reusing spools works indefinitely unless the spool develops cracks, warping, or deep grooves that prevent even line winding. If damage occurs, replacement spools are inexpensive and readily available.
Our Final Editorial Take on How To Replace String Trimmer Line
Replacing string trimmer line is a straightforward maintenance task that takes 10 to 15 minutes once you understand your trimmer’s design. By identifying your head type (bump-feed, automatic, or fixed-spool), choosing the correct line gauge, and following the step-by-step procedure, you’ll keep your trimmer running smoothly and efficiently. Regular line replacement, proper storage, and basic head maintenance will extend your trimmer’s lifespan and ensure a well-groomed lawn season after season. When in doubt, consult your trimmer’s manual for model-specific guidance, or contact the manufacturer’s customer support for clarification.
Technical Standards and Compliance
Mechanical safety standards, operational tolerances, and protective gear guidelines align with benchmark specifications established by the American National Standards Institute (ANSI).









