Quick Answer: How to Clean Lawn Mower Carburetor Without Removing
Quick Answer: To clean a lawn mower carburetor without removing it, shut off the fuel, remove the air filter, and spray a dedicated carburetor cleaner directly into the air intake and carburetor throat. For better results, remove the float bowl screw and jet to spray directly inside, flushing out ethanol varnish and gum. This process typically fixes mower sputtering and surging in 15 to 20 minutes using nothing more than a screwdriver and a can of cleaner.
Why Your Mower is Sputtering and Surging (The Real Culprit)
Before you grab a wrench, it helps to understand what you are fighting. If your lawn mower starts, runs for a few seconds, and then dies, or if it surges up and down in rhythm, the problem is almost certainly fuel delivery. Modern gasoline contains ethanol, which is hygroscopic (it attracts water). Over the winter, or even after just a few weeks of sitting, the lighter components of the fuel evaporate, leaving behind a sticky, yellowish-brown residue known as varnish or gum.
This ethanol gas varnish accumulation coats the tiny internal passages of your carburetor. Because these passages are microscopic, even a microscopic film of gum restricts fuel flow, causing the lean-richen cycle you hear as surging. You don’t need to pull the entire carburetor off the engine and rebuild it; you just need to dissolve that varnish.
Diagnostic Matrix: Symptoms vs. Solution
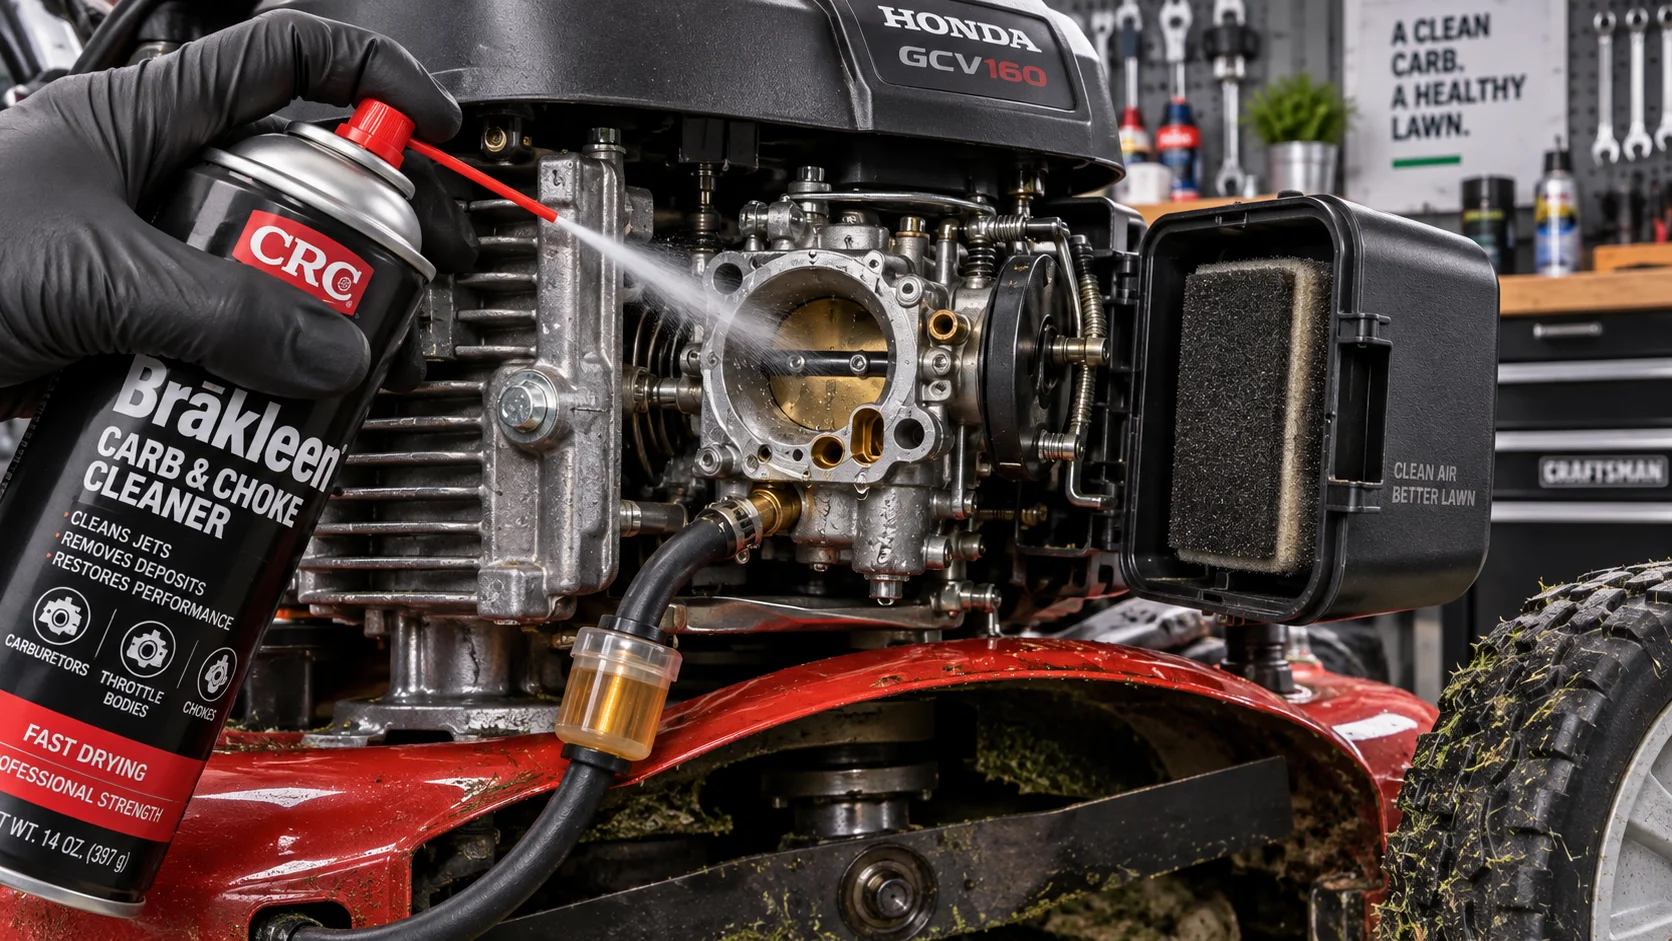
Determining whether you need a quick spray or a deeper internal cleaning depends on your specific symptoms. Use this diagnostic table to gauge the severity of the ethanol gas varnish build-up before you begin the cleaning float bowl screw jet process.
| Symptom | Severity | Recommended Action | Required Tools |
|---|---|---|---|
| Mower starts but dies immediately | Moderate | Spray carburetor cleaner air intake while cranking. | Carb cleaner spray, screwdriver (for air filter). |
| Mower surges (hunting idle) | High | Clean the main jet inside the float bowl. | Screwdriver, wrench, carb cleaner. |
| Mower runs rich (black smoke) | Moderate | Clean the choke plate and air intake throat. | Carb cleaner spray, shop rag. |
| Mower will not start at all | Severe | Full internal cleaning; likely blocked main jet. | Full kit, fuel shut off valve step logic. |
Step-by-Step: How to Clean a Carburetor Without Removing It
Follow this procedure in order. The key is to work systematically from the air intake back to the fuel tank.
1. Preparation and the Fuel Shut Off Valve Step
Safety and preparation are critical. First, locate your fuel shut off valve (if equipped) and turn it to the “OFF” position. If your mower does not have a valve, use a fuel line clamp to pinch the line, or simply run the mower until the carburetor is empty of gas. You do not want fresh gasoline dripping onto a hot engine while you are spraying solvent.
Action: Move the mower to a well-ventilated area, preferably outdoors on a driveway or garage floor where spills can be easily cleaned. Disconnect the spark plug wire and tuck it away to prevent accidental starts.
2. Access the Carburetor via the Air Intake
Remove the air filter cover and take out the air filter element. This exposes the carburetor throat. This is your primary access point for the carburetor cleaner spray air intake method. If the air filter is oil-soaked or clogged with grass, replace it immediately, as a dirty filter will starve the engine of air, mimicking carburetor issues. When planning workspace deployment, consider the engineering criteria outlined in our z890 vs x870e motherboard guide.
With the filter removed, look down the throat. You may see the butterfly valve (choke plate). If there is visible dirt or debris around the edges of the plate, wipe it away with a clean rag.
3. The “Quick Spray” Method (No Disassembly)
This method works best for minor surging or a mower that is reluctant to start after sitting. It focuses on cleaning the venturi and the main nozzle from the outside. For additional operational safety benchmarks, see our published testing notes on marshall stanmore iii vs harman kardon onyx studio 8.
Step A: Shake your can of carburetor cleaner well. Attach the red straw applicator to the nozzle for precision.
Step B: Insert the straw into the carburetor throat. Spray a generous 3-second burst directly into the venturi (the narrow part of the intake). To compare alternative configurations, check our hands-on review of dyson v8 cyclone vs bissell featherweight stick.
Step C: Without letting the spray settle, immediately pull the starter cord. The engine will likely pop or fire briefly. This “fire” helps blast the dissolved varnish out of the engine. Repeat this spray-and-pull process 3 to 4 times.
Step D: Locate the small brass hole just above the butterfly valve (the pilot circuit). Spray a short, controlled burst directly into this hole. This targets the low-speed circuit responsible for idling.
4. The Deep Clean: Cleaning the Float Bowl Screw and Jet
If the quick spray doesn’t solve the surging, the ethanol gas varnish has likely solidified inside the float bowl or clogged the main jet. You must access the internals without fully removing the carburetor from the engine. Most modern Briggs & Stratton, Kohler, and Honda engines allow you to drop the bowl while the carburetor remains bolted to the intake manifold.
Step A: Locate the Bowl Screw. Look at the bottom of the carburetor. There is usually a single bolt or screw holding the metal cup (the float bowl) in place. Place a shallow drain pan underneath.
Step B: Remove the Screw. Unscrew the bottom bolt. Be careful; the bowl is under spring tension from the float. As the screw comes out, gas will pour out. Let it drain completely.
Step C: Inspect the Jet. On many mower carburetors, the main jet is actually integrated into the screw you just removed, or it is visible as a tiny brass hole in the center of the carburetor stem. Hold it up to the light. If you cannot see a pinhole of light through the center, it is blocked.
Step D: Spray the Jet. This is the most critical step. Insert the red straw of your carburetor cleaner directly against the hole in the jet. Spray forcefully. You should see a mist spray out the other side. If it sprays sideways or dribbles, continue spraying until the passage is clear.
Step E: Clean the Bowl. Spray the inside of the metal float bowl you removed. Wipe out any brown residue or “sand” (dried varnish) with a paper towel. Clean the needle valve (the small rubber-tipped pin) with a spray of cleaner to ensure it isn’t stuck.
5. Reassembly and Testing
Reinstall the float bowl screw. Ensure the O-ring or gasket is seated correctly to prevent leaks. Snug the bolt down; do not overtighten, as the threads are often aluminum.
Turn your fuel shut off valve step back to “ON” (or unclamp the line). Let the bowl fill for about 30 seconds. Reconnect the air filter (essential for proper air-fuel ratio) and the spark plug wire. Start the mower. It may smoke slightly for a few seconds as the cleaner burns off; this is normal.
Recommended Hardware & Essential Equipment
Using the wrong chemicals or cheap tools can damage rubber seals and O-rings. You need a non-chlorinated carburetor cleaner that is safe for modern fuel systems and ethanol-based fuels. Below are the verified tools and chemicals we recommend for this job. These specific units are formulated to dissolve heavy varnish quickly without harming plastic components or rubber gaskets.

Pros
- Targets common deposits such as carbon, gum, and varnish
- Useful across multiple intake and fuel-system cleaning applications
- VOC compliant across all 50 states
- Convenient 13 oz aerosol format for easy spray application
Cons
- Intended for unpainted metal parts, so it is not suitable for painted surfaces
- Aerosol spray can be less precise than a brush or pinpoint applicator in tight areas
- It is a cleaner, not a repair solution for worn or damaged engine components
Valvoline Carb, Choke & Throttle Body Cleaner, 13 oz is a spray cleaner made for routine maintenance of carburetors, throttle bodies, intakes, and similar engine components. The aerosol format is simple to use, and the formula is focused on removing deposit buildup rather than acting as a general purpose degreaser.
Its extra-strength solvent blend is designed to break down carbon, gum, and varnish so airflow and fuel delivery passages stay cleaner. That makes it a practical choice for addressing rough idle, sticking residue, and hard starting caused by buildup on unpainted metal parts. The VOC compliant, chlorinated-solvent-free formula is also a useful feature for buyers who want broader compliance coverage.
Considerations: this product is limited to cleaning, so it will not fix worn sensors, vacuum leaks, or other mechanical issues. It is also intended for unpainted metal surfaces, which means users should avoid applying it where the surface material is not compatible.
Verdict: this is a solid option for DIY users and technicians who want a straightforward carburetor and throttle body cleaner with broad compliance and strong deposit removal. It is best suited for maintenance and light restoration, not as a cure for deeper engine problems.

Pros
- Targets common carburetor buildup on key moving and airflow parts.
- Safe for catalytic converters and oxygen sensors according to the product description.
- Meets all state and federal VOC regulations as a 50-state formula.
- Useful for maintenance on carburetors and choke assemblies.
Cons
- It is a specialty cleaner, so it will not repair worn carburetor parts or mechanical issues.
- The 12 wt oz can size may be limiting for frequent or heavy cleaning tasks.
- Best suited to carburetor and choke cleaning rather than broader engine repair needs.
Overview: The CRC Clean-R-Carb Carburetor Cleaner 05379 is a carb and choke cleaner designed for routine fuel system maintenance. It focuses on cleaning the deposits that can interfere with airflow and throttle response, and its 50-state formula gives it broad regulatory compatibility.
Performance: According to the product details, it instantly dissolves buildup on venturi, linkages, butterflies, and PCV systems. That makes it a practical option for users looking to improve carburetor performance and keep older fuel systems running more cleanly. It is also described as harmless to catalytic converters and oxygen sensors.
Drawbacks: This is a cleaning chemical, not a mechanical repair product, so it will not fix worn jets, damaged gaskets, or other failing carburetor components. The 12 wt oz size may also be small for repeated or heavy-duty use, especially on badly neglected systems.
Verdict: The CRC Clean-R-Carb 05379 is a solid fit for drivers, hobbyists, and technicians who need a compliant carburetor cleaner for maintenance and light restoration. It is most valuable for users who want targeted cleaning without the added concern of harming catalytic converters or oxygen sensors.

Pros
- Large assortment of cleaning heads and tools for different passage sizes and surfaces.
- Rust-resistant materials are better suited to repeated workshop use than basic disposable picks.
- Compact aluminum case improves portability and storage organization.
- Useful across many small-engine and precision-cleaning applications.
Cons
- This is a manual cleaning kit, so it may not be enough for severe carburetor buildup without additional cleaning methods.
- No exact wire dimensions or sizing chart are provided, which can make fit less certain for specialized jets.
- It is a maintenance tool, not a repair solution for worn, damaged, or poorly tuned carburetors.
Overview: The Quadafy Carburetor Cleaning Kit is a compact manual tool set built for cleaning small passages in carburetors, jets, and similar precision components. The stainless steel wires, nylon brushes, hooks, and case give it a straightforward workshop-ready feel.
Performance: In real-world use, the value comes from the variety of fine tools included. The needles and brushes are designed to reach narrow openings that are difficult to clean with standard brushes, making the kit suitable for routine maintenance on motorcycles, lawnmowers, chainsaws, airbrushes, welding torches, and spray guns.
Drawbacks: This is not a powered cleaner, and it will not fix damaged carburetor parts or solve tuning problems by itself. The product details also do not provide exact dimensions or sizing guidance for every tool, so users with very specialized jets may need to test carefully.
Verdict: For buyers who want an affordable, reusable, multi-tool cleaning set for small engines and precision nozzles, this kit is a practical pick. It is best suited to routine upkeep and light to moderate clog removal rather than heavy-duty restoration work.
Pros
- Wide mix of needles and brushes for small-detail cleaning tasks.
- Rust-resistant materials are better suited to workshop and garage use.
- Compact storage box improves portability and organization.
- Broad compatibility with many small-orifice maintenance jobs.
Cons
- This is a manual cleaning kit, so stubborn buildup may still require solvent, compressed air, or additional tools.
- Brush sizes are limited to 2 mm through 7 mm, which may not suit larger openings.
- Best for small passages and precision work, not heavy-duty or large-area cleaning.
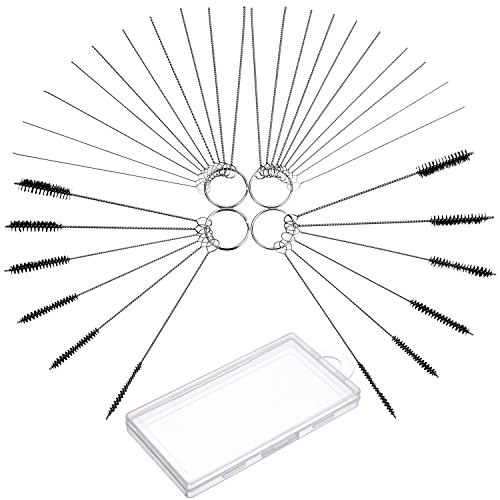
Overview: The Frienda 32 Piece Carburetor Cleaning Kit combines 20 stainless steel cleaning needles with 12 nylon tube brushes. It is built for precision cleaning and arrives with a storage box plus detachable key rings for easier organization.
Performance: The helical brush design and 2 mm to 7 mm brush range make the set practical for small passages such as carburetor jets, nozzles, firing holes, torch tips, and stove burners. The nylon and stainless steel materials are intended to resist rust and stay usable after repeated cleaning jobs.
Drawbacks: This kit is manual, so it works best on light to moderate debris and may need help from solvent or compressed air for tougher blockages. It is also focused on small openings, so larger components fall outside its main use case.
Verdict: For riders, mechanics, and DIY users who need an affordable, compact kit for detailed cleaning, this is a practical choice. It offers a useful mix of sizes and storage convenience, but it is best viewed as a precision maintenance tool rather than a heavy-duty cleaning solution.
Next Step & Hardware Pairing: For recommended machine configurations and real-world durability tests, see our buyer guide on commercial grade zero-turn mowers.
Frequently Asked Questions (FAQ)
Can I use WD-40 instead of carburetor cleaner?
No. While WD-40 is a penetrant, it is not a solvent strong enough to dissolve hardened ethanol varnish or gum. It will leave an oily residue that can further contaminate your fuel system. Always use a dedicated carburetor cleaner spray designed for air intakes and internal parts.
Why is my mower surging after I cleaned it?
If the mower is surging after cleaning, you may have cleared the blockage but the air-to-fuel ratio is still off. Check your air filter, if it is wet with cleaner fluid, it will suffocate the engine. Let it dry completely or replace it. Additionally, ensure the float bowl screw is tightened properly; an air leak at the gasket will cause surging.
How do I prevent ethanol gas varnish from coming back?
Prevention is better than cure. Always use fresh fuel. Add a fuel stabilizer to your gas can before filling the mower. Even better, run the mower dry of fuel at the end of the season, or use ethanol-free gas (E0) if available in your area. This prevents the ethanol gas varnish accumulation that causes sputtering.
Do I really need to remove the air filter to spray the cleaner?
Yes. Spraying through the air filter will saturate the filter material, restricting airflow and potentially ruining the filter. The carburetor cleaner spray air intake method requires direct access to the carburetor throat for maximum pressure and effectiveness.
What if the jet is completely blocked and the spray won’t clear it?
If the cleaning float bowl screw jet process fails to clear the blockage with spray alone, the jet may be corroded or physically damaged. In this case, you will need to remove the jet completely (if your model allows) and soak it in a small cup of carburetor cleaner for 24 hours, or replace the carburetor entirely. However, in 90% of cases, the pressurized straw method is sufficient.
Technical Standards and Compliance
Mechanical safety standards, operational tolerances, and protective gear guidelines align with benchmark specifications established by the American National Standards Institute (ANSI).