Direct Answer
To fix a lawn mower pull cord, you must first safely remove the starter assembly, then extract the old cord, measure and cut a new one to the correct length, thread it through the recoil pulley and starter handle, and finally reattach the assembly while ensuring the recoil spring is properly tensioned. Always consult your mower’s manual for model-specific instructions.
Understanding the Lawn Mower Pull Cord Problem
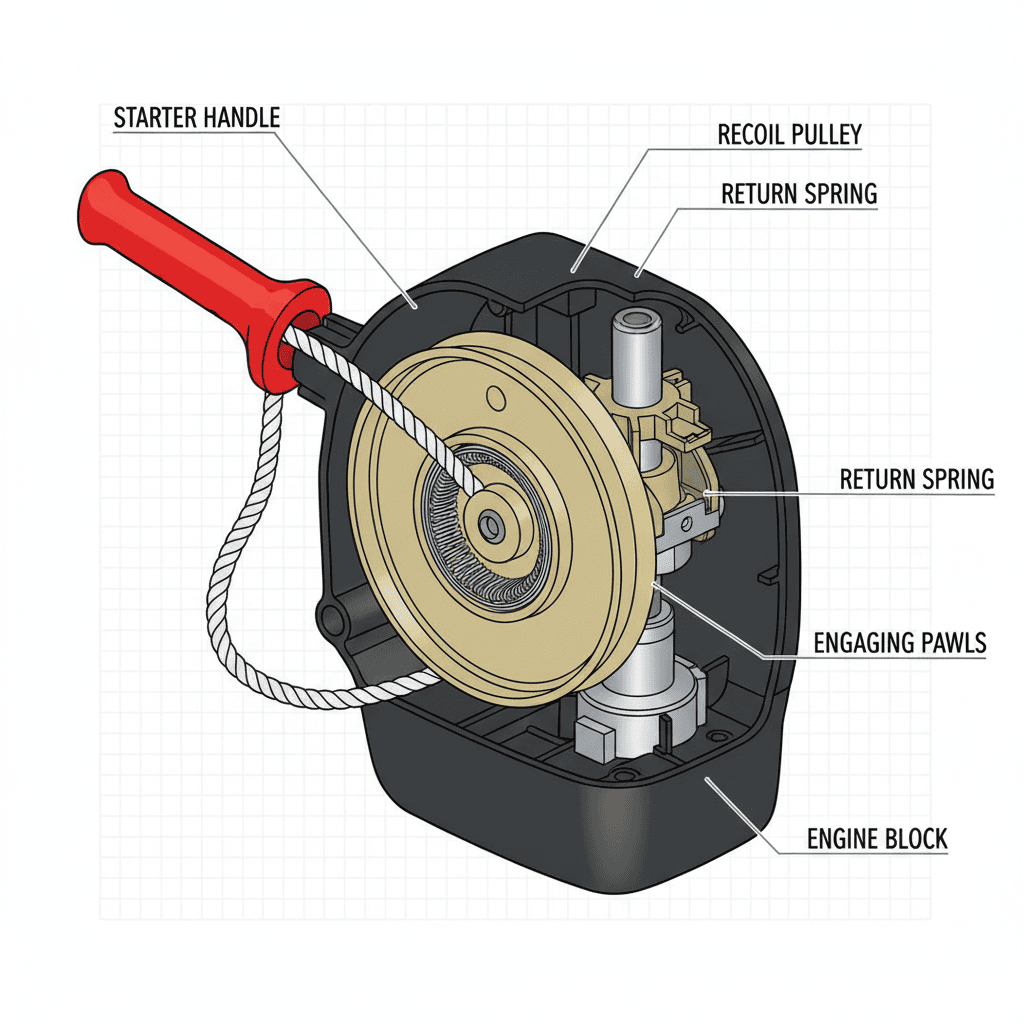
The pull cord, also known as the starter cord or recoil starter, is a critical component of the engine’s starting system. It connects the starter handle to the engine’s recoil mechanism, allowing the user to manually crank the engine when it won’t start on its own. Common issues include fraying, snapping, or failure to retract, which can prevent the engine from starting or cause the cord to get stuck.
What is the Function of the Pull Cord and Recoil Starter?
The pull cord is attached to a spring-loaded pulley (recoil pulley) and a handle. When you pull the cord, the pulley winds the cord around a small gear, which engages the engine’s crankshaft. Releasing the cord allows the spring to unwind, turning the engine over and starting it. The recoil spring stores energy to return the cord to its original position.
Common Signs That the Pull Cord Needs Repair or Replacement
- Frayed or split cord: Visible damage to the cord’s surface.
- Snapped cord: The cord breaks during use.
- Failure to retract: The cord gets stuck or doesn’t return to its position after starting.
- Stiff or stuck recoil: The spring doesn’t unwind properly.
How to Tell if the Problem is with the Cord or the Recoil Spring?
Inspect the cord first. If it’s broken or frayed, the issue is likely with the cord. If the cord is fine but the spring is weak or stuck, the problem is with the spring.
Essential Tools and Safety Precautions
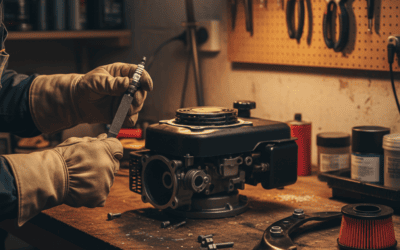
Before starting, gather the necessary tools and follow safety precautions to avoid injury or damage.
Tools and Materials Needed
- Screwdriver (flathead or Phillips, depending on your mower)
- Pliers or needle-nose pliers
- New pull cord (check your mower’s manual for the correct type and length)
- Wrench or socket set (if needed to remove the starter housing)
- Gloves (to protect hands from the recoil spring and sharp edges)
- Safety glasses (to protect eyes from debris)
Key Safety Precautions
- Turn off the engine and let it cool completely before starting any repair.
- Disconnect the spark plug wire to prevent accidental starting.
- Remove the fuel tank cap and place a container under the fuel line to drain any remaining fuel.
- Wear gloves to protect your hands from the recoil spring and sharp metal parts.
- Work in a well-ventilated area to avoid inhaling fumes from gasoline.
Handling the Recoil Spring Safely
The recoil spring is under tension and can cause injury if mishandled. Always wear gloves and use pliers to grip the spring if needed.
Step-by-Step Guide to Replacing the Pull Cord
Follow these steps carefully to replace the pull cord. Note that specific models may vary, so consult your owner’s manual for exact instructions.
Step 1: Remove the Starter Assembly
- Locate the starter housing: It’s usually located on the side or top of the engine.
- Remove the screws: Use a screwdriver to remove the screws holding the starter housing in place. Keep the screws in a safe place.
- Detach the housing: Gently pull the housing off the engine. Be careful not to damage any wires or hoses.
Step 2: Extract the Old Pull Cord
- Unwind the cord: Pull the starter handle to unwind the cord from the pulley.
- Remove the cord: Pull the old cord out of the starter housing. It may be stuck, so use pliers to gently pull it out if needed.
- Inspect the spring: Check the recoil spring for damage or wear. If it’s broken or weak, replace it as well.
Step 3: Prepare and Install the New Pull Cord
- Measure the cord: The new cord should be the same length as the old one. If unsure, measure from the pulley to the starter handle.
- Cut the cord: Use pliers to cut the new cord to the correct length.
- Thread the cord: Insert one end of the new cord into the starter handle. Thread it through the pulley and around the spring.
- Attach to the handle: Secure the cord to the starter handle with the provided knot or clip.
Step 4: Reassemble and Test
- Re-tension the recoil spring: Pull the starter handle to the fully extended position and release it. The spring should return the handle to its original position.
- Reattach the starter housing: Place the housing back onto the engine and secure it with the screws.
- Test the mower: Reconnect the spark plug wire and start the engine. Pull the cord to ensure it works properly.
Troubleshooting and Maintenance Tips
What to Do If the New Cord Won’t Retract Properly
Check the spring tension. The spring may be too loose. Adjust the tension by turning the tensioning screw (if present) until the cord retracts smoothly. Also, inspect the pulley for damage or obstruction.
How to Prevent the Pull Cord from Breaking Again
- Use the correct cord: Follow the manufacturer’s recommendations for cord type and length.
- Avoid over-pulling: Don’t pull the cord too hard or too far. This can strain the spring and cord.
- Inspect regularly: Check the cord and spring for wear before each use.
When to Replace the Entire Recoil Starter Assembly
If the recoil spring is broken or worn out, or if the pulley is damaged or stuck, it’s better to replace the entire recoil starter assembly rather than just the cord.
Frequently Asked Questions
Q: What is the most common cause of a broken pull cord?
A: The most common cause is overuse or improper handling, which can cause the cord to fray or snap. Regular inspection can help prevent this.
Q: Can I replace just the cord or do I need to replace the entire recoil starter?
A: If the spring or pulley is in good condition, you can replace just the cord. However, if the spring is weak or the pulley is damaged, it’s recommended to replace the entire recoil starter assembly.
Q: How often should I replace the pull cord?
A: It depends on usage, but a good rule of thumb is to replace it every 1-2 years or whenever you notice fraying or wear.