

Direct Answer: Sharpen Your Lawn Mower Blade with a Bench Grinder in 5 Steps
To sharpen a lawn mower blade with a bench grinder, first disconnect the spark plug and remove the blade. Secure the blade in a bench vise, then grind only the cutting bevel at its original angle (typically 30 to 45 degrees) using light, even passes. Keep the blade cool by dipping it in water frequently to avoid overheating, which damages the steel’s temper. Finally, check the blade balance on a nail or balancer before reinstalling with the cutting edge facing the correct direction.

Pros
- Powerful 1/3 HP motor with 1750 RPM enables quick and effective sharpening
- Compatible with blades from all brands and a range of sizes
- Includes built-in safety kill switch and one 8-inch sharpening stone
- Easy to use design supports blade reuse and longer service life
- Compact heavy duty build suits both large and small blade work
Cons
- Limited to single direction action without multi-directional options
- Kit provides only one 8-inch sharpening stone requiring future replacements
- Basic economy setup includes no extra accessories beyond the grinder and stone
The Oregon 88-025 Economy Lawn Mower Blade Sharpener and Grinder is a compact heavy duty tool built for sharpening lawn mower blades across various sizes. Its sturdy design and adjustable features create a solid first impression for anyone focused on practical blade maintenance.
Performance relies on the 1/3 horsepower motor at 1750 RPM with single direction action that makes quick work of blades from all manufacturers. Standout elements include the built-in safety kill switch and the included 8 inch sharpening stone, which together enable simple operation to reuse and extend the life of grass cutter blades.
Considerations include the single direction grinding that may limit flexibility for certain techniques, plus the kit containing just one sharpening stone so replacements become necessary with ongoing use. The economy focus keeps things straightforward without extra complex options.
This product suits homeowners and small lawn care operators who need a reliable way to keep blades sharp and avoid frequent new purchases. It provides clear value through its power and ease for everyday maintenance routines.

Pros
- Accurate balancing reduces blade wobble and engine wear effectively
- Works with nearly all standard lawnmower blade shapes for true universality
- Durable zinc die-cast construction ensures long-term rust resistance
- Intuitive design makes it easy for beginners and DIY users to operate
- Supports better cutting efficiency after blade sharpening sessions
Cons
- Lacks advanced precision indicators so users must rely on visual leveling judgment
- May not fit highly specialized or non-standard irregular blade designs perfectly
- Basic single-tool package includes no carrying case or extra accessories
The SporGain Lawn Mower Blade Balancer is a compact universal tool built from premium zinc die-cast metal for balancing lawnmower blades after sharpening. Its solid rust-resistant construction gives an immediate impression of durability suited for garage storage or occasional outdoor exposure, making it a practical accessory for standard lawn care routines.
In performance, the tool excels at simple balance checks by letting users place nearly any round, square, or common blade shape on it to detect imbalances. This process helps reduce wobble, vibration, and engine strain while verifying bent blades, leading to smoother cuts and longer mower life based on its core design features. The intuitive layout supports quick adjustments without specialized skills.
Drawbacks include the absence of built-in precision markers, which means results depend on careful visual assessment, and potential fit issues with highly custom blades outside standard shapes. It also comes as a basic 1pk unit without extras like storage options.
Overall, this SporGain balancer delivers strong value for DIY homeowners and lawn maintenance enthusiasts who regularly sharpen blades and want an affordable, reliable way to maintain cutting performance. It is ideal for those seeking universal compatibility and lasting metal quality without needing professional-grade equipment.

Pros
- Heavy-duty zinc alloy build for long-term use.
- Universal fit for many common blade shapes.
- Simple design is easy to use after sharpening.
- Compact size is convenient for storage and transport.
Cons
- It is a single-purpose tool and does not sharpen blades.
- Compatibility is broad, but the product data does not list exact mower model support.
- No instructions or extra accessories are mentioned in the manufacturer listing.
Overview and design. The Silcpall Lawn Mower Blade Balancer is a compact universal tool made from zinc alloy. Its round, simple shape is designed to hold mower blades at the center for quick balance checks after sharpening.
Performance and key features. In use, the balancer is meant to help you spot uneven blades before they cause vibration, poor cut quality, or extra wear on the mower. The universal design is intended to work with most common blade shapes, including round and square styles.
Drawbacks and considerations. This is a single-purpose accessory, so it will not sharpen blades or provide model-specific mounting guidance. Compatibility is broad, but users should still confirm their blade sits securely on the center slot before relying on it.
Verdict. For homeowners, DIY users, and anyone who sharpens mower blades at home, this is a practical maintenance tool that can make blade balancing faster and more consistent. It is best suited to buyers who want a simple, durable balancer rather than a multi-function kit.
Understanding the Task: What Sharpening with a Bench Grinder Involves
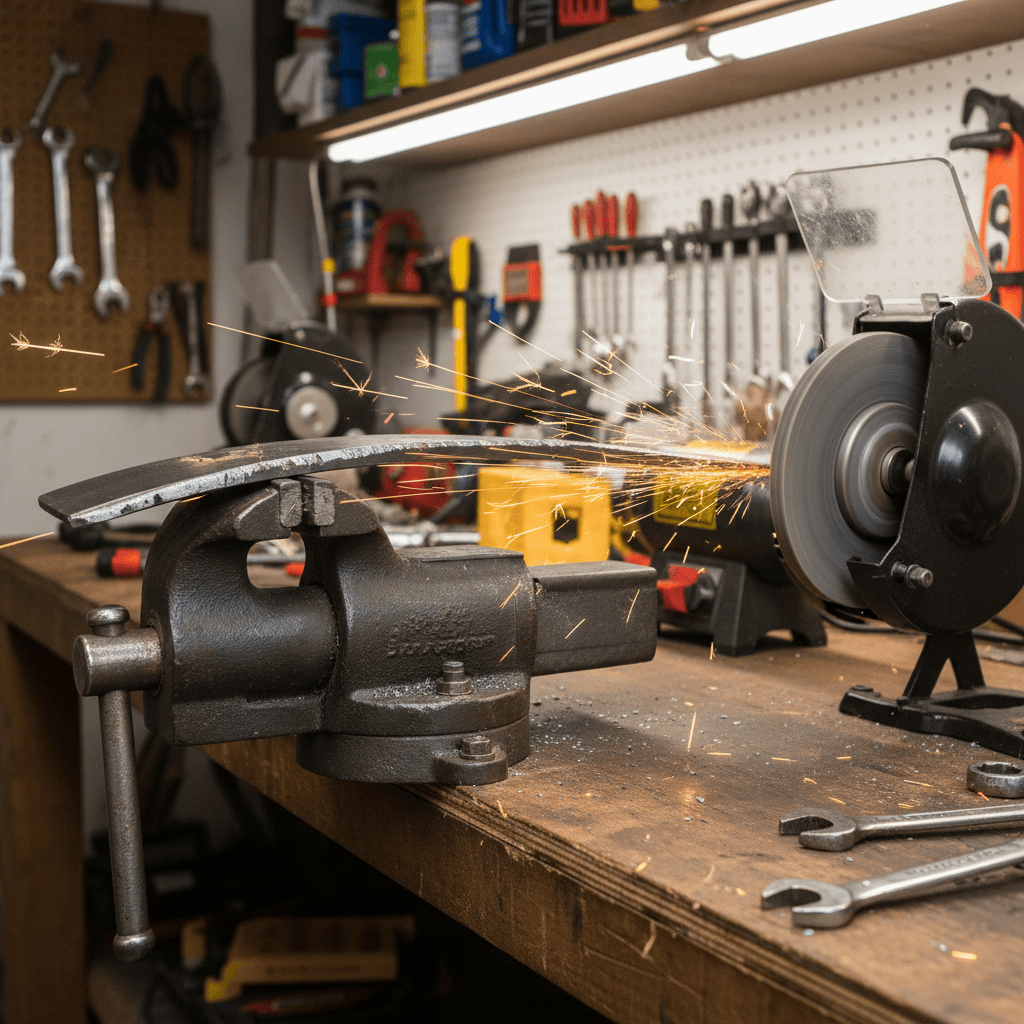
A bench grinder is one of the most efficient tools for restoring a dull lawn mower blade’s cutting edge. Unlike hand files or angle grinders, a bench grinder provides consistent material removal and produces a razor-sharp edge with minimal effort. However, understanding what a bench grinder can and cannot do is essential before you begin.
What a Bench Grinder Does to a Lawn Mower Blade
A bench grinder uses a rotating grinding wheel to remove metal from the blade’s cutting edge. This process reshapes the bevel, the angled portion of the blade that does the actual cutting. The grinding wheel’s abrasive surface wears away dulled steel, exposing fresh metal beneath. When performed correctly, this produces a keen cutting edge that slices through grass cleanly rather than tearing it.
Why Only the Bevel Should Be Ground
Lawn mower blades are designed with a specific geometry: one flat side (the backing side) and one beveled side (the cutting side). The bevel creates the cutting edge where the angle meets the flat side. Grinding the flat side would alter this geometry, reducing cutting efficiency and potentially causing the blade to vibrate or pull to one side during operation.
Single Blade vs. Multi-Blade Mowers
Whether your mower has one blade or multiple blades, the sharpening process remains essentially identical. Each blade must be removed, sharpened individually, and checked for balance before reinstallation. Never attempt to sharpen blades while they are still attached to the mower, this is dangerous and makes achieving a consistent angle nearly impossible.
Safety Preparation Before You Start
Sharpening a lawn mower blade involves handling sharp metal, working with rotating machinery, and potentially hazardous situations if proper precautions are not taken. Thorough preparation is not optional, it is essential for your safety and the quality of your work. For complementary field maintenance guidelines, examine our breakdown of z890 vs x870e motherboard.
Why Disconnecting the Spark Plug Is Critical
Before removing the blade, you must disconnect the spark plug wire. This prevents the mower’s engine from accidentally starting while you are working near the blade attachment point. Even with the ignition turned off, a faulty safety switch or mechanical issue could cause the blade to spin unexpectedly, resulting in severe lacerations. Pull the spark plug wire and tuck it away from the plug to ensure it cannot reconnect accidentally.
Essential Safety Gear for Bench Grinder Work
Wearing appropriate personal protective equipment (PPE) prevents injuries during the sharpening process. At minimum, you need: To evaluate matched hardware tolerances, consult our detailed overview of marshall stanmore iii vs harman kardon onyx studio 8.
- Safety glasses or a face shield: Grinding creates flying metal particles and sparks that can cause eye injuries.
- Work gloves: Heavy-duty gloves protect your hands when handling the sharp blade and hot metal.
- Hearing protection: Bench grinders are loud; prolonged exposure without hearing protection can cause damage.
- Long sleeves and pants: Cover exposed skin to protect against sparks and flying debris.
Removing and Cleaning the Blade
After disconnecting the spark plug, drain the fuel tank or run the mower until empty to eliminate fire risk. Block the blade rotation using a wooden block or blade removal tool, then loosen the mounting bolt(s) with a socket wrench. Note the blade’s orientation before removal, the cutting edge should face downward toward the deck when installed.
Once removed, clean the blade thoroughly using a wire brush or pressure washer. Grass clippings, sap, and debris accumulate on the blade and can interfere with the grinding process. Removing this buildup also allows you to inspect the blade for cracks, bends, or significant damage that might require replacement rather than sharpening. When planning workspace deployment, consider the engineering criteria outlined in our dyson v8 cyclone vs bissell featherweight stick guide.
Step-by-Step: How to Sharpen a Lawn Mower Blade with a Bench Grinder
With the blade clean and inspected, you are ready to begin the actual sharpening process. Follow these steps carefully to achieve professional results.
Step 1: Secure the Blade in the Bench Vise
Clamp the blade firmly in a bench vise positioned near your bench grinder. The beveled cutting edge should face outward and upward, positioned to contact the grinding wheel. Ensure the blade cannot shift or move during grinding, any movement compromises the consistency of your angle and can cause uneven sharpening. For additional operational safety benchmarks, see our published testing notes on bissell crosswave hydrosteam vs shark stainforce.
Step 2: Position Yourself and the Grinder
Stand to the side of the bench grinder, never directly in front of or behind the wheel. Position the blade so the bevel contacts the wheel at approximately a 30-degree angle, the existing bevel’s angle. Some grinders have tool rests that help maintain consistent positioning; use them.
Step 3: Make Light, Even Passes Along the Bevel
Turn on the bench grinder and let the wheel reach full speed. Gently press the blade’s bevel against the wheel, maintaining the original angle throughout. Move the blade steadily from the cutting edge toward the back of the bevel in a controlled motion. Apply light pressure, the wheel should do the cutting, not your force. Each pass should remove only a small amount of metal.
Step 4: Cool the Blade Frequently
Heat is the enemy of a properly sharpened blade. Friction from grinding generates significant heat that can destroy the blade’s temper, the hardened molecular structure that keeps the edge sharp. Dip the blade in a bucket of water every 3 to 4 passes. Never let the blade glow blue or become too hot to hold comfortably.
Step 5: Check Your Progress and Repeat as Needed
Periodically remove the blade from the vise and examine the edge. A properly sharpened blade should have a consistent, clean bevel with a thin, sharp edge. Continue grinding until the entire beveled surface has a uniform appearance and the edge feels sharp to the touch (use caution). Most blades require 8 to 12 passes per edge for moderate dulling.
Getting the Angle and Technique Right
The success of your sharpening effort depends heavily on maintaining the correct angle and using proper technique. Deviating from the blade’s original geometry compromises performance and can damage the blade.
Understanding the 30 to 45 Degree Bevel Angle
Most lawn mower blades have a bevel angle between 30 and 45 degrees, measured from the flat side of the blade to the beveled surface. This angle is designed during manufacturing and optimized for cutting grass efficiently. Your goal is to preserve this angle, not create a new one. Attempting to create a sharper (thinner) angle by grinding deeper will weaken the blade and cause it to dull faster.
Avoiding Common Mistakes
Several common errors can ruin an otherwise straightforward sharpening job:
- Overheating the blade: As mentioned, excessive heat destroys temper. Keep water nearby and cool frequently.
- Grinding the flat side: Only the bevel should contact the wheel. The flat side is not designed for grinding.
- Applying too much pressure: Let the wheel do the work. Heavy pressure generates excess heat and removes material too quickly.
- Creating a wire edge: After grinding, a thin ridge of metal (called a wire edge or burr) may form on the cutting edge. This is not sharpness, it will break off immediately during use. Lightly pass the bevel over the wheel once more at a very shallow angle to remove it.
How to Remove the Wire Edge
After completing your grinding passes, make one or two very light passes holding the blade at approximately 5 to 10 degrees, essentially just kissing the wheel surface. This removes the wire edge without significantly changing the bevel angle. Alternatively, you can use a fine file or sharpening stone to gently deburr the edge.
Balancing and Reinstalling the Blade
Sharpening removes metal from the blade, and if you are not careful, this removal is uneven. An unbalanced blade causes excessive vibration during operation, which accelerates wear on the mower’s spindle, bearings, and engine mounts. Balancing is not optional, it is a critical final step.
Why Balance Matters
A balanced blade rotates smoothly around the spindle with no wobble. An unbalanced blade creates centrifugal forces that cause the entire mower to shake. This vibration makes cutting inconsistent, creates an uncomfortable ride, and subjects components to stresses they were not designed to handle. Over time, vibration damage can require expensive repairs.
How to Check Blade Balance at Home
Simple balance checking requires only a nail driven into a wall stud or a commercially available blade balancer. To use a nail:
- Drive a nail into a wall stud or sturdy vertical surface so that 2 to 3 inches protrude.
- Hang the blade on the nail by its center hole.
- Observe which way the blade tips. The heavy side (the side with more metal remaining) will drop downward.
- Grind a small amount of metal from the heavy side, only a few passes on the bevel near the center.
- Recheck and repeat until the blade remains level on the nail.
A commercial balancer works similarly but provides more precise readings. Regardless of method, a properly balanced blade should not tip noticeably in either direction.
Reinstalling the Blade Correctly
Before reinstalling, ensure the blade is completely dry to prevent rust. Apply a thin coat of machine oil or anti-seize compound to the mounting bolt threads (optional but recommended). Position the blade so the cutting edge faces downward toward the mower deck, opposite the direction of rotation. The beveled side should face upward toward the top of the deck.
Tighten the mounting bolt to the manufacturer’s specifications using a torque wrench. Undertightening allows the blade to shift; overtightening can strip threads or break bolts. Reconnect the spark plug wire, add fuel if you drained the tank, and start the mower briefly to verify smooth operation.
Buyer FAQs: How To Sharpen Lawn Mower Blade With Bench Grinder Solved
How Often Should I Sharpen My Lawn Mower Blade?
For typical residential use, sharpening once or twice per season is sufficient. However, if you mow frequently, mow in wet conditions, or cut over sandy soil, you may need to sharpen more often. Watch for signs of dulling: torn grass blades (instead of clean cuts), a brownish tint to your lawn after mowing, and increased cutting effort.
When Should I Replace the Blade Instead of Sharpening It?
Replace the blade if it shows visible cracks, significant bends, or has been sharpened so many times that the bevel is nearly gone. Most blades have wear indicators, small holes or markings near the cutting edge that disappear when it’s time for replacement. Also replace blades that are heavily gouged, corroded, or show signs of metal fatigue.
Can I Use an Angle Grinder or File Instead of a Bench Grinder?
Yes, but with limitations. An angle grinder works but requires more skill to maintain consistent angles and control heat buildup. A hand file is viable for touch-up work but is labor-intensive for significantly dulled blades. A bench grinder remains the best choice for most users because it provides consistent angle control, efficient material removal, and predictable results.
What Happens If I Overheat the Blade During Sharpening?
Overheating causes the blade’s steel to lose its temper, the heat treatment that gives it hardness and edge retention. Signs of overheating include discoloration (blue, purple, or straw-colored areas) or visible warping. An overheated blade will dull quickly and may crack during use. If you suspect overheating, allow the blade to cool completely and inspect for damage before continuing.
Conclusion
Sharpening a lawn mower blade with a bench grinder is a straightforward task that delivers significant benefits: cleaner cuts, healthier grass, reduced engine strain, and money saved compared to professional service or replacement blades. By following the steps outlined in this guide, prioritizing safety, maintaining the correct angle, avoiding overheating, and properly balancing the blade, you can achieve professional-quality results in your own workshop. Regular maintenance, including sharpening at appropriate intervals, keeps your mower performing at its best season after season.
Related Reading for Blade Work
Remove the spark plug wire before handling the blade, and wear gloves and eye protection while grinding. If you are weighing a replacement machine, the related article on who sells honda push mowers is worth a read. Safety information for outdoor equipment is available through American National Standards Institute (ANSI).









