

How Do You Spool a Weed Eater? The Short Answer
To spool a weed eater (string trimmer), disconnect the spark plug or remove the battery, take the trimmer head apart, and pull out the empty spool. Cut two equal lengths of the trimmer line size recommended by your model, insert one end into the anchor hole, and wind the line in the direction shown by the arrow printed on the spool, keeping the coils tight and even. Thread both line ends through the eyelets in the housing, then reassemble the spool, spring, and button so they seat correctly, and test the line feed before you put the trimmer back to work.
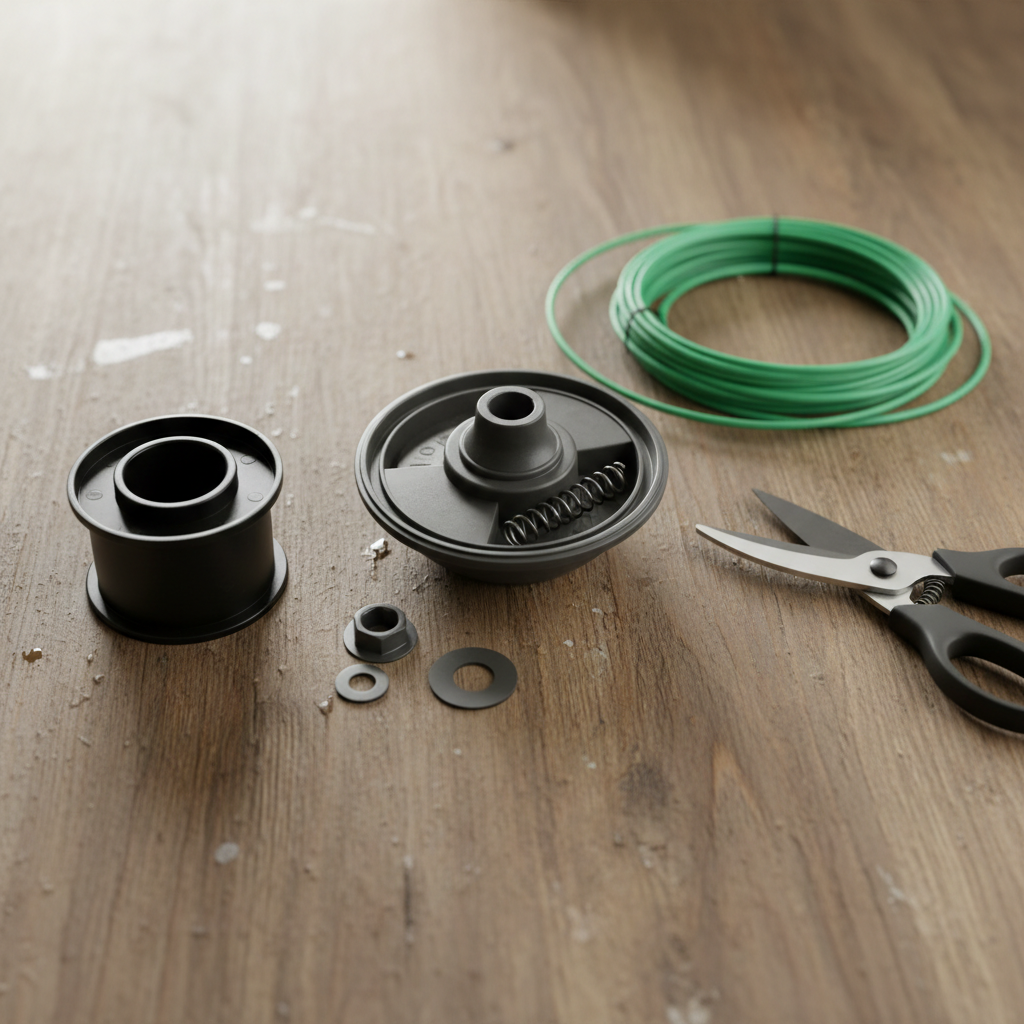
That one-paragraph answer covers the core routine, but the details matter. Winding direction, line diameter, and how the head releases line vary by brand and model, so the safest habit is to follow the arrow on the spool and check the specs in your owner’s manual. Below is everything you need to do it right the first time.
Understanding the Weed Eater Spool and How Line Feeding Works
What Is the Spool and What Does It Do?
The spool is the plastic cylinder that stores your trimmer line inside the trimmer head. It holds several coils of line so that the trimmer can keep cutting even as the tip of the line wears down. The spool sits inside the head housing, and the two free ends of the line exit through small openings called eyelets. When the head spins at high speed, centrifugal force extends the line outward, letting the line act as an impact cutting tool on grass and weeds.
How Does Trimmer Line Feed Out of the Spool?
Different trimmers release line in different ways, but they all depend on the line being wound neatly on the spool. In a bump-feed system, you tap the trimmer head on the ground while the head is spinning, which releases a short section of new line. In an auto-feed system, the line advances automatically when the engine speed changes, often when you throttle up. In both cases, the line has to unspool smoothly. If the windings are loose, crossed, or wound in the wrong direction, the line will jam or refuse to advance.
Why Does the Direction of the Wind Matter?
Every trimmer head is designed to unwind the line in a specific direction, and the arrow printed on the spool shows you which way to wind. If you wind backward, the line tries to unspool against the rotation of the head, which tangles the coils, jams the eyelets, and stops the feed mechanism from working. Because some heads wind clockwise and others counterclockwise, the arrow is not a suggestion; it is the single most important visual cue during spooling.
What to Consider Before Spooling Your Trimmer
Line Diameter and Length: Match Your Model
Trimmer line comes in different diameters, and your trimmer head is designed for a specific range. Common sizes include 0.065, 0.080, 0.095, and 0.105 inches, with heavier-duty and commercial heads sometimes accepting even thicker line. The correct size and the maximum length of line the spool can hold are printed in your owner’s manual or sometimes on the spool itself. Using line that is too thin cuts poorly, while line that is too thick can jam the head, strain the engine, and even crack the housing. Do not guess; if you no longer have the manual, search online using your model number to confirm the recommended gauge and capacity.
Brand and Model Variations
Weed Eater is actually a brand name that has become a generic term for all string trimmers, which means your trimmer might be a Stihl, Ryobi, Echo, Husqvarna, Toro, or another make. The basic spooling concept is the same, but each brand uses different head designs. Some heads have two plastic tabs you press to remove the cover, some unscrew, and newer no-tool heads let you insert line through a port without disassembling the spool at all. Before you start, look for release tabs, directional arrows, and any printed line size on the head. If your model uses a proprietary spool or a push-in loading system, follow the instructions printed on the head itself.
Manual Winding vs. Pre-Wound Spools
Many trimmers give you two options: wind the spool yourself or buy a pre-wound replacement spool. Pre-wound spools come out of the package with the correct line already installed and are usually a drop-in fit: you remove the old spool, place the new one in the head, thread the line ends through the eyelets, and snap the housing closed. This is faster and removes most of the guesswork, though replacement spools often cost more than a bulk spool of line. If you already have a good spool, manual winding is cheaper and takes only a few minutes once you know the technique.
Bump-Feed vs. Auto-Feed Mechanisms
You also need to know which feed system your trimmer uses because it affects how tightly the line should be wound and how the head should be reassembled. Bump-feed heads have a spring-loaded button and internal tabs that catch the line when you tap the head. Auto-feed heads rely on centrifugal force and often have a clutch-like mechanism that meters out line when the engine speed rises. The winding direction must always match the arrow, and the line should be wound snugly for both systems, but auto-feed heads are more sensitive to loose windings and misaligned spring components. For broader ecosystem context, read through our operational guide on marshall stanmore iii vs harman kardon onyx studio 8.
Step-by-Step Guide: How to Spool a Weed Eater
Below is the full procedure for a typical bump-feed trimmer head. The general sequence also applies to most auto-feed heads, with the differences explained in the next section.

Pros
- Large 825-foot length offers strong value for frequent trimming jobs
- Hex shape and .095-inch diameter support a cleaner, more aggressive cut than basic round line
- Compatible with specific John Deere and Kawasaki OEM numbers
- Lightweight 1-pound package is easy to handle and store
Cons
- Only the line is included, so it is not a full trimmer accessory kit
- Compatibility is tied to specific OEM numbers, so buyers should verify fit before ordering
- The .095-inch thickness may be too light for some heavy-duty commercial applications
Overview & Design: The Stens 380-832 Silver Streak is a .095-inch edge trimmer line sold on an approximately 825-foot spool. It uses a durable co-polymer construction and a hex shape, which is designed to help produce a cleaner cut during routine trimming.
Performance & Key Features: This line is built for users who want consistent edging performance and a professional-looking finish. The hex profile can help improve cutting action compared with basic round line, while the long spool length is useful for homeowners, landscapers, and property managers who go through line quickly.
Drawbacks & Considerations: The product is line only, so buyers will need a compatible trimmer and spool setup. Compatibility is listed against John Deere 074962 and Kawasaki 99969-1828 references, so it is important to confirm fit before purchase. The .095-inch diameter is versatile, but it may not be ideal for the most demanding heavy-duty jobs.
Verdict: The Stens 380-832 is a practical choice for anyone looking for a long-lasting supply of .095-inch trimmer line with a clean-cutting hex design. It makes the most sense for users who value compatibility with specific OEM references and want dependable performance for regular lawn maintenance.

Pros
- Made from high-quality nylon that is soft yet tough and not easy to break
- Twisted design offers better mowing effects and higher speed than round alternatives
- Generous 5 LB capacity with about 1140 feet of .095-inch line for extended use
- Compatible replacement for Echo Black Diamond and similar popular trimmer lines
- Improved durability compared to commercial-grade options for longer-lasting performance
Cons
- Requires soaking in water for two to three days before first use to achieve full resilience
- Needs careful storage away from light and humidity when left unused for long periods
- Limited to .095-inch diameter which may not fit every trimmer head without verification
The CONIVNTU Twisted 095 Trimmer Line is a professional 5LB spool of twisted nylon string built as a direct replacement for Echo Black Diamond and similar lines. Its high-quality nylon construction feels soft yet tough right out of the package, giving an immediate impression of durability suited for regular yard maintenance.
In real-world use the twisted .095-inch design delivers better cutting ability and faster speeds than round line, while the approximately 1140 feet of material supports long sessions without constant reloading. The line's toughness and soft flexibility produce cleaner mowing results and greater longevity than commercial-grade options.
Users should note that unused line needs storage away from light and humidity, and a two-to-three-day water soak is recommended before installation to restore full resilience. Diameter is fixed at .095 inches so trimmer head compatibility should be confirmed beforehand.
Overall this spool is an excellent choice for homeowners and landscapers who own compatible Black Diamond-style trimmers and want reliable, high-performance line that lasts longer and cuts more efficiently.
Pros
- Exceptional durability from commercial-grade co-polymer construction resists wear and breakage
- 50 percent noise reduction for quieter operation compared to standard lines
- Precise cutting performance with undulated surface for clean results
- Made in the USA ensuring quality engineering and materials
- Long 140-foot length provides extended value per spool
Cons
- Supplied as a continuous spool that requires manual winding into the trimmer head and cutting to length
- 0.095-inch diameter may not match the preferred thickness for every trimmer model
- Limited to basic cutter accessory with no pre-cut segments or extra tools included
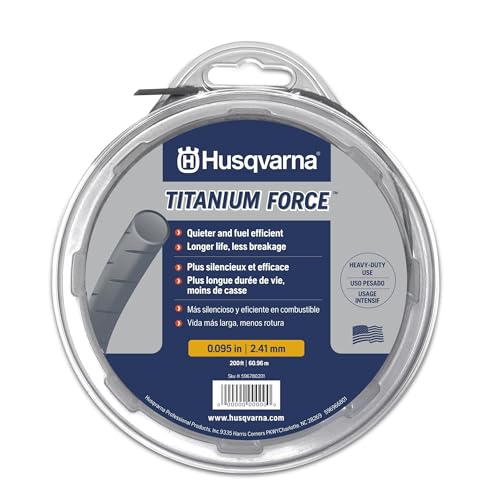
The Husqvarna Titanium Force 0.095-Inch 140-Foot Spooled String Trimmer Line is a professional-grade copolymer weed eater line built for reliability. Its co-extruded polymer construction with a round dimpled profile offers immediate impressions of solid build quality aimed at both homeowners and those seeking gifts for men or Fathers Day. Manufactured in the USA, the continuous spool design prioritizes longevity and flexibility right out of the package.
In real-world performance this line excels through its undulated surface that cuts noise by 50 percent while delivering precise cutting and improved energy efficiency. The commercial-grade resins provide strong abrasion resistance and reduced breakage, making it suitable for tackling thick weeds and grass around standard trimmer heads. The included cutter allows easy length customization for consistent results across various landscaping tasks.
Potential drawbacks include the need to manually wind the full 140-foot spool into the head and cut segments as required, which adds a minor setup step. The fixed 0.095-inch diameter also means it may not optimally match every trimmer model that prefers thinner or thicker line options.
Overall this Husqvarna Titanium Force line is an excellent choice for homeowners and yard maintenance users who value quiet durable performance and USA-made quality. Those needing a versatile professional-grade replacement will find strong value in its design and features.

Pros
- Heavy-duty .095" nylon construction is built for tougher trimming tasks.
- Square shape can improve cutting efficiency and edging precision.
- Long 330-foot spool reduces the need for frequent replacement.
- Compatible with many trimmer types that use .095" line.
Cons
- May be less suitable for very light-duty trimming where a thinner line could be easier on smaller trimmers.
- No included trimmer head or additional accessories are listed in the product data.
- Performance can vary by trimmer power and the type of vegetation being cut.
Overview & Design: The VIABRICO .095" Weed Eater String is a square-profile trimmer line made from premium nylon-based material for general lawn care and heavier edging tasks. The orange color makes the spool easy to identify, and the 330-foot length is useful for users who go through line regularly.
Performance & Key Features: Its square shape is designed to create sharper cutting edges and a larger cutting surface than standard round line, which can help improve trimming speed and edge definition. The line is also advertised as abrasion resistant, crack resistant, and highly impact resistant, with a precision-wound spool intended to reduce tangling, misfeeds, and jams.
Drawbacks & Considerations: This is a .095" heavy-duty line, so it may be more than some lightweight trimmers need. The product data does not include accessories, and real-world results will still depend on the power of the trimmer and the type of weeds or terrain being handled.
Verdict: This VIABRICO trimmer line is a solid fit for homeowners and frequent yard-maintenance users who want a durable .095" line with better cutting performance than basic round string. It is especially relevant for edging, thicker weeds, and rougher terrain where wear resistance matters.
Step 1: Prepare the Trimmer Safely
- Disconnect the spark plug wire on a gas trimmer, or remove the battery on a battery-powered model.
- Set the trimmer on a flat, sturdy surface with the head facing up.
- Let the engine and cutting head cool completely if you have been using the trimmer.
Step 2: Remove the Trimmer Head and the Spool
- Look for release tabs on the side of the head housing. Press them together and pull the cover or the entire head assembly away.
- If the head is threaded, hold the head and turn the cover counterclockwise, or use the wrench that came with the trimmer. Some heads have a large knob or locking ring that simply unscrews by hand.
- Remove the empty spool from the housing. Note the position of the spring and the button, and take a photo with your phone if you are unsure how they fit back together.
Step 3: Cut the Correct Length of Line
- Check the manual (or the spool itself) for the recommended line diameter.
- Cut two equal lengths of line. A common rule of thumb is to cut each piece about as long as the spool is wide, but many spools hold between 10 and 30 feet of line total. If the manual gives a specific length, use that.
- Make clean cuts with scissors or a sharp knife so the ends slide easily into the anchor holes.
Step 4: Anchor One End and Wind
- Find the arrow printed on the spool. It shows the direction the spool rotates as the line unwinds, and it is the direction you must wind.
- Insert one end of the line into the anchor hole near the outer rim of the spool. Pull it through so that an inch or so sticks out the other side.
- Begin winding the line in the direction of the arrow, keeping constant tension with your thumb on the coil so the windings lie flat and side by side.
- Wind until the line almost reaches the outer edge of the spool flange, then stop. Overfilling makes the head hard to reassemble and prevents the line from feeding.
Step 5: Wind the Second Half
- Insert the free end of the line into the second anchor hole on the opposite side of the spool.
- Wind the second half in the same direction and with the same tension, again stopping before the line reaches the top of the flanges.
- Leave a short tail from each line end so they can be threaded through the eyelets later.
Step 6: Thread the Eyelets
- Hold the wound spool over the housing so the two line ends line up with the two eyelets.
- Feed each line end through its eyelet from the inside of the housing to the outside.
- Keep tension on the line so it does not unwind while you work. Some spools have a notch or slot you can hook the line into to hold it in place temporarily.
Step 7: Reassemble the Head Correctly
- Make sure the spring and button are seated in their original positions inside the housing.
- Align the spool with the housing, guiding the line ends through the eyelets as you push the spool into place.
- Press the spool down until it clicks or locks, and reattach the cover or outer knob.
- Pull both line ends firmly to confirm the line is captured. The line should extend past the cutting edge of the head; trim it to the length recommended in the manual if it is too long.
Step 8: Test Before Use
Reconnect the spark plug or reinstall the battery, then run the trimmer briefly at a safe distance. On a bump-feed head, tap the head on the ground and confirm a short length of line advances. On an auto-feed head, rev the engine and watch for the line to extend automatically. If nothing feeds, disassemble the head and verify the winding direction, tension, and spring seating before trying again. For troubleshooting and reliability insights, consult our in-depth dyson v8 cyclone vs bissell featherweight stick report.
Bump-Feed vs. Auto-Feed: What’s Different?
The table below summarizes how the two main feed systems change the spooling and reassembly steps.
| Feature | Bump-Feed (Tap-to-Advance) | Auto-Feed |
|---|---|---|
| How line is released | You tap the head on the ground while spinning to release a short length of line | Line advances automatically when engine speed or RPM changes |
| Winding direction | Always follow the arrow on the spool | Always follow the arrow on the spool |
| Winding tension | Snug and even so the line does not slip inside the head | Snug and even; loose windings can prevent the centrifugal mechanism from grabbing the line |
| Key reassembly point | Spring and button must seat into their matching slots for the tap mechanism to release line | Internal pawl or clutch parts must align exactly; misalignment causes the line to not feed |
| Common failure | Tapping hard enough to break the line or misaligning the button | Winding against the arrow, which makes the line tangle inside the head |
For a bump-feed head, the spring and button work together: when you bump the head, the button is pushed up, and the spring returns it so the ratchet lets a little more line out. If the spring is missing or the button is upside down, the head cannot release line no matter how well you wound the spool. For an auto-feed head, the line is usually released as the spool shifts inside the housing under centrifugal force. That means the line must be wound snugly in the correct direction, and the spool must be free to move slightly when the engine revs. Some auto-feed systems require you to manually pull out a small length of line the first time you install a new spool, so check your manual for that step. Readers comparing setup options can review our technical analysis on bissell crosswave hydrosteam vs shark stainforce.
Common Mistakes to Avoid When Spooling a Weed Eater
- Winding in the wrong direction. This is the most common cause of a jammed head. If the line is wound opposite to the arrow, it will not feed, may wrap around the shaft, and can snap under load. Stop, unwind, and rewind in the correct direction.
- Using oversize line. Thicker line caught between the spool and the housing creates friction, jams the feed mechanism, and can burn out the engine clutch or crack the head. Always use the diameter recommended for your model.
- Uneven or crossed windings. If the coils overlap or you release tension while winding, the line binds on itself and cannot slide out through the eyelet. Keep a thumb on the line while winding and push each coil flat against the previous one.
- Overfilling the spool. A spool stuffed past its flange will not fit back into the housing, or it will rub against the housing and stop the line from advancing. Leave a small gap at the top of the spool.
- Forgetting to thread both eyelets. If one line end is left inside the housing, that side of the spool will not feed, and the head will vibrate badly. Thread both ends and pull until both stick out.
- Reassembling the spring or button incorrectly. A misplaced spring or an upside-down button silently disables the bump-feed mechanism. Compare your reassembly with the photo you took before disassembly.
- Using a spool of line that is too long for the head. Excess line makes the head heavy, slows the motor, and can flail dangerously. Trim the ends to the recommended cutting length after reassembly.
When to Replace the Spool or Trimmer Head Instead of Rewinding
When the Spool Is Damaged
If the spool is cracked, melted from friction, or has broken anchor holes, rewinding it is wasted effort. A damaged spool will not hold tension, and the line will slip or snap immediately. Buy a replacement spool that matches your model, or use a pre-wound spool in the correct size.
When a Pre-Wound Spool Is Simpler
If winding by hand is difficult for you, or if the trimmer head is awkwardly positioned, a pre-wound spool is a practical shortcut. Replacing a pre-wound spool takes about 30 seconds: remove the old spool, drop in the new one, thread the line ends through the eyelets, and snap the housing closed. Check that the replacement spool has the same diameter line and the same winding direction as the original.
When the Trimmer Head Needs Replacing
If the head’s release tabs are broken, the ratchet inside is worn, or the housing will no longer hold the spool securely, the entire trimmer head should be replaced. A worn head can also cause repeated line jams even with a perfectly wound spool. Replacing the head is usually straightforward: loosen the retaining nut or bolt, remove the old head, and install the new head with the correct rotation for your trimmer shaft. When in doubt, consult the parts diagram in your owner’s manual or look up the head type by model number.
Common Questions on How Do You Spool A Weed Eater Answered
How much trimmer line do I need to spool?
The amount depends on the capacity of your specific spool, which is printed in the owner’s manual or on the spool itself. A common rule of thumb is to cut two equal lengths of line, each about as long as the spool is wide, then stop winding while there is still a small gap below the top edge of the spool flange. Overfilling prevents the head from feeding line and can make reassembly impossible.
Which direction do I wind the line on a weed eater spool?
Always wind in the direction shown by the arrow printed on the spool. There is no universal rule because some heads wind clockwise and others counterclockwise. If no arrow is visible, check the owner’s manual or look for a directional indicator molded into the head housing. Winding against the arrow is the most common cause of a line that will not feed.
Why won’t my weed eater feed new line after I spooled it?
The usual culprits are winding the line in the wrong direction, using line that is too thick or too long, releasing tension while winding causing crossed coils, or reassembling the spring and button incorrectly. Start by checking the winding direction against the arrow, then confirm the line diameter matches your model. If both are correct, disassemble the head and verify that the spring and button are seated exactly as they were before.
Can I use any trimmer line in my weed eater?
No. Your trimmer head is designed for a specific line diameter range, and using thicker line can jam the feed mechanism, strain the engine, and damage the head. Thinner line cuts poorly and breaks more often. Match the line diameter to the recommendation in your manual or the marking on the spool, and consider a pre-wound replacement spool if you are unsure about manual winding.
For more hands-on benchmarks and buying recommendations, consult our guides on cordless stick vacuum buyer guide, as well as robotic pool cleaner comparison guide, as well as deep carpet cleaning machine reviews, as well as automated robotic vacuum cleaning systems.
Technical Standards and Compliance
Mechanical safety standards, operational tolerances, and protective gear guidelines align with benchmark specifications established by the American National Standards Institute (ANSI).









