

Direct Answer: The Core Replacement Steps
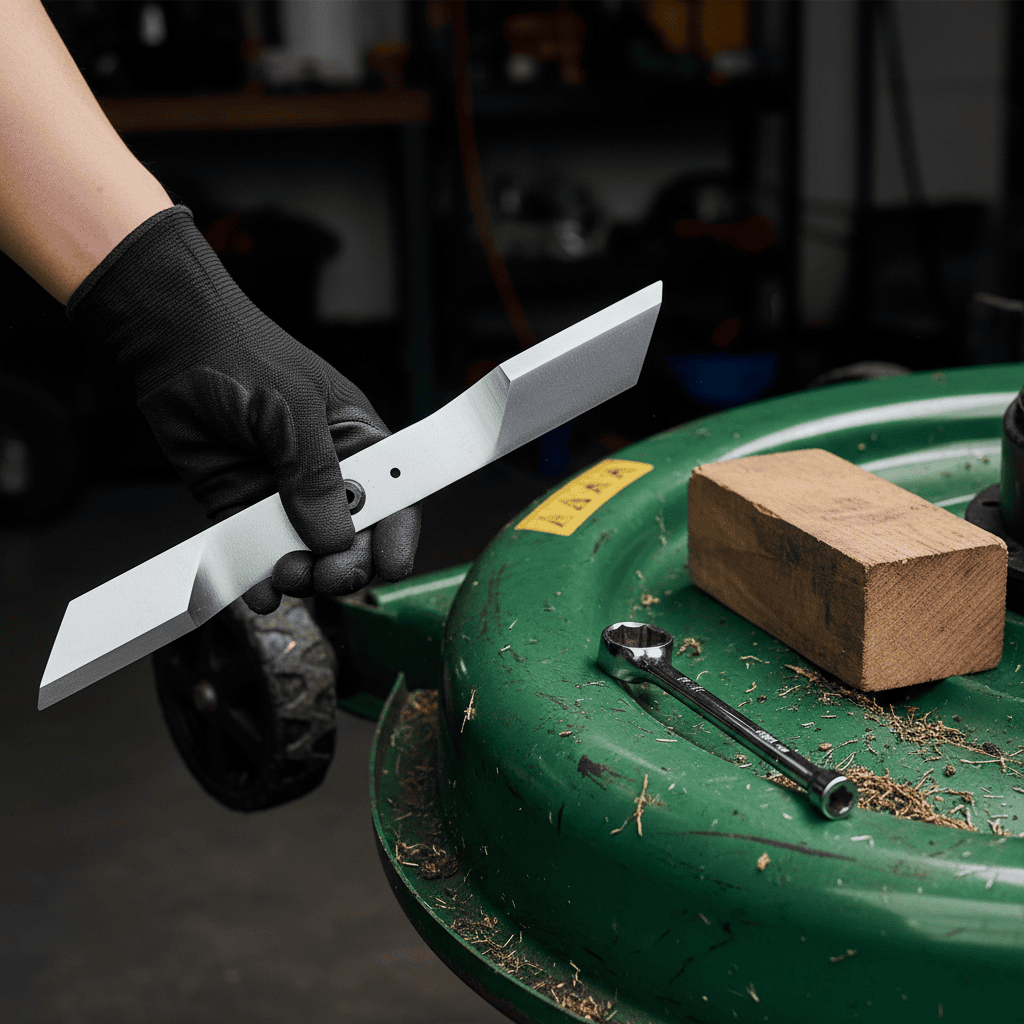
To change a push mower blade, first ensure the mower is completely off and cool. For a gas mower, disconnect the spark plug wire; for electric or battery mowers, remove the battery or unplug the unit. Tilt the mower on its side with the air filter and carburetor facing up. Use a socket wrench and a block of wood wedged between the blade and the deck to keep the blade from spinning. Loosen the center bolt (counterclockwise), remove the old blade, and install the new one with the sharpened edge facing the direction of rotation. Torque the bolt to the manufacturer’s specification, typically 30 to 50 ft-lb, then reconnect power and verify the blade spins freely before starting.
Understanding Your Push Mower Type
The term “push mower” can refer to two main categories: rotary mowers (gas, electric, or battery-powered with a spinning blade) and manual reel mowers (human-powered with cylindrical blades). This guide focuses primarily on the most common type: the gas-powered rotary push mower. The process for electric and battery-powered rotary mowers is very similar, with key safety differences. Manual reel mowers have a completely different blade system and typically require professional servicing rather than a simple blade swap.
Pros
- Manual reel mower design offers quiet, emission-free mowing with no fuel or oil required.
- Compact 14-inch cutting width and 18 lb frame make it practical for maneuvering in tighter spaces.
- Bundled trimmer and edger adds edge cleanup capability without needing a separate purchase.
- Included batteries and charger increase convenience for first-time cordless tool users.
Cons
- The 14-inch mower width is relatively small, so it may take longer to mow larger lawns.
- As a push reel mower, it depends on user effort and may be less effective on very tall or dense grass.
- Battery runtime and full charge duration are not provided in the product data.
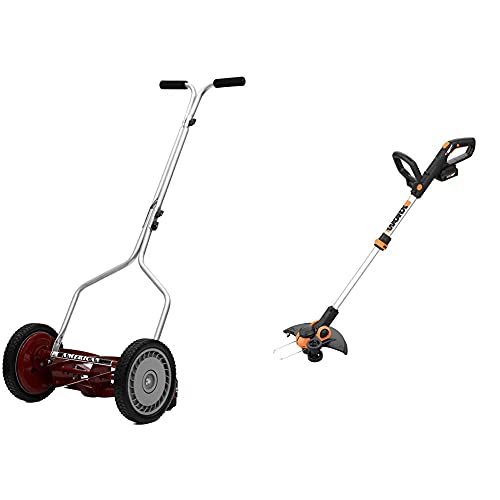
Overview & Design: The American Lawn Mower Company combo pairs a 14-inch 5-blade push reel mower with a Worx GT3.0 20V string trimmer and edger. The mower is lightweight at 18 lbs and uses 10-inch polymer wheels, while the trimmer includes a 12-inch cutting width and a cordless battery-powered design.
Performance & Key Features: The reel mower offers adjustable cutting heights from 1 inch to 2.25 inches and is built with heat-treated alloy steel blades for precise cutting. The trimmer converts between trimming and edging, includes two 20V lithium-ion batteries and a charger, and features a 90-degree tilting head plus rubberized wheels for more controlled edging on uneven ground.
Drawbacks & Considerations: This set is best suited to small or moderate lawn areas because the mower has a narrow cutting width and relies on push power. It is also not designed to replace the cutting force or speed of a gas mower, and battery runtime details are not provided in the specifications.
Verdict: Buyers who want a simple, low-maintenance lawn care setup will get the most value from this combo. It is especially appealing for homeowners looking for quiet mowing, cordless edging, and a practical alternative to gas-powered yard tools.

Pros
- Quiet, gas-free mowing reduces noise and maintenance needs
- Strong 12 amp edger motor supports precise, professional-looking edge work
- Tool-less assembly and cushioned grip add convenience for quick setup and use
- Adjustable shaft on the edger helps accommodate users of different heights
Cons
- The 14-inch cutting width is relatively narrow, so larger lawns may take longer to mow
- The push reel mower is best suited to lighter, regular maintenance rather than tall or overgrown grass
- The electric edger requires corded power access, which can limit range during use
Overview & Design: The Great States 14" 5-Blade Push Reel Lawn Mower and Worx 12 Amp 7.5" Electric Lawn Edger is a practical yard-care pairing for homeowners who want a tidy, low-maintenance setup. The reel mower is designed for quiet, manual cutting, while the corded Worx edger adds powered precision for borders and trench lines.
Performance & Key Features: The Great States mower offers a 14-inch cutting width with an adjustable height range from 0.5" to 1.75", which is useful for regular upkeep and a clean finish. The Worx edger uses a 12 amp motor and a 7.5" blade that reaches 4700 RPM, giving it enough speed for sharp, defined edges. Helpful details like the cutting line indicator and adjustable shaft make it easier to maintain straight results and improve comfort.
Drawbacks & Considerations: This setup is not the best fit for everyone. The reel mower’s narrower cutting width can mean more passes on bigger lawns, and push mowing takes more effort than a powered mower. The edger is corded, so users will need access to a power source and should expect some range limitations while working.
Verdict: This product is a good value for homeowners with smaller yards who want a quiet mower and a capable electric edger in one purchase. It is especially appealing for users who prioritize cleaner edges, simple maintenance, and gas-free operation over maximum speed or wide-area coverage.
Pros
- Completely motor-free operation requires no gas oil or electricity for true zero-emission mowing
- Quality heat-treated alloy steel blades deliver lasting sharpness and clean scissor-like cuts
- Quick-snap 1-3 inch height adjustment ensures easy customization without tools
- Lightweight construction and cushioned ergonomic handle make it simple to push and maneuver
- Tool-less assembly speeds up initial setup for immediate use
Cons
- Manual push design demands physical effort making it less suitable for large lawns or users with limited mobility
- Cutting height limited to the 1-3 inch range which may not suit all grass types or preferred lengths
- No power assist means slower mowing progress compared to gas or electric models on bigger properties
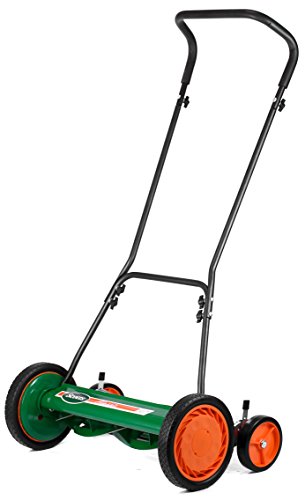
The Scotts 2000-20S Classic Push Reel Lawn Mower stands out as a traditional yet practical manual mower built for homeowners seeking an eco-friendly alternative. Its green finish and classic design house a sturdy 20-inch cutting deck with a 5-blade ball bearing reel and 10-inch dual tracking wheels. The overall impression is one of simplicity and reliability with an ergonomic handle featuring a cushioned grip that enhances user comfort right from the start. Easy tool-less assembly further underscores its approachable build quality for everyday lawn care.
In real-world use the mower performs admirably on small to medium lawns thanks to its heat-treated alloy steel blades that stay sharp longer and produce a clean even cut. The quick-snap height adjustment ranging from 1 to 3 inches allows precise control for different grass conditions while the lightweight no-motor construction requires no gas or oil. This results in quiet operation free of emissions and fumes making it ideal for frequent use without the noise or maintenance of powered mowers. Dual tracking wheels aid stability for consistent tracking across the yard.
Potential drawbacks include the physical effort needed to push the unit which can become tiring on larger or thicker lawns and may not suit everyone. The restricted cutting height range of 1 to 3 inches limits versatility for taller grass preferences and progress is naturally slower than with motorized options. Users should also note that results depend on regular blade care to maintain peak performance.
Overall the Scotts 2000-20S delivers excellent value for eco-conscious users with modest yards who prioritize quiet lightweight operation and low maintenance. It is best suited for those seeking a classic reel mower experience without fuel costs or emissions and who appreciate tool-free setup and durable blades for clean results.

Pros
- Environmentally friendly motorless design requires no gas, oil, or batteries
- Scissor-like 5-blade reel produces clean cuts that promote healthier grass growth
- Nine cutting heights from 1.3 to 2.6 inches offer flexible lawn customization
- 20-inch deck and large 10-inch front wheels improve navigation and coverage
- Durable steel blades built for extended use and lasting sharpness
Cons
- Manual push operation demands more physical effort than powered mowers
- Cutting height limited to 1.3-2.6 inches may not handle taller or overgrown grass well
- Reel-style design performs best on regularly maintained lawns and is less ideal for thick weeds
The LawnMaster LMRM2001 is a 20-inch 5-blade push reel lawn mower built for homeowners who value simple, eco-friendly lawn care. Its motorless design and durable steel blades create an immediate impression of solid, no-fuss construction focused on quiet operation and healthy grass results.
In real-world use the scissor-like cutting action cleanly slices grass without tearing for better lawn health, while nine height positions ranging from 1.3 to 2.6 inches allow easy customization. The 20-inch cutting width paired with 10-inch front wheels provides strong maneuverability around obstacles, and the absence of gas or batteries keeps operation silent and emission-free.
Potential drawbacks include the physical effort required for push operation and the relatively narrow height range, which may struggle with taller or neglected grass. As a reel mower it also works best on lawns that are already kept in reasonable condition rather than heavily overgrown areas.
Overall the LawnMaster LMRM2001 delivers excellent value for eco-conscious users with small to medium yards who prioritize a clean cut, quiet performance, and zero emissions. It is an ideal choice for those ready to trade power features for simplicity and environmental benefits.
When and Why You Should Replace the Blade
A dull, damaged, or unbalanced blade won’t just give you a poor cut; it can stress your mower’s engine or motor and create safety hazards. You should consider blade replacement rather than sharpening if:
- The blade has deep nicks, cracks, or visible bends.
- The blade is excessively worn, with the edges rounded over.
- The blade is bent or unbalanced, causing significant vibration.
- The blade has been repaired or welded before.
For minor dullness, sharpening is often sufficient. Most residential mower blades should be inspected and sharpened or replaced at least once per mowing season or after every 25-50 hours of use.
Safety Preparation Before You Begin
This is the most critical section. Never skip these steps. Mower blades are extremely sharp and can cause severe injury.
- Disconnect All Power: For a gas mower, remove the spark plug wire and secure it away from the plug. For electric or battery mowers, remove the battery or unplug the unit from the wall. This prevents accidental starting.
- Wear Safety Gear: Always wear heavy-duty gloves and safety glasses.
- Handle Fuel Safely: If you need to tilt the mower, ensure the fuel tank is less than 1/4 full or use a fuel stabilizer to prevent leaks. Never tip the mower with the carburetor or air filter facing down, as this can cause oil to flood the air filter or fuel to leak.
- Work on a Stable Surface: Perform the blade change on a flat, level area like a driveway or garage floor.
Tools and Materials Needed
Gather everything before you start to avoid unnecessary trips to the hardware store.
- Socket Wrench or Breaker Bar: With a socket that fits the center blade bolt (common sizes are 15/16″, 5/8″, or 18mm).
- Torque Wrench: Essential for tightening the bolt to the correct specification. Over-tightening can strip threads; under-tightening can be dangerous.
- Block of Wood: A 2×4 piece of lumber works perfectly to jam between the blade and mower deck to stop the blade from spinning.
- Replacement Blade: Ensure it matches your mower’s make, model, and blade adapter specifications.
- Wire Brush or Cloth: To clean the mounting area.
- Blade Balancer (Optional but Recommended): To check if the new blade is balanced before installation.
Step-by-Step: Removing the Old Blade
- Prepare the Mower: Follow all safety steps above. For gas mowers, disconnect the spark plug wire.
- Tilt the Mower Correctly: Carefully tilt the mower onto its side. The correct orientation is with the air filter and carburetor (on gas models) facing UP. This prevents oil from flooding the air filter and fuel from leaking out.
- Secure the Blade: Wedge the block of wood between the blade and the inside of the mower deck. This will prevent the blade from turning when you apply force to the bolt.
- Loosen the Center Bolt: Using your socket wrench, turn the center bolt counterclockwise (“lefty-loosey”). It may be very tight; a breaker bar can provide extra leverage.
- Remove and Inspect: Once the bolt is loose, remove it, the washer(s), and the blade. Inspect the bolt, washer, and the blade adapter (the part the blade mounts to) for wear, cracks, or damage. Clean the mounting area with a wire brush.
Step-by-Step: Installing the New Blade Correctly
- Check Blade Orientation: This is crucial. The sharpened edge of the blade must face the direction of rotation. On most rotary mowers, the blade spins counterclockwise when viewed from above. Therefore, the sharp edge should face the front of the mower deck. Many blades have “Grass Side” or “Deck Side” stamped on them to indicate correct orientation.
- Position the Blade: Align the new blade with the mounting holes or adapter on the mower. Ensure any anti-scalp wheels or features are positioned correctly.
- Hand-Thread the Bolt: Place the washer(s) and bolt back on by hand to ensure you don’t cross-thread it.
- Torque to Specification: Use a torque wrench to tighten the bolt to the manufacturer’s recommended torque. Do not guess. The typical range for residential mowers is 30 to 50 ft-lb, but your owner’s manual will have the exact value. Over-tightening can strip the threads or crack the adapter.
- Reconnect Power: Reattach the spark plug wire (gas) or reinstall the battery (electric/battery).
Post-Installation Checks and First Test
- Manual Spin Test: With the mower still tilted or after lowering it, carefully spin the blade by hand (wearing gloves!) to ensure it rotates freely without hitting anything.
- Final Bolt Check: Double-check that the center bolt is tight.
- First Test Run: Start the mower on a clear patch of grass. Listen for unusual vibrations or noises, which could indicate an unbalanced blade or loose bolt. If everything sounds normal, proceed with mowing.
- Maintenance: To extend blade life, clean grass clippings from under the deck after each use and sharpen the blade as needed throughout the season.
Key Differences for Electric, Battery, and Reel Mowers
- Electric/Battery Mowers: The mechanical process of removing and installing the blade is nearly identical to a gas mower. The critical safety difference is disconnecting the power source: remove the battery or unplug the unit. There is no spark plug to disconnect.
- Manual Reel Mowers: These mowers use a set of cylindrical blades that spin against a stationary bedknife. They do not have a single center bolt. Sharpening or adjusting these blades is a specialized task that often requires professional service or specific tools. They are not typically serviced with a simple blade swap like rotary mowers.
Everything You Need to Know: How To Change A Push Mower Blade FAQ
What is the most commonly missed step in changing a mower blade?
The most critical and commonly missed step is disconnecting the power source. Forgetting to remove the spark plug wire on a gas mower or the battery on an electric mower can lead to accidental engine start and severe injury. Always make this your first action. Readers comparing setup options can review our technical analysis on z890 vs x870e motherboard.
Can I sharpen my old blade instead of replacing it?
Yes, if the blade is only dull and not damaged. A blade with minor nicks or a dull edge can be sharpened with a metal file or a bench grinder. However, if the blade is bent, cracked, has deep gouges, or is excessively worn, replacement is the only safe option. An unbalanced blade from improper sharpening can cause dangerous vibrations.
How tight should the mower blade bolt be?
The bolt must be torqued to the manufacturer’s specification, which is typically between 30 and 50 foot-pounds (ft-lb) for most residential push mowers. Using a torque wrench is the only way to ensure it is tight enough to be safe but not so tight that it strips the threads or damages the blade adapter. Consult your owner’s manual for the exact value. For complementary field maintenance guidelines, examine our breakdown of marshall stanmore iii vs harman kardon onyx studio 8.
Which way does the mower blade face when installing?
The sharpened cutting edge must face the direction of rotation. On a standard rotary mower, the blade spins counterclockwise (when viewed from above). This means the sharp edge should face the front of the mower deck. Most replacement blades have labels like “Grass Side” or “Deck Side” to indicate correct orientation.
Related Maintenance and Operating Guides
To keep your equipment running at peak operating efficiency, explore our related technical walkthroughs and maintenance tutorials:
- Consult our detailed breakdown on residential zero-turn lawn mower guide.
- Consult our detailed breakdown on heavy-duty chainsaw buyer guide.
Push Mower Blade Safety Resources
A push mower blade can stay sharp for a long time, yet the edge still deserves respect whenever the mower is tipped or worked on. General guidance on mower safety from American National Standards Institute (ANSI) makes a good companion to these steps.









