

Quick Answer: How to Fit Strimmer Line to Spool
To fit strimmer line to a spool: (1) Depress retaining clips to remove the spool. (2) Cut two equal lengths of nylon line (2 meters each). (3) Insert line ends into the spool anchor holes and wind tightly in the arrow direction. (4) Thread ends through outer eyelets and latch.

Pros
- Twisted profile helps decrease operating noise and trimmer vibration
- Square cutting edges designed for clean, aggressive weed slicing
- High-temperature resistance helps prevent spool welding
- Universal fit compatible with most standard gas-powered string trimmers
- Provides 253 feet of .095-inch diameter line in a large clamshell pack
Cons
- 0.095-inch gauge may be too thick for low-powered electric trimmers

Pros
- 271 ft donut spool of .095" line
- High-strength nylon copolymer blend
- Round profile designed for snag-free feeding
- Includes a heavy-duty cutting tool
- High-visibility orange color
Cons
- Round shape is less aggressive on woody weeds
- Requires manual spool winding

Pros
- Long 200-foot supply supports repeated reloading
- Universal fit increases compatibility with many gas string trimmers
- 0.095-inch thickness is suitable for tougher trimming than lighter-duty line
Cons
- Compatibility still depends on the trimmer's required line diameter and head design
- The commercial-grade 0.095-inch line may be more than some light-duty trimmers need
- No detailed performance specs such as shape profile or break resistance are provided
Overview & Design: The Arnold Maxi-Edge .095-Inch x 200-Foot Commercial Grade String Trimmer Line is a replacement line for string trimmers. It is designed as a universal option for most gas string trimmers and comes in a large 200-foot supply with 10 refills.
Performance & Key Features: With a .095-inch diameter, this line is built for trimming grass and light vegetation with more durability than thinner lines. The commercial-grade specification makes it a practical choice for routine yard work where a stronger cutting line is preferred.
Drawbacks & Considerations: The main limitation is compatibility, since trimmer line must match the tool's required diameter and head design. It is also better suited to users who need a sturdier line, which may be unnecessary for very light trimming jobs.
Verdict: This Arnold trimmer line is a solid option for homeowners and maintenance users who want a universal .095-inch replacement line with a generous supply. It offers a straightforward, no-frills choice for keeping a gas trimmer ready for regular cutting tasks.
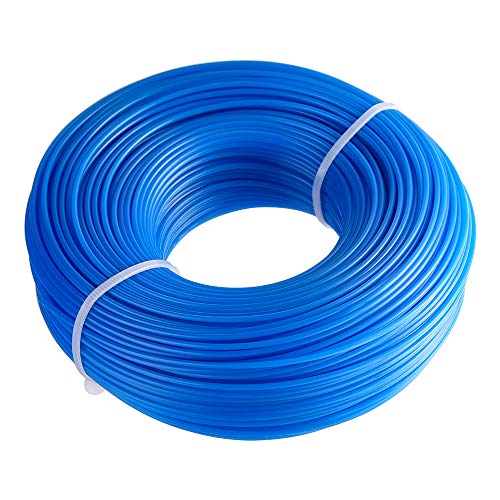
Pros
- Common .065-inch round line size improves compatibility with many trimmer models.
- Long 328-foot spool supports multiple refills from one package.
- Nylon material is positioned as a budget-friendly option for basic lawn maintenance.
- Useful for light trimming and edging around typical residential yards.
Cons
- Round .065-inch line is designed for light trimming, so it is not ideal for heavy weeds or thick overgrowth.
- Compatibility is broad but not universal, so users still need to confirm their trimmer calls for .065-inch line.
- No extra accessories or prewound spool system are included in the product information provided.
Overview: The FEPITO Round .065-Inch String Trimmer Line is a nylon replacement line designed for garden string trimmers and edgers. It is positioned as a straightforward, economical option for routine home yard maintenance.
Performance: With a 0.065-inch round profile and 328 feet of total line, this spool is meant for light trimming of small to medium grass. The longer length can provide around 16 refills, which is useful for users who want a supply that lasts through repeated mowing and edging sessions.
Drawbacks: This is not a heavy-duty trimmer line, so it may be less effective on thick weeds, dense brush, or tougher landscaping jobs. Buyers also need to check compatibility, since it is only suitable for trimmers that specifically call for .065-inch round line.
Verdict: The best value will be for homeowners who need a basic, budget-conscious replacement line for regular light trimming. If your yard work is mostly routine edging and grass cleanup, this FEPITO spool is a practical fit.
Understanding Your Strimmer Spool Type
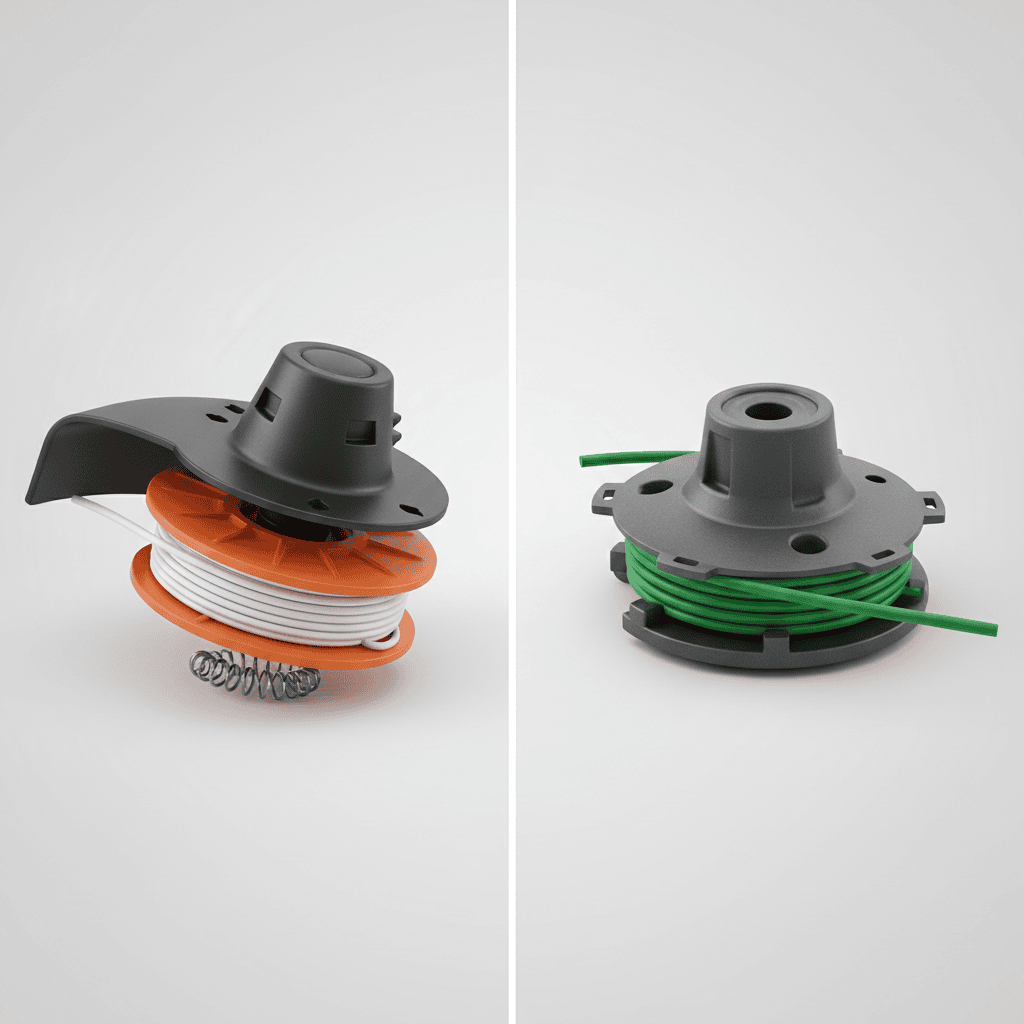
Before you begin, identify which type of spool your strimmer uses. The two most common mechanisms are:
- Bump-Feed Head: This is the most common type on modern electric and petrol strimmers. It features a spring-loaded spool. When you tap (or “bump”) the head on the ground while it’s spinning, a mechanism releases a small amount of new line. The line is pre-wound onto an inner spool that sits inside the outer housing.
- Manual Wind Spool: Found on some older or simpler models, this type requires you to manually wind the line onto a fixed spool. There is no automatic feed mechanism; you typically need to stop the strimmer and wind more line by hand when it gets short.
You can usually tell which type you have by looking at the head. A bump-feed head will have a button or bump knob in the center. A manual wind spool often has a simpler design where the line is wound directly around a central hub.
Choosing the Right Replacement Line
Using the wrong line can lead to poor performance, frequent breakage, or even damage to your strimmer. Always check your owner’s manual for the manufacturer’s specifications.
Line Diameter
The diameter (thickness) of the line is critical. Common diameters range from 1.5mm to 3.0mm. Thicker line is more durable for thick weeds but requires a more powerful motor. Using a line that is too thick for your model can strain the motor and cause overheating.
Line Shape
Replacement line comes in various shapes:
- Round: The standard, all-purpose shape. Good for general grass trimming.
- Square or Star: These shapes have edges that cut more aggressively and are better for thicker, tougher weeds.
- Twisted or Helical: Designed to reduce noise and wind resistance.
Line Length
The amount of line you need depends on the size of your spool. A typical residential strimmer spool holds between 3 to 5 meters (10 to 15 feet) of line. Overloading the spool can cause jamming and poor feeding.
Step-by-Step: Replacing Line on a Bump-Feed Spool
This is the most common procedure. Follow these steps carefully:
- Safety First: Turn off the strimmer and disconnect it from the power source. For cordless models, remove the battery. For petrol models, ensure the engine is off and cool.
- Remove the Spool Head: Press the release buttons or tabs on the side of the trimmer head (often two or more) and pull the outer spool housing off the trimmer body. You may need to press a central button or unscrew a cap.
- Remove the Old Line: Take out any remaining old line from the inner spool. Clean out any grass or debris.
- Cut New Line: Cut a length of new line as recommended for your spool (typically 3 to 5 meters). Ensure you are using the correct diameter.
- Thread and Anchor the Line: Look for the anchor point on the inner spool, this is often a small hook, notch, or hole in the center. Thread the midpoint of your cut line through or around this anchor point so that you have two equal lengths extending from the spool.
- Wind the Line: Wind each half of the line tightly and neatly onto the spool in the direction indicated by arrows molded into the plastic. Keep tension on the line as you wind to prevent tangles. Wind the lines onto their respective channels without crossing them.
- Secure the Ends: Once wound, tuck the last few centimeters of each line end into the temporary holding notches on the edge of the spool. This keeps the line from unwinding during reassembly.
- Reassemble the Head: Place the wound inner spool back into the outer housing. Align the tabs or guides and push until it clicks securely into place. Ensure the line ends are feeding through the metal eyelets on the outer housing.
- Test the Feed: Pull on each line end to ensure it feeds smoothly. Start the strimmer and tap the head on the ground (while spinning) to test the bump-feed mechanism.
Step-by-Step: Replacing Line on a Manual Wind Spool
The process is similar but simpler, as there is no inner spool mechanism. For additional operational safety benchmarks, see our published testing notes on marshall stanmore iii vs harman kardon onyx studio 8.
- Safety First: Power off and disconnect the strimmer completely.
- Access the Spool: You may need to remove a cap or cover to access the winding hub directly.
- Cut New Line: Cut the appropriate length and diameter of line.
- Anchor the Line: Find the anchor point (a hole or notch) on the spool hub. Thread the midpoint of the line through it.
- Wind the Line: Wind each half of the line neatly onto the hub in the direction indicated. Keep the coils tight and side-by-side.
- Secure and Reassemble: Once wound, feed the ends through the eyelets. Replace any covers or caps securely.
- Test: Start the strimmer and check that the line is feeding correctly. On a manual spool, you will need to stop and unwind more line by hand as it wears down.
Troubleshooting Common Strimmer Line Problems
Why does my new line keep breaking?
Common causes include using a line that is too thin or brittle, hitting hard objects like fences or walls, or allowing the line to become too long (which increases centrifugal force and stress). Ensure you are using the correct diameter and shape for your model and trimming technique.
Why won’t the line feed out from a bump-feed head?
This often happens if the line is wound too loosely, wound in the wrong direction, or tangled on the spool. It can also occur if the bump mechanism is clogged with debris. Remove the spool, check the winding direction (arrows), ensure the line is tight, and clean the head thoroughly. To compare alternative configurations, check our hands-on review of dyson v8 cyclone vs bissell featherweight stick.
How do I fix tangled or jammed line on the spool?
Remove the spool head and carefully unwind the tangled line. Clean out any grass or dirt. Rewind the line neatly, following the direction arrows, and ensure there are no crossovers between the two line channels. Apply slight tension while winding.
Common Questions on How To Replace Strimmer Line Answered
Can I use any brand of replacement line for my strimmer?
Yes, as long as the line matches the specifications (diameter and shape) recommended by your strimmer’s manufacturer. The brand is less important than the correct size and type. Users looking for related component recommendations can explore our bissell crosswave hydrosteam vs shark stainforce breakdown.
How often should I replace the strimmer line?
You don’t replace the line on a fixed schedule. You replace it when it breaks or wears down to a length that is ineffective for trimming. Carrying a pre-cut length of spare line in your pocket while working is a common practice.
What is the difference between bump-feed and auto-feed strimmers?
The terms are often used interchangeably. “Auto-feed” or “bump-feed” both refer to the mechanism where tapping the head releases more line. A “manual wind” spool requires you to stop and wind more line by hand.
Is it normal for the strimmer to vibrate more after changing the line?
Slight vibration can occur if the two lengths of line extending from the head are not equal. Ensure both ends are the same length after installation. Excessive vibration may indicate the spool is not seated correctly or is unbalanced.
Related Maintenance and Operating Guides
To keep your equipment running at peak operating efficiency, explore our related technical walkthroughs and maintenance tutorials:
- Consult our detailed breakdown on how to refill a string trimmer.
- Consult our detailed breakdown on how to remove a STIHL trimmer head.
- Consult our detailed breakdown on what size file for a 3/8 chain.
- Consult our detailed breakdown on leaf blower CFM meaning.
- Consult our detailed breakdown on what a Sawzall is used for.
Technical Standards and Safety Guidelines
Equipment design tolerances, operational vibration thresholds, and protective gear guidelines comply with published safety standards from the American National Standards Institute (ANSI) under ANSI B71.1 and B175 safety specifications for outdoor machinery.









