If your lawn mower cranks but won’t start, or runs rough with a weak spark, a faulty ignition coil is often the culprit. The good news is that you don’t need to be a professional mechanic to diagnose it. With a basic multimeter and a few safety precautions, you can test the coil yourself in about 15 minutes. This guide walks you through the entire process, from understanding what the coil does to interpreting your test results.
Direct Answer: How to Test a Lawn Mower Coil
To test a lawn mower ignition coil, disconnect the spark plug wire, then use a multimeter to measure the coil’s primary and secondary resistance. The primary winding typically reads between 0.5 and 2.0 ohms, while the secondary winding typically reads between 2,500 and 5,000 ohms. A coil that reads out of specification or shows no continuity should be replaced. You can also perform a spark test by grounding the removed spark plug against the engine block and cranking the engine — a strong blue spark means the coil is working.
Before you start, note that the “coil” on a small engine is also called the ignition armature or magneto coil. These terms all refer to the same component mounted near the flywheel, which generates the high-voltage spark that ignites the fuel-air mixture.
What Does a Lawn Mower Ignition Coil Do?
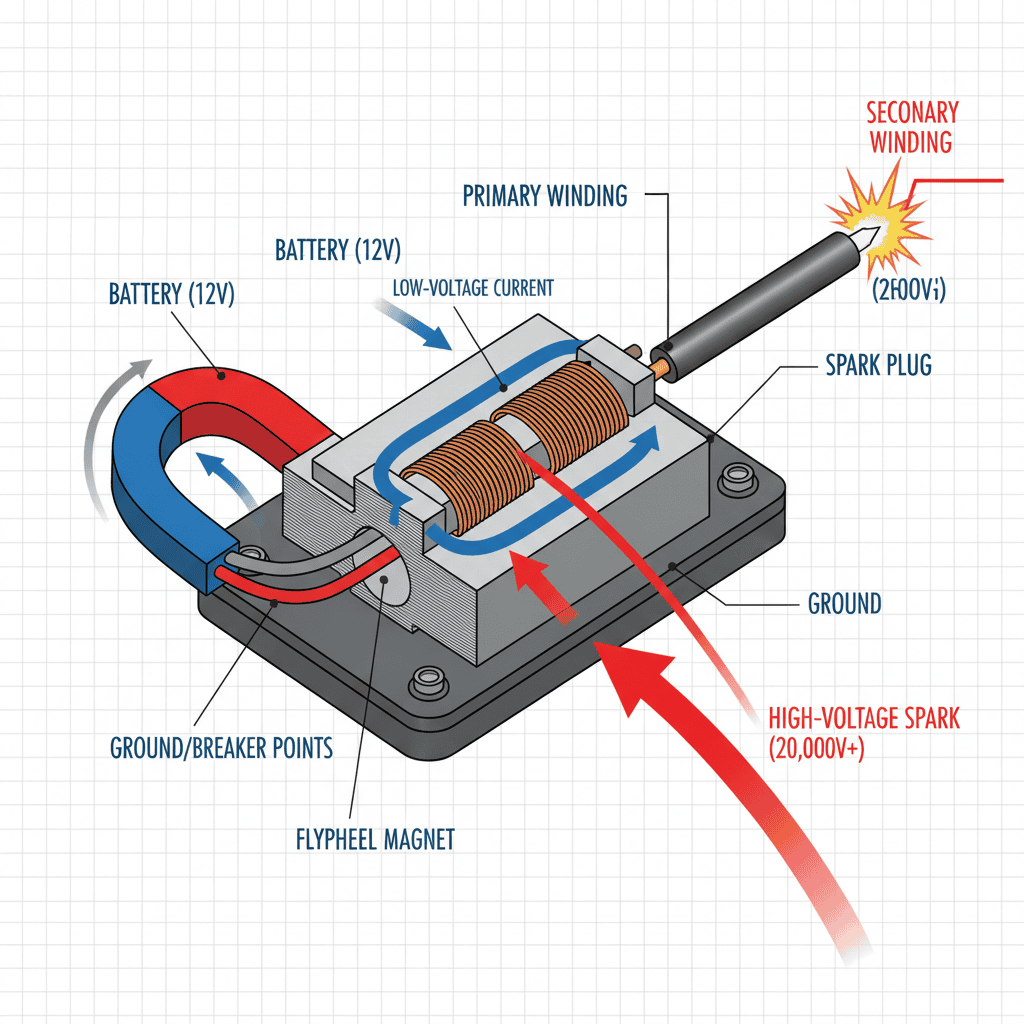
Understanding how the ignition coil works will make testing it much easier. The coil is essentially a small transformer made of two wire windings wrapped around a metal core.
The Role of the Ignition Coil in a Small Engine
When you pull the starter rope or turn the key, the engine’s flywheel spins past the coil. A magnet embedded in the flywheel passes the coil’s iron core, which induces a low-voltage current in the primary winding (a short, thick length of wire). That current then collapses rapidly, which induces a much higher voltage — often 10,000 to 30,000 volts — in the secondary winding (a long, thin length of wire). That high voltage travels down the spark plug wire to the spark plug, where it jumps the gap and ignites the fuel-air mixture.
Why the Coil Fails
Most ignition coil failures are caused by heat, vibration, and age. Over time, the insulation on the windings can break down, causing shorts or open circuits. A cracked coil housing, corroded terminals, or a stretched spark plug wire can also reduce spark output. When the coil fails, the symptoms are usually the same: the engine won’t start, starts but stalls, or misfires under load.
Because the coil works by induction rather than being constantly powered, it cannot be tested with a simple on-off continuity check alone. You need to measure resistance in ohms on both windings to see whether they are within specification.
Safety First: Before You Begin Testing
Ignition systems can deliver a painful shock, and an accidental spark can be dangerous near fuel. Follow these safety steps before touching anything.
- Disconnect the spark plug wire. Always pull the boot off the spark plug before working on the ignition system. This prevents the engine from accidentally starting.
- Remove the spark plug. This makes the engine easier to turn over and allows you to perform a spark test safely.
- Work in a well-ventilated area. If the engine has fuel in the tank or carburetor, gasoline vapor can ignite from a stray spark.
- Keep the engine cool. Let the mower sit for at least 30 minutes if it has been running recently — hot engine parts can cause burns.
- Never test an ignition coil while the engine is running or while holding the spark plug wire with bare hands.
The most important habit to build is simply disconnecting the spark plug wire first. If the flywheel turns while the spark plug is attached and grounded, the engine can fire unexpectedly — which is exactly what you want to avoid while your hands are near the blade or flywheel.
Tools and Materials Needed
You probably already own most of what you need. Here is the full list:
| Tool | Purpose |
|---|---|
| Digital multimeter | Measures resistance (ohms) of the coil’s primary and secondary windings |
| Spark plug socket and ratchet | Removes and reinstalls the spark plug |
| Spark plug wire puller or pliers | Safely removes the boot without damaging the wire |
| Needle-nose pliers or jumper wire | Grounds the spark plug for the spark test |
| Socket wrench (for coil removal) | Removes the coil if you plan to replace it |
| Owner’s or service manual | Provides the exact resistance specifications for your model |
Any inexpensive digital multimeter with an ohms (Ω) setting will work. You do not need a fancy automotive-grade meter for this test. Just make sure the battery is fresh, because a low meter battery will give inaccurate resistance readings.
Step 1: How to Test Primary and Secondary Resistance with a Multimeter
The resistance test is the most reliable way to determine whether the coil’s internal windings are intact. If either winding shows an open circuit (infinite resistance) or a short (near zero ohms when it shouldn’t be), the coil is faulty.
Locate the Coil and Its Terminals
On most push mowers, the ignition coil is a small black component mounted on the engine block just outside the flywheel, with one or two wires coming from it and the spark plug wire attached to it. Follow the spark plug wire from the plug back to the engine — the component it connects to is the coil.
- Primary terminals: The small blade or stud terminals where the low-voltage wires connect. On many mowers, one wire comes from the engine stop switch, and the coil’s mounting bracket itself serves as the ground.
- Secondary terminal: The connection point where the spark plug wire attaches (or the metal core inside the rubber boot where the plug wire screws on).
- Metal core (lamination): The iron core of the coil, which acts as the ground reference. It is the large bracket that bolts to the engine block.
Since coil designs vary, your fastest reference will be the wiring diagram in your mower’s service manual.
Set Up Your Multimeter
Turn the multimeter dial to the ohms (Ω) setting. On most meters, this is the symbol that looks like an upside-down horseshoe. Choose the lowest range if your meter has manual ranges, or simply the Ω position if it is auto-ranging.
Before testing the coil, touch the two meter probes together. The reading should be near zero ohms. This verifies that your leads are in good condition and tells you about how much resistance the leads themselves add. Subtract this lead resistance from your readings if the meter doesn’t zero itself automatically.
Testing the Primary Winding
The primary winding is the low-voltage circuit. To test it:
- Disconnect any wires attached to the coil’s primary terminals so you are measuring only the coil.
- Set the multimeter to the lowest ohms range (e.g., 200 Ω).
- Place one probe on one primary terminal and the other probe on the other primary terminal (or on the coil’s metal mounting bracket if there is only one terminal and the bracket grounds the circuit).
- Read the value on the display.
Typical primary resistance for small engine coils is about 0.5 to 2.0 ohms. On an auto-ranging meter, you may see a decimal point like 0.9 or 1.3. Some meters will read 0.4 to 1.5 ohms and still be fine. If you get an “OL” (over limit) reading, the primary winding is open and the coil is dead.
Important: Resistance specifications vary by manufacturer and model. The ranges given here are typical, but always check your mower’s service manual for the exact values. The manual may specify, for example, a primary resistance of 0.6 to 1.4 ohms or a secondary resistance of 3,000 to 7,000 ohms.
Testing the Secondary Winding
The secondary winding is the high-voltage circuit. To test it:
- Set the multimeter to a higher ohms range (e.g., 20k Ω or auto-range).
- Place one probe on the metal terminal where the spark plug wire attaches to the coil. On many coils, this is a threaded stud under the spark plug wire boot; you may need to unscrew or pull the wire away to make contact.
- Place the other probe on the coil’s metal core (the laminated bracket).
- Read the value on the display.
Typical secondary resistance is between 2,500 and 5,000 ohms (2.5 kΩ to 5 kΩ). Some small engines specify up to 7,000 ohms. A reading of “OL” means the secondary winding is open, and a reading of zero usually indicates an internal short — either way, the coil must be replaced.
What the Readings Tell You
- Both readings within specification: The coil’s windings are electrically sound. Move on to the spark test to verify actual spark output.
- Primary open (OL): The coil has an internal break in the low-voltage winding. Replace the coil.
- Secondary open (OL): The high-voltage winding is broken. Replace the coil.
- Resistance far below spec (e.g., primary reads 0.1 or secondary reads under 1,000): Internal short caused by failed insulation. Replace the coil.
- Resistance far above spec: Corroded or partly broken windings. The coil may produce a weak spark. Replace it to be safe.
Step 2: How to Perform a Spark Test
If the resistance values are good, the next step is to verify that the coil actually produces a spark under cranking conditions. A coil can pass a static resistance test but still fail to fire because of a cracked housing, a failed internal connection, or a weak magnet on the flywheel.
Safely Ground the Spark Plug
- Remove the spark plug using a spark plug socket and ratchet.
- Reattach the spark plug wire boot to the removed plug.
- Ground the threaded metal body of the spark plug against the bare metal of the engine block. You can rest it against a clean spot on the engine, clip on a jumper wire between the plug base and the engine, or hold it with insulated pliers. The plug must make solid metal-to-metal contact.
- Make sure the area is free of fuel vapor and standing gasoline.
Crank the Engine and Observe the Spark
With the plug grounded, pull the starter rope (or press the start button) several times while watching the gap between the plug’s electrodes.
- A strong spark is a bright blue spark that jumps the gap consistently with every pull. This indicates the coil and spark plug are likely fine.
- A weak spark is orange, thin, or intermittent. This points to a failing coil, a bad plug, or a weak connection — but it does not conclusively prove the coil is bad.
- No spark means either the coil, the spark plug, the plug wire, the flywheel magnet, or a safety switch is preventing ignition.
If there is no spark, do not immediately blame the coil. Test the spark plug itself first: install a known-good new or used plug, repeat the test, and see if the spark changes. Also inspect the spark plug wire for cracks and ensure the boot is seated firmly on the coil terminal.
Ruling Out Other Ignition Components
A no-spark condition can be caused by several parts beyond the coil:
- Spark plug: Fouled, cracked, or worn-out plugs often produce no spark at all. Try a new plug.
- Flywheel magnet: If the magnet is weak, broken, or the flywheel key is sheared (causing the magnet to misalign with the coil), spark output drops. Check that the flywheel key is intact if the mower recently hit something hard.
- Coil air gap: The gap between the coil and the flywheel is typically 0.010 to 0.015 inches. If it is too wide or too narrow, spark output suffers.
- Stop switch or wiring: A shorted kill wire or a faulty safety interlock switch can ground out the ignition system, preventing spark even though the coil is fine. With the engine off, disconnect the kill wire from the coil and repeat the spark test. If spark returns, the switch or wiring is the problem.
- Breaker points (on older mowers): Very old engines use mechanical points instead of an electronic module. If the points are pitted or the condenser is shorted, the coil won’t fire.
Interpreting Results and Next Steps
Once you have your resistance readings and the results of your spark test, the path forward is usually clear.
If the Coil Fails the Resistance Test
An open or shorted winding means internal damage. The coil cannot be repaired — it must be replaced. Replacement coils are widely available for most mower engines and typically cost $15 to $40. Before buying, note your mower’s make, model, and engine model number (usually stamped on the engine shroud) so you get the correct part.
If the Coil Tests Good But There Is Still No Spark
If both windings are within spec but the spark test fails, work through these checks in order:
- Install a known-good spark plug and retest.
- Inspect the spark plug wire and boot for damage, and confirm they are tight on the coil terminal.
- Check the coil-to-flywheel air gap with a feeler gauge (typically 0.010–0.015 inches on most mowers). Loosen the coil mounting screws, set the gap with a business card or feeler gauge, and retighten.
- Disconnect the kill wire from the coil and retest. If spark returns, the stop switch, kill wire, or interlock switch is the problem.
- Inspect the flywheel key. If it is sheared, the flywheel magnet will be out of time relative to the piston, and the engine won’t start even with a good coil.
If the Coil and Spark Are Good But the Engine Still Won’t Start
The ignition system is only one part of the puzzle. If the coil tests good and the spark test shows a strong blue spark, check the other causes of a no-start condition:
- Fuel: Old gasoline, a clogged fuel filter, or a dirty carburetor can prevent the engine from starting even with a perfect spark.
- Air: A clogged air filter starves the engine of oxygen.
- Compression: If the engine has low compression due to worn rings, a bad head gasket, or a bent valve, it won’t start. A compression tester will confirm this.
- Timing: A sheared flywheel key can throw off ignition timing, as mentioned above.
When replacing the coil, there are a few best practices to keep in mind. Always check the air gap after installing the new coil, as the gap between the coil’s iron core and the flywheel magnet must be set precisely. Use a thin non-magnetic feeler gauge and tighten the mounting bolts while the gauge is in place, then remove it. Also, route the primary wires carefully so they cannot chafe against the flywheel or engine parts, and apply a small amount of dielectric grease to the spark plug boot to keep moisture out.
Finally, remember that the resistance numbers provided here are typical values. Always consult the service manual for your specific engine. Some manufacturers specify different ranges, and a coil that reads slightly outside the “typical” range could still be perfectly healthy for your model. The reverse is also true — a coil that reads within typical ranges can still fail under load. When in doubt, the spark test is your best functional proof.
Frequently Asked Questions
Can I test a lawn mower coil without a multimeter?
Yes. The simplest no-multimeter test is a spark test. Remove the spark plug, reconnect the plug wire to it, ground the plug’s metal body against the engine block, and pull the starter rope. A strong blue spark means the coil is producing high voltage. However, the spark test alone won’t tell you whether the coil is weakening — a coil can produce a visible but weak-orange spark that still fails to start the engine. For a complete diagnosis, a multimeter is the more reliable tool.
What resistance should a lawn mower coil read?
Typical primary resistance is about 0.5 to 2.0 ohms, and typical secondary resistance is about 2,500 to 5,000 ohms. These values vary by manufacturer, so the exact specifications for your engine should be taken from the service manual. A reading of “OL” (over limit) means the winding is open — the coil is faulty.
How do I know if my mower coil is bad?
Common symptoms include a no-start condition, hard starting, stalling, misfiring, or a weak orange spark when you perform a spark test. Confirmation comes from the multimeter resistance test: if the primary or secondary winding reads out of specification, the coil is bad. A cracked coil housing or a burned smell around the coil are also strong visual clues.
Does a lawn mower coil need air gap adjustment?
Yes. The air gap between the ignition coil’s iron core and the flywheel magnet is critical. On most small engines it should be between 0.010 and 0.015 inches. Too large a gap produces a weak spark; too small a gap can cause the flywheel to rub the coil. Set the gap with a feeler gauge or business card when installing a new coil.