Direct Answer: How to Jump Start a Lawn Mower
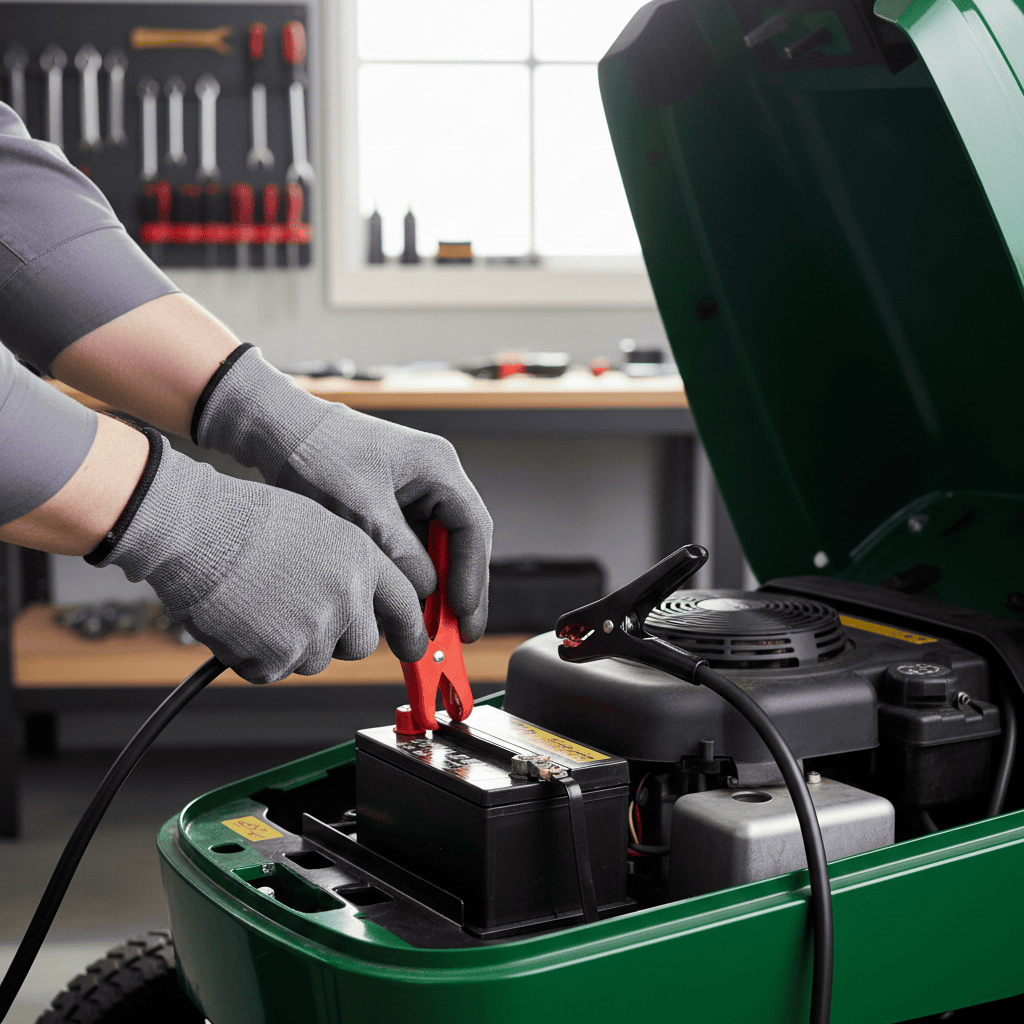
To jump start a lawn mower with a dead battery, turn off both the mower and the donor vehicle, then connect the red (positive) jumper cable clamp to the mower’s positive battery terminal and the other red clamp to the donor battery’s positive terminal. Next, connect the black (negative) clamp to the donor battery’s negative terminal, and attach the final black clamp to a grounded metal frame bolt on the mower rather than directly to the negative battery terminal. Start the mower, let it run to recharge the battery, then disconnect the cables in the exact reverse order, starting with the black clamp on the mower.
If your mower is a push or manual-start model without a battery, jump starting does not apply; use the pull-start method instead. This guide focuses on riding mowers and other mowers with electric starters that use a 12-volt battery, which is the only type of lawn mower that can be jump started.
Jump Starting vs. Push Starting: What’s the Difference?
Before you grab a set of jumper cables, it is important to understand what jump starting actually means in the context of a lawn mower. Many homeowners use the phrase “jump start” loosely, which can lead to confusion when they are dealing with the wrong type of mower.
Does My Lawn Mower Have a Battery That Can Be Jumped?
Jump starting requires a battery, a starter motor, and an electrical starting system. This applies to riding lawn mowers, lawn tractors, and some newer walk-behind mowers with electric start features. These machines typically use a 12-volt battery similar in design to a small car battery, which is what makes the jump start procedure possible.
On the other hand, a classic push mower with a pull cord has no battery, no starter motor, and no electrical system to jump. If you have this type of mower and the engine will not start, the problem is almost never a dead battery because there is no battery at all. The solution is to check the fuel, the spark plug, and the air filter, and to use the pull-start method properly. Trying to jump start a battery-less mower would be dangerous and completely ineffective.
Push Starting vs. Electrical Jump Starting
Push starting is a technique used to start a mower by forcing the engine to turn over through physical motion, such as pulling the starter cord or, in the case of some tractors, rolling the machine. Jump starting is an electrical procedure that uses power from another 12-volt battery to crank the starter motor. The two methods are not interchangeable. If your mower has a battery and an electric starter, jump starting is the correct approach when the battery is too weak to crank the engine. If your mower is manual start only, no electrical jump start is possible.
Key Factors to Consider Before You Connect Jumper Cables
A few minutes of preparation will make jump starting safer and more likely to succeed. Reviewing the following factors before you touch any cables can prevent sparks, electrical damage, and personal injury.
What Voltage Battery Does a Typical Riding Mower Use?
A typical riding lawn mower uses a 12-volt battery, and it can be jump started from a similarly rated 12-volt car battery. Because both systems operate at the same voltage, the mower’s electrical components will not be overloaded by the donor power source. Do not attempt to use a 24-volt truck system or any other higher-voltage source, as this can fry the mower’s wiring, ignition module, and charging system.
Some very small mowers use a 6-volt battery, although these are rare in modern machines. If you are unsure of your mower’s battery voltage, check the battery casing or the owner’s manual before connecting any cables. Connecting a 12-volt source to a 6-volt system can cause serious damage.
Why Should the Donor Vehicle Be Turned Off?
Many experts recommend leaving the donor vehicle off during the jump start procedure. A running donor vehicle produces high alternator output, which can exceed what the mower’s small charging system or electrical components are designed to handle. Turning the vehicle off and relying on its battery alone is gentler on the mower and reduces the risk of overcharging or damaging the mower’s charging system.
This is one of the biggest differences between jumping a car and jumping a mower. When you jump a car, the donor is often kept running to provide alternator power. With a mower, the safer practice is to keep the donor vehicle off for the connection and start, then let the mower’s own charging system take over once it is running.
Check the Condition of the Mower Battery First
Not every mower that fails to start needs a jump. If the battery case is cracked, swollen, leaking, or corroded, do not attempt a jump start. A damaged lead-acid battery can release flammable hydrogen gas, and the sparks produced during a jump start can ignite that gas, causing an explosion. If the battery looks damaged, replace it instead of jumping it.
Also check the terminal connections. Loose or corroded terminals are a common cause of starting problems that looks exactly like a dead battery. Clean the terminals with a wire brush and ensure the connections are tight before you decide that a jump is necessary.
When Should You Replace the Battery Instead of Jumping It?
Jump starting is a temporary fix. If the mower battery consistently fails to hold a charge, is several years old, or requires another jump almost immediately after being charged, it is time to replace the battery. Mower batteries typically have a shorter service life than car batteries because they are smaller, experience vibration, and are often subjected to temperature extremes in a shed or garage. If your mower will not start even after a successful jump and a reasonable running period, the battery or the charging system is likely faulty.
Step-by-Step Guide: How to Jump Start a Lawn Mower Safely
The following procedure assumes you have a riding mower or electric-start mower with a 12-volt battery, a donor vehicle with a 12-volt battery, and a set of jumper cables with clamps that can reach both batteries. Always wear safety glasses and gloves, work in a well-ventilated area, and keep any open flames away from the batteries.
Step 1: Position the Donor Vehicle
Park the donor vehicle close enough to the mower that the jumper cables can reach both batteries without being stretched tight. Engage the parking brake on both the vehicle and the mower. Turn the key off in both machines, and remove the mower key if it is in the ignition. Never let the vehicles touch each other, as this can create an unintended electrical path that can cause sparks or damage.
Step 2: Locate the Mower Battery and Identify the Terminals
Open the mower’s hood or battery compartment and locate the battery. Identify the positive and negative terminals. The positive terminal is usually marked with a red cap, a plus sign, or both. The negative terminal is usually marked with a black cap or a minus sign. If the terminals are dirty or corroded, clean them with a wire brush before connecting the cables so that you get a solid electrical connection.
Step 3: Connect the Red (Positive) Cable
Take the red jumper cable clamp and attach it to the positive terminal of the mower’s dead battery. Make sure the clamp has a firm grip on the metal terminal, not just the cable insulation. Then attach the other red clamp to the positive terminal of the donor battery. At this point, the positive side of both batteries is connected.
Step 4: Connect the Black (Negative) Cable
Attach the black jumper cable clamp to the negative terminal of the donor battery. For the final connection, do not clamp directly onto the mower’s negative terminal. Instead, attach the remaining black clamp to a clean, unpainted, grounded metal bolt or bracket on the mower’s frame. This reduces the risk of sparks near the battery, where flammable battery gases may be present. If the frame is painted, choose a bare metal spot or lightly scrape the paint off to ensure a good ground.
This final connection is the point where the circuit is completed, and it is normal to see a small spark at this location. That is precisely why you want this connection away from the battery itself.
Step 5: Start the Mower
Double-check that all four clamps are secure and that the cables are not near any moving parts, belts, or blades. Sit on the mower, set the parking brake, and turn the key to the start position just as you normally would. If the mower cranks and starts, let it run for several minutes so the mower’s alternator or charging system can begin recharging the battery.
Step 6: Disconnect the Cables in Reverse Order
Once the mower is running, disconnect the cables in the exact reverse order of the connection. Remove the black clamp from the mower’s grounded frame first, then remove the black clamp from the donor battery’s negative terminal. Next, remove the red clamp from the donor battery’s positive terminal, and finally remove the red clamp from the mower’s positive terminal. Never let the clamps touch each other or any metal surface while they are still connected to a battery.
What Order Should You Connect the Positive and Negative Cables?
The safe order is always positive first, then negative, with the final negative connection made to a grounded metal surface rather than the dead battery. The reverse order applies when disconnecting: remove negative first, then positive. This sequence minimizes the chance of a spark igniting hydrogen gas near the battery because the final connection, where the circuit is completed, happens away from the battery terminal.
What to Do After the Mower Starts
Successfully starting the mower is only half the job. The battery is still low on charge, and the way you finish the process will determine whether the mower starts again next time.
How Long Should the Mower Run After a Jump Start?
Let the mower run for at least five to ten minutes after a jump start, preferably longer if you plan to mow. The mower’s charging system needs time to replace the energy used during the starting attempt. If you are relying on the mower’s own engine to recharge a deeply discharged battery, a longer run time of twenty to thirty minutes at a moderate engine speed is safer than idle speed. Many mower charging systems produce minimal output at idle, so running the engine at a higher speed will charge the battery more effectively.
Check the Terminals for Corrosion
After the mower has run and you have shut it down, inspect the battery terminals for corrosion. A white, green, or bluish crust on the terminals indicates the presence of corrosive buildup that can interfere with charging and starting. Clean the terminals with a wire brush and a mixture of baking soda and water if needed, then apply a thin layer of dielectric grease or a corrosion inhibitor to protect the connection. Keeping the terminals clean is one of the simplest ways to prevent future starting problems.
What Signs Indicate the Battery Needs Replacement?
Watch for these warning signs that point to a battery that should be replaced rather than repeatedly jumped: the mower needs a jump more than once every couple of months, the battery is more than three to four years old, the starter cranks slowly even after the battery has been charged, or the battery fails to crank the engine at all after a full charge. A swollen or leaking battery case is also an immediate replacement signal. If the mower will not start even with a fresh, fully charged battery, the problem may be in the starter, the ignition switch, or the charging system rather than the battery itself.
Common Mistakes and Safety Warnings
Even experienced DIYers make costly errors when jump starting a mower. The table below summarizes the most important do’s and don’ts in a quick reference format.
| Do | Don’t |
|---|---|
| Turn off the mower and the donor vehicle before connecting cables | Don’t connect cables while either machine is running |
| Connect the red (positive) clamp to the mower first, then the donor | Don’t connect the black (negative) clamp directly to the mower’s dead battery terminal |
| Attach the final black clamp to a grounded metal frame bolt | Don’t let the vehicles touch each other |
| Disconnect cables in reverse order, black from the mower first | Don’t attempt to jump a push mower with no battery |
| Let the mower run afterward to recharge the battery | Don’t jump a cracked, swollen, or leaking battery — replace it |
| Check terminals for corrosion after the jump | Don’t ignore a battery that repeatedly fails to hold a charge |
Why Should You Never Connect the Final Negative Clamp Directly to the Dead Battery?
Lead-acid batteries can release flammable hydrogen gas, especially when they are being charged or discharged. When you complete the jumper cable circuit, a small spark is created at the point of the final connection. If that spark happens right at the battery’s negative terminal, it can ignite any hydrogen gas venting from the battery, which can cause the battery to explode. By attaching the final negative clamp to a grounded metal frame instead, you move the spark away from the battery and significantly reduce the risk of an explosion.
What Should You Do If the Mower Still Will Not Start After Jumping?
If the mower still will not start after a proper jump start, the problem is not the battery. Check the basics: is there fresh fuel in the tank? Is the fuel shutoff valve open? Is the spark plug wire connected, and is the spark plug in good condition? Is the air filter clogged? Also confirm that the parking brake is engaged and the blade engagement is in the disengaged position, because many mowers have safety interlocks that prevent starting under those conditions. If all of these check out, the issue may be the starter motor, the ignition switch, the safety switch, or the mower’s charging system, and you should consider consulting a professional repair shop.
Frequently Asked Questions
Can I jump start my lawn mower with my car?
Yes, you can jump start a 12-volt lawn mower battery using a 12-volt car battery. Use the same procedure as described above: turn off both machines, connect positive to positive and negative to a grounded frame point on the mower, start the mower, and disconnect in reverse order. However, you should avoid keeping the car running while jumping the mower, because the car’s alternator output can be higher than the mower’s electrical system is designed to handle.
Can I use a jump starter pack or portable battery booster instead of a car?
Yes, a portable jump starter or battery booster rated for 12-volt batteries can be used to jump start a lawn mower. These devices are often more convenient than a car because they are small and can be placed right next to the mower. Follow the same connection order: attach the red clamp to the mower’s positive terminal and the black clamp to a grounded metal frame point, then turn on the booster and start the mower. Check the booster’s manual for any model-specific instructions.
How long do I need to leave the jumper cables connected?
You only need to leave the jumper cables connected long enough to start the mower. Once the mower engine is running, its own charging system begins producing power, and the cables can be disconnected. However, it is a good idea to let the mower run for several minutes before disconnecting so that the battery is not immediately drained again when you remove the external power source.
Will jump starting a lawn mower damage the car battery?
Jump starting a lawn mower will not damage a healthy car battery, provided the connection is made correctly and the car is off during the procedure. The mower’s starter draws relatively low current compared to a car starter, so the drain on the donor battery is small. The main risk is to the mower, not the car, if the connections are reversed or if the car is left running during the jump. Always double-check that you have connected positive to positive and negative to the mower’s frame.
Final Thoughts
Jump starting a lawn mower is a simple procedure once you understand the fundamentals: it only applies to mowers with a 12-volt battery and electric starter, you should keep the donor vehicle off, you must connect positive first and complete the negative connection on the mower’s grounded frame, and you must disconnect in reverse order. Always prioritize safety by inspecting the battery for damage, keeping sparks away from the battery, and working in an open, well-ventilated area.
Remember that a jump start is a temporary solution. If your mower battery needs to be jumped repeatedly, does not hold a charge, or shows signs of damage or corrosion, replace the battery and inspect the charging system. With clean terminals, a healthy battery, and the correct jump starting sequence, your lawn mower will be back to cutting grass in a matter of minutes.