Direct Answer: How to Change a Mower Blade
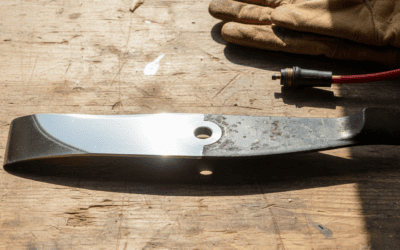
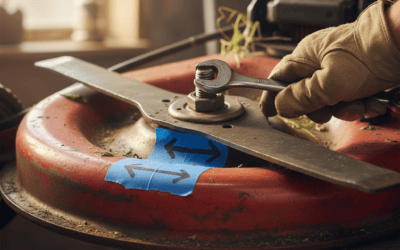
To change a mower blade safely, disconnect the spark plug wires and ensure the engine is cold, then secure the mower on a flat surface. Locate the blade bolt(s) underneath the deck, use a block of wood to prevent blade rotation while loosening the bolt counterclockwise, remove the old blade and note its orientation, install the new blade with the marked side facing down, tighten the bolt securely, and reconnect the spark plug wires before testing. The entire process takes 15–30 minutes and requires basic tools: a socket wrench, block of wood, and potentially a blade removal tool depending on your mower type.
Why Blade Maintenance Matters

Your mower blade is the most critical component for cutting performance and lawn health. A dull or damaged blade tears grass rather than cutting it cleanly, leaving jagged edges that brown and become susceptible to disease. Regular blade maintenance prevents equipment strain, improves fuel efficiency, and extends your mower’s lifespan.
Signs that your blade needs replacement include uneven cutting patterns, visible damage or chips, excessive vibration during operation, and difficulty cutting normal grass heights. Most manufacturers recommend replacing blades annually or every 20–50 hours of operation, depending on your lawn conditions and debris exposure.
Safety Precautions Before You Start
Safety must be your first priority when working with mower blades. The blade can cause serious injury even when the engine is off if it’s disturbed improperly.
- Disconnect spark plug wires: Remove both wires from the spark plugs to ensure the engine cannot start accidentally while you’re working underneath the mower.
- Allow the engine to cool: Never work on a blade immediately after operation. Wait at least 30 minutes for the engine to cool completely.
- Work on a flat, stable surface: Place the mower on level ground or a sturdy workbench. Use wheel blocks or a jack to prevent the mower from rolling.
- Wear protective equipment: Use heavy gloves, safety glasses, and steel-toed boots. The blade edges are sharp and can cause lacerations.
- Never reach under the deck: Always use a block of wood or blade holder to prevent the blade from spinning while you work.
Tools and Materials You’ll Need
Gather these items before beginning to avoid interruptions and ensure you have the correct tools:
- Socket wrench set (typically 5/8-inch or 3/4-inch for most mowers)
- Block of wood (4×4 or 2×4) to prevent blade rotation
- Heavy work gloves
- Safety glasses
- New replacement blade (ensure it matches your mower model)
- Torque wrench (optional but recommended for accurate bolt tightening)
- Blade balancer tool (optional, for checking new blade balance)
- Marking pen or tape (to note blade orientation)
Check your mower’s manual to verify the correct wrench size and blade bolt specifications for your specific model, as these vary significantly across manufacturers.
Step-by-Step Blade Removal for Push Mowers
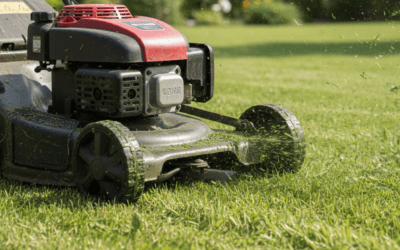
Push mowers have a single blade mounted horizontally beneath the mower deck. This is the most common type and the easiest to service at home.
- Tip the mower: Carefully tip the mower on its side, with the carburetor and air filter facing upward. This prevents oil and fuel from leaking into the engine. Never tip toward the carburetor side.
- Mark the blade orientation: Use a marking pen to draw an arrow on the top side of the blade indicating which direction it faces. This ensures you install the new blade correctly.
- Place the wood block: Position a 4×4 block of wood against the blade to prevent rotation while you work.
- Loosen the bolt: Using your socket wrench, turn the blade bolt counterclockwise to loosen it. The bolt typically requires a 1/2-inch or 5/8-inch socket. Apply steady pressure; do not force the wrench as this can strip the bolt.
- Remove the blade: Once loose, carefully unscrew the bolt by hand and remove it completely. Slide the old blade off the spindle shaft, noting any washers or spacers.
- Inspect the spindle: Before installing the new blade, check the spindle shaft for damage, rust, or corrosion. Wipe it clean with a dry cloth.
Step-by-Step Blade Removal for Riding Mowers
Riding mowers typically have two or three blades mounted on separate spindles beneath the mower deck. The process is similar to push mowers but may require removing the deck for full access.
- Access the deck: Some riding mowers allow blade access without removing the deck; others require removing the deck completely. Consult your manual to determine if deck removal is necessary for your model.
- Secure the mower: Engage the parking brake, remove the key, and use jack stands or blocks to secure the mower if you’re working underneath.
- Mark blade positions: If your mower has multiple blades, mark each one clearly to ensure you reinstall them in the correct locations. Different spindles may have different blade orientations.
- Remove each blade individually: Follow the same process as push mowers: block the blade with wood, loosen the bolt counterclockwise, remove the bolt and blade, and inspect the spindle.
- Check spindle alignment: On riding mowers, verify that spindles are not bent or damaged. A misaligned spindle can cause vibration and premature blade wear.
Installing Your New Blade Correctly
Proper installation is critical for safety and performance. An incorrectly installed blade can cause severe vibration, equipment damage, and injury.
- Verify blade orientation: New blades are typically stamped or marked on one side. This marked side should face downward (toward the grass). Most blades have a curved leading edge and a trailing edge; the leading edge should point in the direction of mower travel.
- Install the blade: Slide the new blade onto the spindle shaft, ensuring any washers or spacers are in the correct positions. Refer to your manual for the exact assembly order.
- Thread the bolt by hand first: Screw the blade bolt in by hand to ensure the threads align correctly. Cross-threading can damage the spindle.
- Tighten securely: Use your socket wrench to tighten the bolt clockwise. Apply firm, steady pressure until the blade is snug. Do not overtighten, as this can strip the threads.
- Use a torque wrench if available: If you have a torque wrench, tighten to the manufacturer’s specification, which typically ranges from 35 to 90 foot-pounds depending on your mower model. Consult your manual for the exact value.
- Final check: Manually rotate the blade to ensure it spins freely without striking any part of the deck.
Testing and Post-Installation Checks
Before resuming normal mowing, verify that your blade installation is safe and correct.
- Reconnect spark plug wires: Firmly push both spark plug wires back onto their respective plugs until you hear a click.
- Start the engine: Start the mower in an open area, away from obstacles. Listen for any unusual sounds such as grinding, squealing, or excessive vibration.
- Run at low speed: Let the mower run at idle and low throttle for 1-2 minutes before engaging the blade.
- Engage the blade carefully: Slowly engage the blade drive and observe the mower’s behavior. Stop immediately if you notice unusual vibration or noise.
- Perform a test cut: Mow a small test area at normal operating speed. The cut should be even and clean, with no torn grass or uneven patterns.
- Monitor for vibration: Excessive vibration indicates a problem. Stop the mower, disconnect the spark plugs, and inspect the blade for damage or improper installation.
Key Differences Across Mower Types
Different mower types have unique blade characteristics and installation methods.
Push Mowers: Single blade, horizontal orientation, simple installation. Bolt direction is counterclockwise to loosen, clockwise to tighten. Access by tipping the mower to the side.
Riding Mowers: Two or three blades on separate spindles, horizontal orientation. Multiple spindles may require different torque specifications. Some models require deck removal for full access.
Zero-Turn Mowers: Similar to riding mowers with multiple blades, but spindles are typically larger and more robust. Blade replacement follows the same process but may require more time to access.
Rotary Tillers: Use prongs or tines rather than blades. The principle is similar, but attachment methods vary significantly by manufacturer.
Before purchasing a replacement blade, verify your mower’s make, model, and year. Blade sizes, bolt types, and orientations vary considerably across manufacturers and cannot be interchanged.
Maintenance Tips to Extend Blade Life
Proper maintenance reduces replacement frequency and improves cutting quality.
- Clear debris regularly: Grass clippings, sticks, and stones damage blades and reduce efficiency. Empty the deck after each mowing and inspect for embedded debris.
- Mow at appropriate heights: Cutting grass too short stresses the blade and engine. Follow recommended cutting heights for your grass type, typically 2.5 to 3.5 inches for most lawn grasses.
- Avoid wet grass: Mowing wet grass causes clumping and requires the blade to work harder, leading to faster dullness and potential damage.
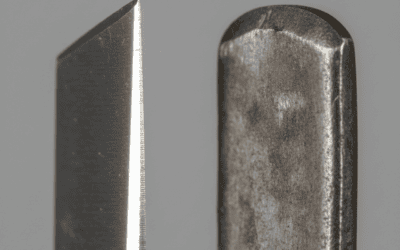
- Replace rather than sharpen: Most manufacturers recommend replacing blades rather than sharpening them. New blades are inexpensive and ensure optimal cutting quality.
- Store blades safely: Keep replacement blades in a dry location away from moisture and extreme temperatures. Protect the sharp edges with blade covers or cardboard sleeves.
- Balance new blades: An unbalanced blade causes vibration and premature spindle wear. Some retailers offer blade balancing; consider this service for optimal performance.
Frequently Asked Questions
How often should you replace a mower blade?
Most manufacturers recommend replacing mower blades annually or every 20–50 hours of operation, whichever comes first. However, blade lifespan depends on lawn conditions, debris exposure, and cutting frequency. If your lawn has rocks, sticks, or hard ground, you may need to replace blades more frequently. Inspect blades monthly during mowing season and replace them when you notice chips, cracks, or excessive dullness.
Can you sharpen a mower blade instead of replacing it?
While you can sharpen a blade using a metal file or grinder, most manufacturers recommend replacement over sharpening. Sharpening requires precise technique to maintain blade balance, and improper sharpening can cause vibration and damage to the spindle. New blades are relatively inexpensive (typically $20–$60) and ensure optimal cutting quality and safety. If you do sharpen a blade, balance it afterward using a blade balancer tool.
What happens if you install the blade upside down?
Installing a blade upside down (with the marked side facing up) will result in a torn, uneven cut and potential damage to the mower. The blade’s curved design is engineered to cut in one direction; reversing it prevents proper cutting action. The blade may also strike the deck or create excessive vibration. If you notice these symptoms after installation, stop the mower immediately, disconnect the spark plugs, and verify blade orientation.
Do you need to balance a new mower blade?
New blades are typically factory-balanced, so balancing is not always necessary. However, if a blade has been dropped, sharpened, or stored improperly, it should be balanced before installation. An unbalanced blade causes vibration that damages the spindle and reduces cutting quality. Use a blade balancer tool (available at hardware stores for $10–$30) to check balance, or have your local mower shop balance the blade for a small fee.
Conclusion
Changing a mower blade is a straightforward maintenance task that any homeowner can perform with basic tools and proper safety precautions. The key steps—disconnecting spark plugs, securing the mower, blocking the blade, removing the old blade, and installing the new one with correct orientation—take only 15–30 minutes. Regular blade maintenance extends your mower’s lifespan, improves cutting quality, and ensures your lawn remains healthy and attractive. Follow the manufacturer’s specifications for your specific mower model, wear appropriate safety gear, and never rush the process. With attention to detail and a safety-first mindset, you’ll keep your mower operating smoothly for years to come.