

Are Lawn Mower Blade Bolts Reverse Threaded?
Yes, many rotary lawn mowers use reverse-threaded bolts on the left blade. On standard rotary mowers, the left blade typically has a reverse-threaded bolt that turns clockwise to loosen, while the right blade has standard threading that turns counterclockwise to loosen. This dual-threading system prevents blades from unscrewing due to their rotation during operation. However, not all mowers follow this design—always consult your specific mower’s manual before attempting blade removal.
Why Lawn Mower Blade Bolts Are Reverse Threaded
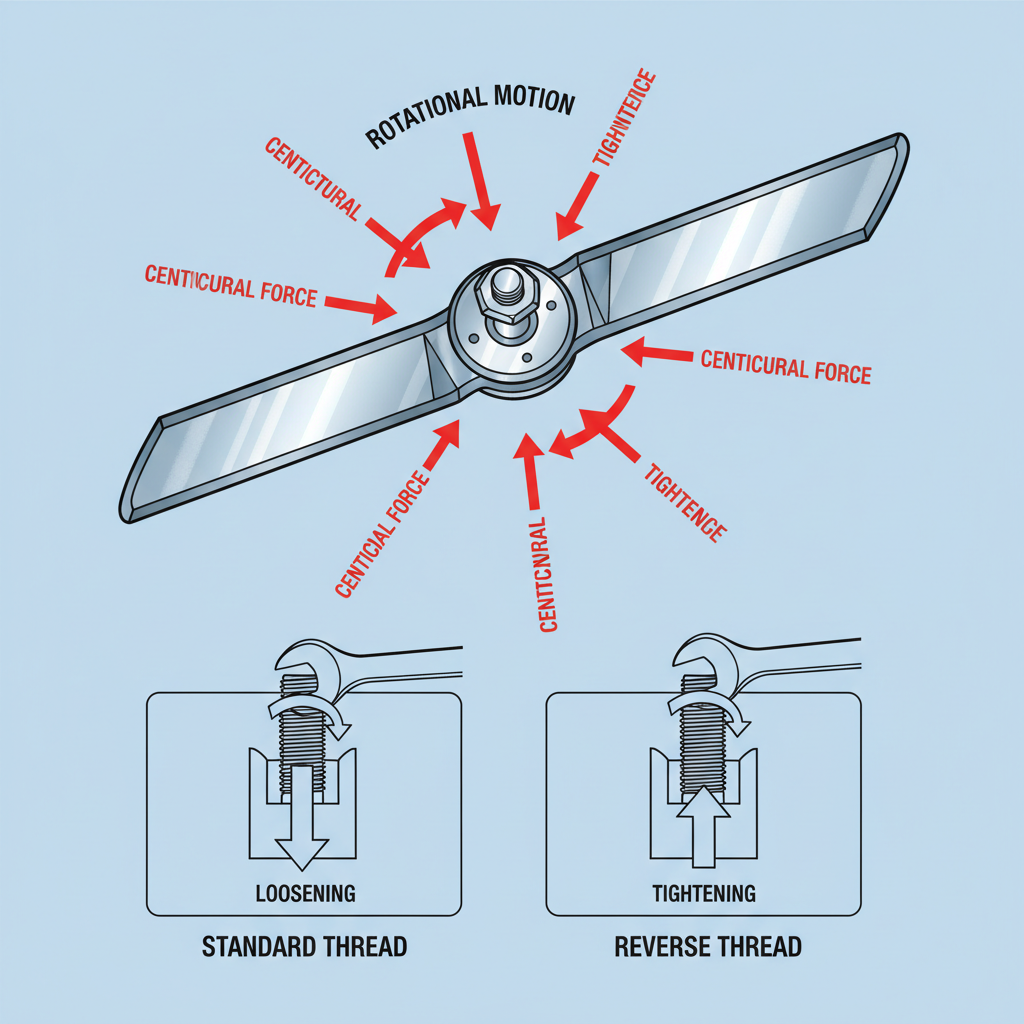
Understanding the reasoning behind reverse threading helps you appreciate this safety feature and handle your mower more confidently.
The Problem: Blade Rotation and Bolt Loosening
Lawn mower blades rotate at extremely high speeds—typically between 2,800 and 4,000 RPM on residential mowers. As the blades spin, they create centrifugal force that naturally wants to push components outward. On a standard rotary mower, both blades rotate in the same direction (usually clockwise when viewed from above). This rotation creates a continuous force that can gradually unscrew a standard bolt over time.
Consider the left blade: it rotates clockwise. A standard bolt threaded with a right-hand thread (turn counterclockwise to loosen) would naturally loosen as the blade rotates. The spinning motion acts like a wrench constantly trying to unscrew the bolt.
The Solution: Reverse Threading on the Left Side
Manufacturers solved this problem by reverse-threading the left blade bolt. A reverse-threaded bolt requires a clockwise turn to loosen—the opposite of standard bolts. Since the left blade rotates clockwise, the rotation actually tries to tighten the reverse-threaded bolt rather than loosen it. The right blade, rotating in the same clockwise direction when viewed from the side, operates with standard threading, which naturally tightens during rotation.
This ingenious design creates a self-locking mechanism that prevents blade bolts from loosening due to operational vibration and centrifugal force.
Safety and Maintenance Benefits
The reverse-threading design offers several practical advantages:
- Prevents unexpected blade detachment—A loose blade during operation poses serious safety risks
- Reduces maintenance frequency—You won’t need to repeatedly retighten blades
- Improves reliability—Less downtime due to blade failure
- Protects equipment—Loose blades can damage the mower deck and other components

How to Identify Which Blade Has Reverse Threading
Before you attempt to remove your mower blades, correctly identifying which side uses reverse threading is essential to avoid stripping the bolt or damaging your equipment.
Standard Configuration on Rotary Mowers
On most standard rotary mowers:
- Left blade bolt: Reverse threaded—turn clockwise to loosen
- Right blade bolt: Standard threading—turn counterclockwise to loosen
This applies to the majority of residential push mowers and many riding mowers. However, some manufacturers deviate from this standard.
Physical Markings and Indicators
Many mower manufacturers mark reverse-threaded bolts to prevent confusion:
- “L” marking—Indicates the left blade bolt
- “R” marking—Indicates the right blade bolt
- Directional arrows—Show the proper turn direction
- Color coding—Some bolts are painted or marked differently
- Text on the bolt head—May read “LH” (left-hand) for reverse threading
Check your mower deck, blade bolts, and bolt heads carefully before proceeding with removal.
Verifying Threading Direction Without Removal
If your mower lacks clear markings, try this verification method:
- Place your wrench on the bolt
- Apply gentle pressure clockwise on the left blade bolt
- If you feel tightening resistance (the bolt doesn’t want to turn clockwise), it’s reverse threaded
- If it turns clockwise easily and loosens, it has standard threading
Important: Use only gentle pressure during this test—never force a bolt that’s stuck or corroded.
Consult Your Mower Manual
The most reliable method is checking your owner’s manual, which explicitly states the threading direction for each blade. If you’ve lost your manual, most manufacturers post PDF versions on their websites, searchable by mower model number.
Step-by-Step Guide to Safely Remove Lawn Mower Blades
Removing blades safely requires proper technique, especially when dealing with reverse-threaded bolts.
What You’ll Need
- Adjustable wrench or socket set matching your bolt size (typically 1/2″ or 9/16″ on residential mowers)
- Block of wood or wedge to prevent blade rotation
- Leather gloves for hand protection
- Safety glasses
- Blade balancer (optional but recommended)
- Container for small parts
Pre-Removal Safety Steps
- Disconnect the spark plug wires—This prevents accidental engine startup while working
- Allow the engine to cool—Mower decks retain heat for several minutes after operation
- Place the mower on a level surface—An unstable mower is a safety hazard
- Mark blade positions—Use paint or tape to remember which side is left and right
Removing the Left Blade (Reverse Threaded)
- Locate the left blade bolt on the mower deck
- Place your wooden wedge between the blade and deck to prevent rotation
- Position your wrench on the bolt
- Turn clockwise to loosen (opposite of standard bolt removal)
- Once loose, unscrew by hand and remove the bolt
- Carefully pull the blade away from the spindle
Removing the Right Blade (Standard Threading)
- Locate the right blade bolt
- Place your wedge to prevent blade rotation
- Position your wrench on the bolt
- Turn counterclockwise to loosen (standard bolt removal)
- Once loose, unscrew by hand and remove the bolt
- Carefully pull the blade away from the spindle
Reinstalling Blades
When reinstalling, remember the reverse-threading:
- Left blade: Turn counterclockwise to tighten (opposite of normal)
- Right blade: Turn clockwise to tighten (standard)
- Tighten firmly but do not over-tighten, which can strip the threads
- Verify the blade is secure before reconnecting the spark plug wire
Variations by Mower Type
Not all mowers follow the same reverse-threading pattern. Understanding these variations helps you approach blade removal on different equipment.
Push Mowers vs. Riding Mowers
Push Mowers: Most standard push mowers (gas and cordless) follow the left-reverse, right-standard threading pattern. This is the most common configuration you’ll encounter.
Riding Mowers: Riding mowers often use multiple blades and may have different configurations. Some brands use reverse threading on all blades, while others use standard threading throughout. Always consult the manual for your specific model.
Reel Mowers and Cylinder Mowers
Reel mowers (also called cylinder mowers) work on a completely different principle. Rather than spinning blades, they use rotating cylinders that cut like scissors. Their fastening systems typically don’t employ reverse threading because the cutting mechanism operates differently and doesn’t create the same centrifugal loosening problem.
Zero-Turn Mowers
Zero-turn mowers, popular for residential use, typically feature multiple blade decks. Each deck may have its own threading configuration. Some manufacturers use reverse threading universally across all blades, while others stick to the standard left-reverse pattern.
Commercial and Residential Variations
Commercial mower manufacturers sometimes deviate from standard configurations. Brands like Toro, John Deere, and Husqvarna may use different systems depending on the mower model and intended use. This reinforces the importance of consulting your specific manual rather than making assumptions based on mower type alone.
Common Mistakes When Removing Blade Bolts
Avoid these frequent errors that can damage your mower or create safety hazards.
Turning Reverse-Threaded Bolts the Wrong Direction
The most common mistake is assuming all bolts follow standard threading. Turning a reverse-threaded bolt counterclockwise (the natural instinct) actually tightens it further. If you encounter unexpected resistance when trying to loosen a bolt, stop immediately and reconsider the threading direction. Forcing a bolt the wrong way can strip the threads and create an expensive repair.
Not Securing the Blade During Removal
Attempting to remove a bolt while the blade can freely rotate is dangerous and difficult. A spinning blade can pinch fingers or cause the wrench to slip. Always use a wooden wedge or specialized blade holder to prevent any rotation before applying force to the bolt.
Forcing Stuck or Corroded Bolts
If a bolt won’t budge after reasonable pressure, don’t continue forcing it. Corrosion, rust, and accumulated debris can freeze bolts in place. Instead:
- Apply penetrating oil (like WD-40 or similar) and wait 15-30 minutes
- Try again with gentle, steady pressure
- Consider using a larger wrench for better leverage
- If still stuck, consult a professional to avoid damage
Forgetting to Mark Blade Position
If you remove both blades, mark their positions clearly. Reinstalling blades backward or swapped between sides can cause imbalance, vibration, and poor cutting performance. Most blades have a marked top side—make sure this faces upward during reinstallation.
Over-Tightening Bolts
While loose blades are dangerous, over-tightened bolts can strip the threads, bend the bolt, or damage the spindle. Tighten bolts firmly but stop when you feel solid resistance—don’t apply maximum force.
Neglecting Blade Balancing
After sharpening or replacing blades, imbalance is common. An unbalanced blade causes excessive vibration, which stresses the spindle and can loosen bolts over time. Use a blade balancer to check and correct any imbalance before reinstalling the mower.
Frequently Asked Questions
Q: Why don’t all mower manufacturers use reverse threading?
A: Some manufacturers have experimented with all-standard or all-reverse-threaded systems, and a few still use them. However, the left-reverse/right-standard configuration has become an industry standard because it provides effective self-locking without requiring different wrench directions on the same mower. Some newer designs use thread-locking compounds instead of reverse threading, though reverse threading remains common.
Q: Can I accidentally damage my mower by turning a reverse-threaded bolt the wrong way?
A: Turning a reverse-threaded bolt the wrong direction will tighten it rather than loosen it. Continued force in the wrong direction can strip threads or damage the bolt head. If you suspect you’re turning a bolt the wrong way, stop immediately, reassess the threading direction, and try the opposite rotation.
Q: Do electric (cordless) mowers use reverse-threaded blade bolts?
A: Most cordless mowers follow the same reverse-threading pattern as gas mowers. The blade rotation and centrifugal forces are identical regardless of power source. However, some manufacturers may use different systems, so always check your specific mower’s manual.
Q: What should I do if I can’t find my mower’s manual?
A: Search the manufacturer’s website using your mower’s model number (usually found on a sticker on the mower deck or frame). Most manufacturers provide free PDF manuals online. Alternatively, contact the manufacturer’s customer service with your model number and they can provide threading information or mail you a replacement manual.








