Quick Answer: How to Clean a Honda Lawn Mower Carburetor
To clean a Honda lawn mower carburetor, shut off the fuel valve, drop the float bowl, and clear the pilot and main jets with carburetor cleaner spray and compressed air. If heavy varnish or ethanol residue persists, soak disassembled metal components in an ultrasonic cleaning solution, replace brittle gaskets, or install an OEM carburetor rebuild kit.
Pros
- Includes replacement gaskets and a 98079-55846 spark plug
- Matches Honda HRR216 and HRS216 lawn mower models
- Designed around the 16100-Z8B-901 carburetor specification
Cons
- Restricted to select Honda GCV160 mower applications
- Installation requires basic mechanical tools and skills
Pros
- 128 oz concentrated jug yields up to 9 gallons of solution
- Formulated specifically for ultrasonic cleaning of engine parts
- Provides bulk volume for multiple cleaning cycles
Cons
- Requires an ultrasonic cleaning machine to use effectively
Pros
- Fits Honda GCV160LA0, GCV160LA0G5B, and GCV160LA1 engines
- Direct replacement part for engine fuel system maintenance
Cons
- Limited to specific listed engine model codes
- Additional mounting hardware or gaskets are not specified
Symptoms of a Dirty Honda Lawn Mower Carburetor
Recognizing carburetor restriction early prevents complete engine failure and excessive wear on recoil starter assemblies. Several distinct symptoms indicate your Honda GCV160, GCV190, or GCV200 engine requires fuel system servicing:
- Hard Starting or No-Start: Stale ethanol fuel evaporates, leaving sticky gum and varnish deposits that clog the tiny pilot orifice. If the engine pops briefly when starting fluid is sprayed into the intake but dies immediately, the carburetor is fuel-starved.
- Engine Surging / Hunting: The governor arm constantly bounces back and forth at idle because a partially clogged main jet leans out the air-fuel ratio.
- Loss of Power Under Load: The mower stalls as soon as the cutting deck enters taller grass due to insufficient fuel delivery through the primary nozzle.
- Fuel Leaking from Air Box: A stuck float needle valve allows unmetered gasoline to overflow the bowl and flood the intake chamber.
If your mower exhibits hard starting after sitting through winter storage, reference our comprehensive checklist on troubleshooting why a lawn mower won’t start before replacing electrical ignition modules.
Required Tools, Solvents & Safety Equipment
Before beginning disassembly, assemble the appropriate small-engine mechanical tools to avoid rounded bolt heads and torn paper gaskets:
- Hand Tools: 10mm socket wrench, flathead screwdriver with a narrow tip (for brass jet removal), needle-nose pliers, and fuel line pinch-off clamp.
- Cleaning Agents: High-volatile aerosol carburetor cleaner spray and concentrated small-engine ultrasonic parts cleaning solution. Avoid harsh brake cleaners that swell rubber Viton needle tips.
- Cleaning Instruments: Micro-wire jet cleaning needles, soft nylon bristle brushes, and compressed air canister or compressor set to 30 PSI.
- Personal Protection: Nitrile chemical-resistant gloves and safety glasses. Fuel spray under pressure easily splashes back when blowing out blind jet passages.
Disassembly & Removal of Honda GCV Carburetor
Disconnect the spark plug boot first to eliminate accidental engine turnover. Next, close the in-line fuel shut-off petcock. Clamp the rubber fuel hose and slide back the spring clamp using pliers. Disconnect the fuel line and route any remaining fuel into an approved container.
Unbolt the two long 10mm bolts securing the plastic air cleaner housing. Pull the air cleaner assembly forward, exposing the metal carburetor body and governor linkage. Take a high-resolution smartphone photo of the governor spring, throttle rod, and auto-choke thermal actuator linkages before detachment. Gently rotate the carburetor body counterclockwise to unhook the Z-bend linkage wire without stretching the delicate governor spring.
Slide the carburetor off the two mounting studs, paying close attention to the intake heat insulator block and multiple paper gaskets. If recoil resistance feels unusually heavy during teardown, inspect our walkthrough on lawn mower recoil pull cord jammed fixes to verify mechanical clearance.
Deep Cleaning Procedure: Jets, Emulsion Tube & Float Bowl
Remove the 10mm bolt from the bottom of the float bowl. Carefully detach the aluminum bowl, noting the condition of the black rubber O-ring seal. Slide out the plastic float hinge pin and lift away the float assembly with its brass needle valve.
Next, extract the brass main jet and underlying emulsion tube located inside the central stem. Spray aerosol cleaner through the emulsion tube’s tiny lateral holes until light is visible through every orifice. Use fine guitar wire or dedicated jet cleaning picks—never use hardened steel drills that enlarge factory calibrated fuel orifices per standards set by the Outdoor Power Equipment Institute (OPEI).
Remove the black plastic idle pilot jet screw on top of the carburetor body. Spray cleaner through the pilot jet hole until fluid sprays freely from the tiny transition ports inside the throttle bore. Blow all channels dry with compressed air at 30 PSI.
Reassembly, Torque Tolerances & Gasket Stack Order
Reassembling a Honda mower carburetor requires strict adherence to gasket sequencing. The Honda GCV intake stack contains three distinct gaskets that must not be reversed: the engine block insulator gasket, the insulator plate, the carburetor base gasket, and the air cleaner backplate gasket. Reversing these gaskets blocks the internal vacuum pulse port, preventing the automatic choke mechanism from disengaging after engine warmup.
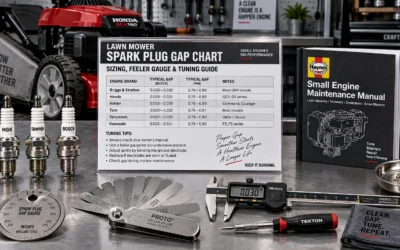
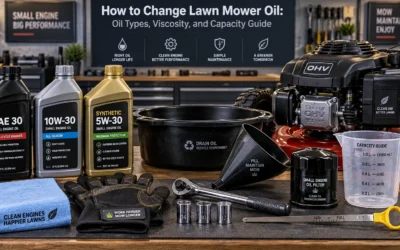
Install the emulsion tube, hand-thread the brass main jet, and snug it gently without over-torquing. Reinstall the float and needle valve, verify the float swings smoothly without binding, and torque the bottom float bowl bolt to 8–10 ft-lbs. Reconnect the governor linkage and slide the complete assembly onto the engine studs. While performing fuel maintenance, verify engine lubrication by consulting our lawn mower oil change guide and inspect electrode spacing with our lawn mower spark plug gap specifications.
Preventative Fuel Care & Off-Season Storage
Over 80% of small engine carburetor failures stem from ethanol-blended E10 gasoline degrading during storage. Ethanol attracts atmospheric moisture, leading to phase separation, water accumulation in the bottom of the float bowl, and galvanic corrosion of aluminum alloys.
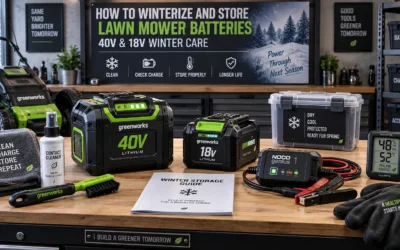
To eliminate recurring carburetor tear-downs, treat all fresh pump gasoline with fuel stabilizer containing metal deactivators and antioxidants. Before storing your lawn mower for the winter season, turn off the fuel petcock and let the engine idle until it runs completely out of fuel. For comprehensive seasonal procedures, review our guide on winterizing lawn mower engine and battery systems.
Frequently Asked Questions
Can I clean a Honda mower carburetor without removing it from the engine?
You can remove the 10mm float bowl bolt while the carburetor remains mounted to spray cleaner into the main jet and flush sediment. However, thoroughly clearing the idle pilot jet and auto-choke passages requires removing the unit from the engine.
Why does my Honda mower still surge after thorough cleaning?
Surging after cleaning usually indicates either a partially blocked pilot jet passage, an air leak caused by a pinched intake gasket, or a stretched governor linkage spring. If ultrasonic cleaning does not resolve the surge, replacing the carburetor assembly is recommended.
Is it better to clean or replace a Honda lawn mower carburetor?
If the carburetor is merely gummed with varnish, cleaning takes 30 minutes and costs under $10 in spray cleaner. However, if water has corroded white aluminum oxidation into the internal passages, installing a new OEM-spec carburetor kit is more reliable and cost-effective.