Quick Answer: How to Replace a Riding Lawn Mower Belt
Set the parking brake, disconnect the spark plug wire, then remove the mower deck (deck belt) or the drive cover panel (ground drive belt). Photograph the old belt routing, slide the worn belt off every pulley, thread the new OEM-spec belt along the exact same path shown in your owner’s manual diagram, confirm it sits fully in every pulley groove and clears all guards, reattach all guards and hardware, reconnect the spark plug wire, and run the mower under light load to verify no slipping or vibration.
Deck Belt vs. Drive Belt vs. Transmission Belt: Which Belt Do You Actually Need?
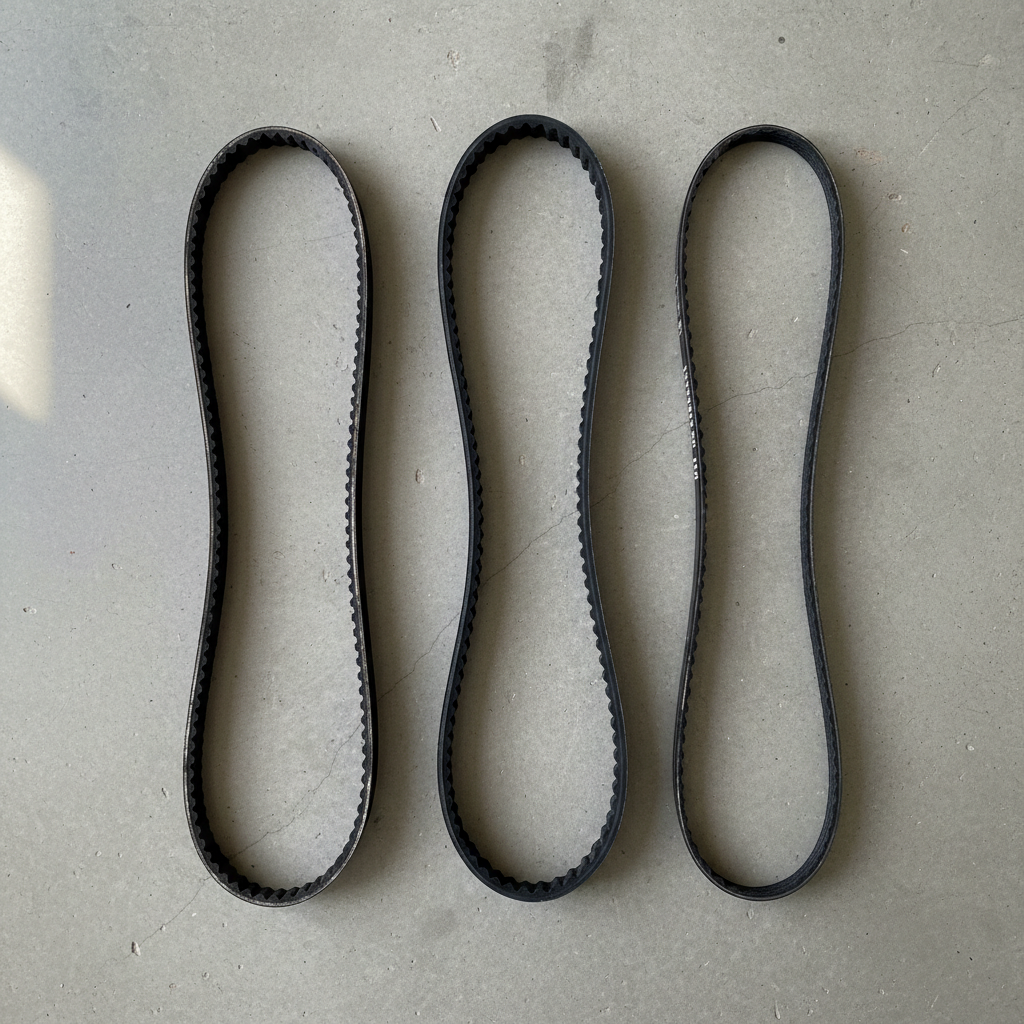
Riding mowers use two or three belts with completely different locations and jobs. Replacing the wrong one wastes time and money. Identify the failed belt by its symptoms before ordering a part.
| Belt Name | Also Called | Location | Function | Failure Symptoms |
|---|---|---|---|---|
| Deck belt | Blade drive belt | Under the mower deck, spanning the mandrel housing pulleys | Transfers engine power to the blade spindles so blades spin | Blades stop spinning; deck vibrates; burning rubber smell; belt visible broken or frayed |
| Ground drive belt | Motion drive belt | Between the engine pulley and the transaxle or transmission input pulley | Moves the mower forward and backward | Mower won’t propel; sluggish movement; slips out of gear on hills; squealing under load |
| Transmission belt | Hydrostatic drive belt (hydrostatic models) | Between engine crankshaft pulley and hydrostatic pump pulley | Drives the hydrostatic pump on variable-speed models | Loss of ground speed control; mower moves but speed is erratic or absent |
Rule of thumb: If the mower moves but won’t cut, start with the deck belt. If the mower won’t move but the engine runs fine, start with the ground drive belt.
Safety First: What to Do Before You Touch Any Belt
These steps are non-negotiable for both procedures. Skip none of them.
- Engage the parking brake. Prevents the mower from rolling on any slope.
- Disconnect the spark plug wire. Pull the rubber boot off the spark plug tip and tuck it away from the plug. This prevents accidental engine start while your hands are near pulleys and blades — the single most important safety step.
- Let the engine cool completely. Exhaust components stay hot enough to cause burns for 20–30 minutes after shutdown.
- Do not drain fuel for a standard belt swap — fuel drainage is unnecessary unless you need to tip the mower. Work on a flat, level surface instead.
- Wear heavy work gloves. Deck belt edges and pulley flanges have sharp burrs on worn units.
Tools needed:
- Socket set and ratchet (typically 3/8 in. and 1/2 in. drive)
- Flathead and Phillips screwdrivers
- Needle-nose pliers (for belt keepers and retaining clips)
- Smartphone or camera (photograph belt routing before removal)
- Owner’s manual open to the belt routing diagram page
- Replacement belt (correct OEM part number — see belt selection section below)
- Penetrating oil (for rusted deck attachment bolts)
How to Replace the Deck Belt (Blade Drive Belt) on a Riding Lawn Mower
The deck belt is the most commonly replaced belt. This procedure covers the generic sequence; consult the brand-specific notes section and your owner’s manual diagram for exact pulley layout on your model.
Step 1 — Complete All Safety Steps
Parking brake on. Spark plug wire disconnected. Engine cold.
Step 2 — Set the Blade Engagement Lever to Disengaged and Lower the Deck to Its Lowest Position
Lowering the deck creates slack in the belt and gives you maximum clearance for removal.
Step 3 — Photograph the Existing Belt Routing
Take three to four photos from different angles before touching the belt. The routing diagram in your owner’s manual is authoritative, but photos of the actual routing on your unit confirm how the belt exits the engine pulley and wraps the idler. Reference both during reinstallation.
Step 4 — Remove the Mower Deck
- Disconnect any deck lift linkage pins or hairpin clips attaching the deck to the lift arms — typically two to four connection points depending on model.
- Remove the front deck hanger bracket pin or strap if present.
- Slide the deck out from under the left or right side of the mower (most models slide to the left).
- Set the deck on a flat surface where you can work around all sides.
On some models (notably certain Craftsman and MTD units), the belt can be accessed and replaced without fully removing the deck by reaching through the discharge chute opening. Check your manual — full removal is easier and reduces routing errors for first-timers.
Step 5 — Remove the Old Deck Belt
- Locate the idler pulley — it sits on a spring-loaded or fixed arm and is the tension-relief point for the system.
- Use needle-nose pliers to unhook the idler spring (if spring-loaded) or push the idler arm toward the belt to create slack.
- Slip the belt off the idler pulley first, then off each mandrel housing pulley in sequence.
- Note the position of any belt keepers (also called belt guides) — these are small metal tabs bolted near the pulleys that hold the belt in its groove. They do not rotate. Do not bend or remove them unless replacing them.
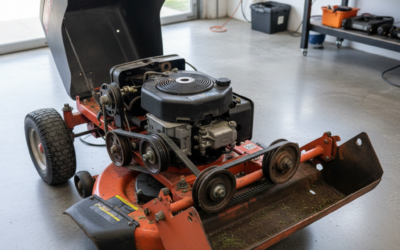
- Slide the belt off the engine PTO (power take-off) pulley and fully remove it from the deck.
Inspect the old belt: cracks across the inner surface, glazed or shiny sidewalls, frayed edges, or a stretched appearance all indicate a worn belt. Also inspect every pulley for wobble (failed spindle bearing) and every belt keeper for bending — both cause premature belt failure.
Step 6 — Thread the New Deck Belt
- Route the new belt around the engine PTO pulley first (outermost pulley, closest to the engine).
- Following the routing diagram exactly, thread the belt around each mandrel housing pulley. On a standard 42-inch twin-blade deck there are two mandrel pulleys; a 54-inch deck typically has three.
- Ensure the belt sits fully inside the pulley groove — not riding up on a flange — at every mandrel pulley before proceeding.
- Route the belt under or over any belt keepers as the diagram specifies. Belt keepers should be within 1/8 inch of the belt surface without touching it when the belt is tensioned.
- Last, hook the belt onto the idler pulley and re-engage the idler spring.
Step 7 — Verify Seating Before Reinstalling the Deck
Rotate each mandrel pulley by hand one full turn and watch the belt track. It must stay centered in every groove. Tug the belt between pulleys — properly tensioned, it should deflect no more than about 1/2 inch under firm finger pressure (consult your manual for the exact spec; tension varies by model).
Step 8 — Reinstall the Deck, Reconnect Spark Plug Wire, and Test
Slide the deck back under the mower, reconnect all lift linkage pins, and reattach any guards or shields removed during access. Reconnect the spark plug wire. Start the engine, let it idle for 60 seconds, then engage the blades at low throttle for 30 seconds before running at full throttle. Listen for squealing, watch for vibration, and shut down immediately if either occurs.
How to Replace the Ground Drive Belt (Motion Drive Belt) on a Riding Lawn Mower
The ground drive belt runs between the engine crankshaft pulley and the transaxle input pulley. It is located above the deck area, typically accessed by removing a belt cover or belly pan on the mower frame — the deck does not need to come off on most models.
Step 1 — Safety Steps and Deck Lowering
Parking brake on, spark plug wire off, engine cold. Lower the deck if needed for clearance to the drive belt cover.
Step 2 — Remove the Drive Belt Cover or Access Panel
Most riding mowers have a stamped steel or plastic cover over the drive belt, secured by two to six bolts or snap clips. Remove it and set aside all hardware. On some gear-drive models (Craftsman, MTD), you may need to remove the battery or battery tray for full access.
Step 3 — Photograph the Routing and Remove the Old Drive Belt
- Note whether the belt passes through a fixed guide bracket between the engine pulley and the transaxle pulley — this guide is critical to reroute correctly.
- Relieve tension by pushing the motion-drive idler arm (if present) or by simply working the belt off the smaller pulley first.
- Slide the belt off the engine crankshaft pulley, then off the transaxle input pulley.
Step 4 — Inspect the Transaxle Pulley and Idler
Spin the transaxle input pulley by hand. It should rotate smoothly with no grinding. A rough or seized transaxle bearing is a separate repair; installing a new belt on a seized pulley destroys the belt immediately.
Step 5 — Install the New Drive Belt
- Loop the new belt over the transaxle input pulley first.
- Route through any fixed guide bracket in the correct orientation (the belt must not twist).
- Stretch the belt up and over the engine crankshaft pulley.
- Engage the idler arm or tensioner to apply spring tension.
- Confirm the belt sits in both pulley grooves and passes cleanly through the guide bracket without rubbing the bracket walls.
Step 6 — Check Tension, Reassemble, and Test
Drive belt tension is typically set by the idler spring — no manual adjustment is needed if the spring is in good condition. A weak or stretched idler spring that fails to tension the belt properly causes slipping under load; replace the spring at the same time as the belt if it looks corroded or stretched. Reinstall the cover, reconnect the spark plug wire, start the mower, and test forward and reverse motion on flat ground before using on a slope.
Hydrostatic vs. gear-drive note: On hydrostatic mowers (infinitely variable ground speed), the drive belt connects the engine to the hydrostatic pump — not a manual transaxle. The routing is similar, but the pump pulley is smaller and sits higher. Consult the model-specific diagram. Gear-drive mowers use a shift-lever-operated transaxle; the belt replacement procedure is mechanically simpler.
Choosing the Right Replacement Belt: OEM vs. Aftermarket, Sizing, and Part Numbers
How to Find Your Correct Belt Part Number
- Locate your mower’s model number and serial number — found on a decal under the seat, on the frame near the engine, or on the back of the mower deck. Record both numbers exactly.
- Enter them at the manufacturer’s parts lookup (e.g., Husqvarna Parts, John Deere Parts, Craftsman Parts Direct) to retrieve the OEM belt part number for your specific model year and deck width.
- Alternatively, open your owner’s manual to the parts diagram section — the belt part number is listed there.
OEM vs. Aftermarket Belts
OEM belts are manufactured to the exact length, width, angle, and compound specified for your mower’s pulley geometry. Aftermarket belts from reputable brands (Gates, Stens, Oregon) can be acceptable substitutes when they match the OEM cross-reference number precisely. Generic V-belts from a hardware store cut to approximate size are not acceptable — mower deck belts use a specific Kevlar-reinforced raw-edge V-belt construction (sometimes called a cogged belt) that a standard industrial V-belt does not replicate. Using the wrong belt type causes rapid wear, slipping, and premature breakage.
A belt that is too long will not tension properly and slips. A belt that is too short overstresses the idler bearing and snaps prematurely. Width mismatches cause the belt to ride incorrectly in the pulley groove, generating heat and wear.
Brand-Specific Belt Routing Notes
Husqvarna
Most Husqvarna decks use a spring-loaded idler arm that must be pushed toward the belt to create slack for removal and installation. The idler spring hooks onto a specific tab on the deck frame — confirm the spring is fully seated on that tab after installation or the belt will lose tension under load. Husqvarna’s belt routing diagram is printed on a decal attached to the top of the mower deck on most models — check there before opening the manual.
John Deere
John Deere decks on many popular models (100 Series, X300 Series) use keeper tabs — small fixed guides that the belt must pass under or over in a specific direction. Missing a keeper tab is the most common routing error on John Deere decks and causes the belt to throw off immediately under blade engagement. Route under every keeper before tensioning the idler. John Deere OEM belts are color-coded by series; confirm the color matches the original when buying from a dealer.
Craftsman
Craftsman riding mowers (manufactured by MTD or Husqvarna depending on year) commonly allow deck belt replacement without full deck removal by reaching through the discharge opening. The belt guide bracket position near the engine PTO pulley is adjustable on many Craftsman models — do not reposition it during belt replacement; leave it where it sits unless it is visibly bent.
Cub Cadet
Cub Cadet XT1 and XT2 series decks route the belt through a center mandrel pulley on three-blade decks in a figure-eight-adjacent path — photograph this carefully before removal because the crossover point looks counterintuitive. The idler on Cub Cadet decks is often dual-function (flat on one side, grooved on the other); install the new belt on the correct face.
MTD (Troy-Bilt, Yard Machines, White Outdoor)
MTD-platform mowers use interchangeable decks across multiple brand names. The belt routing diagram is typically stamped or printed on the deck shell. MTD uses a fixed idler bracket on entry-level models (no spring) — tension is set by the bracket position, which is adjusted with a single bolt. Confirm the bracket position matches the original before running the mower.
Troubleshooting: Why Does My Riding Mower Belt Keep Coming Off or Breaking?
A correctly installed belt on a healthy mower should last 3–5 years or approximately 100–200 hours of operation under normal residential use. Repeated failure indicates an underlying mechanical problem — not just a bad belt.
- Worn idler pulley bearing: A failing bearing causes the idler to wobble, which throws the belt off-track. Test by spinning the idler by hand — any roughness, grinding, or wobble means replace the idler pulley assembly, not just the belt.
- Bent or missing belt keeper / belt guide: Belt keepers hold the belt in the pulley groove when the system decelerates. A bent keeper (from hitting debris) allows the belt to jump the pulley. Inspect every keeper and straighten or replace any that are bent more than 1/8 inch out of position.
- Incorrect routing: A belt routed over a keeper instead of under it (or vice versa) tracks incorrectly and ejects under load. Re-check the routing diagram against your installation.
- Pulley misalignment: A cracked mandrel housing, a bent spindle, or a loose engine mount shifts pulley alignment and causes uneven belt wear and ejection. Inspect spindles for play by grabbing each blade boss and pushing up and down — more than minimal play indicates a worn spindle bearing.
- Wrong belt size: A belt slightly too long runs loose enough to slip off the idler. Always verify the OEM part number match, not just nominal length and width.
- Debris accumulation under deck: Packed grass clippings interfere with belt and pulley movement. Clean the underside of the deck after every third to fourth mow.
Frequently Asked Questions
How much does it cost to replace a riding lawn mower belt?
A DIY belt replacement costs $15–$60 for the belt depending on brand and deck width; OEM belts from dealer parts counters run toward the higher end, quality aftermarket belts toward the lower end. Professional replacement at a service shop typically runs $80–$200 total including parts and labor, based on typical small-engine shop labor rates of $60–$100 per hour and 30–60 minutes of labor time for a standard deck belt swap.
How long does it take to replace a riding mower belt?
A first-time DIYer should plan 60–90 minutes for a deck belt replacement, including deck removal and reinstallation. An experienced home mechanic familiar with their specific model can complete the same job in 30–45 minutes. Ground drive belt replacement is often faster — 30–60 minutes — because deck removal is not required on most models.
How often should I replace the belt on a riding lawn mower?
Most mower manufacturers recommend inspecting the deck belt annually and replacing it every 3–5 years or every 100–200 hours of operation, whichever comes first. Replace immediately if you see cracking, fraying, glazing, or any sign of structural damage regardless of age. Consult your owner’s manual maintenance schedule for the interval specific to your model.
Can I replace a riding lawn mower belt myself without a mechanic?
Yes — deck belt and ground drive belt replacement are among the most beginner-accessible riding mower repairs. The procedure requires only basic hand tools, one to two hours, and the ability to follow a routing diagram. The critical steps are disconnecting the spark plug wire before starting and photographing the old belt routing before removal. Riders who are uncomfortable working near engine components or who cannot safely lift and slide the deck should use a service technician.
Should I replace both the deck belt and drive belt at the same time?
Not automatically — each belt should be replaced based on its own condition and service life, not simply because the other failed. However, if one belt has failed after five or more years of use and both belts have the same age and operating hours, replacing both during the same service visit saves a second labor session. Inspect the second belt carefully before deciding.