Quick Answer: How to Change Trimmer Line
Turn off the trimmer and disconnect power — unplug electric models or remove the spark plug boot on gas models. Press the spool tabs to release the head cap, pull out the old spool, remove remaining line, cut the correct diameter line to the manufacturer-specified length (typically 9–25 ft per strand depending on spool size), wind in the direction of the arrow molded into the spool, thread the ends through the eyelets, and snap the spool back until it clicks. The exact steps vary by head type: bump-feed, fixed-line, and auto-feed heads each follow a distinct process detailed in the sections below.
What Type of Trimmer Head Do You Have?
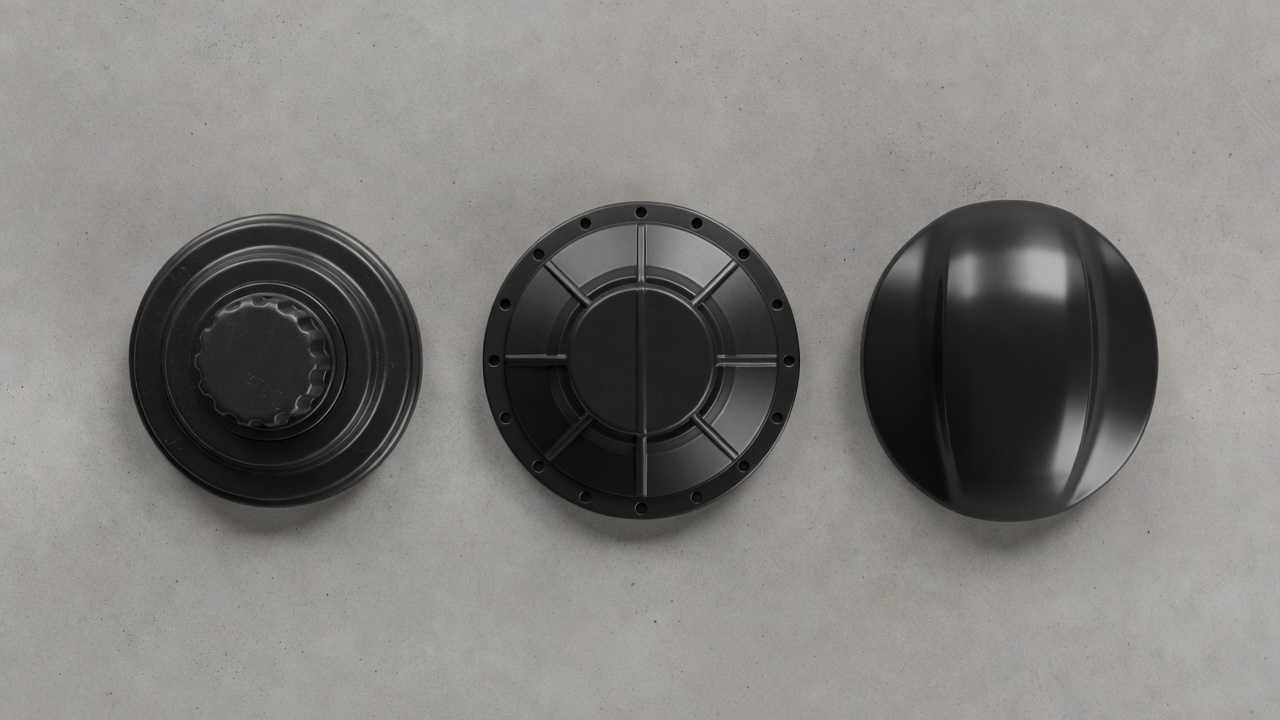
Identifying your head type before starting prevents wasted time and damaged equipment. The three common types are:
- Bump-feed head: The most common residential design. You tap the head against the ground to advance line. It uses a spring-loaded spool that you reload with bulk trimmer line. Common on Ryobi, Husqvarna, and EGO models.
- Fixed-line head (speed-feed head): Has no spring mechanism. Pre-cut line segments insert directly into holes or slots in the head without spool removal. Common on commercial trimmers and some Oregon aftermarket heads.
- Auto-feed head: Automatically advances line using a sensor or centrifugal mechanism. Most auto-feed heads use brand-matched pre-wound replacement spools rather than bulk line. Common on WORX, Greenworks, and some EGO models.
To identify your head: look for a bump knob on the underside (bump-feed), insertion holes around the head perimeter (fixed-line), or a label indicating auto-feed or automatic line advance. Check your trimmer’s manual or the manufacturer’s website if unsure — spool compatibility is model-specific.
Choosing the Right Trimmer Line: Diameter, Length, and Shape
Using the wrong line diameter strains the motor, causes premature breakage, or prevents the spool from seating correctly.
Line Diameter by Application
| Diameter | Best For | Typical Trimmer Class |
|---|---|---|
| 0.065 in | Light residential: thin grass, edging | Lightweight electric and battery trimmers |
| 0.080 in | General residential: mixed grass and weeds | Mid-range battery and gas trimmers |
| 0.095 in | Heavy residential to light commercial: thick weeds, overgrowth | Higher-output gas and 56V+ battery trimmers |
| 0.105 in and above | Commercial: brush, heavy vegetation | Commercial-grade gas trimmers |
Always verify the recommended diameter in your trimmer’s manual or on the spool housing label. Some premium residential models accept 0.080 in as their standard gauge. Using line thicker than rated for your head can jam the eyelet and overload the motor.
Line Length
Most residential bump-feed spools require 9–25 ft per strand (dual-line spools use two strands wound in separate chambers). The correct length depends on spool capacity — check the spool housing or the trimmer manual before cutting. Overfilling causes line to bind and prevents bump-feed advancement.
Line Shape
- Round: Most durable, longest-lasting, quietest. Best for general grass trimming.
- Twisted: Reduced vibration and noise, good cutting efficiency in grass.
- Multi-sided (square, star, serrated): More aggressive cut through thick weeds and light brush; wears faster against hard surfaces.
Round trimmer line is the safest all-purpose choice for most residential users. Confirm that non-round line shapes are compatible with your specific head before purchasing — some fixed eyelets restrict shape options.
Safety Steps Before You Start
Skipping safety steps during spool removal is the primary cause of accidental hand injuries during this task.
- Electric corded trimmer: Unplug from the outlet. Do not rely on the power switch alone.
- Battery-powered trimmer: Remove the battery pack completely before touching the head.
- Gas trimmer: Disconnect the spark plug boot — pull the rubber cap off the spark plug tip. This prevents accidental ignition if the engine turns over during spool removal. Allow the engine to cool before handling if recently run.
- All types: Wear work gloves. Trimmer line ends are sharp and can cut skin during handling. Safety glasses are advisable — old line fragments can break off during removal.
How to Change the Line on a Bump-Feed Trimmer Head
This process covers the standard bump-feed spool reload using bulk trimmer line.
- Complete the safety steps above.
- Remove the spool cap: Press the side tabs on the trimmer head simultaneously and pull the cap straight off. On some models the cap threads off counterclockwise — check for arrows on the cap indicating the removal direction.
- Remove the spool and spring: Lift out the spool. Set the spring aside — do not lose it. Note the spring orientation before removal.
- Clear old line: Pull all remaining trimmer line off the spool. Inspect the spool for cracks. A cracked spool must be replaced, not reloaded.
- Cut new line to length: Cut bulk trimmer line to the manufacturer-specified length (typically 9–25 ft per strand). For dual-line spools, cut two equal lengths or one length that you will fold and wind into separate chambers.
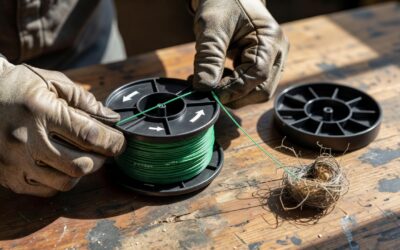
- Locate the winding arrow: Find the directional arrow molded into the spool body. This indicates which way to wind the line. Winding in the wrong direction is the most frequently cited cause of bump-feed heads failing to advance line — the line ends up fighting the feed mechanism rather than releasing with it.
- Anchor the line: Insert one end of the line into the anchor slot or hole in the center of the spool. Fold it to secure it, or tie a small overhand knot if the spool design requires it.
- Wind the line: Wind the line in tight, even, parallel coils following the arrow direction. Keep coils flat and avoid crossing lines over each other — crossed lines jam the feed. For dual-line spools, fill the bottom chamber first, then anchor and wind the second strand in the top chamber.
- Secure the line ends: Hook each line end into the holding notches on the spool rim to keep tension while you reinstall the spool.
- Reinstall the spool: Drop the spring back into the head (if applicable), seat the spool over the spring, thread each line end through the eyelets on the head, and press the cap back on until it clicks. Confirm the tabs are locked.
- Test the feed: Pull about 6 inches of line out of each eyelet. With the trimmer on level ground (and power still disconnected), tap the bump knob — the line should advance slightly. Reconnect power and run the trimmer briefly to confirm feed function.
How to Change the Line on a Fixed-Line Trimmer Head
Fixed-line heads (also called speed-feed or direct-load heads) require no spool removal. Pre-cut segments insert directly into the head.
- Complete the safety steps above.
- Cut line to length: Cut bulk trimmer line into segments. Most fixed-line heads use segments between 6 and 12 inches — check the head’s label or manual for the exact length. For dual-exit heads, one longer piece folded in half is often used.
- Locate the feed holes: Identify the insertion holes on the trimmer head. They are usually evenly spaced around the perimeter or on the top face of the head.
- Insert the line: For a dual-exit head, fold the line segment at its midpoint and insert the folded bend into the center channel of the head, then rotate the head slightly to advance it until both ends exit the eyelets evenly. For single-insertion holes, push each segment in individually until it exits the opposite eyelet.
- Pull to even length: Pull both ends until they are equal length (typically 4–6 inches per side).
- Repeat for all channels: Fill all available slots in the head to maximize cutting efficiency before each session.
Fixed-line heads are the fastest reload method and are common on commercial trimmers for this reason. No winding, no spring, no cap tabs.
How to Change the Line on an Auto-Feed Trimmer Head
Most auto-feed heads are designed around brand-matched pre-wound replacement spools. Many do not support bulk-line rewinding — confirm this in your trimmer’s manual before attempting to rewind.
- Complete the safety steps above.
- Release the head: Press the cap tabs or twist the cap in the indicated direction to remove it. Lift out the spent spool.
- Discard the spent spool: Pre-wound spools are generally not rewindable. Check local recycling guidelines for plastic spool disposal.
- Install the replacement spool: Purchase a pre-wound spool matched to your exact trimmer model and line diameter. Drop the new spool into the head housing. Pre-wound spools are brand- and model-specific — a mismatched spool will not seat correctly or will advance line incorrectly.
- Thread the line ends: Pull the line ends through the eyelets in the trimmer head before replacing the cap.
- Replace the cap: Press or twist the cap back on until it locks. Tug the line ends to confirm they are seated in the eyelets and not pinched under the cap.
Note on bulk-line rewinding for auto-feed heads: Some auto-feed models do accept bulk line in a refillable spool insert. If your model supports this, the winding process follows the same steps as a bump-feed spool above — follow the directional arrow on the spool insert and do not overfill the chamber.
Common Trimmer Line Problems and How to Fix Them
Line Not Feeding (Bump-Feed)
- Wrong winding direction: Remove the spool and rewind following the arrow. This is the most frequently reported cause of feed failure.
- Lines crossed over each other: Crossed coils bind the spool. Remove and rewind in tight, parallel coils.
- Spool overfilled: Too much line prevents the spool from moving against the spring. Remove excess line — do not exceed the maximum fill line marked on the spool.
- Dirty bump knob: Grass debris can pack under the bump knob and prevent it from moving. Disassemble and clean with a brush.
Line Breaking Immediately After Loading
- Wrong diameter: Line too thin for the head’s output breaks instantly. Verify the rated diameter and replace with the correct gauge.
- Old or dry line: Trimmer line becomes brittle with age and UV exposure. Use fresh line stored properly (see tips below).
- Cracked spool: Sharp spool cracks nick the line at the eyelet exit point. Replace the spool.
- Cutting too close to hard surfaces: Concrete, brick, and metal fence wire destroy line rapidly. Maintain at least 2–3 inches of clearance from hard edges.
Line Welding or Fusing on the Spool
- Cause: Line wound too tightly or stored in a hot environment (truck bed, direct sunlight) melts into a fused mass.
- Fix: Discard the fused spool and reload with fresh line. Store spare line in a cool, dry location away from direct UV exposure.
Excessive Line Consumption
- Trimming close to abrasive surfaces (gravel, concrete edging, chain-link fence) is the primary driver of rapid line wear.
- Cutting at the correct height — letting only the tip of the line do the cutting rather than the full exposed length — significantly extends line life.
- Overextending line beyond the blade guard’s trim length causes uncontrolled whipping and excess consumption. The guard’s cutting blade trims excess line automatically on most heads.
Tips to Make Trimmer Line Last Longer
- Soak line before winding (verify first): Soaking nylon trimmer line in water for 24 hours before loading can reduce brittleness by restoring moisture to the nylon. Some manufacturers endorse this practice; others do not recommend it for their specific line formulations. Check your line manufacturer’s guidance before soaking — do not treat this as universally applicable.
- Store line away from UV and heat: Keep bulk line in a sealed bag or container in a cool, shaded location. UV exposure and heat are the primary causes of premature brittleness in nylon line.
- Avoid hard surface contact: Concrete curbs, brick walls, gravel paths, and wire fencing destroy line faster than any cutting load. Use a plastic edging guard or work at a safe distance from abrasive surfaces.
- Cut at the right height: Hold the trimmer so only the outer tip of the line contacts vegetation. Running the full line length through dense material increases wear and heat buildup on the spool.
- Clean the bump-feed head periodically: Packed grass and debris under the cap and around the bump knob can jam the spool and cause the line to feed unevenly, forcing the operator to tap harder and wear line faster. Disassemble and rinse with water (for electric models, wipe clean) every few sessions.
- Match line shape to task: Using aggressive serrated or multi-sided line for light grass trimming accelerates wear without cutting benefit. Reserve aggressive shapes for heavy vegetation.
Frequently Asked Questions
How do I know which direction to wind trimmer line on the spool?
Look for a molded directional arrow on the spool body — it indicates the correct winding direction. If no arrow is visible, check the trimmer head cap: many caps print the winding direction as text or an arrow. The winding direction is typically opposite to the head’s rotation direction during operation, which allows the feed mechanism to release line correctly when the bump knob is tapped.
Can I use any brand of trimmer line in my trimmer?
For bump-feed and fixed-line heads, any bulk trimmer line of the correct diameter and shape that fits the eyelet will work — it does not need to be the same brand as the trimmer. For auto-feed heads that use pre-wound replacement spools, the spool must match the specific trimmer model because spool dimensions, line exit points, and tension systems vary by manufacturer. Check your trimmer’s spool compatibility list before purchasing a pre-wound spool.
How often should trimmer line be replaced?
There is no fixed interval — line life depends on cutting conditions, surface contact, and line quality. Replace or reload line whenever the exposed line is too short to reach the cutting guard’s trim blade (typically under 3–4 inches per side), or whenever line breaks off flush with the head and no more advances from the spool. Inspect the spool every 2–3 uses for fusing, brittleness, or uneven coiling.
Why does my trimmer line keep breaking right at the eyelet?
Breakage at the eyelet is almost always caused by a sharp edge on the eyelet itself — from wear, impact damage, or a crack in the trimmer head. Inspect the eyelet for burrs or chips. A worn metal or plastic eyelet cuts into the line under load. Replace the trimmer head or eyelet insert if damaged. Secondary causes include using line that is too thin for the trimmer’s output power, or old UV-degraded line that has lost tensile strength.