Quick Answer: How to Lower a Lawn Mower Cutting Height
Disengage the engine, disconnect the spark plug wire, then move the deck height adjustment lever to a lower numbered notch, or reposition the wheel bracket adjustment pins on all four corners. On riding and zero-turn mowers, disengage the PTO clutch first, then use the deck lift lever or height-of-cut dial to select a lower setting. Never remove more than one-third of the grass blade length in a single pass.
What Does “Lowering a Lawn Mower” Actually Mean?
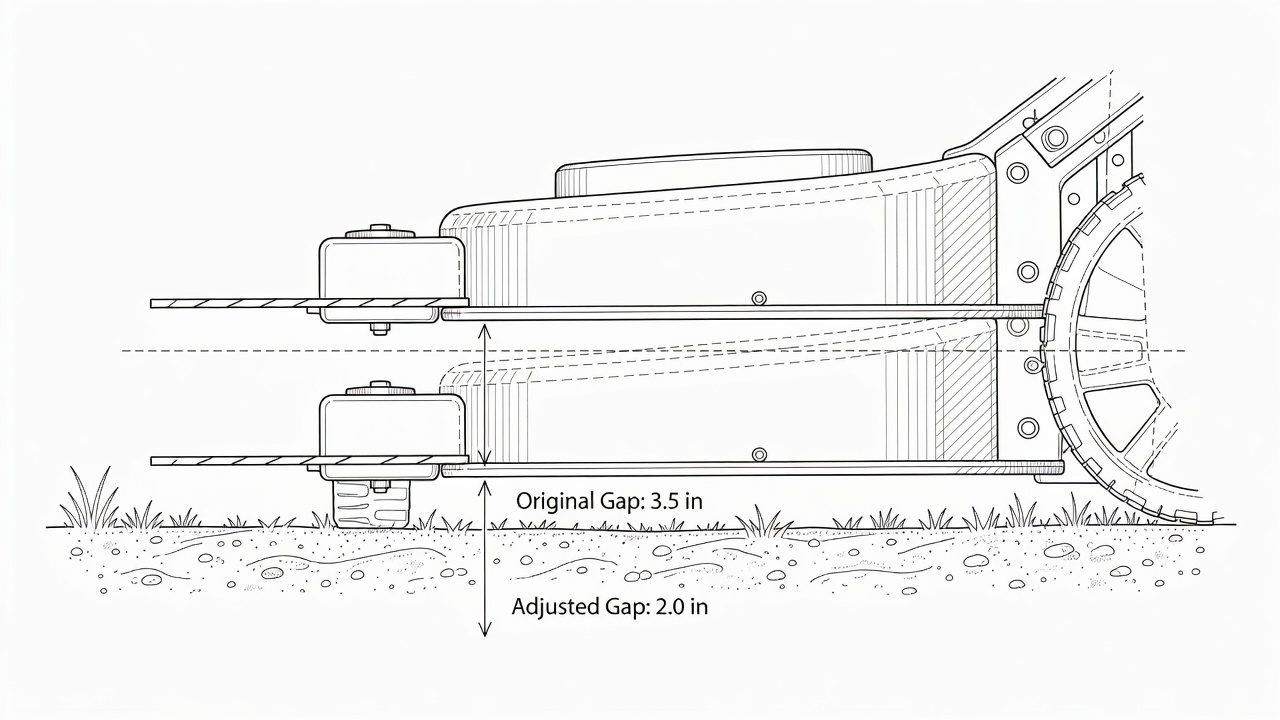
“Lowering a lawn mower” refers specifically to reducing the cutting height, moving the mower deck closer to the ground so the blade cuts grass shorter. It does not mean physically relocating a stored machine.
- Cutting height: The distance between the ground and the lowest point of the rotating blade. Measured in inches, typically ranging from 1 inch to 4.5 inches on residential mowers.
- Mower deck: The metal housing that encloses the blade(s). Its vertical position relative to the wheels determines cutting height.
- Blade clearance: The gap between the blade tip and the ground surface. Lowering the deck reduces this gap and cuts grass shorter.
- Deck height adjustment lever / wheel height bracket: The mechanism that locks the deck at a chosen height setting.
Why lower the cutting height? Common reasons include transitioning from winter to spring growth, matching species-specific turf requirements (e.g., Bermuda grass performs best at 0.5 to 1.5 inches), overseeding prep, or simply a personal preference for a tighter-cut appearance.
Safety Steps Before You Adjust Any Lawn Mower
These steps apply universally , walk-behind, riding, and zero-turn mowers alike. Skip none of them. Before finalizing equipment decisions, refer to our comprehensive z890 vs x870e motherboard comparison. For complementary hardware performance, examine our breakdown on weed eater.
- Park on flat, level ground. An uneven surface produces inaccurate height readings after adjustment.
- Turn off the engine and wait for all moving parts to stop completely.
- Disconnect the spark plug wire. Pull the rubber boot away from the spark plug tip. This is the single most critical safety step: it physically prevents the engine from firing if the blade is accidentally contacted or the mower shifts during adjustment. OSHA outdoor power equipment guidance and every major manufacturer’s operator manual list this as mandatory before any undercarriage work.
- On riding mowers, also set the parking brake and remove the ignition key.
- Wear work gloves. Deck edges and blade tips are sharp even when stationary.
- Tools needed: Most lever-style adjustments require no tools. Individual wheel-pin systems may need a flathead screwdriver or needle-nose pliers to dislodge a stubborn clip. Riding mower deck-leveling verification requires a ruler or a dedicated deck-gauge tool.
How to Lower a Walk-Behind Lawn Mower Cutting Height
Walk-behind rotary mowers, both push and self-propelled models, use one of two adjustment systems. Identify yours before proceeding.
System 1: Single Integrated Deck Height Lever
This is the most common system on modern walk-behind mowers (Toro, Honda, Craftsman, EGO, and most Husqvarna walk-behind models). A single lever, usually located on the left rear or left side of the deck, simultaneously adjusts all four wheel brackets. For broader ecosystem context, read through our operational guide on marshall stanmore iii vs harman kardon onyx studio 8. For complementary hardware performance, examine our breakdown on lawn tractor.
- Locate the deck height adjustment lever. It typically sits in a slotted bracket with numbered or notched positions (e.g., 1 through 7, or marked in inches).
- Squeeze or lift the lever release tab, the small plastic or metal tab that locks the lever in place.
- Slide the lever toward the lower number or lower-marked notch. Lower numbers = shorter cut = deck closer to ground.
- Release the tab to lock the lever into the new notch. You should feel and hear a positive click.
- Verify the lever is fully seated. Tug it gently; it should not move without deliberate release.
- Reconnect the spark plug wire and make a short test pass to confirm the new cut height.
- Honda (HRX, HRN series): Single lever on the left rear wheel bracket area. Positions labeled in inches.
- Toro (Recycler series): Single front-mounted lever that adjusts all four wheels simultaneously.
- Craftsman / Husqvarna walk-behind: Side-mounted lever, typically on the left rear. Positions are numbered 1 to 7; lower number = lower cut.
System 2: Individual Wheel Bracket Pin or Bolt System
Older walk-behind mowers and some budget models use a separate wheel height bracket and adjustment pin (or bolt) at each wheel. All four must be adjusted to the same position or the deck will cut unevenly.
- Crouch down to access the first wheel. Locate the height-adjustment bracket, a slotted metal plate mounted where the wheel axle meets the deck side skirt.
- Pull out the adjustment pin (a spring-loaded clip or cotter pin) or loosen the bolt securing the axle to the bracket.
- Reposition the axle to a lower slot on the bracket. Moving the axle down raises the deck relative to the wheel, which lowers the cut height. (Counter-intuitive but correct: the wheel sits lower, the deck stays the same, so the blade is closer to the ground.)
- Re-insert the pin through the new hole or re-tighten the bolt. Confirm the pin is fully seated through both bracket and axle.
- Repeat identically on all four wheels. Mismatched positions produce a tilted deck and an uneven cut.
- After adjusting all four, measure from the blade tip to the ground at the front and each side with a ruler to verify level. Front-to-back variance should be within ¼ inch (front typically set ⅛ inch lower than rear for a clean discharge).
- Reconnect the spark plug wire and test cut.
How to Lower a Riding or Zero-Turn Lawn Mower Cutting Height
Riding mowers and zero-turn mowers use a hydraulic or mechanical deck lift system. The adjustment mechanism differs from walk-behind mowers and requires an additional safety step: disengaging the blade drive.
Step-by-Step: Riding Mower Deck Height Adjustment
- Disengage the PTO (Power Take-Off) clutch. The PTO clutch drives the blades. On most riding mowers it is a dash-mounted switch or lever labeled “Blades” or “PTO.” Set it to OFF/disengaged before any height change. Engaging the deck lift while the PTO is active can damage the deck linkage.
- Set the parking brake and remove the ignition key.
- Locate the deck lift lever. On most riding mowers (John Deere, Cub Cadet, Husqvarna, Craftsman riding series), this is a lever on the right side of the operator seat, in a slotted height-of-cut panel. It may be labeled with numbers (1 to 7) or with inch markings.
- Lift the lever slightly to disengage it from its current notch, then move it to a lower-numbered position. On John Deere models the lever moves toward the operator to lower; on Husqvarna models it typically moves forward. Consult your operator manual for the direction specific to your unit.
- Lock the lever into the new notch. Confirm it is fully seated.
- On models equipped with a separate height-of-cut dial or adjustment knob (common on zero-turn mowers such as Husqvarna Z200-Z400 series and Toro Titan), turn the dial to the lower inch setting. The dial is typically located near the deck lift lever or on the deck itself.
- Verify deck levelness after adjustment. With the engine off and spark plug wire disconnected, use a ruler to measure blade tip-to-ground height at the front-center, left side, and right side. Side-to-side variance must be less than ¼ inch. Front should be ¼ inch lower than rear. If uneven, use the deck leveling adjustment bolts (located on the deck hanger brackets) to correct, consult your operator manual for the specific bolt location on your model.
- Reconnect the spark plug wire, start the engine, engage the PTO at low throttle, and make a short test pass.
Brand-Specific Quick Reference
- John Deere (D100, E100, S240 series): Right-side deck lift lever; numbered 1 to 7. Deck leveling via rear draft arm adjustment nuts.
- Husqvarna (YTH series): Right-side lift lever; inch markings. Front-to-rear deck pitch adjusted via front lift link.
- Cub Cadet (XT1, XT2 series): Right-side lift lever; numbered. Side-to-side leveling via left and right deck hanger bolts.
- Zero-turn (general): Height-of-cut dial on deck; some models also have a manual pin-style height adjuster at each wheel spindle housing.
Recommended Grass Cutting Heights: How Low Should You Go?
The one-third rule is the primary constraint on how aggressively you can lower your cut in a single session: never remove more than one-third of the total grass blade length at once. Removing more triggers drought stress, root dieback, increased weed germination, and disease susceptibility in the exposed crown tissue, findings documented across multiple university turfgrass extension programs including Purdue University Turfgrass Science and Penn State Extension.
Example: If your lawn is currently 4.5 inches tall and you want to reach a 2-inch cut height, do not do it in one pass. Cut to 3 inches first, let the grass recover 2 to 3 days, then cut to 2 inches.
| Grass Species | Type | Ideal Cutting Height Range | Lowest Safe Height |
|---|---|---|---|
| Bermuda grass | Warm-season | 0.5 to 1.5 in | 0.5 in |
| Zoysia grass | Warm-season | 0.5 to 2.0 in | 0.5 in |
| St. Augustine grass | Warm-season | 2.5 to 4.0 in | 2.0 in |
| Kentucky bluegrass | Cool-season | 2.5 to 3.5 in | 2.0 in |
| Tall fescue | Cool-season | 3.0 to 4.0 in | 2.5 in |
| Perennial ryegrass | Cool-season | 2.0 to 3.5 in | 1.5 in |
Seasonal guidance: Raise cool-season grasses (Kentucky bluegrass, tall fescue, perennial ryegrass) to the upper end of their range during summer heat, higher leaf blade area shades the crown and soil, reducing heat and drought stress. This is consistently recommended across university extension publications. Lower the cutting height only in spring and early fall when temperatures are moderate and growth is vigorous.
Troubleshooting: Common Problems When Lowering a Mower Deck
Deck Height Lever Is Stuck and Won’t Move
Cause: Rust, compacted debris, or a bent bracket locking the lever in position. Readers comparing setup options can review our technical analysis on bissell crosswave hydrosteam vs shark stainforce.
Fix: Apply a penetrating lubricant (such as WD-40) to the lever pivot and bracket slots. Wait 10 minutes, then work the lever back and forth with firm, controlled pressure. Do not force it with a pry bar, you risk bending the bracket or snapping the lever. If the lever remains immovable after lubricating, the bracket or lever mechanism may be corroded beyond field repair; take the mower to a service center.
Mower Cuts Unevenly After Lowering the Deck
Cause (walk-behind): Individual wheel bracket pins were not set to identical positions on all four corners.
Fix: Disconnect the spark plug wire, tip the mower carefully (air filter side up on gas mowers), and measure each wheel bracket slot position. Reset all four to the same hole. Verify with a ruler at each side after reassembly.
Cause (riding mower): Deck hanger bolts are not evenly adjusted, producing a side-to-side or front-to-back tilt.
Fix: Use the deck leveling bolts in the hanger brackets (left, right, and front) to equalize blade tip-to-ground measurements. Target: side-to-side within ¼ inch; front ¼ inch lower than rear.
Mower Is Scalping the Lawn
Cause: Deck set too low for terrain undulations, or cutting height is below the grass species’ safe minimum.
Scalping, where the deck contacts high spots and shears turf to soil level, causes immediate crown damage, browning, increased weed seed germination opportunity, and disease entry points. University turfgrass research (NC State Extension) identifies scalping as one of the primary causes of preventable lawn deterioration.
Fix: Raise the cutting height one notch. Address terrain irregularities (low/high spots) through topdressing or grading before attempting lower cut heights again.
Blade Sounds Like It Is Hitting the Ground
Cause: Deck set too low, blade is bent, or blade spindle bearings are worn, allowing the blade to wobble downward under centrifugal force.
Fix: Stop immediately, blade-ground contact destroys the blade edge, throws debris at high velocity, and can bend the spindle shaft. Raise the deck. Inspect the blade for bends or nicks. A blade that hits the ground even at a nominal setting requires professional inspection of the spindle and blade before further use.
When to Call a Professional
Take the mower to a service center when: the adjustment lever is physically broken or bent; the deck hanger brackets are cracked or warped; the blade spindle wobbles; or deck leveling bolts are seized. These conditions cannot be safely corrected with field adjustments alone.
Buyer FAQs: How To Lower A Lawn Mower Solved
Do I need tools to lower a lawn mower cutting height?
For most modern walk-behind mowers with a single integrated lever, no tools are required, the lever releases and relocks by hand. Individual wheel-pin systems may need needle-nose pliers to remove a stubborn clip. Riding mower deck leveling verification requires a ruler or a dedicated deck-gauge tool; leveling bolt adjustments require a wrench (size varies by model, check the operator manual).
How much lower can I go in one mowing session?
The one-third rule limits how much height you remove in a single pass: never cut more than one-third of the current grass blade length at once. If grass is 4.5 inches tall, the lowest you can cut in one session is 3 inches. Cutting deeper removes too much leaf blade, stresses roots, and opens the lawn to weeds and disease. This rule is consistently supported by university turfgrass extension research at Purdue, Penn State, and NC State.
Why is my mower deck making a grinding noise after I lowered it?
A grinding noise after lowering indicates the blade is contacting the ground, deck housing, or a foreign object caught inside the deck. Stop the mower immediately, disconnect the spark plug wire, and inspect the underside of the deck for debris, blade contact marks on the housing, or blade deformation. Do not resume mowing until the cause is identified and corrected.
Should I lower my mower height in summer or winter?
For cool-season grasses (Kentucky bluegrass, tall fescue, perennial ryegrass), raise the cutting height during summer, not lower it. Taller leaf blades shade the crown and reduce heat stress. Lower cool-season grass in early spring and early fall. For warm-season grasses (Bermuda, Zoysia), lower cutting height is appropriate during the active growing season (late spring through summer) and should be raised or mowing stopped as the grass goes dormant in fall.
Related Maintenance and Operating Guides
To keep your equipment running at peak operating efficiency, explore our related technical walkthroughs and maintenance tutorials:
- Consult our detailed breakdown on our comprehensive riding lawn mower guide.
Technical Standards and Compliance
Mechanical safety standards, operational tolerances, and protective gear guidelines align with benchmark specifications established by the American National Standards Institute (ANSI).