

Quick Answer: How to Load Trimmer Line
Turn off the trimmer and disconnect power (remove the battery or unplug the cord; on a gas trimmer, ground the spark plug wire). Unscrew or press-tab the spool cap, lift out the old spool, cut 20–25 ft of replacement line at the gauge stamped on the head, anchor one end in the center slot, wind in the direction of the molded arrow, thread each line end through its eyelet, and snap the cap back until it clicks. For a pre-wound replacement spool, skip winding — drop it in, thread the eyelets, and reassemble.

Pros
- Six-pack bundle listed in the product title
- Square profile line named in the product title
- Commercial 5 lb size listed for heavier use
Cons
- Trimmer compatibility is not verified in supplied data

Pros
- Six-pack bundle listed in the product title
- Star profile line named in the product title
- Commercial 5 lb size listed for heavier use
Cons
- Line length and trimmer fit are not stated in supplied data

Pros
- Title lists 1280 feet of line length
- Square profile named in the product title
- Lists a 5 lb line rating
- Title describes it as commercial-style line

Pros
- Title lists .095-inch square nylon line
- Lists 1280 feet of line length
- Manufacturer states fit with most string trimmers
- Lists a 5 lb line rating
What You Need Before You Start
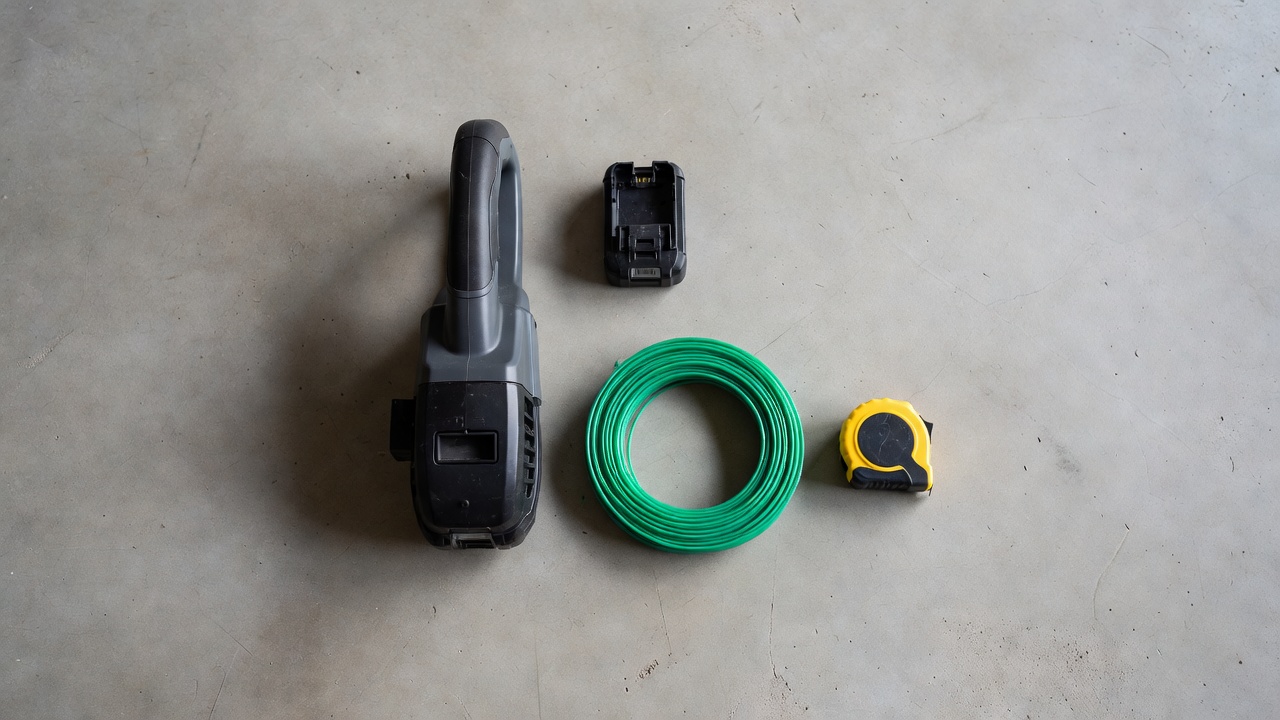
Resolving three questions before touching the trimmer prevents the most common mistakes: buying the wrong line, winding in the wrong direction, and skipping a safety step that matches your power source.
Identify Your Head Type
- Bump-feed (manual-feed) head: The most common residential design. Tapping the head on the ground releases a measured length of line. Requires winding bulk line onto an internal spool.
- Fixed-line head: No spool. Short pre-cut lengths of line clip or insert directly into the head. Common on commercial and heavy-duty trimmers.
- Speed-feed / rapid-load head: Line feeds through a central channel while you rotate the outer housing by hand. No disassembly needed to reload.
- Auto-feed head: Sensors or a mechanical clutch advance line automatically. Reloading procedure is the same as bump-feed but the advance mechanism is internal.
If you are unsure which head you have, look for a bump button on the underside. Its presence confirms a bump-feed or auto-feed design. Before finalizing equipment decisions, refer to our comprehensive jbl partybox club 120 vs sony srs xv500 comparison.
Choose the Correct Line Gauge
The correct diameter is stamped on the trimmer head or listed in the owner’s manual. Using line that is too thick jams the spool; line that is too thin breaks under normal load. See the selection table in the Line Gauge and Type section below.
Safety Steps by Power Source
- Battery trimmer: Press the battery release and remove the pack before any work on the head.
- Corded electric trimmer: Unplug the power cord from the outlet — not just the trigger lock.
- Gas trimmer: Turn the on/off switch to OFF and disconnect the spark plug wire from the spark plug. This prevents accidental engine firing if the blade or head rotates during reloading.
How to Load Line on a Bump-Feed Spool (Single and Dual Exit)
This procedure covers the most common residential head type. Read every sub-step before starting — winding direction and spool-cap thread direction vary by brand. Before finalizing equipment decisions, refer to our comprehensive jbl partybox club 120 vs sony srs xv500 comparison.
- Secure the trimmer. Lay it on a flat surface or secure it in a vise. Keep the cutting head accessible.
- Remove the spool cap. Most caps press in and twist counter-clockwise to release. Some brands reverse this — check your manual. On heads with an arbor bolt (a center fastening bolt), the bolt often threads opposite to the head’s rotation direction to prevent loosening during use. Loosen it with a wrench in the direction indicated on the head label.
- Remove the spool and spring. Lift out the spool. Note the spring orientation — a spring installed backward is a primary cause of line feeding out all at once. Photograph it before removing if you are unsure.
- Clean the head. Clear grass, dirt, and old line fragments from the head cavity and the eyelet openings.
- Measure and cut the line. Cut 20–25 ft of line at the gauge stamped on the head. For a dual-exit head, cut two equal lengths (approximately 10–12 ft each) or fold a single 20–25 ft length in half to create two working strands.
- Anchor the line in the center slot. Each spool has a small notch or hook at its center divider. Insert the end of the line (or the folded midpoint for a dual-line spool) firmly into this anchor slot. Pull lightly to confirm it is seated and will not slip.
- Wind in the arrow direction. An arrow molded into the spool face indicates the correct winding direction — this is non-negotiable. Winding in reverse causes the line to unspool during operation. Wind in tight, even, non-overlapping rows. Overlapping layers cause the line to jam and fuse under heat.
- For a dual-exit head: Wind both strands simultaneously in the same direction, each occupying its own half of the divided spool. Keep equal tension on both strands as you wind.
- Seat the line in the retaining notches. Most spools have small notches on the outer rim. Hook each line end into a notch temporarily — this prevents unwinding while you reassemble.
- Thread the eyelets. Guide each line end from inside the head through its corresponding eyelet (the small metal or plastic guide hole on the outside of the head). On a single-exit head, one line threads through one eyelet. On a dual-exit head, thread one line through each of the two opposing eyelets.
- Reinstall the spring and spool cap. Drop the spring back in the correct orientation, seat the spool, and press-twist the cap clockwise until it clicks or locks. On arbor-bolt heads, torque the bolt snugly by hand and then a quarter-turn with a wrench.
- Pull each line end to release from retaining notches. Pull each line strand outward so it releases from the rim notch and hangs freely at 5–6 inches.
- Test bump advance. On pavement or a hard surface, briefly tap the bump button. Each tap should advance approximately ¼ inch of line. If no line advances, see the Troubleshooting section.
How to Load Line on a Fixed-Line or Speed-Feed Head
Fixed-Line Head
Fixed-line heads accept short pre-cut segments — typically 6–9 inches — inserted directly into the head without a spool.
- Cut line segments to the length specified on the head (usually marked in inches).
- Push each segment into the inlet hole on the head until it emerges from the opposite exit hole and is centered (equal length on both sides).
- Repeat for all inlet pairs. Most fixed-line heads hold 2–6 segments depending on the design.
- No cap removal or reassembly is required.
Fixed-line heads do not use bulk spools and cannot be converted to bump-feed without purchasing a different head assembly. They accept the same line gauge range as bump-feed heads; verify against the head label. For broader ecosystem context, read through our operational guide on z890 vs x870e motherboard.
Speed-Feed / Rapid-Load Head
Speed-feed heads (common on Oregon and some OEM trimmer brands) thread line without spool removal.
- Cut 20–25 ft of line at the correct gauge. Fold it in half to locate the midpoint.
- Insert the midpoint of the folded line into the center hole on the top of the head until both strands exit the bottom eyelets.
- Hold both line ends taut and rotate the outer housing of the head by hand in the direction indicated by the arrow on the housing. The head winds the line onto the internal spool automatically as you turn it.
- Continue rotating until approximately 5–6 inches of line remain outside each eyelet.
- No cap removal or spool reinstallation is needed.
How to Install a Pre-Wound Replacement Spool
Pre-wound spools eliminate the winding step entirely. They cost more per foot of line than bulk line but take under two minutes to install. For troubleshooting and reliability insights, consult our in-depth marshall stanmore iii vs harman kardon onyx studio 8 report.
- Identify the correct replacement spool number. Check the trimmer model number on the data plate (usually on the motor housing) and cross-reference it with the spool number in the owner’s manual or the manufacturer’s parts lookup tool. An incompatible spool will not seat correctly and the cap will not lock.
- Remove the spool cap and old spool using the same procedure as Step 2–3 in the bump-feed section above.
- Note the spring. Pre-wound replacement spools typically do not include a new spring. Transfer the existing spring from the old spool to the new one, or confirm the new spool ships with its own spring.
- Drop in the pre-wound spool. Lower it into the head cavity. Do not pull line off the spool as you do this — keep both line ends secured in the rim notches.
- Thread the eyelets. Guide each line end through its eyelet, then pull to release from the rim notches.
- Reinstall and lock the spool cap.
- Test bump advance on pavement.
Cost comparison: Pre-wound spools typically cost $3–$8 each and carry 20–30 ft of line. Bulk line spools (100–400 ft) cost $8–$20 and yield significantly lower cost per foot. For infrequent residential use, pre-wound spools are convenient. For frequent use, bulk line is more economical.
Trimmer Line Gauge and Type Selection Table
The correct line diameter depends on trimmer engine or motor class and the vegetation being cut. The line cross-section shape affects cutting aggression but must still fall within the head’s rated diameter range. Readers comparing setup options can review our technical analysis on dyson v8 cyclone vs bissell featherweight stick.
| Trimmer Class | Typical Use | Recommended Line Diameter | Common Cross-Section |
|---|---|---|---|
| Light residential | Thin grass, lawn edging | .065 in – .080 in | Round |
| Medium residential | Mixed grass, light weeds | .080 in – .095 in | Round, twisted |
| Heavy-duty / commercial | Thick weeds, brush, overgrowth | .095 in – .130 in | Twisted, star-shaped, serrated |
Line cross-section shapes:
- Round: Quietest, most widely available, lowest cutting aggression. Suitable for maintained lawns.
- Twisted (spiral): Reduced wind resistance during rotation, slightly more aggressive on dense grass. The twist creates a slicing rather than purely impact-based cut.
- Star-shaped or multi-sided: More cutting edges per rotation, higher aggression on woody stems and brush. Generates more noise. Use only in heads rated for this diameter.
Brand compatibility: Monofilament trimmer line is not brand-locked by chemistry — any brand of line at the correct diameter will function. Diameter is the only specification that must match the head’s rating. For complementary field maintenance guidelines, examine our breakdown of bissell crosswave hydrosteam vs shark stainforce.
Troubleshooting: Line Breaks Quickly, Won’t Advance, or Spool Won’t Seat
Line breaks at the eyelet immediately during use
Cause: A burr or crack on the eyelet is shearing the line. Run a finger around the inside of the eyelet. If you feel a rough edge, smooth it with 220-grit emery cloth or replace the head. A secondary cause is using line thinner than the recommended minimum diameter for the vegetation being cut.
Line won’t advance when the head is bumped
Check for these conditions in order:
- Overfilled spool: Too much line creates friction that prevents the spool from sliding. Remove the spool and trim the load to 20–25 ft maximum.
- Line not threaded through the eyelet: If the line end is tucked in the rim notch and was never threaded through the eyelet, there is no strand to advance. Re-thread.
- Line welded / fused on the spool: Heat from operation can fuse overlapping or loosely wound line into a solid mass. Caused by overlapping layers during winding or winding under insufficient tension. Discard the spool load and rewind in single, tight, non-overlapping rows.
- Spring missing or backward: Without the spring, the spool cannot retract after a bump and no line feeds. Remove the cap, confirm the spring is present and seated cup-side-down (or per the orientation you photographed during disassembly).
All the line feeds out at once during the first use
Cause: Spring is installed backward or is missing. The spring must resist spool movement during operation and allow brief advance only on bump contact. Reinstall or replace the spring in the correct orientation.
Spool cap won’t lock or keeps falling off
- Cross-threaded cap: Remove completely, realign the cap tabs with the head slots, and press straight in before twisting.
- Wrong replacement spool: An incorrect spool diameter prevents the cap from seating at the correct depth. Confirm the spool number against the trimmer model.
- Cracked cap: A cap that has been dropped or over-torqued may no longer clip securely. Replace the cap — it is an inexpensive individual part available from OEM parts suppliers.
Line breaks repeatedly during normal mowing
Frequent breakage during use (not at startup) points to one of three conditions: the line gauge is too light for the vegetation, the user is pressing the trimmer head against hard surfaces (fence posts, concrete curbs) rather than keeping the line tip in the cutting zone, or the line has degraded from UV exposure after extended storage. Store unused bulk line sealed in a bag away from direct sunlight. Replace line that feels brittle or discolored.
Frequently Asked Questions About How To Load Trimmer Line
How do I know which direction to wind trimmer line on the spool?
An arrow is molded directly into the face or rim of the spool. Wind the line in that direction without exception. The arrow direction is set by the manufacturer to oppose the head’s rotation during operation — winding in reverse causes the line to unwind the moment the trimmer starts. If the arrow is worn off, check the owner’s manual for your model number; winding direction is listed in the spool replacement section.
How much trimmer line should I put on the spool?
20–25 ft of line is the practical working range for most residential bump-feed spools. Exceeding this creates overlapping layers that fuse under heat and jam the advance mechanism. Loading too little (under 10 ft) means the line runs out mid-task. Some commercial heads accept 30+ ft — confirm capacity against the spool’s own markings or the model’s specification sheet.
Can I use a heavier gauge line than what is stamped on the head?
No. Line thicker than the rated diameter will not seat inside the spool cavity, will not thread through the eyelets, and can overload the trimmer motor or clutch. If the current gauge is insufficient for the vegetation you are cutting, the correct solution is to install a larger head rated for heavier line — not to force a thicker gauge into an undersized head.
What is the difference between a pre-wound replacement spool and bulk line?
A pre-wound replacement spool is a factory-loaded spool purchased as a complete unit and dropped directly into the head — no winding required. Bulk line is purchased on a large spool (100–400 ft) and wound manually onto the trimmer’s own spool. Pre-wound spools cost more per foot but install in under two minutes. Bulk line requires 5–10 minutes to load but reduces cost per reload significantly, making it the better choice for users who trim frequently or maintain large areas.
For more detailed testing breakdowns and top recommendations, check our in-depth guide to residential zero-turn lawn mower guide.
For more hands-on benchmarks and buying recommendations, consult our guides on heavy-duty chainsaw buyer guide, as well as automated robotic lawn mower guide.
Mechanical safety standards, operational tolerances, and protective gear guidelines align with benchmark specifications established by the American National Standards Institute (ANSI).









