

Quick Answer: How to Adjust a Lawn Mower Carburetor
Turn both mixture screws gently clockwise until they seat (do not overtighten), then back each out 1.5 turns as a brand-agnostic starting baseline. Start the engine, let it warm for 5–10 minutes with the blade disengaged, then adjust the low-speed screw first, the high-speed screw under load second, and the idle speed screw last — stopping at each stage when the engine runs smoothest. Always work in a well-ventilated area; keep hands and clothing clear of the blade and hot engine components.

Pros
- Large-size design named in product title
- Sharpening and balancing functions listed
- Listed as a new upgraded version

Pros
- Adjustable 15-to-45-degree range in title
- Sharpening and balancing functions listed

Pros
- Sharpener and balancer functions in title
- 15-to-45-degree adjustable setting listed
- Built for lawn mower blade maintenance
Pros
- Includes replacement gaskets and a 98079-55846 spark plug
- Matches Honda HRR216 and HRS216 lawn mower models
- Designed around the 16100-Z8B-901 carburetor specification
Cons
- Restricted to select Honda GCV160 mower applications
- Installation requires basic mechanical tools and skills
Signs Your Carburetor Needs Adjustment (Not Cleaning or Replacement)
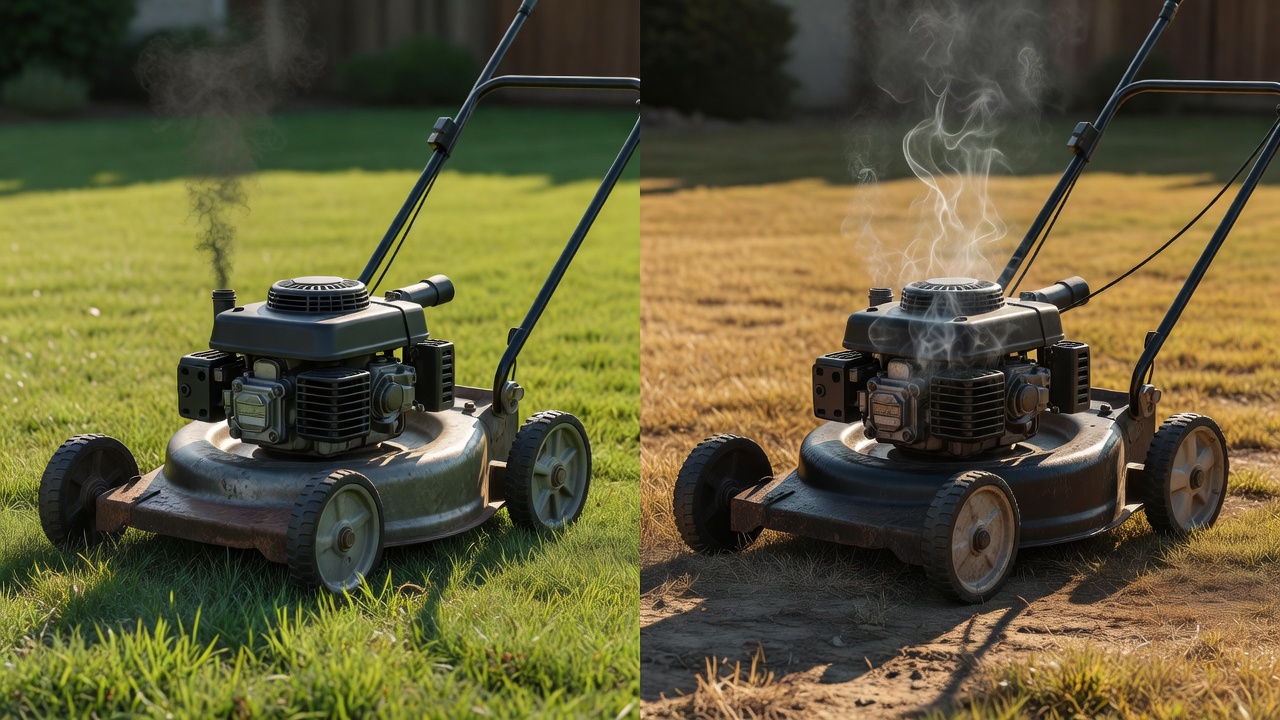
Before touching a screw, confirm adjustment is the correct fix. A gummed or clogged carburetor requires cleaning; a cracked float or worn needle-and-seat requires replacement. Adjustment addresses fuel-to-air ratio and idle speed that have drifted from spec — usually after storage, altitude change, or a previous incorrect tune.
Match your symptom to the responsible screw: To evaluate matched hardware tolerances, consult our detailed overview of jbl partybox club 120 vs sony srs xv500.
- Engine surges or hunts at full throttle: high-speed (main) mixture screw — lean condition, screw turned in too far.
- Rough or hunting idle: low-speed (pilot) mixture screw — mixture imbalanced at low RPM.
- Hard starting or stalling at idle: low-speed screw and choke — engine starving at light load.
- Black smoke or strong fuel smell: rich mixture — one or both mixture screws backed out too far.
- Weak power under load, popping on deceleration, overheating: lean mixture — screws turned in too far, restricting fuel.
- Engine runs fine under load but stalls when throttle is released: idle speed screw set too low.
Rule out these before adjusting: A clogged or collapsed air filter mimics a rich condition and can make a correctly set carburetor run poorly. Inspect and clean or replace the air filter first. Stale fuel — especially ethanol-blended E10 or E15 left sitting more than 30 days — causes gumming that no amount of screw adjustment will fix; drain and refill with fresh fuel before proceeding. To evaluate matched hardware tolerances, consult our detailed overview of jbl partybox club 120 vs sony srs xv500.
Tools and Safety Checklist Before You Start
Tools Needed
- Flat-head screwdriver (small, precision-tip — standard screwdrivers are too wide for most mixture screws)
- Clean rag and compressed air (to clear debris around screws before turning)
- Tachometer or small-engine RPM meter (optional but recommended — eliminates guesswork on idle speed)
- Manufacturer service manual or model-specific spec sheet (for exact baseline turns and idle RPM target)
Safety Steps — Complete All Before Starting the Engine
- Work outdoors or in a fully ventilated space. Open fuel systems and a running engine produce combustible vapors.
- Disengage the blade. On walk-behind mowers, release the blade-engagement bail. On riding mowers, set the PTO switch to OFF. Confirm the blade is fully stopped before leaning over the engine.
- Let the engine cool before touching any screws for the first time. Locate and photograph screw positions with the engine cold, then restart for the warm adjustment phase.
- Do not disconnect the spark plug wire during adjustment — the engine must run. Keep it connected but be aware of the hot plug and wire routing near your hands.
- Keep a fire extinguisher rated for Class B (flammable liquid) fires within reach.
- Do not smoke or work near open flames or pilot lights.
How to Locate the Carburetor and Identify the Adjustment Screws
Finding the Carburetor
On a walk-behind push mower, the carburetor sits on the side of the engine block, sandwiched between the air filter housing (which you remove first) and the intake manifold. It is a small cast-metal body — roughly fist-sized — with a fuel line entering from the bottom or side and a throttle linkage rod attached to its top or side. When planning workspace deployment, consider the engineering criteria outlined in our z890 vs x870e motherboard guide.
On a riding mower, the carburetor location depends on engine orientation (vertical vs. horizontal shaft), but the same principle applies: follow the air filter housing inward to the carburetor body. Riding mower carburetors are typically more accessible because the engine compartment is larger, though the adjustment sequence is identical.
The Three Adjustment Screws and Their Locations
| Screw Name | Also Called | What It Controls | Typical Location on Body |
|---|---|---|---|
| Idle Speed Screw | Throttle Stop Screw | Minimum engine RPM at idle; physically stops the throttle plate from closing fully | Side of carburetor, contacts the throttle lever arm; usually has a spring |
| Low-Speed Mixture Screw | Pilot Jet Screw, Air-Fuel Screw | Fuel-to-air ratio at idle and low throttle | Bottom or side of carburetor body, often recessed; may have a limiter cap |
| High-Speed Mixture Screw | Main Jet Needle, Power Screw | Fuel-to-air ratio at full throttle and under load | Top or side of carburetor, separate from low-speed screw; not present on all models |
Brand-Specific Screw Locations
- Briggs & Stratton (most series): One or two mixture screws on the lower carburetor body. Many models have only a low-speed screw; the main jet is fixed. Idle speed screw contacts the choke-throttle lever on the side.
- Tecumseh: Low-speed and high-speed screws are both typically present and externally accessible, located on the side and bottom of the bowl. Tecumseh carburetors are among the most serviceable by DIYers.
- Kohler (Command and Courage series): Single low-speed mixture screw recessed into the carb body, sometimes behind a limiter cap. Idle speed screw on the throttle body side.
- Honda GCV series (GCV160, GCV190): The GCV carburetor uses a fixed main jet with no external high-speed adjustment screw. There is typically one idle speed screw and, on some variants, a single mixture screw with a limiter cap. Full carburetor mixture adjustment on GCV engines is not possible without dealer tools or limiter cap removal — Honda service documentation confirms these carburetors are largely set at the factory.
Not all carburetors have all three screws. Confirm which screws your specific model has before beginning. Attempting to find a screw that does not exist wastes time and risks damaging adjacent components.
Step-by-Step: How to Adjust a Lawn Mower Carburetor
Step 1 — Inspect and Clean the Air Filter
Remove the air filter housing cover. Tap a paper filter gently to dislodge debris, or replace it if it is visibly clogged or oil-soaked. A foam filter can be washed with warm soapy water, dried fully, and lightly re-oiled. Reinstall the housing before starting the engine. Skipping this step means adjusting to compensate for a restriction that should be removed. When planning workspace deployment, consider the engineering criteria outlined in our z890 vs x870e motherboard guide.
Step 2 — Reset Both Mixture Screws to Factory Baseline
With the engine cold and off, use a small flat-head screwdriver to turn each mixture screw gently clockwise until it just seats. Apply zero force beyond the point of resistance — the needle tip and seat are soft brass and damage easily. Then back each screw out (counterclockwise) by the following brand-specific baseline amounts:
- Briggs & Stratton: 1.5 turns out (verify against your specific series service manual, as some models specify 1 to 1.5 turns)
- Tecumseh: 1.5 turns out for the low-speed screw; 2 to 2.5 turns out for the high-speed screw (model-dependent — confirm in the engine service manual for your series)
- Kohler: 1.5 turns out (Command series); consult the Kohler service manual for Courage and KT series as specs vary
- Honda GCV: Follow Honda dealer specification; external mixture adjustment is limited on most GCV carburetors
- Unknown or unlabeled engine: Use 1.5 turns out as a universal starting point
These baseline values put the mixture in a safe, approximately correct zone so the engine will start and run well enough to fine-tune when warm. For additional operational safety benchmarks, see our published testing notes on marshall stanmore iii vs harman kardon onyx studio 8.
Step 3 — Start the Engine and Warm It Fully
Start the engine using the normal procedure (choke if required, then open choke as the engine warms). Let it run at a fast idle for 5–10 minutes until the engine reaches operating temperature. Do not adjust mixture screws on a cold engine — the mixture requirement changes significantly as temperature rises, and a cold adjustment will be wrong at operating temp.
Keep the blade disengaged throughout. Set the throttle to the manufacturer-recommended idle or mid position for initial warm-up. To compare alternative configurations, check our hands-on review of dyson v8 cyclone vs bissell featherweight stick.
Step 4 — Adjust the Low-Speed (Pilot) Mixture Screw
With the engine warm and throttle at idle:
- Turn the low-speed screw inward (clockwise) in quarter-turn increments, pausing 5–10 seconds after each turn to let the engine respond.
- Continue until the idle begins to drop or roughen — this is the lean limit.
- Turn the screw back out (counterclockwise) in quarter-turn increments until the idle smooths and rises slightly — this is the correct zone.
- If the idle continues to rise as you turn out, stop at the point where any further outward turn causes no further improvement or causes roughness — that is the rich limit. Back in slightly to the smoothest point.
Auditory confirmation: The engine idle sound becomes steady and even, without loping, hunting, or four-stroking (a rhythmic, muffled stuttering typical of a rich mixture). Users looking for related component recommendations can explore our bissell crosswave hydrosteam vs shark stainforce breakdown.
Step 5 — Adjust the High-Speed (Main) Mixture Screw Under Load
If your carburetor has a high-speed screw, adjust it with the throttle at full or near-full open. Simulate load by engaging the blade briefly on a patch of grass, or observe behavior during a test run.
- Turn the high-speed screw inward (clockwise) in quarter-turn increments while listening for surging or hesitation — a lean condition.
- Turn outward (counterclockwise) if the engine bogs, blows black smoke, or smells heavily of fuel under load — a rich condition.
- Find the point where the engine pulls strongest with the cleanest sound and no surging.
Caution: Running an engine lean at high speed causes overheating and accelerated wear. If in doubt, set the high-speed screw very slightly rich (one-eighth turn further out than the smoothest point) rather than lean.
Step 6 — Set the Idle Speed Screw Last
After both mixture screws are set, return the throttle to idle and adjust the idle speed screw (throttle stop screw):
- Turn clockwise to increase idle RPM (opens throttle plate slightly).
- Turn counterclockwise to decrease idle RPM.
- Target range: 1,750–1,850 RPM for most Briggs & Stratton single-cylinder walk-behind mower engines. Tecumseh and Kohler specs vary by model — consult the service manual. A tachometer gives a precise reading; without one, set idle to the lowest steady RPM where the engine will not stall when the throttle is quickly released.
Confirm the blade does not spin at idle (blade engagement RPM threshold should be well above idle speed). On riding mowers, confirm the same for the PTO.
Riding Mower Note
The adjustment sequence above applies identically to riding mower carburetors. The primary difference is access: riding mower engine compartments typically allow more working room, but the carburetor may be mounted horizontally rather than vertically, shifting screw positions 90 degrees. Locate screws before starting the engine to avoid searching with the engine running.
Emissions-Compliant Engines: The Limiter Cap Problem
Engines manufactured after approximately 2012 and sold in the United States must comply with EPA Phase 3 small spark-ignition engine emissions regulations (and CARB standards in California, which are stricter). One common compliance method is a tamper-resistant plastic limiter cap pressed onto the mixture screw(s), physically restricting how far the screw can be turned in either direction.
A limiter cap looks like a small plastic disk or collar seated over the mixture screw head. If the screw turns only a small amount — typically less than half a turn — before hitting resistance in both directions, a limiter cap is present.
What to Do
- If the engine runs acceptably within the limiter cap range: Adjust within that range. The cap is calibrated to allow adequate tuning for most operating conditions.
- If the engine will not run correctly within the restricted range: The underlying problem is likely not mixture adjustment. Cleaning the carburetor (jets, passages, and bowl) is the next step before considering cap removal.
- Removing limiter caps: Legal status varies by jurisdiction. Removing a limiter cap on a certified engine may violate federal anti-tampering provisions of the Clean Air Act in commercial contexts. For personal non-commercial use, many owners remove caps on older out-of-warranty engines; use a small pick or needle-nose pliers to pry the cap off carefully without damaging the screw. After removal, begin at the 1.5 turns out baseline and adjust normally.
- When to see a dealer or replace the carburetor: If the engine will not respond to adjustment after cap removal and cleaning, the carburetor needle, seat, or jets are likely worn or damaged beyond adjustment. Replacement carburetors for common engines (Briggs & Stratton, Tecumseh) cost $15–$50 and are a practical solution on older machines.
Troubleshooting After Adjustment: Still Running Rough?
If the engine still runs poorly after completing the full adjustment sequence, the cause is not mixture or idle speed. Work through these next-step diagnoses:
- Adjustment screws have no effect: The main jet or pilot jet passage is clogged and the screw adjustment cannot compensate. Remove the carburetor, disassemble the bowl, and clean all passages with carburetor cleaner and compressed air. A screw that produces no change when turned in either direction confirms a blocked passage — not a misadjusted screw.
- Still surging after high-speed adjustment: Check for a vacuum leak at the intake manifold gasket. A cracked or dried gasket allows unmetered air into the intake, causing a persistently lean, surging condition that no carburetor adjustment will cure. Spray a small amount of carburetor cleaner around the intake manifold base while the engine idles; if RPM changes, the gasket is leaking.
- Engine floods repeatedly: A worn or stuck float needle is allowing the bowl to overfill. This requires float needle replacement, not adjustment.
- Hard starting persists after low-speed adjustment: Inspect the primer bulb (on engines with one) for cracks or hardening. A cracked primer bulb cannot build adequate fuel pressure to the starting circuit regardless of mixture screw position.
- Old or ethanol-blended fuel: Ethanol in E10 and E15 blends absorbs water and accelerates varnish and gum deposits in carburetor passages. Multiple small engine manufacturers — including Briggs & Stratton and Honda — explicitly advise against using fuel with greater than 10% ethanol and recommend fuel stabilizer for any storage period over 30 days. If stale ethanol-blended fuel sat in the carburetor, a full clean is required before adjustment will hold.
Buyer FAQs: How To Adjust A Lawn Mower Carburetor Solved
How do I know if my lawn mower carburetor needs adjusting or just cleaning?
If the adjustment screws produce a noticeable change in engine behavior when turned — even if the engine still runs poorly — adjustment is a viable fix. If turning the screws in either direction produces no change in RPM or smoothness, a jet passage is clogged and cleaning is required first. Cleaning before adjusting is always the safer sequence when in doubt.
Why can’t I turn the mixture screw on my lawn mower carburetor?
A screw that moves less than half a turn in either direction before hitting a hard stop has a limiter cap installed — a plastic collar required on EPA/CARB-compliant engines built after approximately 2012. A screw that will not turn at all is either seized from corrosion or damaged. Apply penetrating oil, wait 10 minutes, and try again with a correctly sized screwdriver. Forcing a stuck screw strips the soft brass head; if it will not move freely, remove the carburetor and soak it before attempting further adjustment.
Do I need a tachometer to adjust a lawn mower carburetor?
A tachometer is not strictly required but eliminates guesswork on idle speed. Mixture screw adjustment relies on auditory and behavioral cues — smoothness, steadiness, response to throttle — that do not require a meter. Idle speed adjustment benefits most from a tachometer because setting idle by ear can leave the engine idling 200–400 RPM higher than spec, which increases wear and, on some mowers, causes the blade to spin at idle. Inexpensive contact or optical tachometers designed for small engines cost under $20.
Can old gas cause carburetor problems that adjustment won’t fix?
Yes. Fuel left sitting — particularly E10 or E15 ethanol-blended fuel — oxidizes and leaves varnish deposits in the carburetor bowl, jets, and passages within 30–60 days without a stabilizer. These deposits restrict or block fuel flow in ways that mixture screw adjustment cannot overcome, because the screw controls how much of a passage is open, not whether the passage itself is clear. Drain the old fuel, clean the carburetor, refill with fresh fuel (preferably non-ethanol or E10 maximum with stabilizer added), then adjust.
For more hands-on benchmarks and buying recommendations, consult our guides on heavy-duty chainsaw buyer guide, as well as high-CFM commercial leaf blower guide, as well as durable ride-on lawn tractor guide.
Mechanical safety standards, operational tolerances, and protective gear guidelines align with benchmark specifications established by the American National Standards Institute (ANSI).









