

Quick Answer: How to Change a Spark Plug on a Lawn Mower
Disconnect the ignition wire, unscrew the old spark plug with a spark plug socket wrench, gap the new plug to your engine’s specification (typically .030 in for most single-cylinder push mower engines), thread the new plug in by hand, torque to manufacturer spec (commonly 15–20 ft-lb), and reconnect the ignition wire. The full job takes 15–30 minutes and requires no specialized mechanical experience.

Pros
- Large-size design named in product title
- Sharpening and balancing functions listed
- Listed as a new upgraded version

Pros
- Adjustable 15-to-45-degree range in title
- Sharpening and balancing functions listed

Pros
- Sharpener and balancer functions in title
- 15-to-45-degree adjustable setting listed
- Built for lawn mower blade maintenance
Pros
- Includes replacement gaskets and a 98079-55846 spark plug
- Matches Honda HRR216 and HRS216 lawn mower models
- Designed around the 16100-Z8B-901 carburetor specification
Cons
- Restricted to select Honda GCV160 mower applications
- Installation requires basic mechanical tools and skills
What You Need Before You Start (Tools & Safety Checklist)
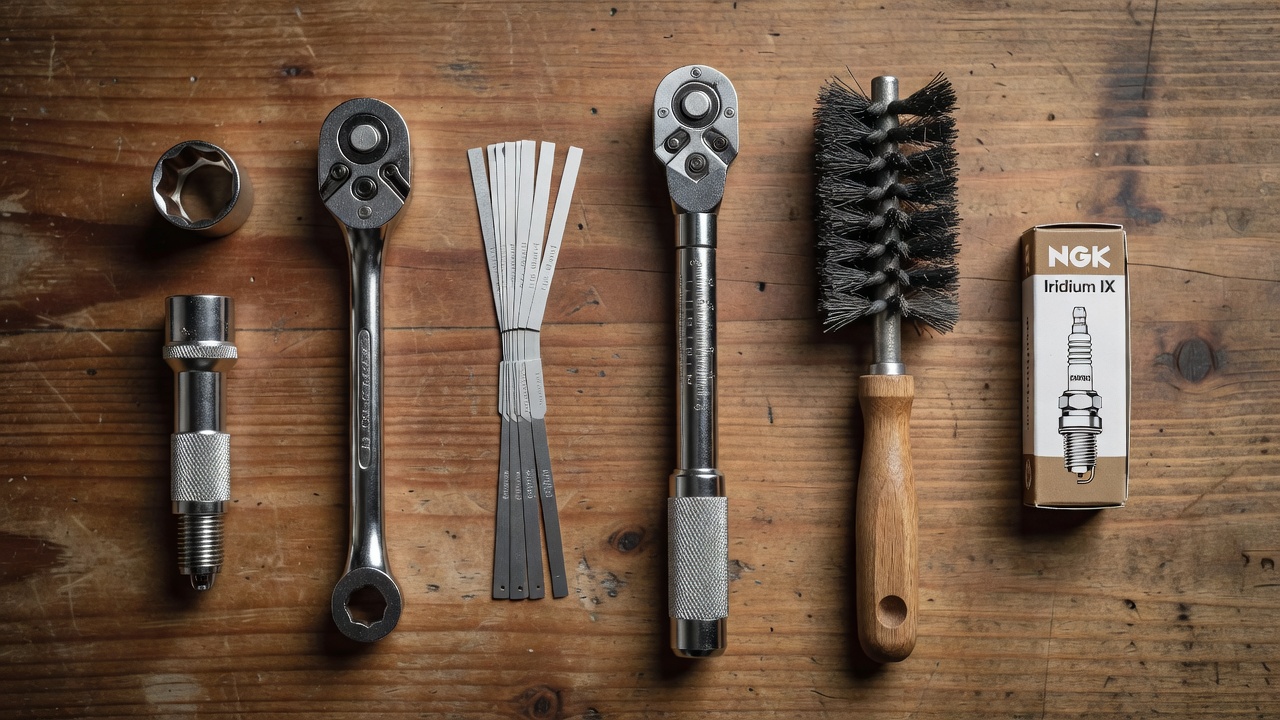
Required Tools
- Spark plug socket wrench — most push mower engines use a 5/8 in socket; many riding mower engines use 13/16 in. Check your owner’s manual before buying.
- Ratchet handle and extension bar — an extension is essential on riding mowers where plugs sit deep in the engine shroud.
- Spark plug gap tool / feeler gauge — a flat feeler gauge or wire-type gap tool works for setting electrode gap precisely.
- Torque wrench — optional for beginners but strongly recommended; overtorquing strips aluminum threads in the cylinder head.
- Wire brush — cleans debris around the plug well before removal so grit does not fall into the cylinder.
- Compressed air (optional) — blows out the plug well after brushing.
- Anti-seize compound (optional) — a thin coat on plug threads prevents seizing in aluminum heads; do not use if the plug has a factory-applied coating.
- Dielectric grease (optional) — applied to the inside of the spark plug boot to prevent corrosion and make future removal easier.
Safety Checklist — Complete Before Touching the Plug
- ☐ Let the engine cool for at least 30 minutes. A hot cylinder head can cause burns and may give a false torque reading.
- ☐ Disconnect the spark plug wire (ignition wire) from the plug tip. This is the single most important step — it prevents accidental starting while your hand is near the blade or engine.
- ☐ Close the fuel shutoff valve (if equipped) to stop fuel flow to the carburetor.
- ☐ Work on flat, stable ground. Tilting a push mower onto its side can flood the air filter with oil — always tilt with the air filter side facing up if repositioning is needed.
- ☐ Remove the ignition key on riding mowers and engage the parking brake.
How to Find the Right Replacement Spark Plug (Gap & Socket Size by Brand)
Using the wrong plug or incorrect gap causes misfires, hard starting, and accelerated wear. Locate your engine’s make and model number (stamped on the engine block or on a label near the oil fill cap), then cross-reference the table below. Always verify against your specific model’s owner’s manual, as specs can vary within the same brand family.
| Engine Brand | Common Engine Series | Typical OEM Plug | Plug Gap | Socket Size | Torque Spec |
|---|---|---|---|---|---|
| Briggs & Stratton | 450E, 500E, 550EX, Intek OHV | Champion RC12YC / NGK BPR6ES | .030 in | 5/8 in | 15 ft-lb (new), 7 ft-lb (used) |
| Honda GCV | GCV160, GCV190 | NGK BPR6ES | .028–.031 in | 5/8 in | 13 ft-lb |
| Kawasaki FR/FS | FR600V, FS600V, FR691V | NGK BPR5ES | .028–.031 in | 5/8 in | 11–15 ft-lb |
| Kohler Command | CV490, CV491, CV740 | Champion RC14YC | .030 in | 5/8 in | 15–22 ft-lb |
Note: Values above reflect typical published specs. Confirm against your engine’s service manual before purchase. Gap and torque values for twin-cylinder Kawasaki and Kohler engines used in riding mowers may differ from the single-cylinder versions listed here. For broader ecosystem context, read through our operational guide on jbl partybox club 120 vs sony srs xv500.
How to Change a Spark Plug on a Push Mower (Step-by-Step)
These steps apply to single-cylinder OHV push mowers — the most common configuration sold by Briggs & Stratton, Honda, Kawasaki, and Toro/Craftsman-branded engines. For broader ecosystem context, read through our operational guide on jbl partybox club 120 vs sony srs xv500.
- Cool the engine for 30 minutes. Never work on a warm engine. Heat expands metal and makes accurate torquing impossible.
- Disconnect the ignition wire. Grip the rubber boot — not the wire — and pull straight off the plug tip. Set it aside where it cannot accidentally contact the plug.
- Clean the area around the spark plug. Use a wire brush to clear away grass clippings, dirt, and dried oil from the plug well. Follow with compressed air if available. Debris entering an open cylinder causes internal engine damage.
- Remove the old spark plug. Fit the spark plug socket over the plug hex, attach your ratchet, and turn counterclockwise. If the plug is seized, apply a small amount of penetrating oil and wait 10 minutes before retrying. Do not force it.
- Inspect the old plug. Note the electrode condition before discarding — see the diagnosis section below. A normal plug has a light tan or gray deposit. Anything outside that range signals an underlying engine issue that a new plug alone will not fix.
- Set the gap on the new plug. Use a feeler gauge to measure the distance between the center electrode and the ground electrode (the curved side arm). Insert the correct-thickness blade — for most push mower engines, .030 in. The blade should slide through with slight drag. Adjust by gently bending the ground electrode. Never bend the center electrode.
- Thread the new plug in by hand. Start threading by hand (finger-tight only) for at least the first two full turns. Cross-threading is the leading cause of ruined cylinder heads — if you feel resistance before the plug is fully seated, back it out and restart.
- Torque to manufacturer spec. Attach a torque wrench and tighten to spec (see the table above for common values). Without a torque wrench: a new tapered-seat plug is typically snugged finger-tight then turned an additional 1/2 turn; a used plug, 1/8 to 1/4 turn past finger-tight. These are approximations — a torque wrench is the only reliable method.
- Apply dielectric grease to the boot interior (optional). A thin coat inside the rubber boot prevents the boot from fusing to the plug tip over a season of heat cycling.
- Reconnect the ignition wire. Push the boot firmly onto the plug tip until it clicks or seats fully. A loose connection causes intermittent misfires.
- Test-start the mower. Open the fuel valve, prime if required, and start normally. The engine should start within two pulls or one key turn and idle smoothly. Rough idle or smoke on startup that clears within 30 seconds is normal for a fresh plug.
How to Change Spark Plugs on a Riding Mower (Step-by-Step)
Riding mowers with twin-cylinder engines — common in Kawasaki FR/FS and Kohler Command series — have two spark plugs, one per cylinder bank. Single-cylinder riding mowers (found on smaller entry-level units) follow the same process as a push mower above, with the added step of accessing the engine under the hood. For troubleshooting and reliability insights, consult our in-depth z890 vs x870e motherboard report.
Accessing the Plugs on a Riding Mower
- Park on flat ground, set the parking brake, and remove the ignition key.
- Let the engine cool 30–45 minutes. Riding mower engines run hotter and longer than push mower engines; allow additional cooling time.
- Open the hood. Most riding mowers have a hood that tilts or hinges forward. Consult your operator’s manual for the release mechanism — some require removing two bolts at the front corners.
- Locate both spark plugs. On a V-twin engine, one plug is on each cylinder bank, typically on the outboard-facing side of each cylinder. They may be partially obscured by the air filter housing, valve covers, or wiring harness. A flashlight helps.
- Disconnect both ignition wires before removing either plug.
Removing, Gapping, and Installing on a Riding Mower
- Use a socket wrench with an extension bar (commonly 6–10 in) to reach deeply recessed plugs. A 13/16 in socket is most common on V-twin riding mower engines, though confirm with your manual.
- Remove both plugs even if only one appears fouled. Replacing one plug and leaving an aged plug in the second cylinder creates an uneven combustion cycle. OEM service manuals for twin-cylinder engines recommend replacing both simultaneously.
- Gap each new plug to spec (see table above for Kawasaki and Kohler values). Gap both plugs identically.
- Thread each plug in by hand for at least two full turns before applying the ratchet. The threads are cut into aluminum heads — cross-threading is expensive to repair.
- Torque both plugs to the engine-specific spec.
- Reconnect both ignition wires, ensuring each boot is fully seated. Wires on V-twin engines are often labeled or color-coded; confirm each wire returns to its original cylinder before starting.
- Close the hood, insert the key, and test-start. Let the engine idle for 2–3 minutes and listen for smooth, even firing on both cylinders.
How to Read a Worn Spark Plug (Diagnose Engine Problems)
The condition of the plug you remove tells you more than whether it needs replacement. Inspect the electrode and insulator tip under good light before discarding.
| Plug Appearance | Diagnosis | Likely Cause | Next Step |
|---|---|---|---|
| Light tan or gray deposits, slight wear on electrode | Normal | Correct fuel mixture, correct heat range | Replace at regular interval; no further action needed |
| Black, dry, sooty deposits | Carbon fouling | Rich fuel mixture, clogged air filter, or extended low-speed running | Clean or replace air filter; check carburetor mixture; use fresh fuel |
| Wet, oily, black deposits | Oil fouling | Worn piston rings or valve seals allowing oil into the combustion chamber | Have a technician inspect rings and valve seals; a new plug will re-foul quickly without addressing the root cause |
| White, chalky, or blistered insulator | Overheating / lean condition | Lean fuel mixture, cooling fin blockage, or incorrect (too-hot) heat range plug installed | Verify correct plug heat range for your engine; check carburetor and cooling fins for debris |
| Rounded, heavily eroded electrode | Normal wear at end of service life | Extended use past service interval | Replace immediately; worn electrode requires higher voltage to fire and causes hard starting |
Diagnostic descriptions above are consistent with published spark plug condition guides from NGK and Champion. If oil fouling or overheating indicators are present, a replacement plug without engine repair is a temporary measure only. For troubleshooting and reliability insights, consult our in-depth z890 vs x870e motherboard report.
How Often Should You Change a Lawn Mower Spark Plug?
Most OEM service manuals recommend replacing the spark plug every 25 operating hours or once per mowing season, whichever comes first. For a homeowner mowing one acre weekly for a 20-week season, that is roughly 20–30 hours of use per year — making an annual replacement the practical standard for push mowers.
Exceptions apply: Readers comparing setup options can review our technical analysis on marshall stanmore iii vs harman kardon onyx studio 8.
- Honda GCV series engines published maintenance schedules list spark plug inspection at 25 hours and replacement at 100 hours under normal use — longer than the Briggs & Stratton recommendation. Verify your specific model’s schedule.
- Commercial and high-hour users (lawn care operators running 200+ hours per season) should inspect plugs every 25 hours and replace at first sign of wear.
- Replace earlier if you notice: hard starting (more than three pull attempts), rough or surging idle, visible black smoke from the exhaust, increased fuel consumption, or engine misfires under load.
- Storage tip: Installing a fresh plug at the start of each spring season is a low-cost maintenance step that prevents a fouled plug from being misdiagnosed as a carburetor problem after winter storage.
Buyer FAQs: How To Change Spark Plug On Lawn Mower Solved
Can a bad spark plug cause a lawn mower not to start?
Yes. A fouled, cracked, or heavily worn spark plug is one of the most common causes of a lawn mower that cranks but will not fire. The plug may fail to produce a spark, produce a weak spark, or misfire under compression. Before assuming a carburetor or ignition coil problem, replace the spark plug — it is the cheapest and fastest diagnostic step.
What size socket do I need for a lawn mower spark plug?
Most single-cylinder push mower engines (Briggs & Stratton, Honda GCV, Kawasaki) use a 5/8 in (16 mm) spark plug socket. Many twin-cylinder riding mower engines use a 13/16 in (21 mm) socket. Standard spark plug sockets have a rubber insert inside to grip the plug without cracking the ceramic insulator — use a proper spark plug socket, not a standard deep socket, to avoid damaging the new plug during installation. For complementary field maintenance guidelines, examine our breakdown of dyson v8 cyclone vs bissell featherweight stick.
Do I need to gap a new lawn mower spark plug?
Always check the gap on a new plug before installation, even if the packaging states it is pre-gapped. Shipping and handling can shift the electrode. Use a feeler gauge to verify the gap matches your engine’s specification. Installing a plug with an incorrect gap — even by .005 in — can cause misfires, hard starting, and reduced engine efficiency.
Should I replace both spark plugs on a riding mower at the same time?
On a twin-cylinder riding mower engine, replace both plugs during the same service interval even if only one is visibly worn or fouled. Both plugs experience the same heat cycles and operating hours. Leaving one aged plug installed creates uneven combustion between cylinders, which produces rough idling and can mask whether a replacement plug has resolved the original problem. To evaluate matched hardware tolerances, consult our detailed overview of bissell crosswave hydrosteam vs shark stainforce.
For more hands-on benchmarks and buying recommendations, consult our guides on heavy-duty chainsaw buyer guide, as well as high-CFM commercial leaf blower guide, as well as durable ride-on lawn tractor guide.
Mechanical safety standards, operational tolerances, and protective gear guidelines align with benchmark specifications established by the American National Standards Institute (ANSI).









