

The Short Answer: How to Clean a Lawn Mower Gas Tank
Drain the old fuel completely, then select your cleaning agent based on the problem: white vinegar for light rust, carburetor cleaner for varnish or gum deposits, or muriatic acid for heavy corrosion. Agitate the solution inside the tank, rinse thoroughly with clean water, dry the tank completely before any fuel contacts it, and reinstall. Always work outdoors or in a well-ventilated area away from open flames, and wear safety goggles throughout.

Pros
- Large-size design named in product title
- Sharpening and balancing functions listed
- Listed as a new upgraded version

Pros
- Adjustable 15-to-45-degree range in title
- Sharpening and balancing functions listed

Pros
- Sharpener and balancer functions in title
- 15-to-45-degree adjustable setting listed
- Built for lawn mower blade maintenance
Pros
- Includes replacement gaskets and a 98079-55846 spark plug
- Matches Honda HRR216 and HRS216 lawn mower models
- Designed around the 16100-Z8B-901 carburetor specification
Cons
- Restricted to select Honda GCV160 mower applications
- Installation requires basic mechanical tools and skills
How to Choose the Right Cleaning Method
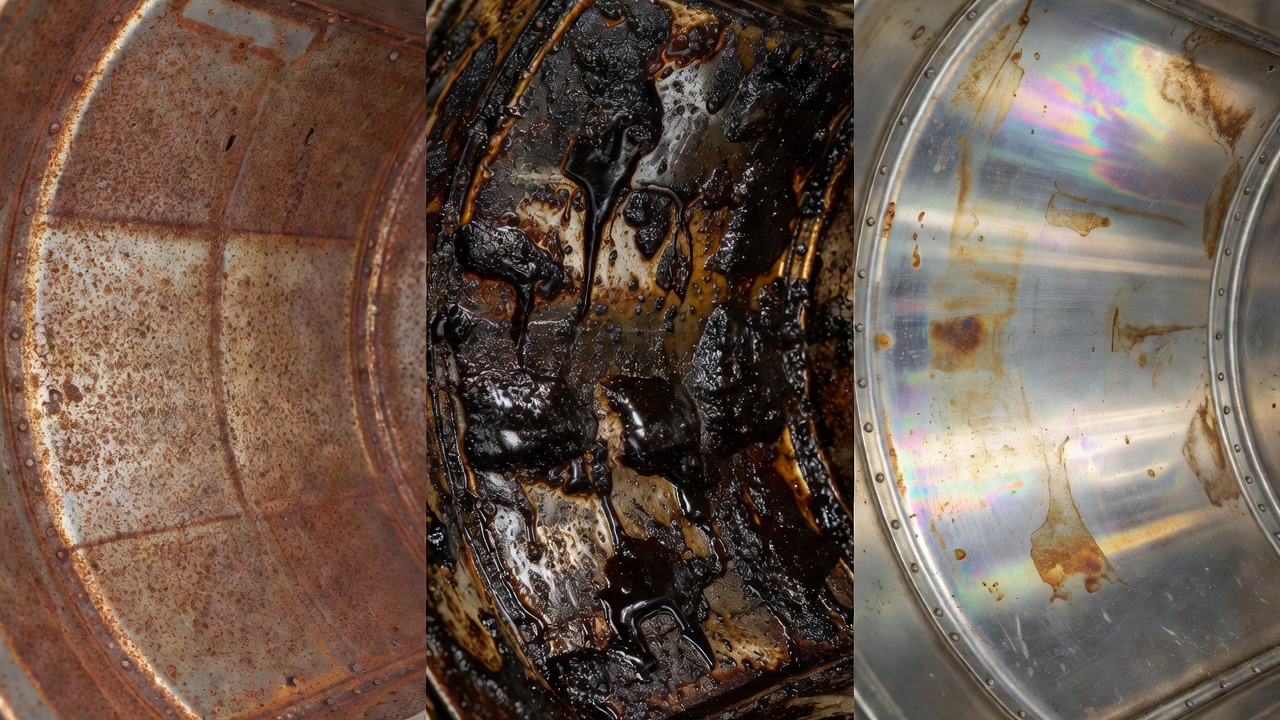
Not all dirty tanks have the same problem. Using the wrong cleaning agent wastes time and can damage the tank or leave residue that clogs the carburetor. Identify your situation first.
Rust
Rust forms when water — introduced through condensation or contaminated fuel — contacts bare metal inside the tank. You will see reddish-brown flakes in drained fuel or visible orange pitting inside the tank. Light surface rust responds well to white vinegar. Heavy rust with deep pitting requires muriatic acid, handled with strict precautions (covered in the safety section below). Readers comparing setup options can review our technical analysis on jbl partybox club 120 vs sony srs xv500.
Varnish and Gum Deposits
Ethanol-blended fuel (E10 or higher) absorbs moisture and degrades faster than pure gasoline. When left sitting — commonly over winter storage — the ethanol separates, leaving behind a sticky varnish or gum residue that coats tank walls and clogs the fuel line and carburetor. This residue does not respond to vinegar. Carburetor cleaner or a dedicated commercial fuel tank cleaner dissolves it effectively. Readers comparing setup options can review our technical analysis on jbl partybox club 120 vs sony srs xv500.
Routine Flush (Old or Stale Gas)
If the mower simply sat with old gasoline and shows no rust or heavy varnish, a basic flush with fresh gasoline or carburetor cleaner is sufficient. This is the least invasive procedure and takes under 30 minutes. For complementary field maintenance guidelines, examine our breakdown of z890 vs x870e motherboard.
Quick Decision Guide
| Symptom | Likely Problem | Recommended Cleaner |
|---|---|---|
| Reddish flakes in drained fuel, light discoloration | Light rust | White vinegar |
| Heavy orange pitting, significant corrosion | Heavy rust | Muriatic acid (diluted) |
| Sticky brown coating, mower ran fine before storage | Varnish / gum deposits from ethanol-blended fuel | Carburetor cleaner or commercial tank cleaner |
| Stale smell, discolored fuel, no visible residue | Old / degraded gasoline | Fresh gasoline flush or carburetor cleaner |
Safety Precautions Before You Start
Fuel work involves flammable vapors and, in some cases, corrosive chemicals. These are non-negotiable steps, not optional suggestions.
- Work outdoors or in a cross-ventilated garage. Gasoline vapors are heavier than air and accumulate at floor level. Enclosed spaces create explosion risk.
- Keep a fire extinguisher rated for Class B fires within arm’s reach. Gasoline fires cannot be extinguished with water.
- Eliminate all ignition sources. No cigarettes, pilot lights, running engines, or power tools within the work area.
- Disconnect the spark plug wire. Pull the wire off the spark plug before any fuel work begins. This prevents accidental engine start.
- Wear safety goggles and chemical-resistant gloves. Muriatic acid causes severe skin and eye burns on contact. Carburetor cleaner is an irritant.
- Use an approved fuel container for drained gasoline. Do not drain fuel into open buckets or onto the ground. Dispose of old fuel at a local hazardous waste facility or auto parts store that accepts it.
- If using muriatic acid: add acid to water, never water to acid. Wear a respirator rated for acid vapors. Neutralize any spills immediately with baking soda.
Step-by-Step Guide to Cleaning Your Lawn Mower Gas Tank
These steps apply to both push and riding mowers. Differences specific to mower type are noted where they occur and expanded in the section that follows. For complementary field maintenance guidelines, examine our breakdown of z890 vs x870e motherboard.
Step 1: Gather Your Materials
- Safety goggles and chemical-resistant gloves
- Class B fire extinguisher
- Approved fuel storage container
- Siphon pump or turkey baster (for fuel removal)
- Wrench set and screwdrivers (for tank removal on riding mowers)
- Cleaning agent: white vinegar, carburetor cleaner spray or liquid, or muriatic acid — based on the decision guide above
- Baking soda (to neutralize vinegar or acid before disposal)
- Clean water for rinsing
- Compressed air or a clean lint-free cloth for drying
- Fuel stabilizer for reinstallation
Step 2: Disconnect the Spark Plug Wire
Locate the spark plug on the engine — a single rubber-capped wire leads to it. Pull the wire cap straight off. Set it aside where it cannot accidentally contact the plug during the procedure.
Step 3: Drain the Fuel Tank
If the mower has a petcock (a small valve at the base of the tank, common on riding mowers), close it first, then position your fuel container beneath it and open it to drain. If there is no petcock, use a hand siphon pump inserted through the fuel cap opening to draw out the fuel. For very small push mower tanks, tipping the mower sideways over a container — spark plug side up to prevent oil contamination — works if a siphon is unavailable, but a siphon is cleaner and safer. To evaluate matched hardware tolerances, consult our detailed overview of marshall stanmore iii vs harman kardon onyx studio 8.
Remove as much fuel as possible. Remaining residue is expected and will be addressed by the cleaning agent.
Step 4: Remove the Fuel Line
Locate where the fuel line connects to the bottom or side of the tank. Use pliers to slide the clamp back, then twist and pull the line free. Have a rag ready — a small amount of residual fuel will drip. On push mowers, this line runs directly to the carburetor and is typically short and accessible. On riding mowers, the line may route through a fuel filter first. When planning workspace deployment, consider the engineering criteria outlined in our dyson v8 cyclone vs bissell featherweight stick guide.
Step 5: Remove the Tank (If Necessary)
For light flushing or carburetor cleaner treatment, you can clean the tank in place on a push mower by spraying cleaner through the fuel cap opening and the petcock or fuel line port. For vinegar or muriatic acid treatments — which require the liquid to dwell and agitate inside the tank — remove the tank entirely.
Tanks are typically held by one to three bolts or a mounting bracket. Unscrew fasteners, disconnect any vent lines, and lift the tank free. Note the routing of all connections before removal so reinstallation is straightforward. For additional operational safety benchmarks, see our published testing notes on bissell crosswave hydrosteam vs shark stainforce.
Step 6: Apply the Cleaning Agent
For Light Rust — White Vinegar Method
Pour enough undiluted white vinegar to fill at least half the tank. Cap the tank and shake vigorously for two to three minutes, then set it down and allow it to soak for 12 to 24 hours. The acetic acid in vinegar dissolves iron oxide (rust) without attacking the metal itself at this concentration. After soaking, shake again, then drain completely.
For Varnish / Gum Deposits — Carburetor Cleaner Method
Pour 8 to 12 oz of liquid carburetor cleaner into the tank. If using spray carburetor cleaner, spray liberally through the fuel port and cap opening, coating all interior surfaces. Cap the tank and agitate for three to five minutes. Allow to soak for 30 to 60 minutes. For heavy varnish, add a handful of clean nuts, bolts, or small gravel to the tank before agitating — the abrasion helps break up stubborn deposits. Drain thoroughly.
For Heavy Rust — Muriatic Acid Method
This method requires strict adherence to safety precautions listed above. Mix one part muriatic acid with ten parts water in a separate container first — always add acid to water. Pour the diluted solution into the tank until it is roughly one-quarter full. Cap the tank and rotate it slowly to coat all surfaces. Allow to dwell for no more than 15 to 20 minutes; muriatic acid works quickly and over-exposure can pit or thin metal walls. Drain into a plastic container. Immediately neutralize the drained acid with baking soda solution before disposal.
Step 7: Rinse Thoroughly
Residual cleaning agents contaminate fresh fuel and damage the carburetor. Rinse the tank a minimum of three times with clean water. After vinegar or muriatic acid treatment, add a tablespoon of baking soda dissolved in water for the first rinse to fully neutralize remaining acid. Shake, drain, repeat with plain water for subsequent rinses until the drained water runs clear and odor-free.
Step 8: Dry the Tank Completely
Any water remaining in the tank causes immediate rust reformation and water-contaminated fuel. Drying options:
- Compressed air: Blow air through the fuel cap opening and all ports for two to three minutes. Most effective method.
- Sun drying: Set the tank in direct sunlight with all openings uncapped for a minimum of two to four hours on a warm day.
- Denatured alcohol rinse: Pour a small amount of denatured alcohol into the tank, agitate, and drain. Alcohol displaces water and evaporates faster than water alone.
Do not reinstall the tank until it is visibly dry and no condensation appears when you look inside.
Step 9: Reinstall and Add Fresh Fuel with Stabilizer
Reattach the fuel line and tighten the clamp. Secure the tank to its mounting bracket. Reconnect any vent lines. Add fresh gasoline — for seasonal mowers, mix in fuel stabilizer at the ratio specified on the stabilizer product label. This slows ethanol-related degradation and varnish formation. Reconnect the spark plug wire. Start the mower and run it for five minutes to confirm steady fuel flow and no leaks at the fuel line connection.
Push Mower vs. Riding Mower: Key Differences
Push Mowers
Push mower tanks are small — typically 0.1 to 0.5 gallons — and are often made of semi-transparent plastic. Plastic tanks do not rust but do accumulate varnish. Avoid muriatic acid entirely on plastic tanks; it degrades the material. White vinegar is safe on plastic if any light discoloration or mineral deposits exist, but carburetor cleaner is the standard choice for varnish. Tank removal usually requires only two bolts and disconnecting a single short fuel line. The entire procedure can often be completed without removing the tank if spraying carburetor cleaner through the fuel cap port.
Riding Mowers
Riding mower tanks are larger (1 to 3 gallons), usually made of metal or hard plastic, and positioned under the seat or hood. Metal riding mower tanks are susceptible to rust. Tank removal typically requires removing the seat, disconnecting a fuel gauge sender wire (if equipped), and unbolting a mounting bracket. Label or photograph all connections before disassembly. The larger volume means more cleaning agent and a longer drying time are required. A petcock is common on riding mowers, making fuel drainage without a siphon straightforward.
When to Replace the Tank Instead of Cleaning
Cleaning restores a functional tank. It cannot repair structural damage. Replace the tank if you observe any of the following:
- Cracks or holes: Any visible crack, pinhole, or seam separation means the tank cannot hold fuel safely. Fuel leaks create fire hazard. No sealant repair is an acceptable long-term fix for a gas tank on running equipment.
- Through-rust: If muriatic acid treatment reveals the rust has eaten entirely through the tank wall, the metal is too thin to seal reliably.
- Severe warping: A deformed tank may not seat correctly, stressing fuel line connections and risking leaks.
- Persistent contamination after multiple cleaning cycles: If the carburetor continues clogging after two thorough tank cleanings, the tank interior has deposits embedded too deeply to remove without professional ultrasonic cleaning — at which point a replacement tank (typically inexpensive for push mowers) is more economical.
Replacement tanks for common mower brands are widely available through manufacturer parts dealers and online retailers. Match the part number from the existing tank or the mower model number.
Common Questions on How To Clean A Lawn Mower Gas Tank Answered
Can I clean the gas tank without removing it from the mower?
Yes, for routine flushing and varnish removal on push mowers. Spray carburetor cleaner through the fuel cap opening and fuel line port, agitate, then drain through the fuel line connection. Full removal is required for vinegar or muriatic acid soaks, as those liquids need extended dwell time and complete interior coverage that requires capping and rotating the tank.
How long does white vinegar need to sit in a gas tank to remove rust?
Undiluted white vinegar requires 12 to 24 hours of soak time to dissolve light rust effectively. Agitate the tank every few hours if possible. After draining, neutralize with a baking soda-water rinse before the plain water rinses to prevent any residual acid from reacting with fresh metal surfaces.
Will old gasoline damage my lawn mower gas tank?
Old gasoline itself does not damage the tank walls, but the varnish and gum deposits it leaves behind — particularly from ethanol-blended fuel — coat the tank interior and restrict fuel flow. This residue migrates into the fuel line and carburetor, causing the engine to run rough, stall, or fail to start. Draining and cleaning at the start of each season prevents this accumulation.
Is it safe to use muriatic acid on a plastic gas tank?
No. Muriatic acid degrades many plastics, including the polyethylene commonly used in push mower tanks. Reserve muriatic acid for metal tanks only, and test a small inconspicuous area if you are uncertain of the tank material. For plastic tanks, use carburetor cleaner or a commercial plastic-safe tank cleaner product.
For more hands-on benchmarks and buying recommendations, consult our guides on heavy-duty chainsaw buyer guide, as well as high-CFM commercial leaf blower guide, as well as durable ride-on lawn tractor guide, as well as automated robotic lawn mower guide.
Mechanical safety standards, operational tolerances, and protective gear guidelines align with benchmark specifications established by the American National Standards Institute (ANSI).









