

Quick Answer: How to Remove a Toro Mower Blade
Disconnect the spark plug wire first — no exceptions. For walk-behind models, tip the mower onto its side with the carburetor facing up, wedge a block of wood between the blade and the deck to stop rotation, then loosen the center bolt counter-clockwise with a socket wrench (typically 5/8″ or 15/16″ depending on model). Slide the blade off the spindle. For riding mowers and zero-turns, engage the parking brake, lower or remove the deck, then access each blade spindle bolt from underneath — same counter-clockwise direction applies.
Safety Precautions Before You Start
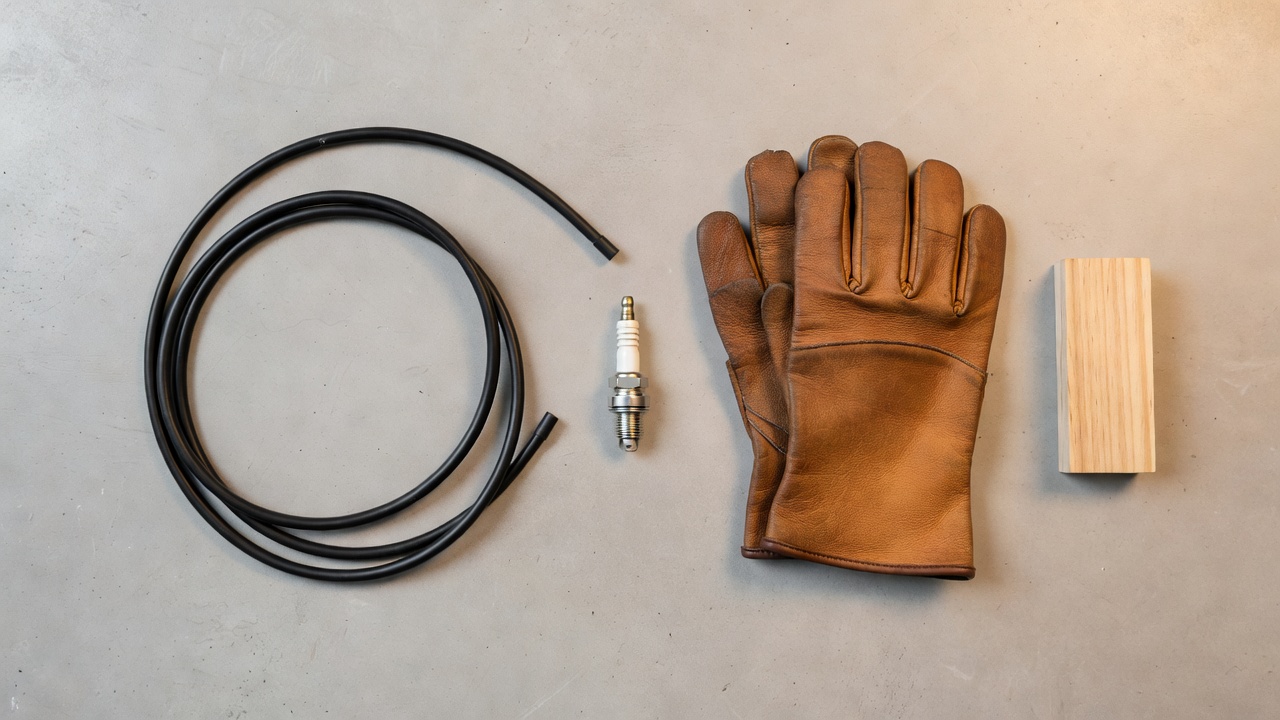
Skipping safety steps when working near mower blades causes serious lacerations and accidental engine starts. Complete every item on this list before touching the blade.
Disconnect the Spark Plug Wire
Pull the spark plug wire off the spark plug and tuck it away from the plug so it cannot arc back. This prevents the engine from firing if the blade is bumped or rotated during removal. On riding mowers and zero-turns with multiple cylinders, disconnect all spark plug wires. Toro operator manuals list spark plug wire disconnection as the mandatory first step for any under-deck service. Users looking for related component recommendations can explore our jbl partybox club 120 vs sony srs xv500 breakdown.
Address the Fuel
When tilting a walk-behind mower, fuel can spill or flood the carburetor if the tank is full and the mower is tipped the wrong direction. Two safe options: run the engine until the tank is empty before tilting, or use the fuel shutoff valve (if equipped) and drain the bowl. If neither is practical, keep the carburetor side facing up — this is the most important tilting rule covered in the section below. Users looking for related component recommendations can explore our jbl partybox club 120 vs sony srs xv500 breakdown.
Let the Engine Cool
Hot engine components and exhaust surfaces cause burns. Wait at least 10–15 minutes after the last use before beginning blade removal. Before finalizing equipment decisions, refer to our comprehensive z890 vs x870e motherboard comparison.
Wear Cut-Resistant Gloves
Even a dull mower blade has enough edge to cause deep cuts. Wear heavy leather or cut-resistant gloves for every step involving contact with the blade.
Work on a Flat, Stable Surface
A tipped mower on uneven ground can fall. Work on a level concrete or asphalt surface. For riding mowers and zero-turns, use a proper mower lift or rated jack stands — never work under a mower supported only by a floor jack. Before finalizing equipment decisions, refer to our comprehensive z890 vs x870e motherboard comparison.
Tools You Need to Remove a Toro Mower Blade
- Socket wrench with breaker bar — A standard ratchet may lack enough torque for a tight blade bolt. A breaker bar gives the mechanical advantage needed without damaging the bolt head.
- Correct socket size — Most Toro walk-behind models (Recycler, Personal Pace, Super Recycler) use a 5/8″ blade bolt. Many riding mowers and zero-turns use a 15/16″ bolt. Confirm against your specific model’s operator manual before starting.
- Block of wood or blade removal tool — A short 2×4 wedged between the blade tip and the inside of the mower deck stops the blade from spinning while you torque the bolt. A dedicated blade removal tool (available at hardware stores) grips the blade and achieves the same result more securely.
- Torque wrench — Required for reinstallation. An under-torqued blade bolt allows the blade to shift; an over-torqued bolt can strip the spindle threads or warp the blade mount.
- Penetrating oil (optional) — If the bolt is seized from rust or debris, apply penetrating oil (e.g., PB Blaster) and wait 15–20 minutes before attempting removal.
- Mower lift or rated jack stands (riding/zero-turn only) — Required to safely elevate the deck for under-deck access.
How to Remove the Blade from a Toro Walk-Behind Mower (Push & Self-Propelled)
This procedure covers Toro Recycler, Personal Pace, and Super Recycler walk-behind models — the broadest segment of Toro’s consumer lineup.
- Disconnect the spark plug wire. Pull it firmly off the plug and fold it back so it cannot contact the plug tip.
- Empty or minimize fuel if possible. Running the tank low before this job prevents carburetor flooding and spills.
- Put on cut-resistant gloves. Keep them on for the rest of the procedure.
- Tilt the mower onto its side — carburetor side up. On most Toro walk-behinds, the carburetor is on the left side of the engine when standing behind the mower. Tilting with the carburetor up keeps oil and fuel out of the air filter and combustion chamber. If you are unsure which side the carburetor is on, locate the air filter — the carburetor sits directly behind it.
- Wedge the block of wood. Place a short piece of 2×4 between one blade tip and the inside edge of the mower deck. This physically prevents the blade from rotating when you apply torque to the bolt.
- Position the socket wrench. Fit your socket (typically 5/8″ for Toro Recycler models) onto the blade bolt at the center of the blade.
- Loosen the bolt counter-clockwise (lefty-loosey). Apply steady pressure — do not jerk. The bolt is standard-threaded on Toro walk-behind mowers; turning it counter-clockwise loosens it. Initial resistance is normal on bolts that have been torqued to spec and exposed to heat cycles. Use the breaker bar if needed.
- Remove the bolt and any washers. Note the order and orientation of any washers or spacers as you remove them — photograph them if helpful. These must go back in the same order.
- Slide the blade off the spindle. The blade fits over a keyed or stepped spindle shaft. Pull it straight down and off. Note which face was pointing downward (toward the grass) — the cutting edge and any lift wings must face that direction on reinstallation.
- Set the blade on a flat surface for inspection. See the inspection section below before proceeding to sharpening, replacement, or reinstallation.
How to Remove Blades from a Toro Riding Mower
Toro riding mowers — including the TimeSaver and LX series — typically have 42″, 50″, or 54″ decks carrying two or three blades. The removal logic is identical to walk-behind models per spindle, but deck access and safety setup differ. For broader ecosystem context, read through our operational guide on marshall stanmore iii vs harman kardon onyx studio 8.
- Park on a flat surface and engage the parking brake. Put the transmission in neutral or park per your model’s manual.
- Disengage the blade (PTO) and turn off the engine. Confirm the blades have fully stopped spinning before proceeding.
- Disconnect all spark plug wires. Riding mowers with twin-cylinder engines have two plugs.
- Lower the deck to its lowest cutting position. This gives the most clearance between the deck and the frame, making under-deck access easier. On most Toro riding models, you do not need to fully remove the deck to change blades — but consult your specific model’s manual, as some configurations benefit from deck removal.
- Elevate the front or deck side using a mower lift or rated jack stands. Never slide under a riding mower that is not properly supported.
- Put on cut-resistant gloves and locate each spindle bolt. Common deck sizes: 42″ decks typically carry two blades; 50″ and 54″ decks carry three. Each blade has its own center spindle bolt.
- Wedge a block of wood at each blade before loosening its bolt. Work one blade at a time.
- Loosen each blade bolt counter-clockwise. Socket size on Toro riding mower blade bolts is commonly 15/16″ — verify against your operator manual. Remove the bolt, washer(s), and blade. Note orientation.
- Repeat sequentially for remaining blades. There is no mandated removal order for multi-blade decks — remove them one at a time for control and safety.
How to Remove Blades from a Toro Zero-Turn Mower
Toro zero-turn models — including the TimeCutter, MX series, and Titan — feature wide decks (42″ up to 60″+) and heavier-gauge spindle hardware than walk-behind units. The procedure is mechanically similar to riding mowers but requires more elevation clearance and awareness of heavier blade weight.
- Park on level ground, disengage PTO, and turn off the engine. Engage the parking brake.
- Disconnect all spark plug wires. Toro Titan models with Kawasaki or Kohler twin-cylinder engines have two plugs.
- Raise the mower using a commercial mower lift or two rated jack stands. Position jack stands under the reinforced frame points specified in the operator manual — not under the deck itself. Toro Titan models are heavy; confirm your lift or jack stand weight rating before proceeding.
- Lower the deck to its lowest setting to maximize working space between the deck and the ground.
- Wear cut-resistant gloves. Zero-turn blades are longer and heavier than walk-behind blades — they require a firm two-handed grip during removal.
- Wedge a block of wood at the first blade and position your socket wrench. Toro Titan blade bolts commonly use a 15/16″ socket — consult your Titan operator manual for model-specific confirmation, as bolt sizes can vary across the Titan product line.
- Loosen counter-clockwise. Apply steady breaker-bar pressure. Titan decks use heavier torque specs on reinstallation, meaning initial removal resistance will be higher.
- Remove bolt, washer(s), and blade. Note blade orientation. Repeat for each remaining spindle.
Inspecting the Blade After Removal
Before sharpening or reinstalling, assess whether the blade is worth keeping. A damaged blade that goes back on the mower is a safety hazard and produces poor cut quality. For troubleshooting and reliability insights, consult our in-depth dyson v8 cyclone vs bissell featherweight stick report.
Signs the Blade Can Be Sharpened and Reused
- No visible cracks, fractures, or chunks missing from the cutting edge
- The blade body is flat — no bends or warps when placed on a flat surface
- The center mounting hole is not elongated or damaged
- Adequate blade thickness remains along the cutting edge (consult your Toro operator manual for the minimum thickness threshold specific to your blade part number)
Signs the Blade Must Be Replaced
- Visible cracks anywhere on the blade body — a cracked blade can shatter at operating speed
- A bent or bowed blade body that cannot be straightened
- Deep gouges, nicks, or missing sections from striking rocks or debris
- Worn cutting edge that is too thin to hold a sharpened edge safely
- Elongated center hole indicating the blade has been spinning loose on the spindle
When in doubt, replace the blade. Toro replacement blades are available by model number at Toro.com and authorized dealers.
Reinstalling the Toro Mower Blade Correctly
Blade Orientation
The cutting edge and any upward-swept lift wings must face downward toward the grass when the mower is in its normal operating position. The stamped or painted surface of many Toro blades faces upward toward the deck. If the blade goes on upside down, the mower will not cut — it will push grass over rather than cut it, and the lift wings will expel clippings downward instead of upward into the deck. Readers comparing setup options can review our technical analysis on bissell crosswave hydrosteam vs shark stainforce.
Torque Specifications
Toro specifies blade bolt torque values in each model’s operator manual. As a general reference across the Toro consumer line:
| Mower Type | Typical Blade Bolt Torque | Source |
|---|---|---|
| Walk-behind (Recycler, Personal Pace) | Approximately 35–50 ft-lbs | Toro model-specific operator manuals |
| Riding mower (TimeSaver, LX series) | Approximately 70–90 ft-lbs | Toro model-specific operator manuals |
| Zero-turn (TimeCutter, Titan) | Approximately 70–110 ft-lbs | Toro model-specific operator manuals |
Always verify the torque specification in your specific model’s operator manual before reinstalling. Toro publishes operator manuals for every current model at Toro.com — search by model number printed on the mower’s serial number tag. Do not rely solely on the table above; torque specs vary by engine, spindle design, and model year.
Reinstallation Steps
- Slide the blade onto the spindle in the correct orientation (cutting edge down).
- Thread the washer(s) back in the original order, then hand-thread the bolt clockwise until snug.
- Wedge the block of wood to prevent rotation.
- Torque the bolt to the specification in your operator manual using a calibrated torque wrench.
- Reconnect the spark plug wire(s).
- Start the engine and listen for unusual vibration, which indicates incorrect blade seating or installation error.
Common Questions on How To Remove Blade From Toro Lawn Mower Answered
Is the blade bolt on a Toro mower reverse-threaded?
No. Toro mower blade bolts are standard right-hand thread on walk-behind, riding, and zero-turn models. Turn the bolt counter-clockwise to loosen, clockwise to tighten — the same as any standard bolt. The reverse-thread myth comes from confusion with some other mower brands that do use left-hand threads on the blade bolt to prevent self-loosening under engine rotation. Toro achieves blade retention through high torque values, not reverse threading. Confirm against your specific model’s operator manual if uncertain.
What do I do if the blade bolt is stuck and won’t loosen?
Apply a penetrating oil product (such as PB Blaster) directly to the bolt threads and let it soak for 15–30 minutes. Use a breaker bar rather than a standard ratchet — the additional leverage typically breaks loose even heavily seized bolts. If the bolt still does not move, apply heat to the bolt head with a heat gun (keep flame away from fuel components) to expand the metal and break corrosion bonding. As a last resort, an impact wrench delivers sudden high-torque jolts that overcome seized fasteners. Do not use a cheater pipe on a standard ratchet; this risks cracking the ratchet housing or rounding the bolt head.
How often should I remove and sharpen Toro mower blades?
Toro recommends inspecting and sharpening blades at least once per mowing season, or after every 25 hours of operation — whichever comes first. Mowing conditions accelerate wear: yards with sandy soil, frequent rock or root strikes, or thick heavy grass may require sharpening every 10–15 hours. A sharp blade cuts cleanly; a dull blade tears grass tips, leaving a ragged brown appearance across the lawn within a day of mowing.
Will removing the blade myself void my Toro warranty?
Blade removal for sharpening or replacement is a standard maintenance task explicitly described in Toro operator manuals. Performing this maintenance yourself does not void the Toro warranty. Toro’s warranty covers manufacturing defects — it excludes damage caused by improper maintenance, use of non-approved replacement parts, or failure to follow manual instructions. Using non-genuine Toro replacement blades or reinstalling a blade incorrectly (wrong torque, wrong orientation) could be cited as cause of resulting damage. Review your specific warranty documentation at Toro.com or in your operator manual for the precise exclusion language that applies to your model and purchase date.

Pros
- Large-size design named in product title
- Sharpening and balancing functions listed
- Listed as a new upgraded version

Pros
- Adjustable 15-to-45-degree range in title
- Sharpening and balancing functions listed

Pros
- Sharpener and balancer functions in title
- 15-to-45-degree adjustable setting listed
- Built for lawn mower blade maintenance
Pros
- Includes replacement gaskets and a 98079-55846 spark plug
- Matches Honda HRR216 and HRS216 lawn mower models
- Designed around the 16100-Z8B-901 carburetor specification
Cons
- Restricted to select Honda GCV160 mower applications
- Installation requires basic mechanical tools and skills
For more hands-on benchmarks and buying recommendations, consult our guides on heavy-duty chainsaw buyer guide, as well as high-CFM commercial leaf blower guide, as well as durable ride-on lawn tractor guide.
Mechanical safety standards, operational tolerances, and protective gear guidelines align with benchmark specifications established by the American National Standards Institute (ANSI).









