

Quick Answer: How to Remove a Stuck Lawn Mower Blade
Disconnect the spark plug wire before touching the blade. Tip the mower with the carburetor side facing up to prevent oil from flooding the combustion chamber, wedge a wood block between the blade and the mower deck to stop the blade from spinning, and soak the bolt with penetrating oil (such as PB Blaster or WD-40 Specialist) for at least 15–30 minutes. Turn the bolt counter-clockwise on most walk-behind mowers, or clockwise on certain riding and zero-turn decks that use reverse-thread bolts, using a breaker bar or impact wrench. If the bolt still will not break free, apply heat to the bolt head with a propane torch as a last resort before considering bolt replacement.

Pros
- Large-size design named in product title
- Sharpening and balancing functions listed
- Listed as a new upgraded version

Pros
- Adjustable 15-to-45-degree range in title
- Sharpening and balancing functions listed

Pros
- Sharpener and balancer functions in title
- 15-to-45-degree adjustable setting listed
- Built for lawn mower blade maintenance
Pros
- Includes replacement gaskets and a 98079-55846 spark plug
- Matches Honda HRR216 and HRS216 lawn mower models
- Designed around the 16100-Z8B-901 carburetor specification
Cons
- Restricted to select Honda GCV160 mower applications
- Installation requires basic mechanical tools and skills
Safety Before You Touch the Blade
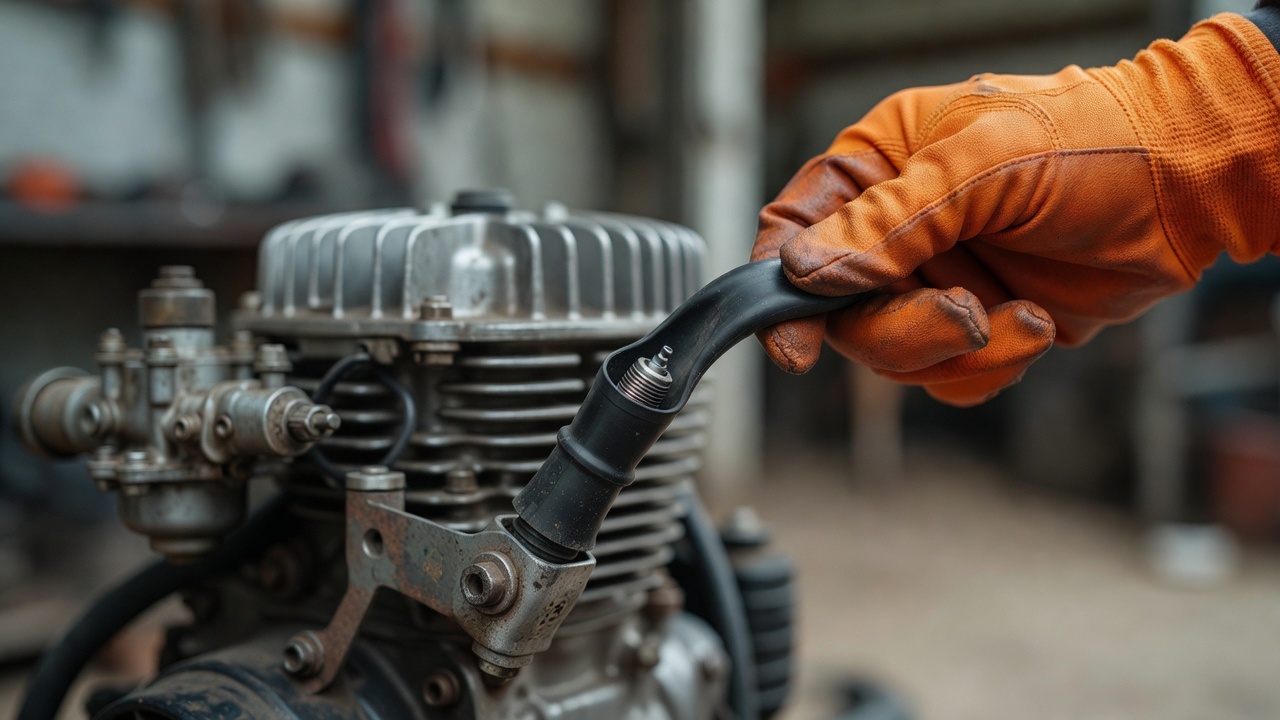
Skipping safety steps causes injuries that dwarf any time saved. Complete every item below before picking up a wrench.
- Disconnect the spark plug wire. Pull the rubber boot off the spark plug and tuck it away from the plug so the engine cannot fire accidentally. An unexpected engine start while your hands are near the blade is the primary cause of severe lacerations during blade work.
- Tip the mower carburetor-side up. On most walk-behind mowers the carburetor is on the left side. Tipping the mower so the carburetor faces upward prevents oil from draining into the air filter and combustion chamber, which causes hard-starting or engine damage after the job is done. Consult your owner’s manual if you are unsure which side the carburetor is on.
- Drain or stabilize fuel if the tank is full. A full tank tipped on its side can leak from the cap. Either run the fuel low before tipping or use a fuel shut-off valve if your mower has one.
- Wear cut-resistant gloves and safety glasses. Mower blades are sharp even when dull, and penetrating oil or debris can spray unexpectedly.
- Work on a stable, flat surface. A mower tipped on an uneven surface can fall, pinning hands or feet.
Why Is Your Lawn Mower Blade Stuck? Diagnose Before You Force It
Applying brute force to the wrong problem strips bolts and damages spindles. Identify which of the three scenarios applies before reaching for a tool. Readers comparing setup options can review our technical analysis on jbl partybox club 120 vs sony srs xv500.
1. Rusted or Seized Bolt
The most common cause. Moisture, grass clippings, and seasonal storage combine to weld the bolt threads to the blade adapter with rust. The blade itself stays stationary when you try to turn the bolt — the bolt simply will not move. Penetrating oil and mechanical advantage (breaker bar or impact wrench) resolve this. Readers comparing setup options can review our technical analysis on jbl partybox club 120 vs sony srs xv500.
2. Free-Spinning Spindle (Blade Turns With the Bolt)
When the bolt turns but the blade rotates with it instead of the bolt threading out, the spindle is spinning freely rather than the bolt backing off the threads. This is not a stuck-bolt problem — it is a blade-immobilization problem. A wood block wedged firmly between the blade tip and the inside of the deck, or a dedicated blade-holder tool clamped onto the blade, is required. Adding more torque without arresting the blade accomplishes nothing and risks damaging the spindle. For complementary field maintenance guidelines, examine our breakdown of z890 vs x870e motherboard.
3. Cross-Threaded Bolt
A cross-threaded bolt was installed at an angle, so the threads do not align correctly. Signs include a bolt that turns partway but then binds without coming free, or visible thread damage on the bolt shank. A cross-threaded bolt can sometimes be walked out carefully by alternating between tightening a quarter-turn and loosening, to re-engage threads. Severely cross-threaded bolts require an extractor kit or professional shop removal to avoid destroying the blade adapter threads. Do not apply full torque to a cross-threaded bolt — the adapter threads will strip.
Walk-Behind vs. Riding Mower: Which Direction Does the Bolt Loosen?
Getting the loosening direction wrong is the single most common reason DIYers strip blade bolts. The answer depends on mower type. For complementary field maintenance guidelines, examine our breakdown of z890 vs x870e motherboard.
Walk-Behind Mowers: Standard Thread, Counter-Clockwise to Loosen
The vast majority of walk-behind mowers use a standard right-hand thread blade bolt. Loosen by turning the bolt counter-clockwise (righty-tighty, lefty-loosey). This applies to most Husqvarna, Troy-Bilt, Toro, and Honda walk-behind models. Confirm in your owner’s manual if uncertain.
Riding Mowers and Zero-Turn Mowers: Check Before You Turn
Some riding mower and zero-turn decks — particularly certain Craftsman, Husqvarna, and Ariens models with multi-blade decks — use reverse-thread (left-hand thread) bolts on specific blade positions, meaning the bolt loosens by turning clockwise. The logic is that the blade’s rotation direction tightens a reverse-thread bolt during normal operation, preventing blade loss. Incorrectly applying counter-clockwise force on a reverse-thread bolt tightens it further. To evaluate matched hardware tolerances, consult our detailed overview of marshall stanmore iii vs harman kardon onyx studio 8.
How to confirm your thread direction:
- Check the owner’s manual or OEM service manual for your deck model number.
- Look for an embossed arrow or the word “REVERSE” stamped on the bolt head or blade adapter.
- Contact the manufacturer’s parts line with your model and serial number — they can confirm thread direction in under two minutes.
When in doubt, apply gentle force in one direction. If resistance increases immediately, stop and reverse. When planning workspace deployment, consider the engineering criteria outlined in our dyson v8 cyclone vs bissell featherweight stick guide.
Tools You Need to Remove a Stuck Blade Bolt
| Tool | Purpose | Notes |
|---|---|---|
| Wood block (2×4 scrap) | Immobilize the blade to prevent spindle spin | Free; wedge firmly between blade tip and inner deck wall |
| Blade-holder / blade removal tool | Clamps blade for hands-free immobilization | Safer than a wood block; available at hardware stores for under $15 |
| Breaker bar (½-inch drive, 18–24 inches) | Delivers high torque without air tools | Most practical for DIY use; no compressor needed |
| Impact wrench (air or electric) | Delivers rapid rotational impacts to break bolt free | Fastest method on badly seized bolts; prevents body strain |
| Socket (typically 5/8-inch or 15/16-inch) | Fits blade bolt head | Check your manual — sizes vary by brand; 5/8 in. is most common on walk-behinds |
| Penetrating oil (PB Blaster, WD-40 Specialist Penetrant) | Wicks into rusted threads to break corrosion bond | Not the same as standard WD-40 lubricant; use a penetrant-specific formula |
| Propane torch | Last-resort heat expansion to break seized threads | Use only outdoors; keep away from fuel lines and plastic components |
| Torque wrench | Re-install bolt to spec after removal | Required for safe reinstallation; prevents future seizing from over- or under-torque |
Step-by-Step: How to Remove a Stuck Lawn Mower Blade
Follow these steps in order. Do not skip Step 1.
- Disconnect the spark plug wire. Pull the rubber boot off the spark plug. Set the wire aside where it cannot contact the plug. This is non-negotiable regardless of skill level.
- Tip the mower onto its side, carburetor facing up. Place a tarp or cardboard on the ground first to protect the deck. If your model has a fuel shut-off valve, close it before tipping.
- Locate the blade bolt and inspect it. Identify whether the bolt head is rusted, cross-threaded, or visually damaged. If it is cross-threaded, do not apply full torque — see the cross-threaded section above.
- Apply penetrating oil generously to the bolt and blade adapter interface. Spray PB Blaster or WD-40 Specialist Penetrant directly onto the bolt threads and the area where the blade contacts the adapter. Allow the oil to soak for a minimum of 15–30 minutes. For heavily corroded bolts, a soak of several hours or overnight produces better results. Reapply once during a long soak. The penetrant must have time to wick into the threads by capillary action — rushing this step is the most common reason the bolt still will not budge.
- Immobilize the blade. Wedge a short piece of 2×4 lumber firmly between one blade tip and the inside wall of the mower deck. Alternatively, clamp a blade-holder tool onto the blade. The blade must not be able to rotate when torque is applied to the bolt.
- Confirm your loosening direction. Counter-clockwise for most walk-behind mowers; clockwise for some riding/zero-turn decks with reverse-thread bolts. Double-check before applying force.
- Attempt removal with a breaker bar. Fit the correct socket onto the bolt head. Slide the breaker bar extension to maximize leverage. Apply slow, steady pressure in the correct loosening direction. Avoid jerking — steady pressure is more effective on seized bolts and less likely to round the bolt head. If the bolt does not move after firm effort, stop and do not increase force yet.
- Upgrade to an impact wrench if the breaker bar fails. An electric or pneumatic impact wrench delivers rapid hammering impacts that shock corroded threads loose far more effectively than sustained torque alone. Apply the impact wrench in the correct loosening direction in 3–5 second bursts. Most seized blade bolts release within the first 10–15 seconds of impact wrench use.
- Apply heat as a last resort. If penetrating oil and mechanical tools have both failed, use a propane torch to heat the bolt head for 30–60 seconds. The bolt expands under heat and contracts slightly on cooling, breaking the corrosion bond. Keep the torch flame away from the mower deck paint, fuel lines, and any plastic components. Allow the bolt to cool for 2–3 minutes so it contracts before attempting removal. Reapply penetrating oil after heating — the cooling metal draws the oil into the threads. Do not use heat near a gas tank or fuel line under any circumstances.
- If the bolt head is damaged or the bolt will not move after all steps: A rounded or damaged bolt head requires a bolt extractor socket (also called a spiral socket or locking socket) to grip and remove it. If the bolt is broken flush with the adapter, professional extraction or adapter replacement may be necessary. At this point, a small-engine repair shop is the appropriate next step.
When the Blade Spins Freely: How to Stop the Spindle From Turning
A blade that rotates with the bolt during removal indicates the spindle is turning instead of the bolt threading out. This requires blade immobilization — not more torque. For additional operational safety benchmarks, see our published testing notes on bissell crosswave hydrosteam vs shark stainforce.
Wood Block Method
Wedge a 2×4 block tightly between the flat side of the blade tip and the inner wall of the mower deck. The block must be positioned so the blade cannot rotate even a few degrees in either direction. Reposition the block if it slips and try again before applying force.
Blade-Holder Tool Method
A blade-holder (blade removal tool) clamps directly onto the blade body and braces against the deck, providing positive, hands-free immobilization. This is the preferred method when a wood block repeatedly slips, particularly on worn decks where the interior wall no longer offers a firm stopping surface.
When Free Spin Indicates a Deeper Problem
If the blade continues to spin freely even after firm immobilization, and the bolt appears to be turning but not threading out, the blade adapter threads may be stripped. A stripped adapter cannot be repaired at home — the adapter must be replaced. Continuing to apply torque in this scenario will worsen thread damage.
Re-Installing the Blade Correctly to Prevent It From Seizing Again
Correct reinstallation is what prevents the next removal from being just as difficult.
Blade Orientation
Install the blade with the cutting edge facing down (toward the ground when the mower is upright). Most blades have a stamp or the word “THIS SIDE DOWN” or a colored marking on the correct face. An upside-down blade will not cut — it will mulch ineffectively and stress the spindle.
Torque Specifications
Blade bolt torque specs vary by manufacturer and model. Common ranges are 35–50 ft-lb for walk-behind mowers and 70–90 ft-lb for riding mower decks, but these figures are not universal. Always verify the exact torque specification in your mower’s owner’s manual or OEM service documentation for your specific model and engine displacement. Under-torquing allows the blade to loosen in service; over-torquing makes future removal difficult and risks damaging the adapter. Use a calibrated torque wrench — do not estimate by feel.
Apply Anti-Seize Compound to Prevent Future Corrosion
A thin coat of anti-seize compound (copper-based or nickel-based) on the bolt threads before reinstallation prevents metal-to-metal corrosion that causes future seized bolts. Apply sparingly — only to the threaded shank, not the bolt seating face. Note that anti-seize reduces friction, which can affect torque-to-clamp-force relationships; when using anti-seize, some manufacturers recommend reducing the torque value by approximately 10–15% to avoid over-clamping. Check your OEM service manual for whether the factory torque spec assumes a dry bolt or a lubricated bolt, and adjust accordingly.
Post-Installation Check
After reinstallation and before starting the mower, reconnect the spark plug wire, set the mower upright, and attempt to rotate the blade by hand (wearing gloves) to confirm it is secure and does not wobble on the spindle. Then start the mower and listen for any unusual vibration during the first 30 seconds of operation. Shut down immediately if vibration is abnormal — a blade installed off-center or an adapter with damaged threads will produce noticeable vibration that can damage the spindle bearing.
Common Questions on How To Remove A Lawn Mower Blade That Is Stuck Answered
How long should I let penetrating oil soak on a stuck lawn mower blade bolt?
A minimum of 15–30 minutes is required for penetrating oil to wick into corroded threads by capillary action. For heavily rusted bolts, a soak of 2–8 hours — or overnight — produces significantly better results. Reapply the penetrating oil once during any extended soak. Attempting removal before adequate soak time is the most common reason penetrating oil appears not to work.
Do all lawn mower blade bolts loosen counter-clockwise?
No. Most walk-behind mower blade bolts use standard right-hand thread and loosen counter-clockwise. However, certain riding mower and zero-turn decks use reverse-thread (left-hand thread) bolts that loosen clockwise. Check your owner’s manual or look for a directional arrow or “REVERSE” stamp on the bolt head before applying force. Applying torque in the wrong direction tightens the bolt further and risks stripping the head.
Can I use a regular impact driver instead of an impact wrench to remove a stuck blade bolt?
An impact driver (the compact drill-style tool common in woodworking) typically delivers 1,500–2,000 in-lb of torque — sufficient for many mildly seized bolts when used with an appropriate hex-to-socket adapter. A full-size impact wrench (air or electric) delivers significantly more torque (typically 300–700 ft-lb) and is the better choice for badly seized or corroded blade bolts. If an impact driver does not break the bolt free within 10–15 seconds of sustained use, step up to an impact wrench or breaker bar rather than continuing to stress the smaller tool.
Should I replace the blade bolt after removing a stuck blade?
Replace the blade bolt if the head is rounded, the threads show corrosion pitting or deformation, or the bolt required heat or extreme force to remove. A compromised bolt may not torque to spec correctly, risking blade loss during mowing — a serious safety hazard. New OEM-spec blade bolts are typically inexpensive (under $5–$10) and available at hardware stores or through the mower manufacturer’s parts department. Always match the thread pitch, diameter, and length exactly to the original bolt.
For more hands-on benchmarks and buying recommendations, consult our guides on heavy-duty chainsaw buyer guide, as well as high-CFM commercial leaf blower guide, as well as durable ride-on lawn tractor guide, as well as automated robotic lawn mower guide.
Mechanical safety standards, operational tolerances, and protective gear guidelines align with benchmark specifications established by the American National Standards Institute (ANSI).









