

Quick Answer: How To Install A Lawn Mower Blade?
Disable the mower first so it cannot start: unplug an electric mower or remove its battery, and on a gas mower disconnect the spark-plug wire and keep it off the plug. Stabilize and support the machine, remove the blade bolt and worn blade, seat the replacement in the orientation shown in the owner’s manual, then reinstall the hardware and tighten…
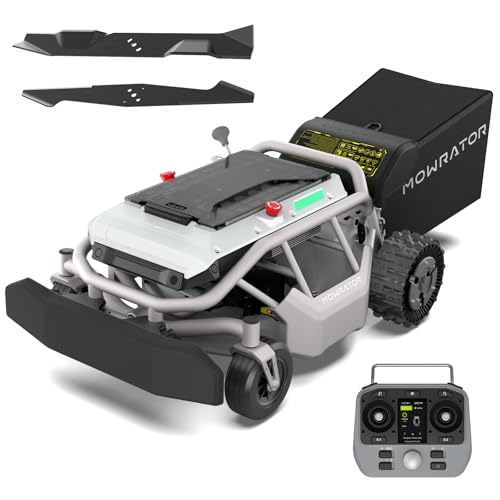
Pros
- Strong dual-motor 2WD system with upgraded tires for reliable performance on inclines up to 24 degrees.
- Versatile 21-inch blade setup includes both standard mowing and mulching options for year-round tasks.
- Automotive-grade LiFePO4 battery offers extended life and fast 70-minute charging for efficient sessions.
- Simple out-of-box remote operation with no RTK setup or apps required.
- Built-in safety sensors and compact agile design support family-friendly mowing near gardens and play areas.
Cons
- Operates only via remote control rather than fully autonomous navigation, requiring continuous user presence.
- Maximum 0.75-acre coverage per charge limits suitability for larger properties.
- 2WD configuration prioritizes simplicity and may need more careful path planning on highly uneven terrain.
The Mowrator S1 2WD remote control lawn mower features a robust steel deck, dual high-torque rear motors, and upgraded soft-compound grip tread tires with weighted metal hubcaps. Its compact and agile build gives an immediate sense of durability suited for residential yards while supporting multi-season tasks.
Performance centers on the 1985.6 W motor driving a 21-inch steel blade that switches easily between standard mowing for thick grass and the included mulching blade for leaf shredding. It maintains steady power on slopes up to 24 degrees (45 percent gradient), covers up to 0.75 acres on a 56V 12Ah LiFePO4 battery with 1.5-hour runtime, and recharges fully in 70 minutes via the 600W charger. Five cutting heights from 1.8 to 4.6 inches plus ultrasonic sensors and emergency stop complete a practical safety package.
Key considerations include the need for active remote operation instead of hands-free autonomy, a coverage limit of 0.75 acres that may require multiple charges on bigger lawns, and the 2WD layout that works well on moderate slopes yet benefits from attentive handling on irregular ground.
This model delivers strong value for homeowners with medium-sized yards, seniors, or anyone seeking to reduce physical strain. It stands out for users wanting reliable slope capability, mulching versatility, and straightforward controls without complex setup.
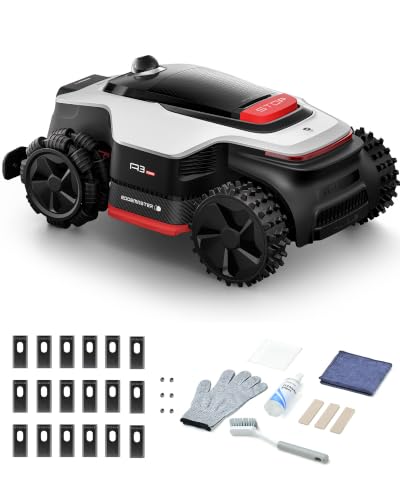
Pros
- AWD hub motors, rated by the maker for 80% (38.7°) slopes
- Wire-free setup using 360° LiDAR and binocular AI vision
- Manufacturer-claimed 45-minute recharge with included 5A adapter
- Night mowing mode, described by the maker as whisper-quiet
- Dreamehome app control with 4G module and HDR camera
Cons
- Edge trimmer module is sold separately
- Manufacturer rates coverage at 0.25-0.5 acre
- No customer reviews available to verify performance

Pros
- Includes two 4.0Ah batteries and a rapid charger
- Self-propelled rear-wheel drive assists on slopes
- 4-in-1 system: mulch, bag, side discharge, and leaf pickup
- Comes with an extra mower blade
Cons
- Coverage up to 3/4 acre varies by terrain and technique
- Requires 60V platform compatibility for spare batteries

Pros
- Highly efficient brushless motor offers more torque and quieter operation than gas models
- Self-propelled variable speed design improves control and reduces user fatigue
- LED headlight enables flexible early or late-day mowing sessions
- Dual battery ports support automatic switchover for longer continuous use
- Durable steel deck and dual blades ensure wide efficient cutting coverage
Cons
- Runtime reaches only up to 3/4 acre on a full 4.0Ah charge and varies with grass conditions and technique
- Single 4.0Ah battery included despite dual ports, so extra battery purchase needed for full dual-port benefit
- Cordless operation requires ongoing battery charging and management between uses
The Greenworks 80V 25" Brushless Cordless Self-Propelled Dual Blade Lawn Mower is a capable electric walk-behind model built for residential use. It features a durable steel deck, aluminum handles, and a solid overall construction that conveys quality and readiness for regular yard maintenance. The self-propelled rear-wheel design creates an immediate impression of controlled power and user-friendly handling.
Performance centers on the brushless motor that supplies strong torque for thorough cutting while remaining 3x quieter than gas alternatives. The 25-inch dual-blade deck delivers an efficient wide path, LED headlights improve visibility in low light, and dual battery ports with automatic switchover extend runtime. With the included 4.0Ah battery the mower covers up to 3/4 acre per charge based on grass condition and operator technique.
Drawbacks to consider include runtime that fluctuates with grass density and the need for regular battery charging. Only one 4.0Ah battery ships with the unit even though dual ports are present, which may require an extra battery for uninterrupted larger jobs.
This mower suits homeowners with medium-sized lawns who want a quiet, low-maintenance cordless alternative to gas power. It delivers strongest value for users prioritizing self-propulsion, LED lighting, and efficient dual-blade cutting in a durable package.
Disable the mower and put on protection first
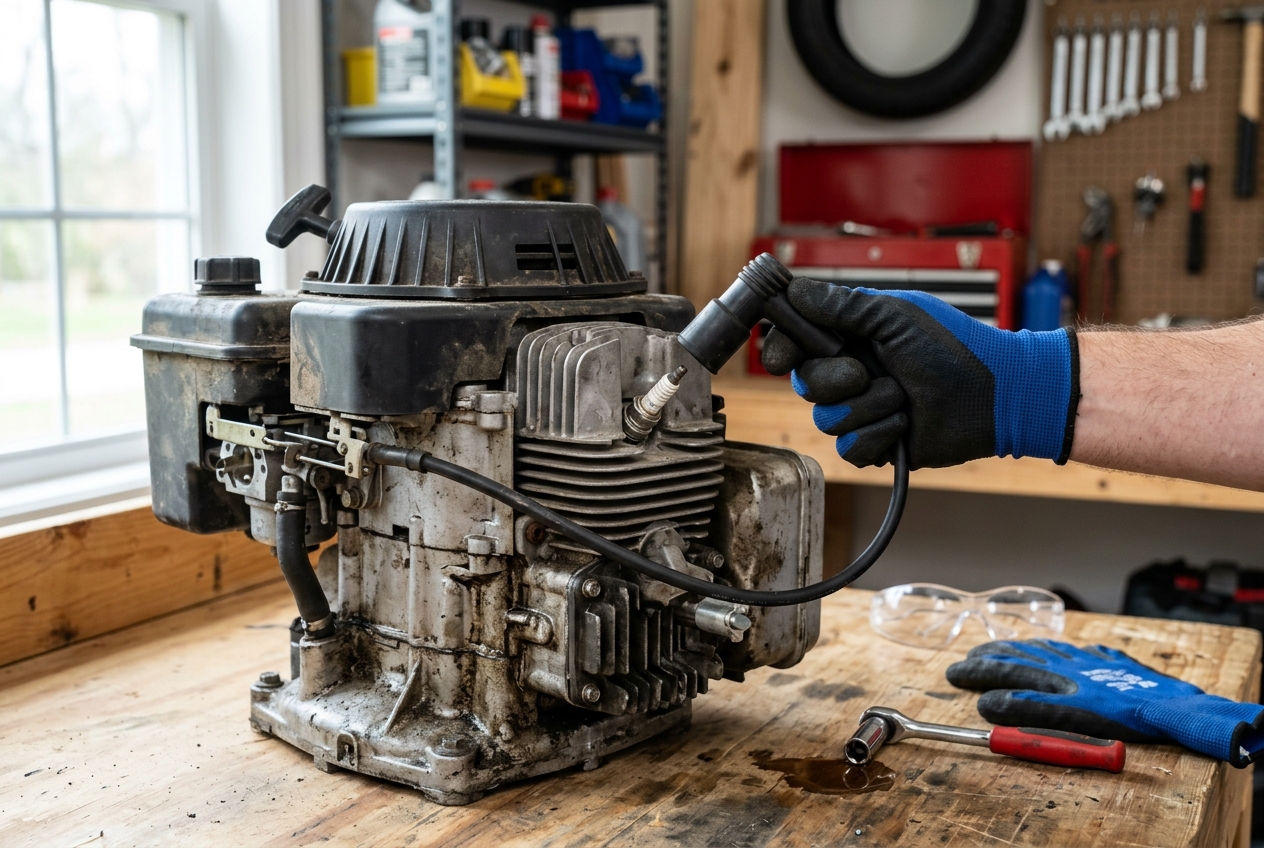
A lawn mower blade can cause severe cuts even when the engine is off. The edge stays sharp after the last pass, and a gas engine can fire if the blade is turned by hand while the spark-plug lead is still connected. Treat the machine as live until you have isolated it. Personal protective equipment (PPE) and a few isolation steps matter more than speed.
How do you stop a gas mower from starting while you work on the blade?
On a typical walk-behind rotary mower, stop the engine and wait until the blade and any other moving parts have fully stopped. Then pull the spark-plug boot off the spark plug and keep the metal connector away from the plug so it cannot snap back into place. Do not rely only on the handle bail, a throttle lever, or a blade-brake control. Those devices stop the machine in normal use; they do not reliably prevent a start if you rotate the blade while the ignition can still spark.
If the owner’s manual names extra isolation steps for your engine, follow those instead of improvising. Do not bypass handle, blade-stop, or other safety interlocks to make the job faster.
How do you disable a corded, battery, or riding mower?
A corded electric mower should be unplugged at the machine and at the outlet so a kicked cord cannot restore power. For a battery mower, remove the battery pack and take out the safety key if the design uses one. That battery disconnect should happen before you tip the deck or put a hand near the blade. Store the pack away from the work area so it is not reinserted by habit.
A riding mower is a different machine. Remove the ignition key and follow the manufacturer’s instructions for isolating the battery or spark system. Riders often have blade-engagement levers, seat switches, and deck-lift hardware that change both access and risk. Do not assume a walk-behind sequence is enough. If the manual is missing, obtain it before anyone reaches under the deck.
What PPE is worth wearing around a sharp blade and dirty deck?
Wear cut-resistant work gloves and eye protection. Packed grass, grit, and rust come off the mower deck when you scrape it. Closed-toe shoes help if a tool or the blade slips. Avoid loose clothing and jewelry that can catch on a deck lip. Gloves reduce cuts; they do not make it safe to grab a cutting edge or to hold the blade with your hand while you turn the bolt. For complementary field maintenance guidelines, examine our breakdown of z890 vs x870e motherboard.
Confirm you have the right blade and basic tools
A replacement mower blade is model- and deck-specific. Length, center-hole shape, thickness, and cutting style must match the mower and the job. A blade that is only “close” can sit cocked, refuse to tighten, vibrate, or come off.
What information identifies a compatible replacement?
Start with the owner’s manual, which is the authority for blade type and mounting. Then inspect the old blade: overall length, the shape of the center hole, any dish or offset, and whether it is a standard, mulching, or high-lift design. A mulching blade usually has extra cutting surfaces or a different sail shape so clippings stay under the deck longer. A high-lift blade has more pronounced wings to move air and throw clippings toward a chute or bag. Using the wrong style can tear grass, clog the deck, or change how the mower discharges. To evaluate matched hardware tolerances, consult our detailed overview of marshall stanmore iii vs harman kardon onyx studio 8.
Match the mower, not a generic “fits most” claim. If stamps on the old blade are worn away, use the mower’s model information rather than a guess from a photo. When the old blade is damaged, do not assume a look-alike aftermarket blade is correct unless the packaging and the manual agree on length and mounting.
Replace a blade that is cracked, has a missing chunk, is badly bent, or has a distorted center hole. Sharpening does not repair structural damage. An unbalanced or cracked blade can vibrate hard enough to harm the spindle or detach while you mow. When planning workspace deployment, consider the engineering criteria outlined in our dyson v8 cyclone vs bissell featherweight stick guide.
Which tools are commonly needed?
Keep the list generic and check fit on your machine before you start:
- Cut-resistant gloves and eye protection
- A socket or wrench that actually fits the blade bolt (size is not universal)
- A scrap block of wood to keep the blade from spinning
- A scraper for packed grass on the deck and adapter
- A marker or phone camera to record washer and adapter order
- The owner’s manual
A wire brush helps clean the adapter face. A torque wrench is appropriate when the manual lists a torque specification. Do not start with a rounded socket that will strip the bolt head, and do not treat any single brand or part number as the correct fit for every walk-behind rotary mower. For additional operational safety benchmarks, see our published testing notes on bissell crosswave hydrosteam vs shark stainforce.
Access the underside and support the mower so it cannot fall
Work on a level, solid surface. If the machine can roll, chock the wheels. You need a stable deck, not a mower balanced on its handle. Never work under a mower that is not stably supported.
Is it safer to tip a push mower or raise one side?
Some walk-behind manuals allow you to tilt the mower to reach a single blade; others tell you to lift one side onto a solid block or to use a designated service position. Only tip or lift in the direction the owner’s manual allows. On many gas engines, tipping the wrong way can send fuel or oil into the air filter or leak fuel from the tank. Battery and electric mowers can have different limits because of the pack, motor, and wiring.
If the manual is silent or missing, do not invent a tipping direction. Get the manual or have a shop do the work. Qualify every tilt as “only if the manual permits.”
What must stay supported so the mower cannot drop onto a hand?
Support the chassis or deck so the machine cannot fall even if you slip. Never crawl under a mower held only by the handle, a single shaky prop, or another person holding it. The deck is heavy, and a drop can pin a hand against a sharp blade.
Riding mowers, zero-turns, and some electric decks may require ramps, a lift, or a shop procedure. Do not invent jack points under a stamped deck pan or a plastic shroud.
Remove the blade bolt, washers, and old blade
Scrape packed grass from the blade, bolt head, and adapter so you can see what you are loosening. Photograph the stack before anything comes off: blade bolt, any lock washer or flat washer, the blade, and the blade adapter. Hardware order is easy to forget and is not the same on every deck.
How do you keep the blade from turning while loosening the bolt?
Brace a wood block between the blade and the deck so the blade cannot spin when you apply force. Do not hold the cutting edge with your hand. Do not jam a screwdriver into a thin deck lip or a vent that can bend.
Many walk-behind blade bolts loosen opposite the blade’s cutting rotation. Some models use a left-hand thread, so the bolt may turn the opposite way from everyday expectation. Do not treat a single clockwise or counterclockwise rule as if it fits every brand. If the bolt will not move with reasonable force in one direction, stop and check the owner’s manual before you round the head or snap the fastener.
What order do the bolt, washers, and blade adapter usually come off?
Once the bolt breaks free, support the blade so it does not drop onto your hand. Remove the bolt and washers, then the blade. Note any adapter, key, tab, or puck that stays on the spindle. Some blades slide off a shaped center; others sit on a separate adapter that must stay aligned with the shaft.
If the adapter is meant to remain on the spindle, do not pry it off unless the manual says to replace it. If it is cracked, rounded, or the locating tabs are broken, stop. That is a hardware problem, not a simple blade swap.
What should you do if the bolt will not budge or the threads seem backward?
A rounded, rust-locked, or heat-damaged bolt is a reason to pause. Light corrosion sometimes yields after cleaning and patience, but extractors, heat, and drilling belong with someone equipped to repair a damaged spindle. A cracked adapter, a shaft that spins inside the hub, or a bolt that turns both ways without loosening are also stop points. Forcing the wrench after guessing thread direction can destroy the only fastener that keeps the blade on the machine. If you cannot confirm left-hand versus right-hand thread from the manual, take the mower to a technician rather than improvising.
Inspect the deck hardware and set the new blade in the correct orientation
Clean the mounting face thoroughly. Grass or rust left between the blade and the adapter keeps the new blade from sitting flat. A cocked blade will vibrate, cut poorly, or work the bolt loose.
How can you tell which side of the blade faces the grass?
Cutting edges and lift wings have a designed “up” or “toward the deck” face. On many blades the sharpened bevel and the sail, the bent wing that lifts clippings, make orientation visible: the cutting edge leads in the direction of rotation, and the sail usually cups toward the deck to move air. Some blades are stamped with a grass-side or deck-side mark. Mulching blades and high-lift blades do not all look alike, so do not apply one slogan to every replacement.
If the new blade looks different from the old one, stop and compare it with the owner’s manual or with markings on the original equipment blade. A backward blade is a common cause of torn grass, weak discharge, and odd vibration.
What does the blade sit against?
The blade must sit flat on the adapter or hub with the center hole fully engaged. It should not rock. Locating tabs, keys, or a shaped hole must nest completely. If the hole is larger than the hub or the blade only catches on a corner, you have the wrong blade or a damaged adapter. The blade should not be able to spin independently of the adapter once it is seated.
Which damaged parts mean you should stop?
Inspect the adapter, any key or tabs, the bolt, and the washers. Cracks, egg-shaped holes, rounded hexes, missing lock washers, and bent adapters are not acceptable reuse. Replacing only the blade while leaving damaged mounting parts in place can let a new blade work loose. A warped deck or a wobbling spindle is also beyond a routine blade change.
Reinstall the blade and tighten the bolt without guessing torque
Put the hardware back in the order you photographed. On many walk-behind decks the blade goes onto the adapter, then the washer or washers, then the bolt, but your machine may differ. Confirm full seating before you apply force.
In what order do the blade, washers, and bolt go back on?
Restate the photographed order rather than a universal stack. Align any tabs or shaped hole. Hold the blade against the adapter so it cannot shift while the bolt starts by hand. Cross-threading is easier to feel at that stage than after you have leaned on a breaker bar.
Keep the wood block in place so the blade cannot spin as you tighten. The blade and adapter should turn together once the bolt is snug enough to take up play.
How tight is tight enough if you do not have a torque wrench?
Tighten the bolt firmly, then use the torque specification and any threadlocker guidance in the owner’s manual when those are listed. If the manual calls for a torque wrench, use one. Do not invent a numeric range, a “good and snug plus a quarter turn” rule, or a universal threadlocker product. Those shortcuts are how bolts are left loose or adapters are crushed.
If you do not have the specification and cannot obtain the manual, it is safer to stop than to guess. A shop can tighten the fastener to the value the manufacturer published for that spindle.
What happens if the blade is loose or the bolt is over-cranked?
A loose blade can vibrate, chew the adapter, throw objects, or come off while you mow. An over-tightened bolt can strip threads, flatten a washer that was meant to lock, or crack an adapter. If the bolt will not tighten, walks backward as soon as you remove the wrench, or the adapter flexes, stop and have the spindle hardware inspected.
Reassemble, inspect, and do a cautious first start
Lower the mower to its normal position. Remove the wood block, scraper, socket, and any loose hardware from the deck and the lawn. Look under the deck once more: blade flat on the adapter, sails oriented as the manual shows, bolt present, nothing hanging.
What should you look at before reconnecting the spark plug or battery?
Confirm that hands, gloves, and tools are clear of the blade path. Only then reconnect the spark-plug boot, battery, or power cord. On a gas mower, push the boot fully onto the spark plug so it cannot fall off the first time the engine shakes. On an electric or battery mower, restore power only after the deck is down and the work area is clear.
How should the first start and first few feet of cutting be handled?
Start the machine in a clear area, away from people, pets, and loose gravel. Listen for the first few seconds, then mow a short, unobstructed strip. You are checking for scraping, a lopsided cut, and vibration, not trying to finish the lawn.
A new blade does not guarantee an even lawn or a specific cut height. Deck level, wheel height, and turf conditions still matter. Do not expect a replacement blade alone to fix scalping or a bent deck.
When is vibration a reason to shut down immediately?
Unusual vibration, a metallic scrape, smoke from a belt area, or grass that looks torn instead of cut means shut down at once. Disable the mower the same way you did at the start, then recheck orientation, seating, and tightness. Continuing to run a machine that shakes hard is how spindles and decks get damaged.
When the owner’s manual or a technician is required
This article describes a general walk-behind rotary mower procedure. It is not a substitute for the book that came with your machine, and it is not safe to treat look-alike photos as if they override model-specific hardware.
Which machines should not follow a generic push-mower write-up?
Do not treat this sequence as sufficient for riding mowers, lawn tractors, zero-turns, robotic mowers, reel mowers, multi-blade decks, timed dual blades, or many electric decks with proprietary fasteners or sealed spindles. Those machines can use different blade bolts, left-hand or right-hand threads, stacked blades, timed alignment, or spindles that must stay in a specific orientation. Commercial multi-spindle decks are outside this scope.
What damage or hardware problems are not DIY-friendly?
Stop and get qualified help if the bolt is seized, rounded, or heat-damaged; if the adapter, spindle, or deck is cracked or warped; if the blade will not sit flat; or if you cannot confirm thread direction. Safety-interlock, blade-brake, and wiring repairs belong in the manual or a shop. Warranty questions are also model-specific; do not treat informal advice as a legal statement about coverage.
Why does guessing thread direction or torque create a safety risk?
Guessing which way a left-hand thread turns can snap a bolt or convince you the fastener is tight when it is still backing out. Guessing torque can leave a blade loose enough to detach or crush the parts that locate it. Either error can throw a blade or send debris out from under the deck. If the manual is unavailable, obtain it or have a technician finish the job.
Problems that show up after a blade change
Some issues appear only after the first start. Treat them as reasons to isolate the mower again, not as puzzles to diagnose while the blade can still move.
Why might the mower vibrate after a new blade is installed?
Vibration can come from a loose bolt, debris left between the blade and adapter, a blade that is not fully on the hub, a bent blade, or a damaged spindle. Those are possibilities, not a complete diagnosis. A nail-and-blade “balance” check at home does not prove the assembly is safe if the mounting hardware is wrong or the spindle is worn. Shut down, disconnect power or the spark-plug boot, and inspect seating and tightness before you run it again.
Why would the grass look torn or the clippings not discharge?
Torn grass, poor bagging, or clippings that sit under the deck can mean the blade is upside down or the wrong style for the deck. Confirm orientation against the manual. A mulching blade on a machine set up to side-discharge, or a high-lift blade used where the deck and chute expect a different sail, can move air the wrong way. Dullness can also tear grass, but orientation is the first thing to verify after a change.
What should you check if the blade loosens again?
A bolt that will not stay tight can mean damaged threads, a missing washer or lock feature, a crushed adapter, or a blade that never seated on the hub. That is a stop-and-repair issue. Do not stack extra washers as a workaround, weld a cracked blade, hammer a bend out of cracked steel, or bypass a blade-stop, handle, or seat switch so the mower is easier to test.
If the cut is uneven after a correct install, check cutting height, whether the deck itself is bent, and, on machines where it applies, tire condition that can tilt the deck. The blade is only one part of an even cut.
Blade Change Safety Notes
Edges stay sharp even when a mower is switched off, so wear gloves and disconnect the spark plug before touching the blade. Readers who want outside context on powered lawn tools can read American National Standards Institute (ANSI).









