

Quick Answer: How To Sharpen Rotary Lawn Mower Blades?
Sharpen a rotary mower blade only after the machine cannot start. Isolate the spark-plug wire, battery, or power cord and wait until the blade is fully stopped. Remove the blade, mark which face points toward the deck, and replace it if it is bent, cracked, or badly thinned. Restore the existing factory bevel equally on both ends without overheating the…

Pros
- Powerful 1/3 HP motor with 1750 RPM enables quick and effective sharpening
- Compatible with blades from all brands and a range of sizes
- Includes built-in safety kill switch and one 8-inch sharpening stone
- Easy to use design supports blade reuse and longer service life
- Compact heavy duty build suits both large and small blade work
Cons
- Limited to single direction action without multi-directional options
- Kit provides only one 8-inch sharpening stone requiring future replacements
- Basic economy setup includes no extra accessories beyond the grinder and stone
The Oregon 88-025 Economy Lawn Mower Blade Sharpener and Grinder is a compact heavy duty tool built for sharpening lawn mower blades across various sizes. Its sturdy design and adjustable features create a solid first impression for anyone focused on practical blade maintenance.
Performance relies on the 1/3 horsepower motor at 1750 RPM with single direction action that makes quick work of blades from all manufacturers. Standout elements include the built-in safety kill switch and the included 8 inch sharpening stone, which together enable simple operation to reuse and extend the life of grass cutter blades.
Considerations include the single direction grinding that may limit flexibility for certain techniques, plus the kit containing just one sharpening stone so replacements become necessary with ongoing use. The economy focus keeps things straightforward without extra complex options.
This product suits homeowners and small lawn care operators who need a reliable way to keep blades sharp and avoid frequent new purchases. It provides clear value through its power and ease for everyday maintenance routines.

Pros
- Accurate balancing reduces blade wobble and engine wear effectively
- Works with nearly all standard lawnmower blade shapes for true universality
- Durable zinc die-cast construction ensures long-term rust resistance
- Intuitive design makes it easy for beginners and DIY users to operate
- Supports better cutting efficiency after blade sharpening sessions
Cons
- Lacks advanced precision indicators so users must rely on visual leveling judgment
- May not fit highly specialized or non-standard irregular blade designs perfectly
- Basic single-tool package includes no carrying case or extra accessories
The SporGain Lawn Mower Blade Balancer is a compact universal tool built from premium zinc die-cast metal for balancing lawnmower blades after sharpening. Its solid rust-resistant construction gives an immediate impression of durability suited for garage storage or occasional outdoor exposure, making it a practical accessory for standard lawn care routines.
In performance, the tool excels at simple balance checks by letting users place nearly any round, square, or common blade shape on it to detect imbalances. This process helps reduce wobble, vibration, and engine strain while verifying bent blades, leading to smoother cuts and longer mower life based on its core design features. The intuitive layout supports quick adjustments without specialized skills.
Drawbacks include the absence of built-in precision markers, which means results depend on careful visual assessment, and potential fit issues with highly custom blades outside standard shapes. It also comes as a basic 1pk unit without extras like storage options.
Overall, this SporGain balancer delivers strong value for DIY homeowners and lawn maintenance enthusiasts who regularly sharpen blades and want an affordable, reliable way to maintain cutting performance. It is ideal for those seeking universal compatibility and lasting metal quality without needing professional-grade equipment.

Pros
- Heavy-duty zinc alloy build for long-term use.
- Universal fit for many common blade shapes.
- Simple design is easy to use after sharpening.
- Compact size is convenient for storage and transport.
Cons
- It is a single-purpose tool and does not sharpen blades.
- Compatibility is broad, but the product data does not list exact mower model support.
- No instructions or extra accessories are mentioned in the manufacturer listing.
Overview and design. The Silcpall Lawn Mower Blade Balancer is a compact universal tool made from zinc alloy. Its round, simple shape is designed to hold mower blades at the center for quick balance checks after sharpening.
Performance and key features. In use, the balancer is meant to help you spot uneven blades before they cause vibration, poor cut quality, or extra wear on the mower. The universal design is intended to work with most common blade shapes, including round and square styles.
Drawbacks and considerations. This is a single-purpose accessory, so it will not sharpen blades or provide model-specific mounting guidance. Compatibility is broad, but users should still confirm their blade sits securely on the center slot before relying on it.
Verdict. For homeowners, DIY users, and anyone who sharpens mower blades at home, this is a practical maintenance tool that can make blade balancing faster and more consistent. It is best suited to buyers who want a simple, durable balancer rather than a multi-function kit.
What this job covers
This sequence is for a typical steel rotary lawn mower blade, the spinning bar under a walk-behind or common riding mower. The goal is a clean, matched cutting bevel on both ends, a blade that hangs level on a simple balancer, correct orientation on reinstall, and no unusual vibration on a short test run.
It does not cover reel mowers, plastic or composite blades, flail blades, commercial fleet programs, or brand-by-brand dealer procedures. If the blade is already unsafe, or if the spindle, adapter, or deck hardware looks damaged, stop and replace the part or take the machine to a qualified shop. Sharpening cannot restore a bent, cracked, or badly thinned blade.
Success is modest and practical: grass is sheared instead of shredded, the edge is even rather than razor-thin, both cutting ends match, and the mower runs smoothly after you remount the hardware in the original order.
Lock out the mower and handle the blade safely
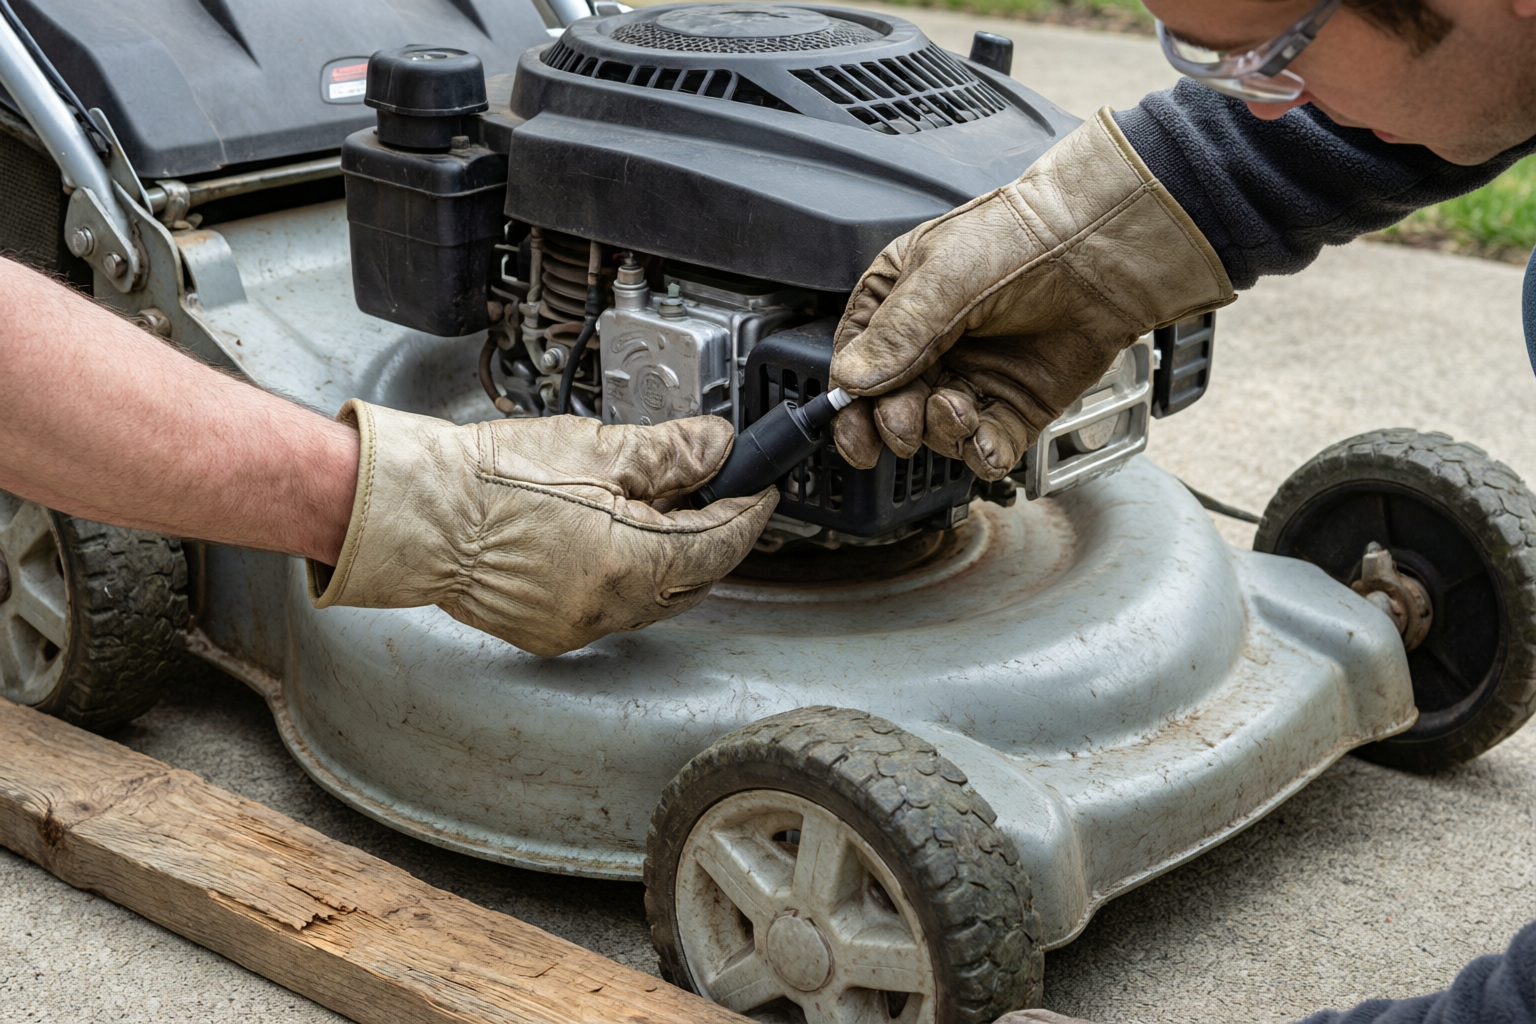
A rotary mower can start if ignition or power is not isolated, even when you are under the deck. Treat lockout as mandatory. Never rely on an “off” switch alone, and never work with the spark plug connected or the battery still in the machine.
Isolate gas, battery, and corded machines
On a gas mower, disconnect the spark-plug wire and keep the boot away from the plug so it cannot snap back. If the machine has a key, remove it. Confirm the blade has fully stopped before you put a hand near the deck.
On a battery mower, remove the battery or safety key and wait until the blade is completely still. On a corded electric mower, unplug the cord at the machine, not only at a distant outlet. If a riding mower has more than one power source, isolate each one the operator’s manual names before you reach under the deck.
Stabilize the machine without creating new hazards
Block the wheels so the mower cannot roll. Keep hands, tools, and clothing out of the blade path until lockout is complete. If you tip a walk-behind to reach the blade, follow the tilt direction in that mower’s manual. Fuel and oil can leak or flood the air filter depending on tank and carburetor layout; there is no single “always tip this way” rule that fits every deck.
Do not invent a universal cool-down wait, fuel-drain ritual, or battery voltage delay. If the manual calls for extra steps, such as waiting after a hot run or supporting a riding mower on jack stands, follow those steps instead of improvising.
Personal protective equipment and blade handling
Wear sturdy gloves and eye protection for the entire job. The blade should be treated as sharp from removal through reinstall. A falling blade, a slipping wrench, or grinding debris can cut or injure in a moment. Hearing protection is reasonable if you use a grinder. Keep bystanders, children, and pets away from the work area.
Gloves reduce lacerations; they do not make a spinning or falling blade safe. Support the blade so it cannot drop onto a foot or bounce off concrete. If you are uncomfortable working under a riding deck or around fuel and pinch points, stop and use a shop. For additional operational safety benchmarks, see our published testing notes on marshall stanmore iii vs harman kardon onyx studio 8.
Remove the blade and mark which way it faces
Orientation mistakes are common and expensive. Before the blade nut comes off, mark the deck-facing side and note which cutting end leads in rotation. Photograph the washer, adapter, locating lugs, and any spacer stack. That record is what lets you reinstall the blade so the cutting edges and lift sails face the right way.
Keep the blade from spinning
Hold the blade with a wood block braced against the deck, not with bare hands and not with a tool that can slip into the edge. A scrap of lumber between the blade and the deck lip is enough for most walk-behind machines. Keep the block away from the cutting bevel so you do not crush or nick the edge you are about to restore. To compare alternative configurations, check our hands-on review of dyson v8 cyclone vs bissell featherweight stick.
Loosen the blade nut without guessing the thread
Many blade bolts are standard right-hand thread and loosen counterclockwise. Some machines use locking hardware or opposite-thread fasteners. Check the operator’s manual or markings on the fastener instead of assuming. Do not force a nut that will not break free; a rounded head or a twisted spindle is worse than a paused job.
Use a socket that fully seats on the nut. If the hardware is rusted, penetrating oil and patience are safer than impact force that can damage the spindle. Once the nut is loose, support the blade so it cannot fall when the last threads release. Users looking for related component recommendations can explore our bissell crosswave hydrosteam vs shark stainforce breakdown.
Inspect the adapter and spindle while the blade is off
With the blade removed, look at the blade adapter, center hole, and spindle. Wear, cracks, a rounded locating feature, or a bent shaft are reasons to stop sharpening and replace the damaged part. A blade that sits crooked because the adapter is worn will vibrate even if the edge is perfect.
Keep the nut, washer, and adapter together in the order they came off. Missing or reversed hardware is a frequent cause of a blade that loosens or sits at an angle.
Inspect first: sharpen or replace
Not every rotary lawn mower blade should go back on the machine. Inspect before you file or grind. Replacement is the correct next step when the steel is no longer sound.
Defects that mean the blade must be replaced
Replace the blade if it is bent, cracked, missing large chunks, or worn so the cutting area or lift sail is badly thinned or distorted. A lift sail is the upturned section that helps move air and clippings; if that shape is flattened, torn, or worn paper-thin, sharpening the edge will not restore safe function.
Do not straighten a bent blade at home. Hidden cracks and lasting imbalance are the risk. Do not weld cracks. A blade that has already been ground down to a narrow ribbon of steel should be retired even if the remaining edge still looks shiny.
Nicks versus structural damage
Small nicks can often be dressed out if enough steel remains and both ends can be matched. Deep gouges that reach into the body of the blade, or damage that leaves one end much shorter than the other, are replace conditions. If you cannot restore a similar bevel on both cutting ends, the blade will be hard to balance and should not return to the spindle.
Mulching, high-lift, and bagging shapes
Mulching or high-lift blade shape does not change the safety inspect. A mulching blade still fails if it is bent or cracked. A high-lift sail still fails if it is thinned or torn. What does change is the replacement: the new blade must match length, center-hole pattern, and intended deck function. A bagging or high-lift blade is not an automatic substitute for a mulching blade, and the reverse is also true.
There is no universal minimum width or thickness that applies to every rotary blade. If the maker publishes a wear limit in the manual, use that limit. Otherwise, replace when the cutting area or sail is clearly thinned, distorted, or too damaged to match on both ends.
Sharpen along the existing cutting bevel
Follow the existing factory bevel. Do not impose a new angle because a chart or a neighbor named a number of degrees. The factory grind is already on the steel; your job is to restore that face evenly on both cutting ends.
Choose a tool that you can control
A hand file is slower and less likely to overheat the edge. It is a good default if the blade is only dull or lightly nicked. A bench grinder or angle grinder removes metal quickly. That speed is useful on a badly rounded edge, and it is also how people blue or weaken the steel by holding the blade in one spot too long.
No single file brand, grit, or grinder speed is required. What matters is light, controlled passes and the same amount of metal from each end. Clamp the blade securely if you file. If you grind, keep a firm grip, stand so debris cannot hit your face, and wear eye protection.
Stroke, heat, and matching both ends
Work along the existing cutting bevel. Push a file in the cutting direction of the teeth or in long, even strokes that follow the factory face. Do not file the flat underside into a new knife geometry. Do not grind the back of the blade just to make it “sharper.”
Use light passes. Pause so the steel does not stay too hot to touch after a brief wait. Quenching in water between passes is a common way to keep heat down if you grind, but heat control is the point, not a ritual. Blue discoloration is a warning that the edge got too hot. An overheated, blued edge is a reason to dress back to sound steel or replace the blade, not a reason to grind hotter.
Remove similar amounts from both cutting ends. Count strokes or alternate ends often. Unequal metal removal is the usual path to an unbalanced blade. Stay off the lift sail and the structural body except where a small nick must be blended into the bevel.
How sharp is sharp enough
A mower blade needs a clean, even cutting bevel, not a fragile razor edge that chips on the first stick. If the edge will slice paper like a kitchen knife, you have probably gone too thin. A slightly blunt, uniform bevel that matches both ends will cut grass cleanly and last longer than a knife-thin wire edge.
After sharpening, wipe away metal dust. Do not blow dust toward your face. Check that you have not created a hook, a secondary bevel that fights the factory face, or a feather that will fold over on the first pass through the lawn.
Balance the blade before it goes back on
An unbalanced or bent blade can cause vibration, loosened hardware, and extra wear on the deck and spindle. Balance is not optional after you have removed metal. It is the check that tells you whether both ends still belong on the same machine.
How to check balance
A simple cone balancer or a horizontal nail or rod through the center hole is enough to show which end drops. The blade should hang close to level. If one end consistently falls, that end is heavy.
Do this check after sharpening, not before you decide the blade is finished. A blade that looked even in the hand can still be heavy on one cutting end after unequal filing.
Where to remove metal if one end is heavy
Remove small amounts from the heavy end, staying on the bevel or a non-structural area. Recheck often. Do not drill random holes to lighten a blade unless a manufacturer method says to do that. Random holes create stress risers and do not reliably fix a blade that is already damaged.
If the blade remains badly lopsided after damage or heavy grinding, replace it. More filing will not correct a bend, a missing chunk, or a center hole that is worn egg-shaped.
Reinstall the blade so it cannot loosen in use
Remount in the marked orientation so cutting edges lead in the direction of rotation and lift sails face the deck as designed. An upside-down blade often looks almost correct until the mower tears grass and throws debris poorly. Your marks and photographs are more reliable than memory.
Hardware stack and seating
Reassemble the original washer, adapter, and any locating lugs in the photographed order. The blade must sit flat against the adapter with the center hole fully engaged. A missing washer or a reversed cup washer can let the nut loosen or let the blade sit crooked.
Start the nut by hand so you do not cross-thread it. Confirm the blade cannot shift on the adapter before you apply final tightness. If the adapter or spindle showed wear during removal, do not reuse it and hope the nut will hold.
How tight is tight enough
When the manual or fastener marking gives a torque value, use a torque wrench and that value. If the specification is unknown, tighten firmly with the correct tool while the blade is blocked, then lock the mower out again and recheck after a short test. Do not apply a borrowed foot-pound number from another machine. Too loose and the blade can shift; too aggressive and you can damage threads or the spindle.
If the fastener is a prevailing-torque nut or uses a special locking feature, replace worn locking hardware rather than relying on a nut that has already lost its grip. Do not treat threadlocker as a universal fix for a nut that loosens. Missing hardware, a worn adapter, or the wrong thread direction are more likely causes.
First start and recheck
Restore the spark-plug wire, battery, or cord only after tools, blocks, and hands are clear of the deck. Keep people away from the discharge opening. On the first start, listen and feel for unusual vibration and stop immediately if it appears. After a short run, lock the machine out again and recheck that the blade nut is still tight and the blade has not shifted.
Keep hands and feet clear until the blade is proven still and the machine is locked out again. A quiet deck and an even cut are the practical confirmation that orientation, balance, and hardware are in order.
Mistakes, vibration, and when to stop
Most problems after sharpening come from orientation, heat, imbalance, or hardware, not from failing to grind a few more strokes.
Upside-down or backward installation
A reversed or upside-down blade can tear grass, throw debris poorly, and stress the deck. Lift sails that face the ground do not lift. Cutting edges that trail instead of lead mash rather than shear. If the cut looks ragged or the mower seems to slap the turf, lock out the machine and compare the blade to your marks and photos before you sharpen anything else.
Blued edges, thin edges, and persistent vibration
Overheated (blued) edges and knife-thin fragile edges are reasons to replace the blade or dress back to sound steel, not to keep grinding. Persistent vibration after a careful balance check points to a bent blade, bent spindle, missing washer, or damaged adapter. Those are inspect-and-replace issues. More filing will not straighten a spindle or replace a crushed washer.
A nut that will not stay tight may mean missing hardware, a worn adapter, or incorrect thread direction. Recheck the stack. Do not disable safety interlocks to “make testing easier,” and do not run the mower with the spark plug connected while you hold the blade.
When further grinding is the wrong next step
Stop grinding when the bevel is clean and matched, when the steel has already run hot, or when metal removal is the only way you can imagine fixing vibration. Further grinding is the wrong next step if the blade is bent, cracked, or badly thinned, if the adapter is damaged, or if the mower vibrates with a new or known-good blade. At that point the problem is no longer the cutting bevel.
Send the job back through lockout, inspect, and replace rather than inventing workarounds. A shop is the right call when you cannot isolate power confidently, cannot support a riding mower safely, or find spindle or deck damage you are not equipped to repair.
A practical order of work
Keep the job in this order so you do not sharpen an unsafe blade or remount one that will loosen:
- Lock out ignition or power and wait until the blade is fully stopped.
- Put on gloves and eye protection; block the wheels and stabilize the deck.
- Mark orientation and photograph the nut, washer, and adapter.
- Hold the blade with a wood block and remove the fastener as the manual indicates.
- Inspect the blade, adapter, and spindle; replace anything bent, cracked, or badly worn.
- Restore the existing cutting bevel on both ends with a file or light grinding, pausing so the steel does not overheat.
- Check balance on a cone balancer or a rod through the center hole; dress the heavy end only as needed.
- Remount in the marked orientation with the original hardware stack and tighten as specified, or firmly if no specification is available.
- Restore power, run a short test, stop if vibration is unusual, then lock out and recheck the nut.
That sequence is the whole job: prevent a start, preserve orientation, refuse to sharpen a ruined blade, follow the factory bevel, prove balance, and put the hardware back so the rotary lawn mower blade cannot loosen in use.
Related Maintenance and Operating Guides
To keep your equipment running at peak operating efficiency, explore our related technical walkthroughs and maintenance tutorials:
- Consult our detailed breakdown on heavy-duty chainsaw buyer guide.
Technical Standards and Compliance
Mechanical safety standards, operational tolerances, and protective gear guidelines align with benchmark specifications established by the American National Standards Institute (ANSI).









