

Quick Answer: How To Charge A Lawn Mower Battery?
Identify the battery chemistry, labeled voltage, and a matching charger first. Charge a cordless lithium pack only in its own dock. For a typical riding-mower starting battery, work in a dry, ventilated area, inspect for damage, connect positive to positive and negative to negative, and charge until the charger shows complete without overheating. Reconnect cables in reverse order. Do not…
Pros
- 250W fast-charging design for supported Husqvarna lithium-ion batteries.
- Active cooling helps lower battery charge time during use cycles.
- Wall-mountable or desktop setup provides flexible storage options.
- Supports multiple Husqvarna BLi battery models: BLi20, BLi22 and BLi30.
- Designed for Husqvarna 40V cordless equipment across select 100, 200, 200X and 300-Series tools.
Cons
- Compatibility is limited to specific Husqvarna BLi batteries and select cordless equipment series.
- Intended for household and part-time use, not positioned as a heavy-duty commercial charger.
- Product data does not list dimensions, cord length or charge times for each battery model.
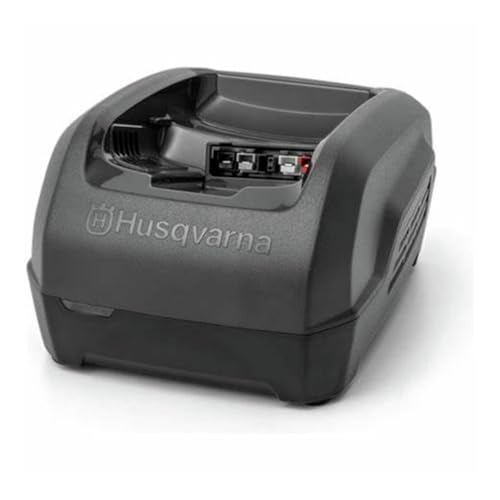
Overview & Design: The Husqvarna QC250 is a 250W lithium-ion battery charger made for compatible Husqvarna BLi batteries, including BLi20, BLi22 and BLi30. It has a practical black desktop design and can also be wall-mounted, which makes it easier to organize a garage, shed or lawn-care charging area.
Performance & Key Features: Its main advantage is fast charging with active battery cooling. This cooling feature is designed to lower charge time, helping users keep cordless Husqvarna equipment ready during larger residential jobs. It works as a 40V charger for supported Husqvarna 100, 200, 200X and 300-Series battery-powered tools.
Drawbacks & Considerations: The QC250 is best suited to household and part-time use, so buyers looking for a charger for intensive commercial workloads should confirm that this model fits their needs. Compatibility is also specific, so it should be matched only with supported Husqvarna BLi20, BLi22 and BLi30 batteries. The available product data does not provide exact charge times, dimensions or cord length.
Verdict: The Husqvarna QC250 is a strong choice for homeowners and part-time users already invested in compatible Husqvarna 40V cordless equipment. Its 250W charging capability, active cooling and flexible wall-mountable design make it a practical upgrade for keeping select Husqvarna batteries ready for routine lawn and garden work.

Pros
- Designed for GustoneMas 18.5V and 21V lithium packs
- Smart protection against overcharging and short circuits
- Clear red and green LED lights show charging status
- Compact, lightweight desktop station footprint
Cons
- Brand-specific compatibility for GustoneMas batteries
- Only charges one battery pack at a time
Identify the battery type, voltage, and charger first
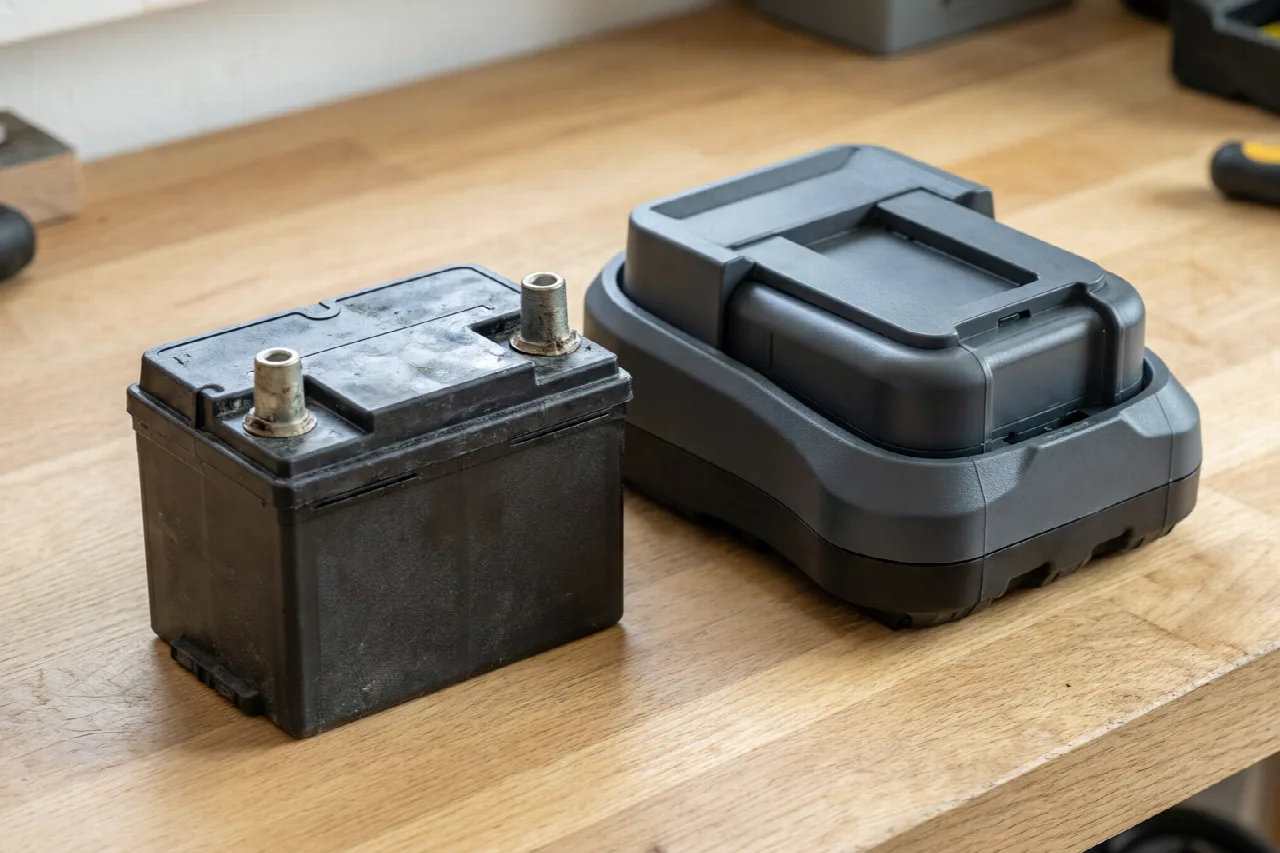
The safest way to charge a lawn mower battery is to treat the label and the matching charger as your primary evidence. Guessing the chemistry, voltage, or connector is how people overheat a pack, spark the terminals, or ruin the charger.
Start by deciding what kind of battery you actually have. A riding mower starting battery is usually a bolted-in lead-acid battery that looks similar to a small automotive battery, with two exposed battery terminals and cable clamps. A cordless electric mower more often uses a removable lithium-ion pack that slides or clips into the handle or deck and charges in a battery dock. Some walk-behind electric models use a smaller proprietary pack, and a few machines have an onboard charger that plugs into a wall outlet while the battery stays on the mower. Those are common patterns, not rules that cover every brand.
Read the case, the handle, the charger brick, and any tag on the wiring harness. You are looking for chemistry words such as lead-acid, flooded, AGM, or lithium, plus a labeled voltage and any connector shape that only fits one dock. Riding mowers often use a 12-volt-style starting battery, but do not assume that voltage if the printing is gone. Do not invent an amp-hour rating or a charger setting either. If the label is missing, use the mower or charger manual, or look up parts from the model number on the machine. Stop rather than match a charger by size or by the fact that the clamps fit.
Charger compatibility is not optional. A lithium-ion pack should not be charged with a generic lead-acid charger, an automotive charger, or a homemade adapter. A flooded battery or AGM battery should not be forced onto a lithium dock. If the plug does not seat fully, the voltage does not match, or the chemistry is unknown, leave the battery alone until you have the correct charger. A mismatch can overheat the cells, blow a fuse, or damage mower electronics.
Safety checks before you charge
Refuse to charge some batteries at all. Do not charge a cracked, leaking, bulging, or frozen battery. Do not charge a lithium pack that is swollen, smells burnt, or has a melted connector. Those conditions are replacement problems, not charging problems. Set a damaged battery aside on a nonflammable surface away from people and pets, and take it to an appropriate recycler when you can move it safely.
Lead-acid charging can release hydrogen gas, which is flammable. Charge in a dry, ventilated area, not in a closed shed full of fuel cans, and keep flames, cigarettes, grinders, and other spark sources away. Use a nonflammable work surface. Keep the area dry so you are not standing in water with a plugged-in charger. Wear eye protection. Avoid getting white or green residue from a lead-acid battery on your skin; if acid or residue reaches skin or eyes, rinse with water and seek medical care.
Jewelry, watches, and loose metal tools belong away from the terminals. A ring or wrench that bridges positive and negative can spark, heat, or weld itself in place. Reverse polarity can do the same. For a lithium-ion pack, the main extra risks are heat, swelling, and thermal runaway if the pack is damaged or the charger is wrong. You do not need a thermometer cutoff from a generic article; you need to stop at the first sign of rapid heating, smoke, or a changing case shape.
Decide whether to charge the battery on the mower or remove it
Many removable lithium packs are designed to leave the mower and sit in a matching charger or battery dock. Take the pack out, keep the contacts clean and dry, and charge it on a hard, nonflammable surface where you can see it. Do not leave a cordless pack wedged in wet grass or under a cover that traps heat.
A bolted-in riding mower starting battery can often be charged on the machine or on a bench. Either method can be acceptable if the terminals are accessible, polarity is clearly marked, and the charger instructions allow that setup. Leaving it in place is convenient when the cables are sound and you can attach clamps without stretching them across painted bodywork or fuel lines. Removal is better when the battery is cramped, the case needs a full inspection, the cables are corroded or frayed, or the charger is a bench unit that expects the battery on a table.
Follow the mower manual when it specifies a method. If the battery is hard to reach, the hold-down is seized, or a cable is damaged, do not pry on the case or yank a live clamp. Stop and have a small-engine shop or a person comfortable with battery service finish the job. Charging is not worth a shorted cable or a spilled flooded battery. When planning workspace deployment, consider the engineering criteria outlined in our marshall stanmore iii vs harman kardon onyx studio 8 guide.
Disconnect power and prepare the battery
For a conventional starting battery, the usual practice is to disconnect the grounded negative cable first and the positive cable last. That order reduces the chance that a tool touching the frame will short the still-connected positive terminal. Set the cables aside so they cannot spring back onto the posts. Reverse that order when you reconnect later: positive first, negative last.
Inspect before you apply a charger. Look for loose clamps, frayed insulation, white or green corrosion, a swollen or leaking case, and missing vent caps on a serviceable flooded battery. Check that the battery is sitting level in its tray and that the hold-down, if present, is not crushing the case. On a lithium pack, inspect the slide rails, latch, and contact pads instead of vent caps. For additional operational safety benchmarks, see our published testing notes on dyson v8 cyclone vs bissell featherweight stick.
Clean only after the battery is disconnected and only enough to get a metal-to-metal connection. Keep tools from bridging the two terminals. Light lead-acid residue can often be addressed with a battery-safe cleaner or a mild baking-soda solution on a disposable cloth, then a dry wipe. Do not soak the top of the battery, and do not use that approach on a lithium-ion pack. Do not open a sealed case, pry off a sealed cover, or add a guessed amount of water. A flooded battery designed to be serviced may show low electrolyte through the case; if you are not equipped to service that design, charge only if the case is intact and the charger matches, or take the battery to a shop. Never invent fill levels or specific-gravity targets.
Connect the charger with the correct polarity
Polarity is the core of a clamp-style charge. On most starting batteries and chargers, red or “+” is positive and black or “−” is negative. Still verify the markings on both the battery and the charger. Do not rely on cable color alone if someone has replaced a lead. To compare alternative configurations, check our hands-on review of bissell crosswave hydrosteam vs shark stainforce.
Use this usual clamp sequence unless your charger manual says otherwise:
- Keep the charger unplugged or switched off.
- Attach the positive clamp to the positive terminal.
- Attach the negative clamp to the battery negative post, or to a clean chassis ground if the charger or mower instructions tell you to do that instead.
- Confirm the clamps cannot twist off or touch each other.
- Power the charger on and select only a mode the charger documents for that chemistry, if it has modes.
When you finish, turn the charger off or unplug it first, then remove the negative clamp, then the positive clamp. That reverse sequence reduces sparking at the battery.
If you are charging on the machine and the negative post is awkward, a clean, unpainted ground point on the frame is sometimes the intended negative connection. Use that only when the instructions say to. Do not clamp onto fuel lines, moving parts, or coated plastic.
For a lithium-ion pack, the workflow is simpler and stricter. Seat the pack fully in its own charger or dock until it latches. Do not improvise adapters, jumper wires, or a car-charger hookup. If the plug or dock does not match, you have the wrong charger. Reverse polarity on a clamp charger can spark, blow a fuse, or damage the charger, the mower wiring, or the battery. There is no safe “try it and see” version of a reversed connection.
Charge the battery and recognize when it is ready
Use the charger’s own charging, complete, ready, or fault indication rather than a guessed clock time. Charge time depends on the battery’s state, capacity, chemistry, and the charger’s output, so a universal “leave it overnight” rule is not a safe instruction. Stay nearby for the first part of the charge and confirm that the battery and charger stay reasonably cool and quiet.
Stop immediately if you see or smell trouble: rapid heating, a strong sulfur or burning odor, hissing, leaking, smoke, or a swelling pack. Unplug the charger from a safe distance if the case is distorting or smoking, and do not keep charging in hopes the symptoms will pass. Those are end-of-charge cues in the wrong direction.
Some lead-acid chargers switch to a maintenance or float mode after they detect a full battery. Many lithium docks stop or idle when the pack is full. That does not mean every charger is safe to leave connected indefinitely. If the unit has no documentation, no useful lights, and no chemistry setting you can verify, replace it with a charger specified for that battery chemistry and labeled voltage. Estimating hours on an unknown brick is not a workaround.
Do not chase a particular voltmeter number from a general article. Resting voltage, charge voltage, and “full” readings vary by chemistry and by how recently the charger was disconnected. The practical ready state is the charger showing complete, the battery remaining cool, and no odor or distortion.
Reconnect the battery and test the mower
On a conventional starting battery, reconnect the positive cable first and the negative cable last. Snug the clamps so they cannot twist on the posts, but do not crush a lead terminal with excessive force. Keep tools off the terminals while you work. Confirm the charger is fully removed and that no clamp is still hanging on the frame. Restore any terminal covers, boots, and the hold-down so the battery cannot bounce in the tray.
For a slide-out lithium pack, install it until the latch catches and the mower recognizes the pack the way it did before. Keep the contacts dry.
A successful charge looks like a normal start and ordinary electrical function: the engine cranks in a familiar way, or the electric mower powers on and runs as it usually does. It is not a promised cranking speed or a restored original runtime. If the mower still does not start, the cause may be a battery that will not hold a charge, a dirty connection, a blown fuse, a safety interlock (seat, blade, or brake switch on many riders), stale fuel, or another mechanical issue. Those other systems need their own checks. A charged battery that sits at the terminals but cannot turn the engine is still a no-start, not proof that charging failed to “take.”
What to check if the battery will not take a charge
Start outside the battery. Confirm the wall outlet works, the charger cord is undamaged, and a lithium pack is fully seated in the dock. On a starting battery, confirm the clamps are on clean, tight terminals and that you did not reverse polarity. Check any inline fuse or circuit breaker the mower uses for the charging or starting circuit. A dead outlet or a half-latched dock looks exactly like a dead battery until you rule it out.
A battery that is physically damaged, will not accept any charge, or dies again immediately after the charger shows complete is generally due for replacement. Neglected lead-acid batteries can sulfate and lose capacity; they may take a little current and still fail to start the mower. A lithium-ion pack can fail closed or go into protection after a deep discharge or a fault. Neither situation is a reason to use recovery gadgets, freeze-and-thaw tricks, aspirin, Epsom salt, or an overcharge “reconditioning” method. Those home remedies are unsafe and unreliable.
Retire a lithium pack that swells, overheats in its own dock, will not communicate with the charger, or has damaged cells or contacts. Retire a lead-acid battery with a cracked case, a leak, a frozen and ruptured container, or repeated failure to hold a charge after a complete cycle on a matching charger.
Used mower batteries belong at an appropriate recycler, not in ordinary household trash. Lead-acid and lithium chemistries both need a proper drop-off. Follow local rules for transport and disposal; a general recycle-don’t-trash habit is the right default.
Lead-acid starting batteries versus lithium mower packs
Chemistry changes the method even when the goal is the same: a battery that can start or run the mower.
Lead-acid starting batteries on riding mowers are often charged with an external battery charger designed for that chemistry and the labeled voltage. A serviceable flooded battery has vent caps and can release more gas while charging, which is why ventilation matters. Sealed types, including many AGM batteries, are less tolerant of a charger that keeps pushing current after the battery is full. If the label identifies the type, use a charger mode that matches it. If the label does not, do not guess between flooded and AGM settings; use a charger and mode documented for that battery or get help identifying it.
Lithium-ion packs on cordless machines almost always require the charger or dock sold for that system. They should not be jump-started, trickle-charged with lead-acid equipment, or clipped to a car battery. The pack’s electronics expect a specific charging profile. A jump pack or a vehicle jump may start a mower that has a weak lead-acid starting battery in some cases, but that is not a substitute for a proper charge. Jumping is unsafe on a damaged battery and is the wrong tool for a lithium pack.
A trickle charger or maintainer can be appropriate for a lead-acid starting battery when the device is designed for that chemistry and voltage. It is not a reason to leave an incompatible charger hooked up. An onboard charger, when the mower has one, is meant to be used as the manufacturer describes, usually a simple cord to the wall, not as permission to add a second charger in parallel.
Winter and long storage differ only at a high level. Store batteries charged according to the manufacturer, in a moderate-temperature, dry place. A lead-acid battery can self-discharge in storage, so it may need a periodic check or a maintainer that matches it. A lithium pack should not be stored fully empty if you can avoid it, and it should not be stored on a live charger unless the dock is designed for that. Skip invented storage voltages, monthly calendars, and temperature ranges that did not come from your manual.
Keep the battery from going flat between uses
Long storage is the usual reason a lawn mower battery is dead in the spring. Other common drains include dirty or loose terminals, a failing charging system on a riding mower that never replenishes the battery after starting, accessories left connected, and a safety switch or aftermarket add-on that draws current while the key is off. Leaving a lithium-ion pack fully empty for a long stretch can also leave it unable to wake up in its dock.
A maintainer is useful when a lead-acid starting battery will sit unused and you have a unit made for that chemistry. A one-time charge is enough when you will use the mower again soon and the charging system on the machine is healthy. A maintainer is the wrong answer if the battery is already damaged or if the only charger you own is for a different chemistry.
Periodic visual checks prevent a repeat of the whole job. Look at the terminals for fresh corrosion, confirm the hold-down is snug, and keep the deck and battery area clean and dry so moisture does not sit on the case. After a ride, a healthy charging system should leave the starting battery able to crank the next time; if the mower starts only from an external charger and dies after one use, the battery or the mower’s charging circuit needs attention, not a more aggressive charge.
Do not use improvised maintenance. That includes leaving a car charger connected for days, jumping the mower as a weekly habit, or storing a lithium pack on a random power supply. Charge with matching equipment, stop when the charger says the job is done, and replace a battery that will not hold what it takes on.
Related Maintenance and Operating Guides
To keep your equipment running at peak operating efficiency, explore our related technical walkthroughs and maintenance tutorials:
- Consult our detailed breakdown on heavy-duty chainsaw buyer guide.
- Consult our detailed breakdown on durable ride-on lawn tractor guide.
Technical Standards and Compliance
Mechanical safety standards, operational tolerances, and protective gear guidelines align with benchmark specifications established by the American National Standards Institute (ANSI).









