

Quick Answer: How To Clean A Lawn Mower Spark Plug?
To clean a lawn mower spark plug, shut the engine off, let it cool, and pull the rubber boot off so the mower cannot start. Unscrew the plug with a spark-plug socket and brush light carbon from the electrodes and insulator without cracking the porcelain or bending the electrode. Reuse the plug only if it is intact and lightly soiled;…

Pros
- Large-size design named in product title
- Sharpening and balancing functions listed
- Listed as a new upgraded version

Pros
- Adjustable 15-to-45-degree range in title
- Sharpening and balancing functions listed
Pros
- Includes replacement gaskets and a 98079-55846 spark plug
- Matches Honda HRR216 and HRS216 lawn mower models
- Designed around the 16100-Z8B-901 carburetor specification
Cons
- Restricted to select Honda GCV160 mower applications
- Installation requires basic mechanical tools and skills
When Cleaning a Spark Plug Helps
A spark plug is a small part with a large job. It has to fire reliably every time the piston comes up on the compression stroke. When the firing end is coated with dry soot, wet fuel, or oil, the spark can weaken, jump in the wrong place, or fail altogether. That is why a fouled plug can contribute to hard starting, misfires, rough idle, or a mower that dies under load. Cleaning is a short inspection-and-cleaning job, not a full tune-up, and it only helps when the plug is structurally sound and only lightly soiled.
People usually reach for the plug after a no-start, after a season in storage, or when the engine coughs and then runs. Those symptoms are a reason to look, not a diagnosis. Stale fuel, a clogged air filter, a stuck kill switch, a flooded carburetor, or an ignition problem can look the same from the operator’s seat. Treat the plug as one possible cause. Do not assume that cleaning it will restore a mower that will not start.
Cleaning is most useful as preventive maintenance or as a first look when the engine still turns over and you suspect light carbon fouling. Dry, sooty deposits on an otherwise intact plug are the usual candidate. A plug that is cracked, melted, badly eroded, or soaked in oil is not a cleaning project. Replacement is cheaper and safer than trying to salvage a damaged firing end.
Cleaning will not fix mixture problems, a flooded carburetor, worn piston rings that keep oiling the plug, a damaged boot, or a weak ignition coil. If the same plug comes out wet or oily after a short run, the deposit will return until the underlying issue is corrected. That work is outside this article.
The basic sequence is the same on a walk-behind push mower, a self-propelled mower, and a riding mower: cool engine, disconnect the spark-plug boot, remove the plug, clean or replace it, check the electrode gap against the specification for that machine, then reinstall and reconnect. Access is what changes. On many walk-behind engines the plug sits near the top of the cylinder head, sometimes under a plastic shroud. On a rider you may need to move a seat, cowling, or other cover as the machine’s manual describes. The plug job itself does not change with deck size.
Safety Steps Before You Touch the Plug
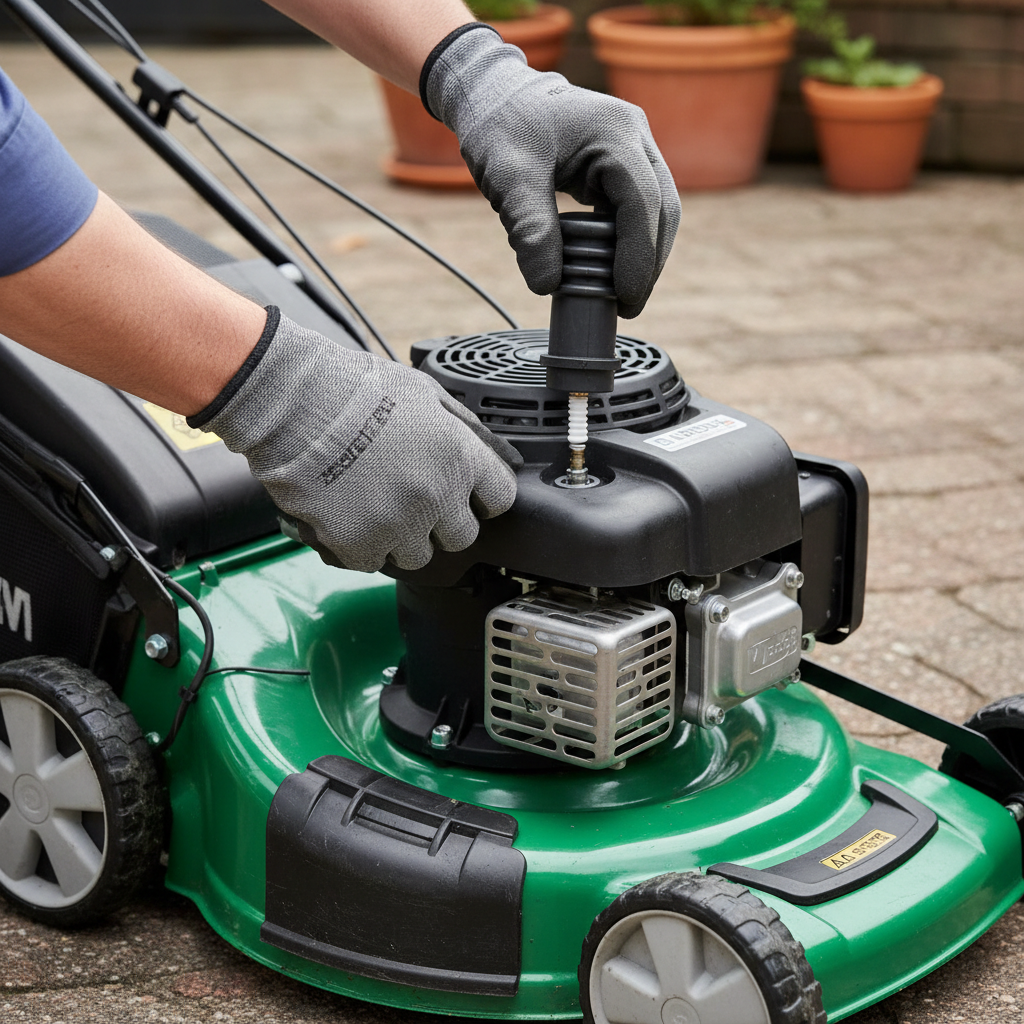
Work on a cool, disabled engine. A hot cylinder head can burn your hand, and a hot porcelain insulator can crack if you quench it with solvent or set a hot plug on a cold bench. Let the engine sit until the metal around the plug is comfortable to touch. There is no universal wait time that fits every mower and every ambient temperature, so judge by the engine, not by a clock.
Disconnect the spark-plug boot before any other work. The boot is the rubber cap on the end of the ignition lead. With the boot still on the terminal, a pull of the starter rope or a bump of an electric starter can fire the plug. That is an accidental-start risk, and it is also how people get a shock from the high-tension lead. Pull the boot, not the cable. After it is off, park the boot where it cannot spring back onto the terminal while you work.
Fuel, oil, and solvents are flammable. Do this job outdoors or in a well-ventilated area, away from heaters, cigarettes, and other ignition sources. Do not clean parts over a hot muffler or exhaust. Keep rags that have absorbed gasoline or solvent in a closed metal container until you can dispose of them according to local rules. Do not treat gasoline as a parts-washing bath.
Set the mower on a level, stable surface. If you have to tip a walk-behind machine to reach the plug or to keep fuel from running out of the tank or carburetor, follow the owner’s manual for the correct tilt direction. Keep hands, clothing, and tools clear of the blade. Do not disable a blade-brake, operator-presence control, seat switch, or other interlock to make the job easier. Those devices exist so the blade and engine stay off when they should. For additional operational safety benchmarks, see our published testing notes on marshall stanmore iii vs harman kardon onyx studio 8.
If the mower has been running rich, leaking, or recently refueled, wipe up spills before you remove anything. A grounded spark check later in the process is only reasonable on a cool engine with no puddled fuel. When in doubt, skip spark tests and install a known-good plug instead.
Tools and Cleaners That Are Appropriate
You do not need a shop full of equipment. You do need tools that fit the plug instead of chewing it. Match the socket to the hex on that plug; lawn-mower plugs are not all the same size, so treat “one socket fits every mower” as a myth. To compare alternative configurations, check our hands-on review of dyson v8 cyclone vs bissell featherweight stick.
- A deep spark-plug socket, often with a rubber insert that holds the porcelain and protects it while you lift the plug out
- A ratchet or breaker bar that fits the socket, plus an extension if the plug sits down in a well
- A clean rag and a soft brush or a brass wire brush for deposits on the firing end
- A flashlight so you can see the insulator nose, electrodes, and threads
- An optional non-residue solvent or a purpose-made plug cleaner, used sparingly
- An optional wire feeler or gap tool if you will compare the electrode gap with the figure in the owner’s manual or on an engine label
A spark-plug socket is preferred over an open-end wrench because it supports the hex evenly and is less likely to round the corners or lever against the insulator. If the rubber insert is missing, you can still use the socket, but lift the plug out carefully so the porcelain does not chip on the well.
For home cleaning, dry brushing is usually enough on light carbon. If you use a solvent, choose something intended for parts cleaning that leaves little residue, apply a small amount, and let the plug dry completely before it goes back in the engine. Dielectric grease on the inside of the boot and anti-seize on the threads are optional practices. Some manuals accept them; some plug designs and some makers discourage them. If you use either product, keep grease and compound off the firing end, and do not treat them as required. Users looking for related component recommendations can explore our bissell crosswave hydrosteam vs shark stainforce breakdown.
Skip household methods that damage porcelain or change the gap. Do not wash a plug in gasoline. Do not bake it in an oven, microwave, or dishwasher. Do not heat it with a torch or lighter. Do not blast it with coarse grit, sandpaper, or a grinding wheel. Those methods can pit the insulator, leave abrasive in the electrode area, or bend the ground electrode. A gap gauge is useful after brushing because the gap can change if the electrode was bumped. It is not a substitute for the specification in the manual.
Find, Disconnect, and Remove the Spark Plug
On a typical walk-behind gasoline mower, look for a thick rubber boot on a ceramic insulator threaded into the cylinder head, often near the top of the engine and sometimes tucked under a cooling shroud. Follow the ignition lead from the coil or module to the plug if the engine is crowded with covers. On a riding mower the same parts exist, but the seat, a side panel, or an engine cowling may be in the way. Move only what the machine’s manual says to move. Do not pry plastic clips until you know how they release.
With the engine off and cool, grasp the spark-plug boot itself and pull it straight off the terminal. A slight twist can help if the boot is stuck, but do not yank the wire. A brittle boot can tear at the cable entrance; if the insulation cracks or the terminal is loose inside the rubber, plan to replace the lead or boot rather than tape it back together. Park the disconnected boot so it cannot contact the plug terminal.
Before the plug comes out, clean the well around it. Grass, grit, and dried mud sitting on the hex will fall into the cylinder the moment the threads break free. Brush the area, and if you use compressed air, keep the blast shallow so you do not drive debris past the plug. A rag around the socket can catch loose dirt as you start to turn.
Seat the spark-plug socket fully on the hex. Turn counterclockwise with steady pressure. Once the plug breaks free, unscrew it by hand or with light ratchet pressure so you can feel the last threads. Lift it straight out. If you pause with the hole open, cover it with a clean rag so nothing falls in.
If the plug will not turn, stop. Do not hammer the socket, do not apply a torch, and do not keep increasing leverage until the hex rounds off. An aluminum cylinder head is easy to strip. A rounded hex or a plug that feels frozen is a reason to use a proper extractor later or to have a shop remove it. If the socket keeps slipping, confirm you have the correct size and that the socket is fully down on the hex before you try again.
How to Clean Carbon and Fouling Without Damage
Work on a cool, dry plug at a bench, not over the open spark-plug hole. Support the metal shell so you are not levering on the insulator. The parts that matter for spark are the center electrode, the ground electrode (the hook that reaches over the center tip), and the insulator nose, the porcelain that surrounds the center electrode. The hex and threads should be clean enough to start by hand, but they are not the firing surface.
Deposits have different looks, and those looks are clues, not a complete engine diagnosis:
- Dry, sooty black on the insulator and electrodes is typical carbon fouling from a rich mixture, a dirty air filter, or a lot of idling and short runs.
- Wet, shiny black film that smears like grease points toward oil fouling.
- A wet plug that smells like gasoline, with little dry soot, suggests fuel flooding.
- A used but healthy insulator nose is often tan, light brown, or gray after normal running. Color alone is not a verdict, and it does not tell you the heat range or prove the carburetor is perfect.
For light, dry carbon, brush the electrode area and the insulator nose until the surfaces are free of loose soot. Use a soft or brass brush and short strokes. Wipe the hex and the threads with a rag so grit does not ride back into the hole. If brushing is not enough, dampen the rag or brush with a small amount of a suitable solvent, clean the same areas, and then let the plug dry completely. Do not soak the plug in a jar of solvent for an invented period of time, and do not blow it off with a method that drives grit into the center electrode bore.
Several actions do more harm than the original deposit:
- Prying or twisting the ground electrode to scrape it, which changes the electrode gap or breaks the weld
- Chipping at the porcelain with a screwdriver, knife, or pick
- Filing, sandblasting, or grinding the firing end, which pits the insulator and can shed abrasive into the engine
- Heating the plug with a torch or kitchen oven to “burn off” carbon
- Leaving bristles, sand, or wet solvent on the plug when it goes back in
Cleaning removes loose deposits. It does not restore a worn electrode to new condition, and it does not repair a cracked insulator. If you have to gouge at the porcelain to get the carbon off, the plug is not a good candidate for reuse.
Inspect the Plug: Reuse or Replace
After the firing end is clean and dry, decide whether the plug belongs back in the engine. A serviceable used plug has an intact insulator, a center electrode that is still well defined, a ground electrode that is not bent or burned thin, and undamaged threads. Light tan or gray on the insulator nose after cleaning is consistent with normal use. A little residual staining that will not brush off is not automatically a fail if the porcelain is sound and the electrodes still have a clear gap.
Replace the plug rather than clean and reuse it when any of the following is true:
- The insulator or porcelain is cracked, chipped, or crazed
- The center electrode or ground electrode is bent, broken, melted, or badly eroded
- The threads are crossed, flattened, or missing
- The crush washer (on plugs that use one) is missing, split, or so crushed that it will not seal
- The plug is heavily oil-fouled or fuel-soaked and you have no reason to think the next run will be different
A cracked insulator should never go back in the engine. The crack can leak compression, let the spark track to ground in the wrong place, or let porcelain fragments fall into the cylinder. The same is true of a broken electrode. Those failures are not “clean it again” problems.
Repeated oil fouling or fuel flooding is a message about the engine, not a request for a better brush. Oil on the plug can point to overfilling, a stuck breather, worn rings, or other oil-control issues. A plug that keeps coming out wet with fuel can point to a float or needle problem, a stuck choke, or an operator habit of over-priming. Cleaning the plug does not correct those faults. If you install a clean or new plug and the same deposit returns quickly, stop repeating the cleaning cycle and treat the mixture or mechanical issue separately, or have a qualified technician look at the engine.
Do not expect a cleaned old plug to perform like a new one. Electrodes wear in service. Heat-range markings, substitute part numbers, and millimeter wear limits belong in the owner’s manual or a parts list for that engine, not in a guess from appearance. When the plug is marginal, replacement is the simpler maintenance choice.
Check the Gap and Reinstall the Plug
Brushing and handling can change the electrode gap. Before the plug goes back in, compare the gap with the specification for that mower or engine. The correct gap and the correct plug type come from the owner’s manual or from a label on the engine, not from a single number that is supposed to fit every lawn mower. If you do not have the specification, do not invent one. Either obtain the figure or install a new plug already set for that engine and still verify it against the manual when you can.
If you adjust the gap, bend only the ground electrode, gently, and only as far as needed. Do not pry against the center electrode or the porcelain. Recheck after any adjustment. If the ground electrode is already thin, cracked at the weld, or so far out of shape that you cannot set it without twisting, replace the plug.
Inspect the spark-plug hole one more time. If anything fell in, try to retrieve it before you thread the plug. Start the plug by hand so you can feel the threads engage squarely. Cross-threading an aluminum head is an expensive mistake. Once the plug turns in smoothly with finger pressure, seat it with the spark-plug socket. Snug is the goal. A loose plug can overheat and leak compression. A plug that is cross-threaded or overtightened can damage the head or crush the insulator. There is no universal torque figure and no one-size-fits-all “quarter turn after it seats” rule that applies to every lawn-mower plug and every washer design. If the manual gives a torque or seating instruction for that engine, follow it. If it does not, stop at firmly seated without leaning on a long breaker bar.
If the plug uses a crush washer, that washer is the seal. Reusing a badly flattened washer can leak. Some service practices call for a new washer when the plug is reinstalled; follow the guidance for that plug and engine rather than a generic extra-turn rule.
Push the spark-plug boot straight onto the terminal until it is fully seated. You should feel it latch over the terminal, not just rest on the porcelain. A boot that is only halfway on can arc, misfire, or fall off the first time the engine shakes. If you use dielectric grease, a thin film inside the boot is the usual idea; keep it off the electrodes. If you used anti-seize, keep it off the firing end and use very little so the next removal still has some friction. When the manual is silent or discourages those products, skip them.
Before you pull the starter, confirm the area is clear of tools and fuel rags, the plug is snug, the boot is on, and the controls are in the run or start position rather than stop.
If Cleaning Does Not Restore a Strong Spark
If the engine still will not start or still runs poorly, recheck the work on the plug first. Confirm the boot is fully seated on the terminal, the plug is not loose, and you did not leave the kill switch, blade-brake lever, or rider seat switch in the stop position. Confirm there is fresh fuel in the tank. Stale fuel is a common reason a stored mower acts as if the ignition failed.
If the old plug was cracked, oily, or heavily eroded, install a new plug of the type specified for that engine and set the gap from the manual. A known-good plug is a better test than cleaning the same damaged part a second time. If a new plug fires and the engine runs, the old plug was at least part of the problem. If a new plug does not help, the ignition lead, coil, fuel system, or compression may be at fault, and those checks go beyond this article.
A brief grounded-plug spark check is sometimes used to see whether the ignition is producing a spark at all. It is only reasonable with strict limits: engine cool, no spilled fuel, plug wire handled by the insulated boot only, blade area clear, and the metal body of the plug held against a clean ground on the engine, not in your bare hand. Do not hold the plug body. Do not perform the check in a puddle of gasoline. Do not defeat safety interlocks to make the starter easier to pull. If you are not comfortable with those limits, skip the test and try a new plug, or have the ignition checked by someone equipped for it. This article does not provide voltage, ohm, or coil specifications.
Adjacent no-start basics worth a glance include an empty tank, a fuel shutoff left closed, a clogged fuel cap vent, a dirty air filter that you can inspect without tearing the carburetor apart, and controls left in stop. Do not move from a dirty plug into carburetor disassembly, ignition-module testing, or compression numbers here. If the plug is clean and correctly installed, the boot is sound, fuel is fresh, and the engine still will not run, cleaning again will not help. Replace a marginal plug and seek service rather than repeating the same brush-and-hope cycle.
Mistakes That Crack Plugs or Damage the Engine
Most damage on this job comes from haste, not from the chemistry of carbon. Use the list below as a closing checklist.
- Pulling the ignition wire instead of the spark-plug boot, which tears the lead or leaves the boot half connected
- Leaving the boot on the plug so a starter pull can fire the engine or shock you
- Working on a hot engine, which risks burns and a cracked porcelain insulator
- Using the wrong socket size, cocking the socket, or levering on the ceramic, which chips the insulator
- Failing to clean the well, then dropping sand, grass, or grit into the open spark-plug hole
- Cross-threading the plug or overtightening it into an aluminum head
- Reinstalling a plug that is still wet with solvent
- Bending the ground electrode while cleaning and then skipping the gap check
- Starting the mower before the boot is fully seated on the terminal
- Using gasoline, an open flame, an oven, or coarse grit as a “cleaner”
Debris in the hole is more than a nuisance. A grain of sand or a chip of porcelain can score the cylinder or lodge on a valve seat. If something falls in and you cannot retrieve it with a magnet or a careful pick while the piston is away from the hole, do not run the engine “to blow it out.” That is a shop problem.
Before the next start-up, walk around the machine once. The spark plug should be snug, the boot fully on, the kill switch or control in run, the blade area clear, and fuel rags off the deck and away from the muffler. Cleaning a lawn mower spark plug is a small maintenance task when the plug is only lightly fouled and still intact. When the insulator is damaged or the electrodes are worn, replacement is the repair, and cleaning is only the inspection that told you so.
Technical Standards and Compliance
Mechanical safety standards, operational tolerances, and protective gear guidelines align with benchmark specifications established by the American National Standards Institute (ANSI).









