

Quick Answer: How Long Does A Lawn Mower Spark Plug Last?
A lawn mower spark plug does not have a single fixed lifespan; duration depends on hours of use, seasonal versus year-round operation, engine type, fuel quality, and maintenance, so replacement timing is determined by inspection and the mower’s service schedule rather than a universal number of years. Owners therefore combine the interval published in the owner’s manual with actual engine…

Pros
- Large-size design named in product title
- Sharpening and balancing functions listed
- Listed as a new upgraded version

Pros
- Adjustable 15-to-45-degree range in title
- Sharpening and balancing functions listed

Pros
- Sharpener and balancer functions in title
- 15-to-45-degree adjustable setting listed
- Built for lawn mower blade maintenance
Pros
- Includes replacement gaskets and a 98079-55846 spark plug
- Matches Honda HRR216 and HRS216 lawn mower models
- Designed around the 16100-Z8B-901 carburetor specification
Cons
- Restricted to select Honda GCV160 mower applications
- Installation requires basic mechanical tools and skills
How Spark Plug Life Is Measured on Lawn Mowers
Lawn mower spark plug life is measured first in engine hours because each hour of operation subjects the electrode and ceramic insulator to repeated high-voltage sparks, combustion heat, and chemical deposits. A spark plug in a typical small engine fires many times per second whenever the engine is running, so accumulated hours give the most direct indication of wear. Some riding mowers and commercial machines include an hour meter; others require the owner to estimate time spent mowing. Either method is more useful than simply watching the calendar.
Mowing seasons offer only a rough conversion. A homeowner who cuts a modest lawn once a week during a short growing season may log far fewer hours than an operator who runs a riding mower several days a week for many months. Grass density, terrain slope, and cutting width all change how long the engine actually works under load, so two machines used “one season” can differ widely in hours. Seasons therefore serve as a planning reminder, not a precise replacement clock.
Calendar years are the weakest measure. A mower stored unused for an entire year experiences almost no electrode erosion, while the same engine used year-round in a long growing season can accumulate the equivalent of several seasonal users’ hours in twelve months. Basing replacement solely on “every few years” ignores both intensity of use and storage conditions and can leave a worn plug in service or replace a still-serviceable one unnecessarily. For troubleshooting and reliability insights, consult our in-depth jbl partybox club 120 vs sony srs xv500 report.
Hours Versus Seasons Versus Years
Because the three time scales are not interchangeable, the practical sequence is to consult the owner’s manual for the stated replacement interval (usually given in hours or in hours-or-calendar-time, whichever occurs first), then confirm the plug’s actual condition by removal and inspection. When an hour meter is absent, logging approximate mowing time each session still yields a better estimate than guessing from the date the mower was purchased. For troubleshooting and reliability insights, consult our in-depth jbl partybox club 120 vs sony srs xv500 report.
Differences Among Mower and Engine Types
Walk-behind push mowers, riding mowers, and other categories do not share identical duty cycles. Homeowner walk-behind machines typically see lower annual hours, while riding and zero-turn mowers used on larger properties or in professional settings often run longer and may be fitted with different engine families. Two-stroke engines, still present on some older or specialized equipment, mix lubricating oil with the fuel; the resulting combustion environment can leave more carbon on the spark plug than a four-stroke engine that has a separate crankcase oil supply. Four-stroke engines now dominate most walk-behind and riding mowers and generally produce a cleaner burn when the air filter, fuel, and oil remain in good condition. These variations mean the same spark-plug design can reach the end of useful life at different hour totals depending on the host engine and how that engine is operated. No single hour, season, or year figure therefore applies across all lawn mower engines; the manufacturer’s schedule plus inspection remains the reliable method. Readers comparing setup options can review our technical analysis on z890 vs x870e motherboard.
Factors That Shorten or Extend Spark Plug Life
Usage frequency is the most obvious variable. More engine hours produce more spark events, more heat cycles, and more opportunity for deposits to form on the electrode and insulator. A machine used daily under heavy load will wear a plug faster than one used only occasionally, even if both are the same model. Storage conditions also matter. A mower left with untreated fuel in the tank can develop varnish or phase-separated ethanol-water mixtures that later cause incomplete combustion and fouling when the engine is finally started. Moisture in an unsealed storage area can promote corrosion on the electrode or the threads.
Fuel quality directly affects the combustion environment the spark plug sees. Stale gasoline loses volatility and can leave gum that disrupts carburetor metering, producing a rich mixture that carbon-fouls the plug. Ethanol-blended fuels attract water; the resulting mixture can lean or richen the burn unpredictably and leave deposits. Using fresh fuel of the grade specified in the manual, and adding stabilizer when the mower will sit unused, reduces these risks. Oil condition plays a similar role. In a four-stroke engine, dirty or incorrect oil can increase smoking and oil consumption that reaches the combustion chamber and fouls the plug. In a two-stroke engine, an incorrect fuel-oil mix ratio produces either inadequate lubrication or excessive smoke and carbon, both of which shorten plug life. Readers comparing setup options can review our technical analysis on z890 vs x870e motherboard.
The air filter is equally important. A clogged filter starves the engine of air, creating a rich mixture that deposits soot on the insulator and electrode—a classic fouled plug. A damaged or missing filter lets abrasive dust enter the cylinder, accelerating mechanical wear on the electrode itself. Regular filter inspection and replacement according to the manual therefore protects both engine and spark plug. Incorrect spark-plug gap, whether from manufacturing variation or from electrode erosion over time, also changes the voltage required to fire and can cause misfires or incomplete combustion that further deposits material on the plug. Other maintenance items—carburetor adjustment, cooling-fin cleanliness, and proper governor operation—keep combustion temperatures and mixture within the range the plug was designed to tolerate, thereby extending its service interval.
Climate and operating environment add further variation. Dusty, dry conditions increase the chance of ingested dirt if the air filter is neglected. Very humid or coastal storage can promote corrosion. Heavy, wet grass that forces the engine to labor at low speed for long periods changes the heat and mixture the plug experiences compared with light, dry mowing. Because these factors interact, two identical mowers can show different plug condition after the same number of hours; inspection remains necessary even when the hour or season interval has not yet been reached.
Signs a Lawn Mower Spark Plug Should Be Replaced
Performance symptoms often appear before the owner has an accurate hour count. Hard starting, especially when the engine is hot or after the mower has sat for days, can indicate a weak spark caused by electrode wear, an enlarged gap, or fouling. Misfires, sputtering under load, or a noticeable loss of power when the mower enters thick grass point to incomplete ignition. Rough idle, increased fuel consumption, or visible smoke may likewise trace to a plug that is no longer firing cleanly. These signs are not exclusive to the spark plug—fuel, air, and ignition-coil problems can produce similar behavior—but they justify removing the plug for inspection rather than guessing. For complementary field maintenance guidelines, examine our breakdown of marshall stanmore iii vs harman kardon onyx studio 8.
Visual inspection of a removed spark plug reveals electrode wear, gap growth, and fouling. A plug that has been operating normally typically shows a light tan or grayish insulator nose and an electrode that still has relatively sharp edges. A fouled plug may be coated with dry black soot (rich mixture or clogged air filter), wet oily deposits (oil consumption or two-stroke mix issues), or white blistered material (overheating or an overly lean mixture). The center electrode may appear rounded or eroded, and the gap between center and ground electrodes may have grown beyond the specification listed in the owner’s manual. Cracks in the ceramic insulator or melted electrodes indicate more severe overheating and require both plug replacement and investigation of the underlying cause.
Performance Symptoms of a Worn or Fouled Plug
Because a lawn mower engine is often started only when needed, owners notice starting difficulty first. A weak or intermittent spark from a worn or fouled plug makes the engine harder to pull or electric-start, particularly after a period of storage. Once running, the engine may surge, hesitate when the throttle is opened, or stall when the blade engages a heavy load. These symptoms worsen as electrode wear increases the voltage needed to jump the gap, eventually exceeding what the ignition coil can supply under all conditions. To evaluate matched hardware tolerances, consult our detailed overview of dyson v8 cyclone vs bissell featherweight stick.
Inspecting the Electrode and Gap
After the plug is removed, compare the insulator color and electrode shape with the descriptions in the owner’s manual or a standard spark-plug reading chart. Measure the gap with a wire-type or blade feeler gauge; if the gap exceeds the specified range, the plug should be replaced rather than merely re-gapped, because electrode material has already been lost. A new plug should also be checked and, if necessary, adjusted to the exact gap called for by the engine manufacturer before installation. Never assume a “pre-gapped” plug matches the particular lawn mower engine; always verify.
Checking and Changing the Spark Plug Safely
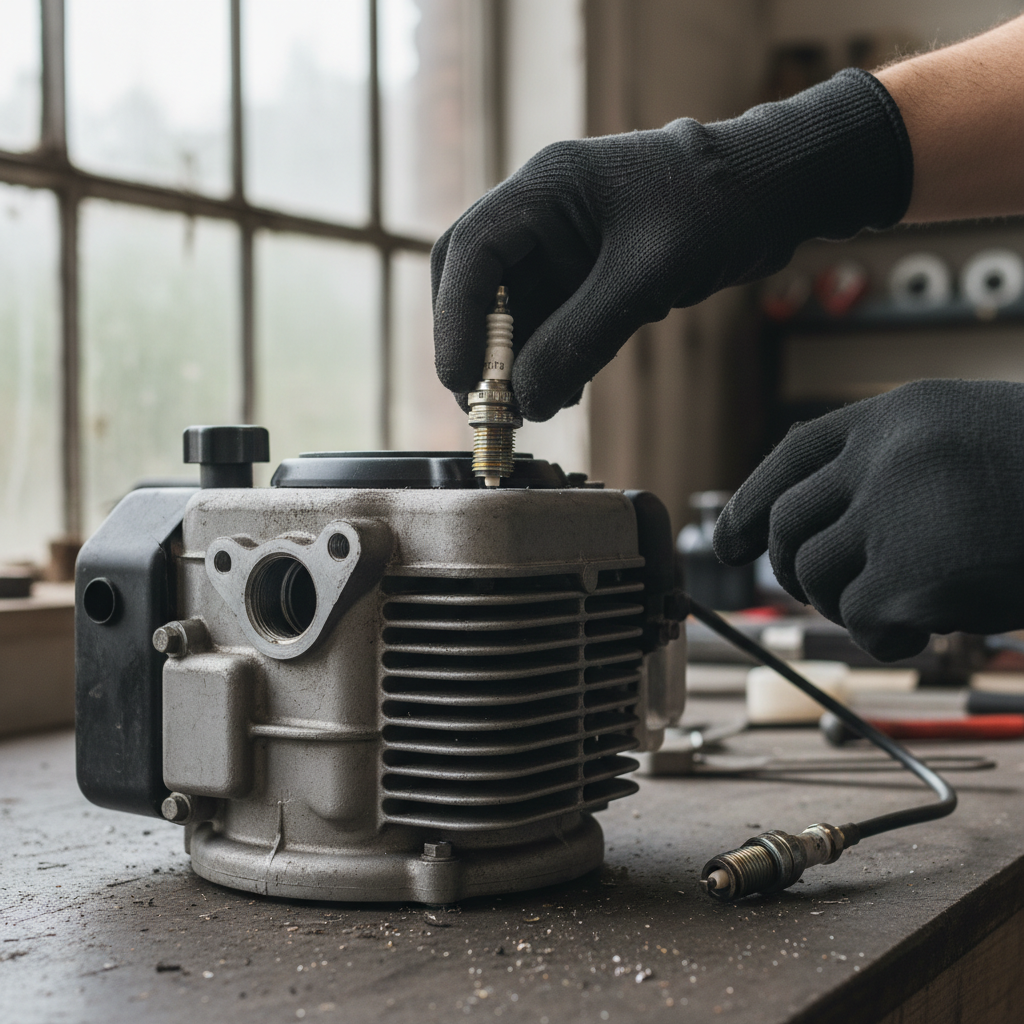
Safety begins with a cool engine, a level surface, and the spark-plug wire disconnected from the plug. Disconnecting the wire first prevents accidental starting while tools are near the engine. Brush or blow loose debris from around the plug well so that dirt cannot fall into the cylinder when the plug is removed. A spark-plug socket of the correct size (commonly 5/8 inch or 13/16 inch for small engines), a ratchet, and an extension are the usual tools; a torque wrench is preferable if the manual specifies a tightening value. A dedicated gap tool or feeler gauge is needed to check or set the electrode gap. When planning workspace deployment, consider the engineering criteria outlined in our bissell crosswave hydrosteam vs shark stainforce guide.
Once the old plug is out, inspect it as described above and compare its condition with the engine’s recent performance. For the new plug, confirm it is the exact type specified in the owner’s manual—heat range, thread reach, and seat type must match. Check and adjust the gap to the published specification; do not force the electrodes. Some manufacturers recommend a light coating of anti-seize on the threads, others do not; follow the manual. Thread the plug in by hand to avoid cross-threading, then tighten to the specified torque or, if no torque wrench is available, to the “finger-tight plus a fraction of a turn” guidance in the manual. Overtightening can damage the cylinder-head threads or the plug itself. Reconnect the spark-plug wire firmly, restore any other disconnected components, and start the engine to confirm smooth operation.
The entire process should be performed with the mower’s owner’s manual at hand. Gap, torque, plug type, and any model-specific precautions are listed there and take precedence over general advice. After installation, continue to observe starting and running behavior; a correctly gapped, properly installed new plug should restore crisp ignition if the original plug was the source of the problem. If symptoms persist, other ignition, fuel, or air-system issues remain to be investigated. Regular inspection at the interval given in the service schedule, combined with attention to fuel, oil, and air-filter condition, keeps the spark plug within its useful life and the lawn mower engine starting and running as intended.
For more hands-on benchmarks and buying recommendations, consult our guides on heavy-duty chainsaw buyer guide, as well as high-CFM commercial leaf blower guide.
Mechanical safety standards, operational tolerances, and protective gear guidelines align with benchmark specifications established by the American National Standards Institute (ANSI).









