

Direct Answer: How to Attach Trimmer Line
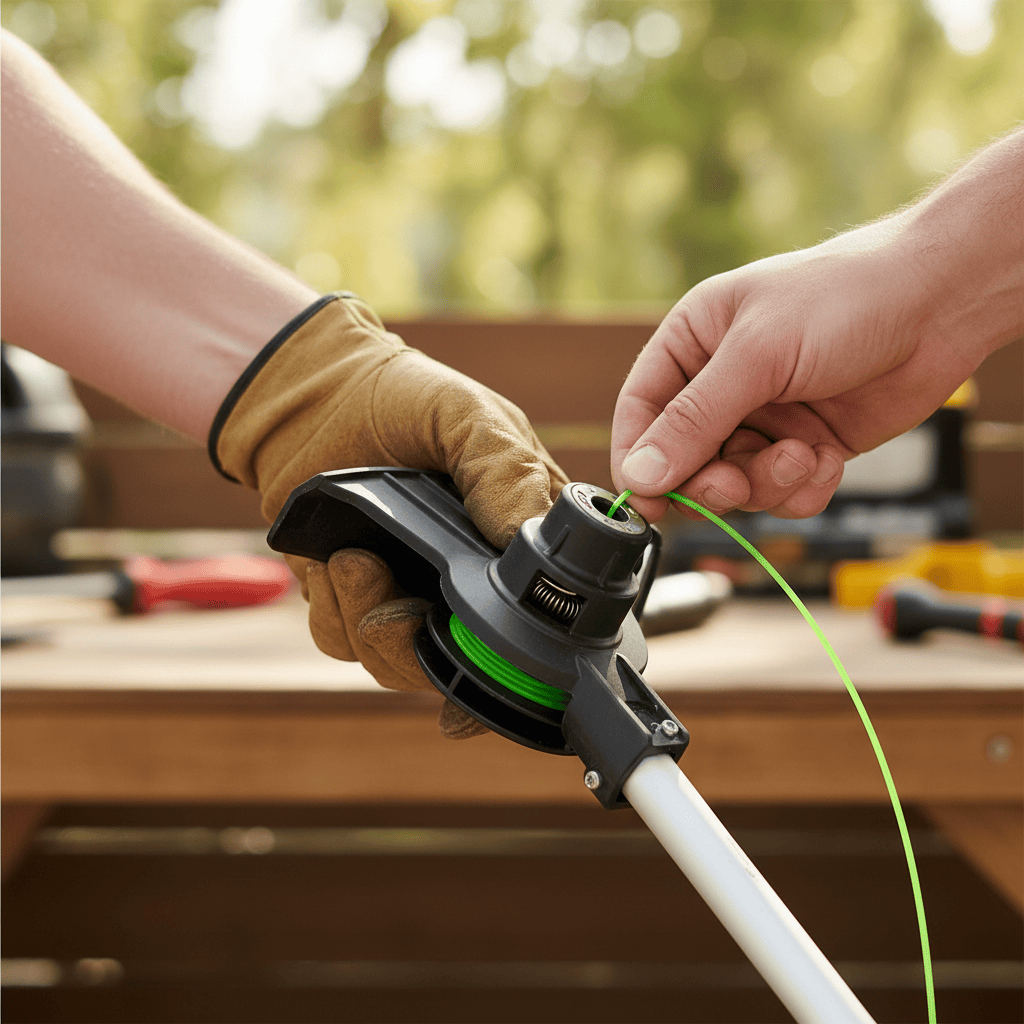
Trimer line attachment depends on your trimer type. Most models use either aspool system (manual or automatic) or a bump feed mechanism. For spool systems, wind the line around the spool in the direction indicated by arrows, thread the ends through the eyelets, and reinstall the spool head. For bump feed trimmers, insert pre-cut line segments into the feed chamber and close the head. Always consult your specific model’s manual, as attachment procedures vary significantly between brands and designs.
Understanding Your Trimmer Type
Before attempting to attach trimmer line, you need to identify which attachment system your trimmer uses. The two primary methods, spool systems and bump feed mechanisms, require different approaches and tools. Identifying your trimmer type takes only a few minutes and prevents installation errors.

Pros
- Twisted profile helps decrease operating noise and trimmer vibration
- Square cutting edges designed for clean, aggressive weed slicing
- High-temperature resistance helps prevent spool welding
- Universal fit compatible with most standard gas-powered string trimmers
- Provides 253 feet of .095-inch diameter line in a large clamshell pack
Cons
- 0.095-inch gauge may be too thick for low-powered electric trimmers

Pros
- Broad compatibility across many listed WORX trimmer models.
- Prewound spools save time compared with manual line winding.
- Reinforced nylon construction is intended to improve durability.
- Package includes multiple spools, which may reduce repeat purchases.
Cons
- Only fits the specific WORX models listed, so it is not a universal spool.
- 0.065-inch line may be less suitable for very heavy-duty cutting tasks.
- Replacement cap use and exact fit depend on the compatible trimmer model.
Overview & Design: The LEIMO KPARTS trimmer spool line is a prewound replacement option made for select WORX string trimmers and edgers. It uses 0.065-inch line and is built as an autofeed spool, which makes it a practical choice for users who want a ready-to-install refill instead of winding line by hand.
Performance & Key Features: According to the listing, the line is made from PA6-GF30 reinforced nylon and is designed for improved tensile strength and wear resistance. The spool is compatible with many WORX models, including WG150, WG163, WG175, and WG180, and the autofeed setup supports normal trimming by releasing line as it is needed.
Drawbacks & Considerations: This is not a universal replacement, so buyers need to confirm model compatibility before ordering. The 0.065-inch diameter is suitable for general yard maintenance, but it may not be ideal for more demanding cutting jobs that call for thicker line.
Verdict: This spool set is best for WORX trimmer owners who want a convenient, prewound replacement with multiple spools in the box. It offers solid compatibility and useful durability claims, but shoppers should verify their exact trimmer model to avoid fit issues.
Pros
- Precise compatibility with specified Toro 14-inch electric string trimmers
- Durable ABS and flexible nylon materials for better longevity than standard lines
- Convenient auto-feed dual-line mechanism for hassle-free operation
- Tool-free installation that saves time during peak seasons
- Multi-pack value offering ample line for repeated use
Cons
- Restricted to Toro 51480 51480A and 51488 models only, not suitable for other brands or trimmers
- 0.065-inch line diameter may advance more often when tackling denser or woody weeds
- Each spool limited to 27 feet of line which could mean more frequent changes for heavy commercial workloads
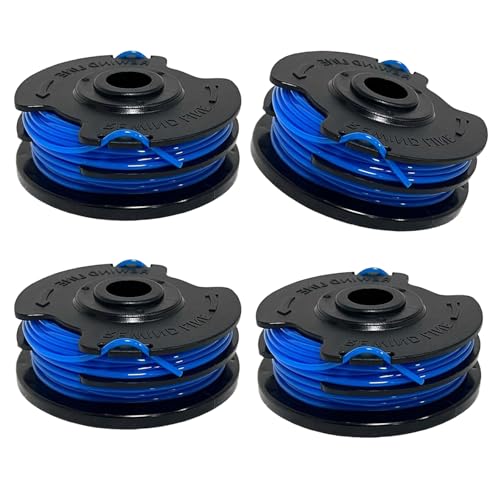
The MengTiger 4 Pack 0.065" 88512 Dual Line Trimmer Spool serves as a direct replacement cartridge for Toro 51480, 51480A, and 51488 14-inch electric weed wackers. Built from high-quality ABS plastic and flexible nylon thread, it presents a sturdy yet lightweight design that prioritizes breakage resistance and straightforward handling right out of the package.
Performance centers on the auto-feed dual-line system engineered for Toro automatic mechanisms, which delivers consistent line release and reduced drag through its aerodynamic shape. This setup supports efficient cutting for residential and light commercial tasks, with each of the four spools providing 27 feet of 0.065-inch line to handle regular yard maintenance without constant rewinding.
Drawbacks and considerations include the product's exclusive fit for the listed Toro models, which limits broader usability. The thinner 0.065-inch diameter may demand more frequent feeding on tougher vegetation, and the fixed 27-foot length per spool could require extra replacements during intensive sessions based on the manufacturer specifications.
This spool pack is best suited for Toro electric string trimmer owners who need affordable, easy-to-install replacements for routine lawn care. It offers solid value through its multi-pack format and auto-feed convenience for users focused on reliable performance without complicated upkeep.

Pros
- Wide compatibility with many Worx string trimmer models.
- Pre-wound spools make replacement fast and simple.
- Includes both replacement spools and cap covers.
- 0.065-inch line is a common size for light to moderate yard maintenance.
Cons
- Compatibility is limited to listed Worx models, so it is not a universal trimmer line set.
- Each spool contains 10 ft of line, which may wear faster on heavy weeds or frequent use.
- No user review history is available in the manufacturer listing, so long-term real-world performance is harder to verify.
Overview: The Xgunion WA0010 trimmer spool line set is a replacement pack for compatible Worx weed eaters and string trimmers. It includes 12 pre-wound spools and 2 cap covers, which makes it a practical refill bundle for routine yard care.
Performance: The 0.065-inch nylon polyamide line is designed for efficient cutting, with the brand claiming improved durability and abrasion resistance. Because the spools are pre-wound, replacing a worn spool is straightforward and takes only a few seconds, which is helpful during regular edging and trimming jobs.
Considerations: This is not a universal trimmer spool, so buyers should confirm their Worx model is listed before ordering. Also, the 10 ft line length per spool may be fine for light maintenance, but heavier trimming conditions could require more frequent replacements.
Verdict: For Worx owners who want an affordable, ready-to-use replacement pack, this Xgunion WA0010 set offers strong convenience and solid value. It is best suited to homeowners needing quick swaps for everyday grass and weed trimming rather than demanding commercial use.
Pros
- Common .065-inch round line size improves compatibility with many trimmer models.
- Long 328-foot spool supports multiple refills from one package.
- Nylon material is positioned as a budget-friendly option for basic lawn maintenance.
- Useful for light trimming and edging around typical residential yards.
Cons
- Round .065-inch line is designed for light trimming, so it is not ideal for heavy weeds or thick overgrowth.
- Compatibility is broad but not universal, so users still need to confirm their trimmer calls for .065-inch line.
- No extra accessories or prewound spool system are included in the product information provided.
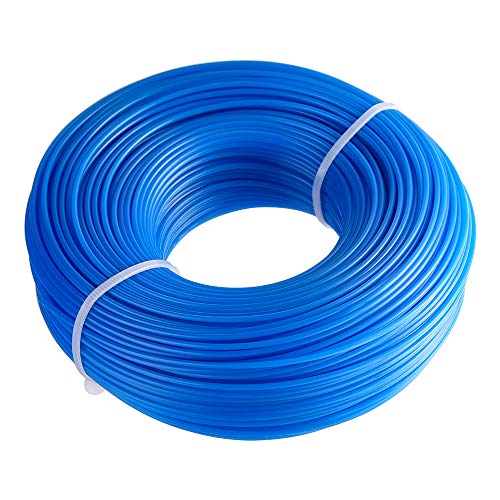
Overview: The FEPITO Round .065-Inch String Trimmer Line is a nylon replacement line designed for garden string trimmers and edgers. It is positioned as a straightforward, economical option for routine home yard maintenance.
Performance: With a 0.065-inch round profile and 328 feet of total line, this spool is meant for light trimming of small to medium grass. The longer length can provide around 16 refills, which is useful for users who want a supply that lasts through repeated mowing and edging sessions.
Drawbacks: This is not a heavy-duty trimmer line, so it may be less effective on thick weeds, dense brush, or tougher landscaping jobs. Buyers also need to check compatibility, since it is only suitable for trimmers that specifically call for .065-inch round line.
Verdict: The best value will be for homeowners who need a basic, budget-conscious replacement line for regular light trimming. If your yard work is mostly routine edging and grass cleanup, this FEPITO spool is a practical fit.
The Two Main Trimer Line Attachment Systems
Most string trimmers and weed eaters fall into two categories:
- Spool-Based Systems: Manual or automatic systems that hold wound trimer line on a removable spool head. These are common on mid-range and professional trimmers.
- Bump Feed Systems: Simpler designs where pre-cut line segments are inserted into a chamber. Pressing the trimer head against the ground automatically feeds new line as it wears.
Spool systems offer longer line capacity and work better for extended triming sessions. Bump feed systems are simpler but require frequent line replacement during use.
How to Identify Your Trimmer’s System
Look at the trimmer head (the rotating part at the end of the shaft). If you see a removable cap or head with a central spool inside, you have a spool system. If the head is a flat disc with a feed hole in the center, you likely have a bump feed system. Check your trimer’s manual or the manufacturer’s website if you’re unsure.
Tools You’ll Need
Most trimer line attachment requires minimal tools: To evaluate matched hardware tolerances, consult our detailed overview of z890 vs x870e motherboard.
- Replacement trimer line (correct gauge for your model)
- Scissors or line cutter
- Your trimmer‘s manual (for model-specific guidance)
- Small flathead screwdriver (optional, for some spool head designs)
Attaching Line to Spool-Based Trimmers
Spool-based systems are the most common attachment method. Whether your trimmer uses a manual spool or semi-automatic system, the basic process follows these steps:
Step 1: Remove the Spool Head
Unplug your trimmer or ensure the engine is off. Look for a cap or central bolt on the spool head. Most designs either twist counterclockwise or have a bolt that removes with a screwdriver. Some newer models use a release button. Gently pull the spool head away from the trimer shaft once it’s loosened. Keep any springs, washers, or small parts in a safe place. When planning workspace deployment, consider the engineering criteria outlined in our marshall stanmore iii vs harman kardon onyx studio 8 guide.
Step 2: Remove the Old Spool
Once the head is detached, you’ll see the spool (the bobin that holds the line). Pull it straight out. If line remains on the spool, you can either wind new line over it or remove the old line completely. For best results, clean the spool and head area of debris and old line fragments.
Step 3: Determine the Correct Winding Direction
This step is critical. Look for directional arrows printed or molded into the spool or head. These arrows show which direction to wind the line. Winding in the incorrect direction reduces cutting efficiency and causes the line to tangle or break. If arrows aren’t visible, consult your manual, different brands may use opposite directions. For additional operational safety benchmarks, see our published testing notes on dyson v8 cyclone vs bissell featherweight stick.
Step 4: Wind the Trimmer Line
Hold the spool firmly. Insert one end of the trimer line into the groove or notch at the base of the spool. Wind the line tightly in the direction indicated by the arrows. Keep tension on the line as you wind to prevent slack coils. Wind until you reach the fill line marked on the spool (typically 5-10 feet from the end). Most spools hold 20-40 feet of line, but your manual specifies the correct amount.
Step 5: Thread Line Through the Eyelets
Once the spool is wound, you’ll see two small eyelets (holes) on the trimer head. Take the free end of the line and thread it through one eyelet, then through the other. Leave4-6 inches of line extending from each eyelet. This exposed length is what cuts grass. If your trimer has only one eyelet or feeding hole, thread the line through it and secure it in the notch provided. To compare alternative configurations, check our hands-on review of bissell crosswave hydrosteam vs shark stainforce.
Step 6: Reinstall the Spool Head
Place the spool back into the head, ensuring any springs or washers are positioned correctly. Align the notches on the spool with the posts or slots in the head. Gently push the head back onto the trimer shaft. Twist the cap clockwise or reinstall the bolt until snug, don’t overtighten, as this can crack the plastic. Ensure the head spins freely before using the trimmer.
Using Automatic or Semi-Automatic Feed Systems
Automatic and semi-automatic spool systems simplify line attachment by eliminating the manual winding step. Instead of winding line yourself, the system automatically feeds pre-wound line as it wears.
How Automatic Feed Systems Work
Automatic systems use springs or tension mechanisms inside the spool head to feed line automatically. As the line wears during triming, bumping the head against the ground triggers a mechanism that advances new line. Semi-automatic systems feed line when you tap the head but don’t advance automatically while trimming.
Attaching Line to Automatic Systems
If your trimmer has an automatic system, the attachment process is simpler:
- Remove the spool head as described in the previous section.
- Pull out the pre-wound spool or cartridge (some models use replaceable cartridges).
- If the spool is reusable, check the existing line. You can either ad line to the spool or replace it with a new pre-wound spool.
- If adding line, follow the same winding and threading steps as manual spools.
- Reinstall the spool or cartridge into the head.
- Replace the spool head on the trimmer.
Some automatic systems come with pre-wound replacement spools, making line changes even simpler, just swap out the old spool for a new one.
Maintenance for Automatic Systems
Automatic feed mechanisms require occasional maintenance. Check that the feed spring moves freely and isn’t bent or damaged. Clean debris from the head periodically, as grass and dirt can interfere with the feed mechanism. If the system stops feeding line, the spring may need adjustment or replacement, consult your manual for model-specific steps.
Loading Trimmer Line into Bump Feed Systems
Bump feed trimmers are simpler and ideal for occasional users. These systems load line segments directly into the trimer head without a spool.
Cutting Line to the Correct Length
Bump feed systems require pre-cut line segments, not continuous spools. The correct length varies by model but typically ranges from 3 to 6 inches per segment. Check your manual for the exact length. Cut line using scissors or a line cutter. Some people make a template from cardboard to ensure consistent lengths.
Loading Line into the Bump Feed Chamber
Follow these steps to load line into a bump feed trimer:
- Unplug the trimmer and ensure the engine is off.
- Look for a access port or chamber on top of the trimmer head (usually a small hole or slot).
- Insert one pre-cut line segment into the chamber opening.
- Repeat with additional segments until the chamber is full. Most designs hold 2-4 segments.
- Close the head cap securely.
As the line wears during use, bumping the head against the ground feeds the next segment into the cutting area automatically.
Advantages and Limitations of Bump Feed Systems
Bump feed systems are durable, require no complex winding, and work well for light residential use. However, they hold less total line than spool systems, require frequent loading during extended use, and cannot reach areas where you can’t safely tap the trimer head on the ground.
Common Mistakes to Avoid
Proper attachment prevents performance problems and equipment damage. Watch for these common errors:
Winding Line in the Wrong Direction
If trimer line is wound opposite the indicated direction, the line tangles or unwinds during use. This reduces cutting efficiency and causes the line to break prematurely. Always verify the directional arrows before winding. When in doubt, consult your manual.
Overfilling or Underfilling the Spool
Too much line causes the head to jam or the line to tangle. Too little line means frequent refilling and reduced triming efficiency. Fill to the line marked on your spool. If no line is marked, fill until the spool is about three-quarters full.
Threading Line Incorrectly Through Eyelets
If the line isn’t properly threaded through both eyelets, it won’t cut grass effectively. Always thread through both holes and leave 4-6 inches extending. Test that line moves freely before powering on the trimmer.
Overtightening the Spool Head
Cranking the head cap or bolt too tightly can crack the plastic, damage the threads, or prevent the head from spinning freely. Tighten until snug, then stop. The head should spin freely without wobling.
Using Incorrect Line Gauge
Trimer line comes in different thicknesses (.065 inches, .080 inches, and .095 inches are common). Using the wrong gauge can cause the line to jam in the head or perform poorly. Check your manual for the correct gauge for your model.
Consulting Your Model’s Manual
While general attachment principles apply to most trimmers, specific procedures vary significantly between brands and models. Your trimer’s manual provides the most accurate guidance for your equipment.
Finding Your Trimer’s Manual
Search the manufacturer’s website using your trimmer’s model number (usually found on a label near the engine or handle). Many manufacturers offer free PDF downloads. If the website lacks manuals, contact customer service with your model number. Older trimmers may require searching used marketplace sites or equipment forums where users share scanned manuals.
What Specific Details to Look For
When reviewing your manual, note:
- The correct trimer line gauge for your model
- The recommended fill amount for your spool
- The directional winding arrows specific to your head design
- Whether your trimmer uses a manual, semi-automatic, or automatic feed system
- The maximum line length that should extend from the eyelets
- Any special tools required for spool head removal
When Manual Procedures Differ from General Steps
If your manual’s procedure differs from general instructions, always follow the manual. Manufacturer-specific designs sometimes require unique steps. For example, some commercial-grade trimmers use different eyelet configurations or spool mechanisms than residential models. Your manual accounts for these differences and ensures proper attachment for your specific equipment.
Frequently Asked Questions About How To Attach Trimmer Line
How often should I replace or refill trimer line?
This depends on use frequency and the type of vegetation. Frequent users may refill daily or every few uses. Occasional users might refill trimer line weekly or monthly. Line wears faster when triming thick weds or hitting hard objects like rocks or concrete. Check line condition before each use and refill if worn down to 2-3 inches from the eyelets.
Can I use any trimer line in my trimer, or does it need to match my brand?
Trimmer line is largely universal, the key is matching the correct gauge (thickness) to your model, not the brand. A .080-inch line from any reputable manufacturer will work in a trimer designed for .080-inch line, regardless of brand. Check your manual for the correct gauge and always use quality line from established outdoor power equipment suppliers.
Why does my trimmer line keep breaking after I attach it?
Several factors cause premature line breakage: winding in the wrong direction, overfilling or underfilling the spool, using the wrong gauge line, hitting hard objects repeatedly, or attaching line incorrectly through the eyelets. Start by verifying you’ve wound line in the correct direction and used the right gauge. If breakage continues, review your manual for your model’s specific requirements.
What’s the difference between manual and automatic spool systems, and which is better?
Manual spool systems require you to wind line yourself but offer greater control and work with any trimer model. Automatic systems advance line as you work, reducing downtime for refilling. Automatic systems are more convenient for extended use but may have more components to maintain. Neither is objectively better, your choice depends on your triming frequency and preference for simplicity versus convenience.
Technical Standards and Compliance
Mechanical safety standards, operational tolerances, and protective gear guidelines align with benchmark specifications established by the American National Standards Institute (ANSI).









