

Direct Answer: How to Balance a Lawn Mower Blade
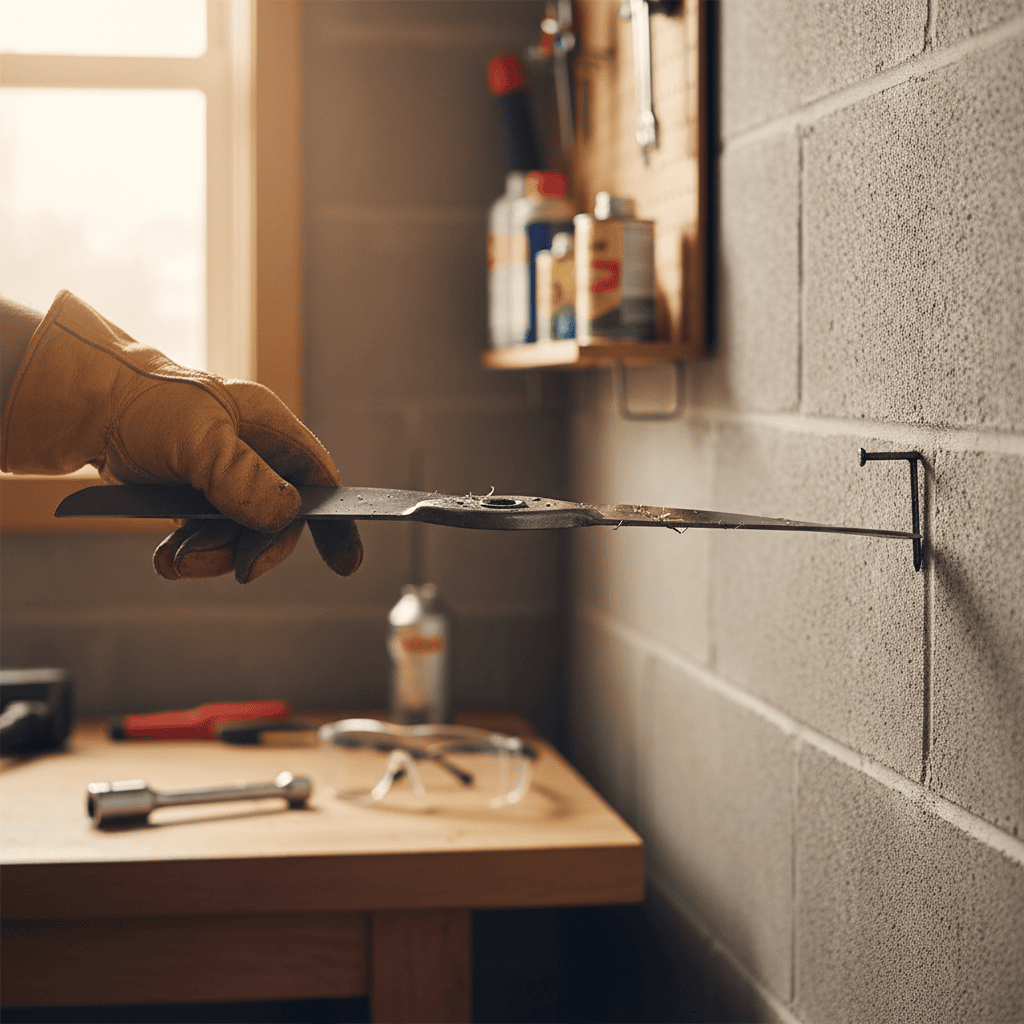
To balance a lawn mower blade, first disconnect the spark plug wires and safely remove the blade from the mower deck. Clean off all grass and debris, then use a simple balancing tool, such as a wall-mounted nail or dedicated blade balancer, to check if the blade hangs evenly on both sides. If one side dips lower, carefully file or grind material from the heavier side in small increments until both sides balance equally. Reinstall the blade and test for smooth operation with reduced vibration. This process prevents uneven cutting, reduces mower vibration, and extends engine life.
Why Balancing Your Lawn Mower Blade Matters
An unbalanced lawn mower blade causes significant operational problems that extend beyond uneven grass cutting. When a blade is heavier on one side, it creates excessive vibration during rotation, which stresses the mower’s engine bearings, crankshaft, and deck mounting points. This vibration accumulates over time, leading to premature wear and potential mechanical failure.

Pros
- Rigid metal construction delivers durable performance for repeated blade maintenance tasks
- Easy-turn handle makes clamping and releasing quick and user-friendly
- Wide model compatibility covers numerous popular MTD-related lawn mowers
- Improves safety by locking blades securely to prevent spinning during nut removal
Cons
- Limited to mower decks measuring no larger than 42 inches
- Compatibility focuses on listed models from specific brands which may not cover all mowers
- Manual clamp requires physical effort without any powered assistance
The KINTLE 490-850-0005 Universal Mower Blade Removal Tool is a specialized clamp built to hold lawn mower blades securely during removal and replacement. With its rigid metal construction and easy-turn clamp handle, it creates a durable first impression as a practical accessory for walk-behind and riding mowers. This universal style tool is crafted for users seeking safer blade work on compatible equipment.
Performance centers on clamping to the mower deck to stop the blade from spinning, which enables easier and safer loosening of the blade nut. It works with single and twin blade models on decks up to 42 inches and supports extensive compatibility lists for Troy-Bilt, Yard Man, MTD, and Yard Machines models such as 11A-B13M729, 13A326JC058, and many others. As a replacement for 339079 and 490-850-0005, it focuses on reliable holding power for routine maintenance.
Considerations include its restriction to decks of 42 inches or less and primary verification for the specified model ranges, so owners of other brands should confirm fit. Being a basic manual clamp, it lacks extras or powered features and depends on user strength for operation.
In verdict, the KINTLE 490-850-0005 offers solid value for owners of compatible walk-behind and riding lawn mowers who need a dependable way to handle blade changes more safely and efficiently. It suits regular yard care where blade security is essential.

Pros
- Heavy-duty zinc alloy build for long-term use.
- Universal fit for many common blade shapes.
- Simple design is easy to use after sharpening.
- Compact size is convenient for storage and transport.
Cons
- It is a single-purpose tool and does not sharpen blades.
- Compatibility is broad, but the product data does not list exact mower model support.
- No instructions or extra accessories are mentioned in the manufacturer listing.
Overview and design. The Silcpall Lawn Mower Blade Balancer is a compact universal tool made from zinc alloy. Its round, simple shape is designed to hold mower blades at the center for quick balance checks after sharpening.
Performance and key features. In use, the balancer is meant to help you spot uneven blades before they cause vibration, poor cut quality, or extra wear on the mower. The universal design is intended to work with most common blade shapes, including round and square styles.
Drawbacks and considerations. This is a single-purpose accessory, so it will not sharpen blades or provide model-specific mounting guidance. Compatibility is broad, but users should still confirm their blade sits securely on the center slot before relying on it.
Verdict. For homeowners, DIY users, and anyone who sharpens mower blades at home, this is a practical maintenance tool that can make blade balancing faster and more consistent. It is best suited to buyers who want a simple, durable balancer rather than a multi-function kit.

Pros
- Accurate balancing reduces blade wobble and engine wear effectively
- Works with nearly all standard lawnmower blade shapes for true universality
- Durable zinc die-cast construction ensures long-term rust resistance
- Intuitive design makes it easy for beginners and DIY users to operate
- Supports better cutting efficiency after blade sharpening sessions
Cons
- Lacks advanced precision indicators so users must rely on visual leveling judgment
- May not fit highly specialized or non-standard irregular blade designs perfectly
- Basic single-tool package includes no carrying case or extra accessories
The SporGain Lawn Mower Blade Balancer is a compact universal tool built from premium zinc die-cast metal for balancing lawnmower blades after sharpening. Its solid rust-resistant construction gives an immediate impression of durability suited for garage storage or occasional outdoor exposure, making it a practical accessory for standard lawn care routines.
In performance, the tool excels at simple balance checks by letting users place nearly any round, square, or common blade shape on it to detect imbalances. This process helps reduce wobble, vibration, and engine strain while verifying bent blades, leading to smoother cuts and longer mower life based on its core design features. The intuitive layout supports quick adjustments without specialized skills.
Drawbacks include the absence of built-in precision markers, which means results depend on careful visual assessment, and potential fit issues with highly custom blades outside standard shapes. It also comes as a basic 1pk unit without extras like storage options.
Overall, this SporGain balancer delivers strong value for DIY homeowners and lawn maintenance enthusiasts who regularly sharpen blades and want an affordable, reliable way to maintain cutting performance. It is ideal for those seeking universal compatibility and lasting metal quality without needing professional-grade equipment.
- Increased engine vibration and noise during operation
- Uneven grass cutting, with some areas scalped and others left longer
- Reduced fuel efficiency as the engine works harder to compensate
- Accelerated wear on engine mounts and deck components
- Potential damage to the crankshaft over extended use
It’s crucial to understand that blade balancing is a separate process from blade sharpening. Sharpening addresses the cutting edge’s dullness and improves cutting efficiency, while balancing addresses weight distribution and rotational stability. A blade can be sharp but unbalanced, or balanced but dull. Both processes are essential for optimal mower performance.
Safety Precautions Before You Start
Working with lawn mower blades requires strict adherence to safety protocols. Blades are sharp, and the mower’s mechanical components can cause serious injury if proper precautions aren’t followed.
Essential safety steps:
- Disconnect the spark plug wires – Remove both spark plug wires from the plugs to prevent accidental engine starting while you work
- Allow the engine to cool – Wait at least 15-20 minutes after mowing before handling the blade
- Secure the mower – Place the mower on a flat, level surface and engage the parking brake if available
- Wear protective gloves – Heavy-duty work gloves protect against sharp blade edges
- Use eye protection – Wear safety glasses when grinding or filing to protect against metal particles
- Never reach under the deck – Always remove the blade rather than working underneath the mower
- Keep hands clear of blade paths – Even with the engine off, never place hands near where the blade rotates
Tools and Equipment You’ll Need
Balancing a lawn mower blade doesn’t require expensive specialized equipment. Most homeowners can complete this task with common tools found in a typical garage.
- Socket wrench or wrench set – For removing the blade bolt (typically 5/8″ or 1/2″)
- Wall-mounted nail or blade balancer – A simple nail driven horizontally into a wall or post serves as a pivot point; alternatively, a dedicated blade balancer tool provides a more stable platform
- Metal file or rasp – For removing small amounts of material from the blade’s heavy side
- Angle grinder (optional) – For faster material removal, though filing offers more control
- Marker or paint pen – For marking the heavy side of the blade
- Work gloves and safety glasses – Essential protective equipment
- Blade cleaning brush or cloth – For removing grass and debris
A dedicated blade balancer tool typically features a horizontal rod or platform that allows the blade to rest and pivot freely. This design is more stable than a wall nail and provides clearer visual indication of imbalance. However, the wall-nail method is equally effective and costs nothing if you already have a suitable nail.
Step-by-Step Blade Removal and Inspection
Proper blade removal prevents damage to the mower and ensures safe handling of the blade. Before finalizing equipment decisions, refer to our comprehensive marshall stanmore iii vs harman kardon onyx studio 8 comparison.
Removal procedure:
- Disconnect spark plug wires – Remove both wires from the spark plugs and set them aside
- Locate the blade bolt – Most mower blades are secured with a single center bolt; consult your mower’s manual if unsure
- Mark the blade orientation – Use a marker to indicate which side faces up; this ensures proper reinstallation
- Remove the bolt – Use the appropriate wrench to loosen and remove the blade bolt; some bolts turn counterclockwise due to left-hand threads, so check your manual
- Carefully lift the blade – Support the blade with both hands and lift it straight up and away from the mower deck
- Inspect for damage – Look for cracks, deep gouges, or bent areas; severely damaged blades should be replaced rather than balanced
- Clean thoroughly – Use a brush or cloth to remove all grass clippings, dirt, and debris from both sides of the blade
During inspection, check for bent blade tips or a warped cutting edge. Minor bends can sometimes be straightened, but severely bent or cracked blades should be replaced for safety and performance reasons. For broader ecosystem context, read through our operational guide on dyson v8 cyclone vs bissell featherweight stick.
How to Check Blade Balance Using Simple Methods
The wall-nail method and dedicated blade balancers both reveal weight imbalance through gravity. A properly balanced blade remains level when suspended horizontally; an unbalanced blade tips toward the heavier side.
- Drive a nail horizontally – Install a nail or bolt horizontally into a wooden post or wall stud at approximately shoulder height, ensuring it protrudes 2-3 inches
- Rest the blade’s center hole – Carefully place the blade’s center hole onto the nail, allowing it to pivot freely
- Observe which side dips – The heavier side will gradually dip downward; the lighter side will rise
- Mark the heavy side – Use a marker to clearly mark the side that dips lower
- Repeat the test – Rotate the blade 180 degrees and test again to confirm which side is consistently heavier
What dipping indicates: When one side of the blade dips, it means that side is heavier and contains more mass. The weight imbalance causes that side to be pulled downward by gravity. The heavier side is where you’ll need to remove material through filing or grinding.
Visual identification tips:
- A blade that dips immediately and noticeably has significant imbalance
- A blade that dips slowly or hesitantly has minor imbalance
- If the blade remains perfectly level, it’s already balanced
- If you’re unsure, rotate it several times and observe the pattern, the same side should consistently dip
Adjusting Blade Weight: Filing and Grinding Techniques
Once you’ve identified the heavy side, carefully remove material to achieve balance. This process requires patience and incremental adjustments to avoid over-correcting.
Filing method (recommended for beginners):
- Secure the blade – Clamp the blade in a vise or use a blade holder to keep it stationary during filing
- File the heavy side – Using a metal file or rasp, remove material from the top side of the heavy end, working from the blade’s tip toward the center
- Make small passes – Remove only small amounts of material with each pass; aim for 10-15 file strokes before rechecking balance
- Recheck balance frequently – After every 20-30 file strokes, return to your balancing tool to test progress
- Continue until balanced – Stop when the blade remains level on both sides when suspended
Angle grinder method (faster but requires care):
- Secure the blade properly – Use a vise or blade holder to prevent movement
- Wear full protective equipment – Safety glasses and gloves are essential when grinding
- Use light pressure – Apply the grinder wheel to the heavy side with gentle, controlled pressure
- Work in short bursts – Grind for 2-3 seconds, then stop to check progress and prevent overheating
- Recheck balance frequently – Test after every few grinding passes
- Avoid the cutting edge – Remove material from the blade’s flat surface or back edge, not the cutting edge itself
Common mistakes to avoid:
- Over-grinding one side – This creates an opposite imbalance; small, frequent adjustments are better than large ones
- Removing material from the cutting edge – This damages the blade’s ability to cut; focus on the blade’s back or flat surfaces
- Grinding too aggressively – Excessive heat can damage the blade’s temper and weaken the steel
- Skipping balance checks – Frequent testing prevents over-correction
- Working on a dirty blade – Grass and debris can affect balance readings; clean thoroughly before adjusting
Testing and Reinstalling Your Balanced Blade
Before reinstalling, verify that your balancing work was successful and that the blade is in good condition.
Final balance verification:
- Clean the blade again – Remove any metal filings or dust from grinding or filing
- Perform the balance test one final time – Suspend the blade on your nail or balancer and confirm it remains level
- Rotate it several times – Spin the blade gently and observe that it doesn’t consistently dip to one side
- Check for damage – Inspect the blade for cracks or damage that may have occurred during adjustment
Proper reinstallation procedure:
- Align with your mark – Position the blade so the marked “up” side faces the same direction as when removed
- Insert the bolt – Place the blade’s center hole over the mower’s spindle shaft
- Install the bolt hand-tight first – This allows for adjustment if the blade isn’t seated properly
- Tighten securely – Use your wrench to tighten the blade bolt firmly; check your manual for the correct torque specification (typically 35-90 foot-pounds depending on mower model)
- Double-check tightness – Gently try to move the blade by hand; it should not shift or rotate on the spindle
- Reconnect spark plug wires – Push the wires firmly onto the spark plugs until they click
Testing for smooth operation:
- Start the mower – Start the engine and let it idle for 30 seconds
- Listen for vibration – A balanced blade produces smooth, quiet operation; excessive vibration or noise indicates remaining imbalance
- Engage the blade slowly – Gradually increase blade speed to full RPM and listen for changes in vibration
- Mow a test area – Cut a small section of grass and observe the cutting pattern; it should be even across the blade’s width
- Compare to previous performance – You should notice reduced vibration and smoother operation compared to before balancing
Balancing Different Blade Types
While the fundamental balancing process is the same, different blade designs have specific characteristics that affect balancing.
Standard blades: These straight-edge blades are the most common and easiest to balance. They typically have a simple design with two cutting edges and require straightforward weight adjustment.
Mulching blades: Mulching blades feature curved or angled designs that create more lift and finer cutting action. Their curved shape means weight distribution is less obvious visually. Use the same balancing methods, but expect the balance point to be less obvious due to the blade’s design. Mark the blade carefully before grinding to ensure you’re removing material from the correct side.
High-lift blades: These blades create more suction and are designed for wet grass. Their increased curvature means weight imbalance can be more pronounced. Balance them using the same techniques, but be aware that their design naturally creates more vibration, so achieving perfect balance is especially important.
Low-lift blades: These blades produce less suction and are ideal for dry conditions. Their flatter design makes balance assessment straightforward. They typically balance easily with standard methods.
Blade length considerations: Longer blades (typically on larger mowers) create more rotational force, making imbalance more noticeable. Conversely, shorter blades may have less obvious imbalance but still benefit from balancing. Regardless of length, use the same balancing procedure.
Troubleshooting Common Balancing Errors
Even with careful work, issues can arise during the balancing process. Here’s how to address them.
Blade still vibrates after balancing:
- Recheck balance – The blade may not be as balanced as you thought; repeat the suspension test
- Check for blade damage – Cracks, bends, or warping can cause vibration even if weight is balanced; inspect carefully
- Verify reinstallation – Ensure the blade is seated properly on the spindle and the bolt is tight
- Check the spindle – If the spindle is bent or damaged, even a balanced blade will vibrate; this requires professional repair
- Inspect the mower deck – Loose deck components or bent mounting points can cause vibration; tighten all bolts and check for damage
Over-ground one side of the blade:
- Grind the opposite side slightly – Remove a small amount of material from the previously light side to rebalance
- Test frequently – Make very small adjustments and test after each one
- Consider replacement – If you’ve removed excessive material and the blade is now too thin or weak, replacement may be safer than continued adjustment
Blade won’t balance no matter what you do:
- Look for hidden damage – Cracks, internal voids, or deformation may prevent balancing; inspect thoroughly
- Check for uneven wear – Severely worn blades may have uneven material distribution that’s difficult to correct
- Consider blade replacement – If a blade can’t be balanced after reasonable effort, it’s likely time for a new one
When to seek professional help: If the blade has visible cracks, is severely bent, or cannot be balanced after multiple attempts, consult a professional mower repair service. They have specialized equipment and expertise to handle complex issues.
Maintenance Tips to Keep Your Blade Balanced
Regular maintenance prevents blades from becoming unbalanced and extends the time between balancing procedures.
Preventive maintenance practices:
- Check balance at the start of each mowing season – Before regular use begins, verify that your blade is still balanced from the previous season
- Clean the blade after each use – Remove grass and debris immediately after mowing; dried grass can add uneven weight
- Inspect for damage regularly – Look for dents, bent edges, or cracks during routine cleaning
- Avoid striking hard objects – Hitting rocks, sticks, or debris can dent or bend the blade; mow carefully and remove debris from the lawn before mowing
- Sharpen and balance together – When you sharpen the blade, check balance afterward; sharpening can affect weight distribution
- Store properly during off-season – Keep the blade in a dry location to prevent rust and corrosion, which can affect weight distribution
- Use quality fuel – Proper fuel prevents engine problems that can cause unusual vibration patterns
What causes previously balanced blades to become unbalanced:
- Striking rocks or debris during mowing, which dents one side
- Uneven sharpening that removes more material from one side
- Rust or corrosion accumulation on one side
- Bent blade tips from impact damage
- Uneven wear from mowing wet grass or abrasive soil
Everything You Need to Know: Balance A Lawn Mower Blade FAQ
How often should I balance my lawn mower blade?
Check blade balance at the start of each mowing season before regular use begins. If you mow frequently (more than once weekly), check balance mid-season as well. After hitting rocks or debris, inspect the blade for damage and recheck balance. Most homeowners find that balancing once per season is sufficient with proper maintenance and careful mowing practices.
Can I sharpen and balance my blade at the same time?
You can perform both procedures, but do sharpening first, then check and adjust balance afterward. Sharpening removes material from the cutting edge, which can affect weight distribution. Balancing last ensures your final result is properly balanced. Some people prefer to sharpen and balance on alternate seasons to extend blade life.
Is it dangerous to use an unbalanced blade?
Yes, operating with an unbalanced blade poses several risks. Excessive vibration can damage the mower’s engine, bearings, and deck components over time. The vibration is also uncomfortable and can cause fatigue during mowing. Additionally, unbalanced blades cut unevenly, potentially scalping some areas of grass while leaving others too long. For safety and performance, balance your blade before each mowing season.
What’s the difference between blade balancing and blade sharpening?
Blade balancing addresses weight distribution and rotational stability; it prevents vibration and ensures even cutting. Blade sharpening addresses the cutting edge’s dullness and improves cutting efficiency. A blade can be sharp but unbalanced (causing vibration despite good cutting), or balanced but dull (running smoothly but cutting poorly). Both processes are essential for optimal mower performance and should be performed regularly.
Conclusion
Balancing a lawn mower blade is a straightforward maintenance task that significantly improves mower performance and longevity. By following proper safety precautions, using simple tools, and making careful adjustments, you can achieve professional-quality results without expensive equipment or professional service. Regular blade maintenance, including balancing, sharpening, and cleaning, ensures your mower operates smoothly, cuts evenly, and lasts for many seasons. Start with a careful inspection, use the wall-nail or blade balancer method to identify imbalance, and make small, incremental adjustments until the blade is perfectly level. Test thoroughly before reinstalling, and incorporate blade checks into your regular seasonal maintenance routine. With these practices in place, you’ll enjoy a smoother-running mower and more attractive lawn results.
Related Maintenance and Operating Guides
To keep your equipment running at peak operating efficiency, explore our related technical walkthroughs and maintenance tutorials:
- Consult our detailed breakdown on bissell crosswave hydrosteam vs shark stainforce.
- Consult our detailed breakdown on heavy-duty chainsaw buyer guide.
Technical Standards and Compliance
Mechanical safety standards, operational tolerances, and protective gear guidelines align with benchmark specifications established by the American National Standards Institute (ANSI).









