

At a Glance: Best How To Change A Carburetor On A Lawn Mower Picks
To change a lawn mower carburetor: Disconnect the spark plug wire for safety, drain fuel, remove the air filter and intake components, unbolt the old carburetor, install a new gasket, position the replacement carburetor, and reconnect all fuel and air lines. The process typically takes 30–60 minutes on a standard push mower. Before replacing, determine whether your carburetor problem requires full replacement or if cleaning and rebuilding the existing unit might restore performance.

Pros
- Large-size design named in product title
- Sharpening and balancing functions listed
- Listed as a new upgraded version

Pros
- Adjustable 15-to-45-degree range in title
- Sharpening and balancing functions listed
Pros
- Includes replacement gaskets and a 98079-55846 spark plug
- Matches Honda HRR216 and HRS216 lawn mower models
- Designed around the 16100-Z8B-901 carburetor specification
Cons
- Restricted to select Honda GCV160 mower applications
- Installation requires basic mechanical tools and skills
Do You Need to Replace or Rebuild Your Carburetor?
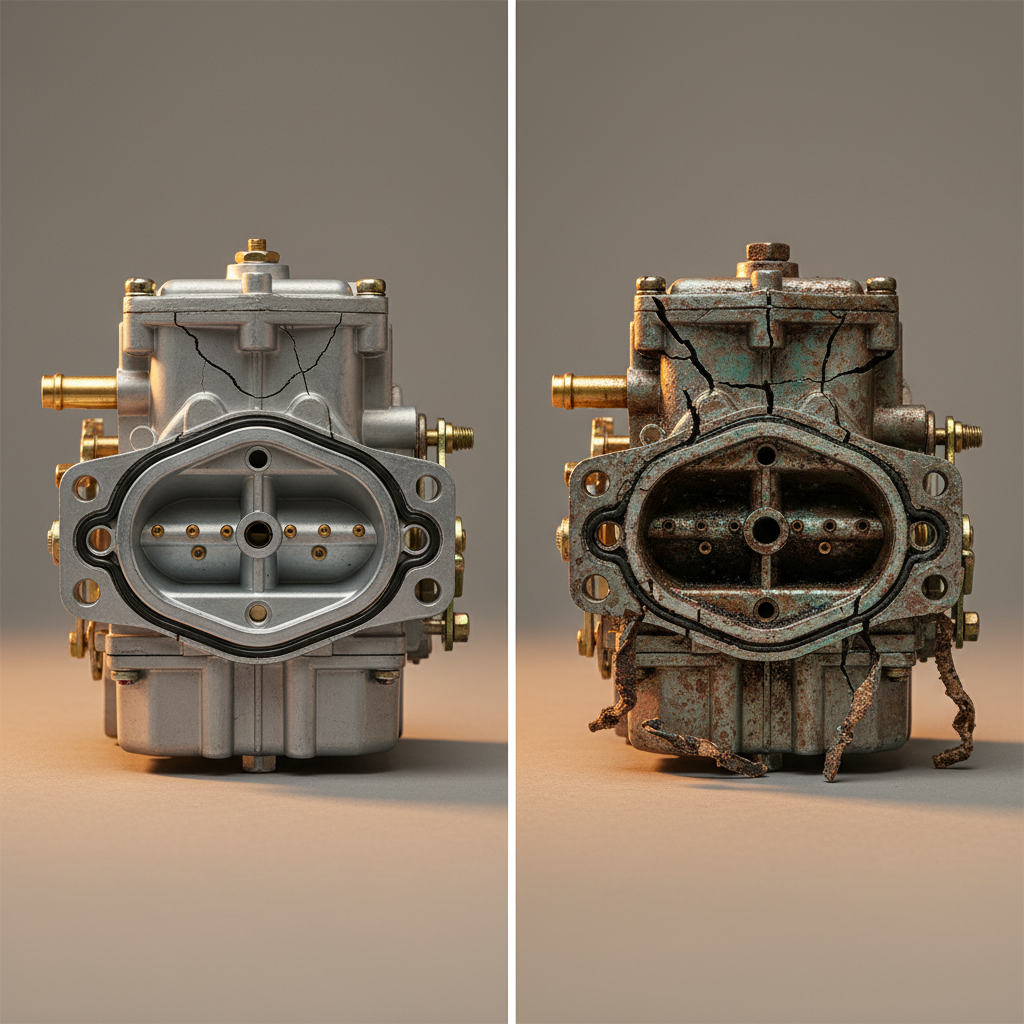
Many homeowners assume a faulty carburetor requires replacement, but cleaning or rebuilding often solves the problem at a fraction of the cost. Understanding the difference helps you make the right decision.
Signs your carburetor needs cleaning or rebuilding:
- Hard starting after storage (common with stale fuel)
- Rough idle or frequent stalling
- Black smoke or backfiring
- Fuel leaking from carburetor overflow tubes
- Mower hasn’t been used for several months
- Visible cracks or damage to the carburetor body
- Severely corroded internal passages that resist cleaning
- Throttle or choke linkage broken beyond repair
- Carburetor flooding despite rebuild attempts
- Internal diaphragm deteriorated (replacement seals unavailable)
If your mower has been sitting with fuel in the tank for more than a month, try draining old fuel, cleaning the carburetor jets with carburetor cleaner, and replacing the fuel filter first. This solves roughly 60–70% of hard-start issues without full replacement.
Identify Your Mower Type and Engine Model
Carburetor designs vary significantly by engine manufacturer and mower category. Identifying yours ensures you order the correct replacement and follow the right procedure.
- Push mowers: Single-cylinder engines, most common for residential use, typically 140–190cc
- Riding mowers: Larger engines, often Kohler or Kawasaki, more complex fuel systems
- Zero-turn mowers: Twin-cylinder engines, premium components, higher replacement costs
Major engine manufacturers and carburetor styles:
- Briggs & Stratton: Float-type carburetors; most push mowers use this brand
- Kohler: Pressurized fuel systems; common on riding mowers
- Honda: Precision-engineered carburetors; premium residential and commercial mowers
- Tecumseh: Older mowers; parts still widely available
Locate the engine model number on a sticker or plate attached to your mower frame or engine block. It typically reads like “Briggs & Stratton 208cc 625 Series.” Write this down—you’ll need it to order the correct replacement carburetor and gasket.
Tools and Materials You’ll Need
Gathering everything before you start prevents frustrating mid-project trips to the hardware store.
- Socket set and wrenches (typically 10mm, 12mm, 14mm)
- Screwdriver set (Phillips and flathead)
- Gasket scraper or plastic putty knife (metal can damage surfaces)
- Small container or ziplock bag for bolts and fasteners
- Fuel line disconnect pliers (optional but helpful for push-fit connectors)
- Carburetor cleaning brush or old toothbrush
Safety equipment:
- Work gloves (fuel can irritate skin)
- Safety glasses
- Shop rags or paper towels
- Small drain pan (for fuel residue)
- Replacement carburetor (engine model-specific; typically $40–$120)
- Replacement gasket and seal kit ($8–$15)
- New fuel filter ($5–$10)
- Carburetor cleaner (if rebuilding option)
- Fresh fuel (stabilized for storage)
Safety Precautions Before Starting
Working with fuel and small engines requires respect for fire and electrical hazards. These steps protect you and prevent damage to your equipment.
Before you begin:
- Disconnect the spark plug wire. Grasp the boot (rubber connector) and twist it off the spark plug. This prevents accidental engine starting if the flywheel rotates during work.
- Allow the engine to cool completely. Wait at least 30 minutes after the last use. Hot metal burns skin instantly.
- Work outdoors or in a well-ventilated garage. Fuel vapors are flammable and toxic. Never work in an enclosed space.
- Have a fire extinguisher nearby. Keep it within arm’s reach, rated for Class B fires (flammable liquids).
- Drain remaining fuel. Locate the fuel shutoff valve (usually a small lever on the fuel line) and turn it off. Unscrew the fuel tank cap to relieve pressure. Use the drain valve at the tank’s lowest point or siphon fuel into a safe container. Never pour fuel down a drain.
Step-by-Step Carburetor Removal
Careful documentation of connections during removal is the key to hassle-free reassembly.
Step 1: Remove the air filter and intake components.
- Locate the air filter box (usually a plastic housing above the carburetor).
- Unbolt or unclip the air filter box and remove it to access the carburetor’s top.
- Photograph or sketch the air intake ducting before removing it so you can reinstall correctly.
Step 2: Disconnect the fuel line.
- Locate where the fuel line connects to the carburetor’s inlet. This is typically a single rubber hose held by a small clamp.
- Place a drain pan or rag underneath to catch fuel drips.
- Loosen the clamp with a screwdriver and gently twist the fuel line free. Fuel will leak—this is normal.
- If the line is stuck, wiggle gently rather than yanking; rough handling can tear the rubber.
Step 3: Disconnect the throttle and choke linkages.
- Identify the small metal rods and springs connecting the carburetor to the engine’s throttle and choke controls.
- Carefully unclip or unbolt these linkages. Take a photo first so you remember their orientation.
- Set linkages aside gently—bent linkages must be straightened or replaced.
Step 4: Unbolt the carburetor from the engine.
- The carburetor bolts to the engine’s intake manifold with 2–4 bolts, usually 10mm or 12mm.
- Using your socket wrench, remove these bolts in a crisscross pattern (like removing car wheel lug nuts) to avoid warping the carburetor mounting surface.
- Place bolts in a labeled container.
Step 5: Remove the old gasket.
- The old gasket will remain on the engine’s intake manifold.
- Use a gasket scraper or plastic putty knife to gently remove it. Do not use a metal blade—you’ll score the manifold surface.
- Clean the manifold surface with a rag until it’s smooth and fuel-free.
Installing the New Carburetor
Proper installation ensures tight seals and prevents fuel leaks and air leaks that affect engine performance.
Step 1: Prepare the mounting surface.
- Verify the engine’s intake manifold is completely clean and dry.
- Lay the new gasket on the manifold. Most gaskets are self-positioning and have alignment holes.
- If your replacement carburetor includes a gasket in the kit, use that one rather than reusing an old gasket.
Step 2: Position the new carburetor.
- Carefully align the carburetor’s mounting holes with the gasket and manifold holes.
- Gently lower the carburetor into place. Do not force it.
- Insert the mounting bolts and hand-tighten first to ensure alignment.
Step 3: Torque bolts to specification.
- Once hand-tightened, tighten bolts in a crisscross pattern using your socket wrench.
- For most residential Briggs & Stratton carburetors, torque to 60–80 inch-pounds (roughly hand-tight plus a quarter turn).
- Check your engine manual for exact torque specifications—over-tightening strips bolt threads; under-tightening causes fuel and air leaks.
Step 4: Reconnect the fuel line.
- Attach the fuel line to the carburetor’s fuel inlet port.
- Slide the hose clamp over the connection and tighten it with a screwdriver. It should be snug but not crushing the hose.
- Check for leaks by opening the fuel shutoff valve and observing the connection for several seconds.
Step 5: Reconnect throttle and choke linkages.
- Reattach the throttle control rod to the carburetor’s throttle arm. Springs should be under tension but not kinked.
- Reattach the choke rod, ensuring it moves freely without binding.
- Move the throttle control on the mower’s handle—the carburetor throttle arm should move smoothly in response.
Step 6: Reinstall the air filter and intake.
- Reattach the air intake ducting and air filter box in reverse order of removal.
- Ensure all connections are snug to prevent air leaks, which cause lean running and hard starting.
Testing and Troubleshooting After Installation
Before starting the engine:
- Reconnect the spark plug wire by pushing it firmly onto the spark plug until it clicks.
- Turn on the fuel shutoff valve.
- Prime the carburetor by pressing the primer bulb (if equipped) 6–8 times, or turn the mower on its side to wet the carburetor bowl with fuel.
First start:
- Pull the starter rope slowly 2–3 times to prime the engine without forcing.
- Move the choke lever to the “Choke” position (usually marked with a snowflake symbol).
- Pull the starter rope with a firm, steady motion. The engine should catch within 3–5 pulls.
- Once running, gradually move the choke to the “Run” position over 30 seconds.
Common post-installation issues:
| Problem | Likely Cause | Solution |
|---|---|---|
| Engine won’t start | Fuel line not connected; air leak in intake | Check fuel line connection and air filter box seals |
| Fuel leaking from carburetor | Loose fuel line clamp; defective new gasket | Tighten clamp; verify gasket is seated properly |
| Black smoke, rough idle | Fuel mixture too rich; choke stuck | Verify choke linkage moves freely; check if idle adjustment is needed |
| Weak acceleration | Air leak in intake; fuel filter clogged | Check all connections; replace fuel filter |
Idle and fuel mixture adjustment:
Most residential carburetors arrive pre-adjusted. If idle is too fast or too slow, locate the idle adjustment screw (usually on the carburetor’s side, marked “L” or “Idle”). Turn it clockwise to lean the mixture (faster idle) or counterclockwise to enrich it (slower idle). Adjust in quarter-turn increments until the engine idles smoothly without stalling.
Differences by Mower Type
Push mowers (most common): Carburetor removal is straightforward, typically taking 30–45 minutes. Parts are inexpensive ($40–$80) and widely available at hardware stores and online retailers.
Riding mowers: Larger fuel tanks and more complex intake systems add complexity. You may need to remove additional components like the blower housing or recoil starter. Allow 60–90 minutes. Replacement carburetors cost $80–$150. Some riding mowers use pressurized fuel systems requiring special care when disconnecting fuel lines.
Zero-turn mowers: Twin-cylinder engines mean dual carburetors or a larger shared unit. Removal is similar but requires attention to identical reassembly on both cylinders. Expect 90–120 minutes and budget $150–$300 for replacement parts. Premium components demand precision; if unsure, consult a dealer.
Engine brand considerations:
- Briggs & Stratton: Most forgiving to work on; extensive online documentation and YouTube guides available.
- Kohler: Pressurized fuel systems and tighter tolerances; consider professional service if uncomfortable with fuel system work.
- Honda: Precision carburetors; excellent manuals provided; relatively straightforward for DIY work.
Frequently Asked Questions About How To Change A Carburetor On A Lawn Mower
How much does a replacement carburetor cost?
Replacement carburetors for residential push mowers range from $40 to $120, depending on engine manufacturer and model. Riding mower carburetors cost $80–$250. OEM (original equipment manufacturer) parts are more expensive but guarantee compatibility. Aftermarket alternatives are cheaper and often identical in function. Always verify compatibility by providing your engine model number to the retailer.
Can I rebuild or clean my carburetor instead of replacing it?
Yes, if the carburetor body is intact and damage is limited to clogged jets or dried varnish. A carburetor rebuild kit ($15–$40) includes new gaskets, seals, and jet needles. Soak the carburetor in carburetor cleaner overnight, scrub jets with a soft brush, and reassemble with new seals. This works for 70% of performance issues caused by old fuel. However, if the carburetor has cracks or internal corrosion, replacement is necessary.
Do I need a torque wrench to install the new carburetor?
A torque wrench is helpful but not essential for residential mower carburetors. Bolts should be snug but not over-tightened (which strips threads and warps the mounting surface). Use a socket wrench and tighten in a crisscross pattern until resistance increases, then add a quarter turn. Most residential carburetors require only hand-tight plus a slight turn. Consult your engine manual for exact specifications if provided.
How long does it take to change a carburetor?
On a push mower, expect 30–60 minutes if you work methodically and document connections as you go. First-time jobs take longer (60–90 minutes) due to learning. Riding mowers require 60–90 minutes, and zero-turn mowers 90–120 minutes. Most of the time is spent safely draining fuel and carefully disconnecting linkages. The actual removal and installation steps are quick once you’ve prepared.









