

How to Change Mower Blades: The Direct Answer
To change mower blades safely, first disconnect the spark plug wire or power source to prevent accidental startup. Then tip the mower on its side (air filter facing up) or use a lift to access the blade. Mark the blade orientation with paint or tape, remove the fastener using the appropriate wrench, and inspect the spindle for damage. Install the new blade with the marked side facing the original direction, tighten the fastener securely to the manufacturer’s torque specification, and reconnect power before testing. The specific steps vary by mower type, but safety disconnection and correct blade orientation are universal requirements.

Pros
- High-quality durable steel construction that resists wear for longer service life
- Maintains sharpness longer for extended cutting sessions with fewer interruptions
- Exact dimensions and center hole for direct fit on specified Ariens and Gravely 52" deck models
- Produces clean even cuts with smooth grass discharge for superior lawn appearance
- Straightforward installation that upgrades mower performance efficiently
Cons
- Compatibility is limited to specific Ariens IKON X/XL and Gravely ZT X/XL models with 52" decks only
- Requires careful double-check of the mower manual and measurements to avoid improper fit or equipment damage
- Includes only the three blades with no additional mounting hardware or accessories
The Oregon 54 Inch Lawn Mower Blades provide a solid 3-pack replacement option built from high-quality durable steel. Designed for 54" decks with an 18" blade length, 5/8" center hole, 2.25" width and 0.164" thickness, these blades create an immediate impression of robust construction suited for demanding lawn care. They serve as a direct replacement for Ariens models with 52" decks such as IKON X and IKON XL as well as Gravely models with 52" decks such as ZT X and ZT XL.
Performance focuses on delivering a clean even cut with smooth grass discharge that results in a neat professional-looking finish. The steel material helps maintain sharpness longer while supporting easy installation and consistent dependable cutting results. These features make the blades effective for upgrading mower efficiency across yards and gardens when used on the listed models.
Key considerations involve the need to verify fit carefully against the mower manual since the blades are tailored only to the specified Ariens IKON and Gravely ZT configurations. Improper matching can lead to issues, and the pack contains no extra hardware or accessories beyond the three blades themselves.
This Oregon set offers the most value to owners of compatible Ariens IKON X/XL or Gravely ZT X/XL zero-turn mowers who want durable steel blades for reliable sharpness and clean cutting performance in regular home and garden maintenance.

Pros
- Exact fit for multiple Gravely Pro Turn 152 and Pro Master 152Z zero turn models
- High-lift profile improves grass lift and overall cut quality on 52-inch decks
- Convenient 3-pack covers a full mower deck replacement in one purchase
- Clear OEM number matching simplifies identification and installation
- 24-month warranty offers extended protection for the blade set
Cons
- Compatible only with specified Gravely 52-inch models and not universal decks
- 0.025-inch thickness limits use to standard residential rather than heavy commercial applications
- Includes blades only with no mounting hardware or extra accessories provided
The JYLEYJ 52 Inch Mower Deck High Lift Blades are a 3-pack replacement set built for Gravely zero turn mowers. These blades measure 18 inches long, 2.5 inches wide, with a 5/8-inch center hole and 0.025-inch thickness, delivering a straightforward OEM-style design that installs cleanly on matching decks.
In performance, the high-lift profile raises grass effectively for smoother cutting and improved discharge across 52-inch decks on models such as the Gravely Pro Turn 152, Pro Master 152Z, and 152i. They replace OEM numbers 00450300, 03253800, and 04916400, ensuring precise compatibility with Pro Turn 52 ZT HD decks and Rapid XZ series units for reliable day-to-day mowing.
Considerations include the limited compatibility that restricts use to listed Gravely 52-inch models only. The 0.025-inch thickness suits standard residential cutting rather than continuous heavy commercial loads, and the pack contains just the three blades without additional hardware.
Overall, these blades deliver strong value for Gravely Pro Turn 152 and Pro Master 152Z owners needing an affordable, warranty-backed high-lift replacement set. Users matching the exact models and deck size will experience the greatest benefit from the precise fit and complete 3-pack convenience.

Pros
- Strong compatibility with popular Toro Titan and TimeCutter 60-inch zero turn mower models.
- Medium-lift profile enhances airflow for effective bagging, mulching and side discharge.
- Pre-sharpened blades with safety coating ready after natural wear-off, no initial sharpening needed.
- Precise matching of OEM length, width, thickness and center hole for reliable fit and performance.
- Convenient 3-pack kit provides extras for ongoing mower maintenance.
Cons
- Requires double-checking exact mower model and blade dimensions before purchase to confirm fit.
- Safety paint coating must wear off during initial use and should never be removed manually.
- Medium-lift design may offer less aggressive lift than high-lift blades for extremely thick or wet grass.
The ZONEWO 115-9649-03 Medium Lift Blades Kit is a 3-pack replacement set engineered for 60 inch decks on Toro Titan and TimeCutter zero turn lawn mowers. These blades deliver a solid first impression through their premium medium-lift curved construction that closely matches OEM quality and dimensions for reliable daily residential use.
Performance centers on the medium-lift design that boosts airflow and suction to handle dense, dry or damp grass effectively. This balances bagging, mulching and side discharge while reducing clogging and delivering more uniform cuts. Key specifications include 20 1/2 inch length, 2 1/2 inch width, 0.236 inch thickness, 7 3/32 inch cutting edge, 63/64 inch air lift and a 5/8 inch round center hole. The edges arrive pre-sharpened under a protective safety coating that wears off naturally during first use.
Considerations include the need to carefully verify compatibility with specific models such as Titan TimeCutter 6000, MX6050, ZX6020, ZX6030 or ZX6050, plus exact blade measurements, to avoid fit issues. The safety coating should not be scraped off manually. As medium-lift blades, they prioritize balanced performance over maximum lift for the thickest vegetation.
This kit provides strong value for homeowners seeking durable, ready-to-install replacements that improve cutting efficiency on compatible Toro zero turn mowers. It suits those focused on versatile everyday residential mowing who want OEM-matching quality in a convenient multipack.

Pros
- Exact dimensional match including 2-1/4 inch width and 5/32 inch thickness for OEM-level performance
- Proven suitability for clearing overgrown weeds and rugged terrain while allowing resharpening for neat cuts
- Multiple rigorous factory tests including V-bend chip balance and field validation ensure reliability
- Clear spindle compatibility guidance reduces installation errors for circle 5/8 inch setups
- Toothed mulching profile improves clipping mulch quality compared to standard straight blades
Cons
- Strictly limited to circle 5/8 inch spindles so users must verify center hole pattern to avoid fitment issues
- Edge paint is temporary and wears off during normal use leaving bare metal that may need separate rust care
- Compatibility restricted to specific TimeMaster serial ranges and models requiring pre-purchase confirmation
The Grasscool 30 inch Deck Toro Timemaster Mower Mulching Blades Replacement serves as a direct aftermarket solution for Toro TimeMaster turfmaster mowers. Built as a toothed mulching blade it matches OEM numbers 20120P 120-9500-03 and 116-6358-03 with a solid steel construction that feels robust upon unboxing. Immediate impression centers on the precise 15-3/8 inch length 2-1/4 inch width and 5/32 inch thickness which align perfectly for 30 inch decks.
In real-world performance this blade handles overgrown weeds and rugged terrain effectively thanks to its 13/16 inch lift and toothed profile that creates fine mulch. Users can resharpen the edge for routine neat lawns while factory tests covering Rockwell hardness V-bend blade chip balance performance and field conditions confirm it maintains balance and cutting power under stress. The 5/8 inch circle center hole supports stable spinning on compatible spindles.
Drawbacks and considerations include the need to double-check that your mower uses a circle 5/8 inch spindle pattern as this is the only supported type. The protective paint on cutting edges wears off after initial use which is normal but requires awareness for rust prevention. Fitment is also limited to specific models such as 20199 20200 21199 21200 with serial range 314000001 and up so verification is essential.
Overall this Grasscool blade offers strong value for Toro TimeMaster owners seeking a reliable mulching replacement for demanding yard work. It suits homeowners with matching 30 inch decks who prioritize tested durability and mulching efficiency over universal fit. Confirm spindle type first to enjoy trouble-free installation and lasting performance.

Pros
- High-lift design optimizes grass lift and cutting efficiency for bagging systems
- Hardened steel build provides durable wear resistance for regular use
- Direct OEM replacement fit with secure 5-point star center hole
- Broad compatibility with popular Craftsman Husqvarna Poulan 48-inch deck models
- 3-pack quantity allows complete blade set replacement in one purchase
Cons
- Compatibility restricted to specific 48-inch deck models that require pre-purchase confirmation
- Optimized mainly for bagging and side discharge rather than mulching duties
- Limited specification details available beyond the high-lift profile and center hole type
The Qopaw 3 Pack 532180054 High Lift Mower Blades are designed as a complete set of replacement lawn tractor blades for 48-inch decks. Built from hardened steel with a high-lift profile, they present a solid and purpose-built impression ideal for owners of Craftsman, Husqvarna, and Poulan riding mowers seeking reliable aftermarket options.
Performance centers on the high-lift airflow design that generates strong suction to lift grass upright for cleaner cutting. These blades excel in bagging and side discharge setups by efficiently directing clippings into collection systems. The 5-point star center hole supports easy and secure installation as a direct swap for OEM parts numbered 180054, 173920, and 575938201 across listed models such as YTH2348, YTH24V48, and YTA24V48.
Key considerations include the need to verify exact mower model compatibility before ordering, since the blades target only certain 48-inch decks. Their focus on high-lift performance suits bagging and discharge better than mulching, and the manufacturer listing offers no further measurements such as thickness or exact blade length.
In summary, this 3-pack offers strong practical value for residential users of compatible Craftsman, Husqvarna, or Poulan lawn tractors who prioritize efficient grass lifting, easy blade changes, and durable steel construction for regular seasonal mowing.
Why and When to Replace Mower Blades
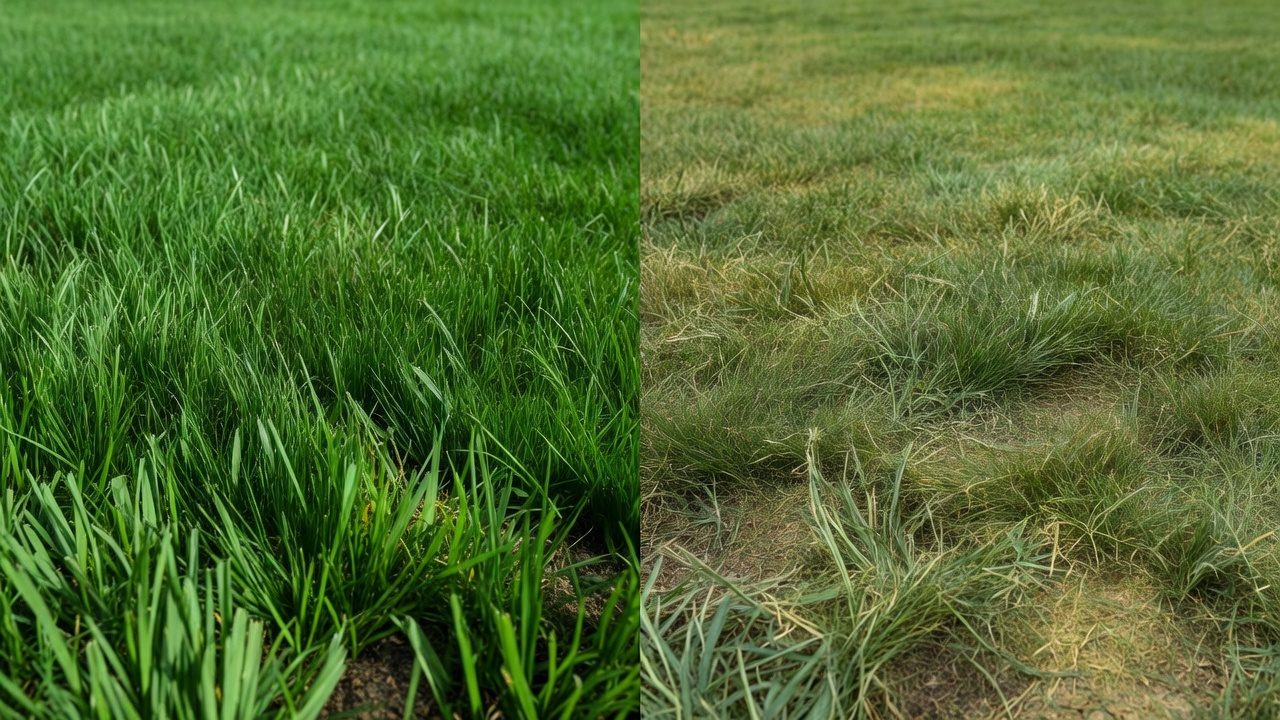
Understanding when to replace your mower blades is as important as knowing how. Dull or damaged blades leave ragged grass edges instead of clean cuts, which increases disease susceptibility in lawns and stresses the grass plant. Most manufacturers recommend blade sharpening or replacement every 20 to 50 hours of mowing, depending on your lawn size and mowing frequency. Signs that blades need replacement include:
- Grass appears torn or ragged after mowing rather than cleanly cut
- Visible dents, cracks, or bends in the blade
- Excessive vibration or unusual noise during operation
- Blade edges are too dull to sharpen effectively
- Uneven cutting height across the lawn
Neglecting blade maintenance forces the mower engine to work harder, reduces fuel efficiency, and accelerates wear on the spindle bearings. Unbalanced blades cause vibration and spindle bearing damage over time, leading to costly repairs. For complementary field maintenance guidelines, examine our breakdown of jbl partybox club 120 vs sony srs xv500. For complementary hardware performance, examine our breakdown on riding lawn mower.
Safety Precautions Before Starting
Blade replacement carries real risks. Follow these safety fundamentals regardless of mower type:
- Disconnect the spark plug wire on gas mowers or unplug electric mowers from the outlet. This prevents accidental blade rotation if the engine starts.
- Wear cut-resistant gloves and eye protection when handling blades.
- Allow the engine to cool for at least 5 to 10 minutes before touching any metal parts.
- Work on level ground in good lighting. Never work under a mower supported only by a jack.
- Position the mower safely: For push mowers, tip on the side with the air filter facing up to prevent oil leakage into the carburetor. For riding mowers, use jack stands or a lift, never rely on a single jack.
- Have a helper nearby when working with larger equipment, especially riding mowers.
How to Change Blades on a Push Rotary Mower
Push rotary mowers are the most common residential type and typically have a single horizontal blade beneath the deck.
Tools and Materials Needed
- Socket wrench or open-end wrench (size depends on your mower model, typically 3/8″ to 1/2″)
- Paint marker or masking tape
- Replacement blade (match your mower’s model number)
- Work gloves and eye protection
- Block of wood (to prevent blade rotation during removal)
Step-by-Step Process
- Disconnect the spark plug wire. Locate the spark plug on the engine and pull the wire cap off. This is non-negotiable.
- Tip the mower on its side. Carefully tip the mower to access the blade from underneath, ensuring the air filter faces upward to prevent oil from entering the carburetor.
- Mark blade orientation. Use a paint marker to mark which side of the blade faces up. This prevents installation errors.
- Block the blade. Place a block of wood against the blade to prevent it from rotating while you loosen the fastener.
- Remove the bolt or nut. Using the correct wrench size, turn counterclockwise to loosen the fastener. Remove and set aside safely.
- Lift off the old blade. Carefully remove the blade and set it down away from your work area.
- Inspect the spindle. Look for cracks, damage, or debris on the spindle shaft. If damaged, the spindle may require replacement before installing a new blade.
- Install the new blade. Align the new blade with the marked orientation (the same side should face up). Slide the blade onto the spindle.
- Reinstall the fastener. Place the bolt or nut back on the spindle and hand-tighten first. Then use the wrench to tighten securely. Do not over-tighten; consult your manual for the correct torque specification (typically 35 to 90 ft-lbs depending on the mower).
- Reconnect the spark plug wire. Push the wire cap firmly back onto the spark plug terminal.
- Test run. Return the mower to upright position, start the engine, and run briefly without load to verify smooth operation.
How to Change Blades on a Riding Lawn Mower
Riding mowers typically have two or three blades mounted on a deck beneath the frame. The process is similar to push mowers but more complex due to multiple blades and deck configuration.
Tools and Materials Needed
- Socket wrench set (common sizes: 1/2″, 9/16″, 5/8″)
- Jack stands or mower lift
- Paint marker or masking tape
- Replacement blades (typically two or three, matching your model)
- Work gloves and eye protection
- Wooden block
Step-by-Step Process
- Disconnect the battery. On electric-start riding mowers, disconnect the negative battery terminal to prevent accidental engine start.
- Raise the mower deck. Most riding mowers have a deck lift lever. Raise it fully to access blades underneath.
- Use a lift or jack stands. Never work under a mower supported only by a single jack. Use a proper mower lift or place jack stands on either side of the frame.
- Mark blade orientation on each blade. Riding mowers often have multiple blades. Mark each blade to ensure correct reinstallation in its original position.
- Remove each blade. Starting with the first blade, block it with wood, remove the fastener using the correct wrench, and lift the blade free. Repeat for each blade on the mower.
- Inspect the spindles. Examine each spindle shaft for cracks or damage. Damaged spindles must be replaced before installing new blades.
- Check blade balance. Hold each new blade horizontally on a balanced scale or blade balancer tool. Blades should be within 5% balance tolerance. Unbalanced blades cause severe vibration.
- Reinstall blades in their original positions. Place each blade on its spindle with the marked side facing up. Reinstall fasteners and tighten to the manufacturer’s torque specification (typically 35 to 90 ft-lbs).
- Lower the deck. Carefully lower the mower deck back to normal cutting height.
- Reconnect the battery. Reconnect the negative battery terminal.
- Test run on an empty lot. Start the mower and run at full throttle briefly without load to verify smooth, balanced operation.
How to Change Blades on a Zero-Turn Mower
Zero-turn radius mowers are commercial-grade residential equipment with three or more blades arranged on a large deck. Blade replacement follows similar principles but requires careful attention to deck geometry and blade positioning.
Key Considerations
- Zero-turn mowers typically have three to five blades depending on deck width.
- Blades are often mounted at angles to ensure overlap and eliminate missed strips.
- Each blade must be marked for its specific position; blades are not interchangeable.
- Blade height and overlap are critical for even cutting and must be rechecked after replacement.
Basic Replacement Steps
- Disconnect the battery. Remove the key and disconnect the negative battery terminal.
- Raise the deck fully. Use the deck lift or the operator’s seat to raise the deck to maximum height.
- Use jack stands. Support the mower frame securely on jack stands placed at manufacturer-recommended points.
- Document blade positions. Take a photo or make detailed notes of each blade’s position, angle, and orientation before removal.
- Remove fasteners and blades. Working on one blade at a time, block it with wood, remove the fastener, and carefully lift the blade free.
- Inspect spindles thoroughly. Zero-turn spindles are under heavy load. Look for any signs of damage before installing new blades.
- Check blade balance. Use a blade balancer to ensure each replacement blade meets balance tolerance.
- Reinstall in original positions. Place each new blade exactly as documented, maintaining all original angles and orientations. Tighten fasteners to specification.
- Verify blade height. Use a straightedge and measuring tape to confirm all blades are at the same cutting height.
- Lower the deck and reconnect the battery. Lower the deck to normal cutting height and reconnect the battery.
- Full-load test. Run the mower at full throttle under load on a test lawn and listen for vibration or unusual sounds.
Blade Inspection and Selection Guide
Identifying the Correct Replacement Blade
Using the wrong blade can damage the mower or produce poor results. To find the correct blade:
- Check your mower’s manual or the manufacturer’s website for the part number.
- Measure the blade. Most push mower blades are 18 to 21 inches long. Riding mower blades are typically 15 to 20 inches. Measure from tip to tip.
- Measure the center hole. Blade fastener holes are typically 5/8″ or 1/2″ in diameter. Measure carefully.
- Verify blade configuration. Standard blades have a cutting edge on both tips. Mulching blades have additional curve and teeth. Always match your original blade type.
- Look for the part number on your old blade. Many replacement blades are labeled with the part number directly.
What Spindle or Deck Damage Prevents Blade Installation
Before installing a new blade, inspect the spindle shaft for:
- Visible cracks or stress fractures
- Bent or deformed shaft
- Stripped threads where the fastener tightens
- Excessive rust or corrosion that prevents a tight fit
- Play or movement when you push the spindle side to side
If any of these are present, the spindle requires replacement or repair by a professional before a new blade can be safely installed.
Common Mistakes to Avoid
Blade replacement errors can damage the mower or create safety hazards:
- Installing blades backward or upside down. This prevents proper cutting and causes severe vibration. Always mark blade orientation before removal.
- Skipping blade balance checks. Unbalanced blades cause spindle bearing wear and costly damage. Use a blade balancer tool for riding and zero-turn mowers.
- Over-tightening fasteners. Exceeding the manufacturer’s torque specification strips spindle threads and can cause blade failure. Tighten firmly but not excessively.
- Working on a moving blade. Never reach under a mower while the engine is running or the blade can rotate. Always disconnect spark plugs first.
- Forgetting to reconnect the spark plug wire. This creates a safety risk and allows the engine to start unexpectedly.
- Ignoring spindle damage. Installing a new blade on a damaged spindle transfers the problem and can make it worse. Always inspect before reinstallation.
- Using the wrong blade type. Standard blades and mulching blades are not interchangeable. Using the wrong type affects cutting quality and engine load.
Post-Replacement Verification and Testing
After blade installation, verify that the work was completed correctly: For additional operational safety benchmarks, see our published testing notes on dyson v8 cyclone vs bissell featherweight stick.
Visual Checks
- Confirm both blade tips are at the same height (use a straightedge for riding mowers).
- Verify the blade fastener is tight and shows no movement when you try to wiggle it.
- Look for any debris, oil, or damage around the blade area.
Test Run Procedure
- Start the mower in an empty area with no obstacles or people nearby.
- Run the engine at idle for 30 seconds and listen for unusual sounds.
- Gradually increase throttle to half-speed and listen for vibration or squealing.
- Run at full throttle briefly without load (no mowing) and verify the blade spins smoothly and quietly.
- If vibration is present, stop immediately and recheck blade orientation and balance.
- Perform a test cut on a small section of lawn and inspect the grass for clean edges.
When to Seek Professional Service
Contact a professional if you encounter:
- Spindle damage or rust that prevents blade installation
- Persistent vibration or noise after blade replacement
- Uneven cutting height or patterns after installation
- Difficulty removing fasteners or concerns about stripped threads
- Uncertainty about blade orientation or positioning on your specific mower model
Everything You Need to Know: How To Change Mower Blades FAQ
How often should you change mower blades?
Most manufacturers recommend blade replacement or sharpening every 20, 50 hours of mowing, depending on lawn size and debris. For a typical residential lot mowed weekly, this translates to approximately every 4, 10 weeks during the mowing season. However, inspect your blades regularly and replace them whenever they become dull, bent, or cracked, regardless of hours of use. To compare alternative configurations, check our hands-on review of bissell crosswave hydrosteam vs shark stainforce.
Can you sharpen mower blades instead of replacing them?
Yes, you can sharpen mower blades using a metal file or angle grinder if they are only dull and not damaged. However, once blades are dented, cracked, or severely bent, replacement is safer and more cost-effective than attempting repair. Professional blade sharpening is also available at lawn mower service shops.
What happens if you install mower blades upside down?
Installing a blade upside down prevents proper cutting and causes severe vibration during operation. The blade will not cut grass cleanly, and the mower will shake excessively, damaging spindle bearings and creating safety hazards. Always mark blade orientation before removal to prevent this error.
Do you need a torque wrench to tighten mower blade fasteners?
A torque wrench is ideal for precision but not absolutely required for most residential mowing. Consult your mower’s manual for the recommended torque specification (typically 35 to 90 ft-lbs). If you don’t have a torque wrench, tighten the fastener firmly with a regular wrench until it is snug but not forced. Over-tightening strips spindle threads and causes expensive damage.
Blade Replacement Safety Basics
Changing a mower blade calls for gloves, a firm grip on the blade, and a disconnected power source. Lift the old blade carefully, since its edge stays sharp even after the engine stops. More general information on safe outdoor power equipment work is available at American National Standards Institute (ANSI).









