

Direct Answer: How to Change a Lawn Mower Pull Rope
To change a lawn mower pull rope, access the recoil starter assembly (usually located on top of the engine), remove the old rope by unthreading it from the handle grip and pulley, and install replacement rope of the same diameter by feeding it through the handle, winding it around the pulley, and securing it with a knot. The entire repair typically takes 15 to 30 minutes using only a screwdriver, pliers, and replacement starter cord.

Pros
- Long 100 ft spool provides flexibility for multiple repairs or custom-length replacements.
- Polyester woven cord offers strong load-bearing support and wear resistance.
- Two included handles add convenience for replacement or new installs.
Cons
- Compatibility depends on the equipment's required rope diameter and starter design, so size should be checked before purchase.
- It is a rope-and-handle replacement, not a full recoil starter assembly.
- The product notes that nails are inside the rope ends for storage, so handling requires care.
Overview & Design: The Saillong 3mm 100ft Starter Rope is a replacement pull cord made for small-engine equipment. It uses a high-strength polyester woven material and includes two starter handles, giving it a practical, ready-to-install feel for routine maintenance jobs.
Performance & Key Features: The 100-foot length is a major advantage because it can be cut to the needed size for different machines. Its low-stretch, wear-resistant construction is intended to keep pull performance stable, while the 3mm diameter makes it suitable for many lawn mowers, chainsaws, trimmers, edgers, brush cutters, water pumps, and small generators.
Drawbacks & Considerations: Fit is the main thing to verify before ordering, since starter rope size requirements vary by machine. It is also important to note that this is a rope replacement rather than a complete recoil starter unit, and the product description warns that nails are inside the rope ends for storage, so careful handling is needed.
Verdict: This is a sensible choice for users who want a long, cut-to-size starter cord for common small-engine repairs. It should offer the best value for DIY owners, landscapers, and anyone maintaining multiple outdoor tools, provided the 3mm size matches the equipment.

Pros
- Covers many common small-engine tool categories with one replacement cord.
- Long 10-meter spool offers strong value for repeat repairs.
- Clear 4.0mm diameter specification helps buyers match the correct size.
- Compatible with several major outdoor power equipment brands.
Cons
- Compatibility is not universal, so buyers must verify the rope diameter and fit before ordering.
- This is only the starter rope, not a complete recoil starter assembly.
- No model-by-model compatibility list is provided in the raw product data.
Overview: The RayTour B07VZ9ZKF3 is a replacement recoil starter rope made for outdoor power equipment repairs. It is a 4.0mm pull cord supplied in a 10-meter length, making it suitable for replacing worn or broken starter rope on compatible tools.
Performance and features: This cord is intended for many lawn mowers, string trimmers, chainsaws, weed eaters, and generators. The broad compatibility list includes Stihl, Husqvarna, Homelite, Ryobi, Craftsman, Poulan, and Briggs Stratton equipment, but the most important factor is matching the rope diameter and ensuring the fit is correct for the specific machine.
Drawbacks and considerations: The main limitation is compatibility uncertainty, since the listing recommends verifying size before ordering. It is also important to note that this product is the rope only, not a full recoil starter assembly or a pre-cut kit.
Verdict: This is a practical choice for DIY users and repair-minded owners who need a replacement starter rope in a standard 4.0mm size. It is best for buyers who can confirm measurements before purchase and want a straightforward cord for common small-engine equipment.

Pros
- Includes both starter rope and multiple handles in one kit
- Braided polyester rope is built for repeated use and tensile strength
- Cut-to-length design adds installation flexibility
- Works across several common small-engine applications
Cons
- Compatibility depends on matching the 3.0 mm rope size and handle style to your engine
- The rope is not pre-cut, so installation requires measuring and trimming
- No detailed model fitment list is provided, so buyers must verify fit before purchase
Overview: The Klfte B0D4ZPWP1W is a pull cord rope replacement kit for small engines, lawn mowers, generators, chainsaws, and string trimmers. It includes 40 ft of 3.0 mm starter rope and four black starter handles, making it a practical option when an original cord wears out or snaps.
Performance: The rope is made from 16-strand braided polyester, which is intended to provide good shock absorption and tensile strength during repeated pulls. Because the cord can be cut to length, it offers useful flexibility for different starter assemblies and repair needs.
Drawbacks: This is a universal replacement kit rather than a model-specific assembly, so fit depends on verifying rope diameter and handle compatibility. It also requires manual measuring, cutting, and installation, which may be inconvenient for users who want a fully preassembled solution.
Verdict: For DIY users who need a straightforward recoil starter repair kit, this product offers solid practical value and broad small-engine use. It is best for buyers who have confirmed the correct rope size and want a simple replacement with extra handles included.
Pros
- Includes both rope and multiple handles for a complete repair kit.
- Continuous 10-meter rope offers flexible, cut-to-fit installation.
- 3.0 mm size is a common option for many small-engine starter systems.
- Universal compatibility expands use across multiple outdoor power tools.
Cons
- Compatibility still depends on measuring your existing cord or checking the equipment manual.
- Only one rope diameter is included in this listing, so it may not fit engines that need a different size.
- No exact pre-cut length is provided, so installation requires cutting and fitting the cord yourself.
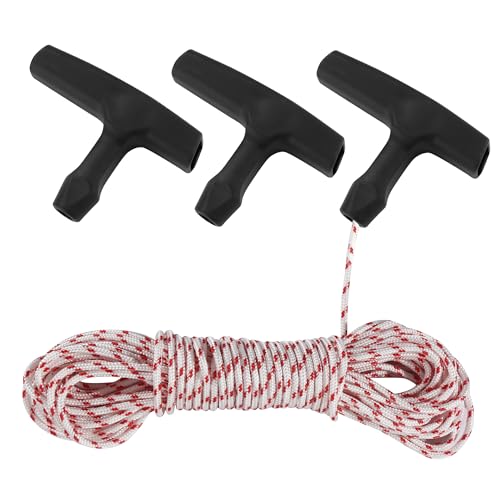
Overview: The Qtcial B0D31SHNM5 is a universal recoil starter rope replacement kit designed for small-engine equipment. It includes a 10-meter continuous polyester cord and 3 starter handles, giving buyers a practical all-in-one repair option for common pull-start machines.
Performance and Features: The 3.0 mm rope size is suited to many lawn mowers and similar outdoor tools, while the long continuous coil can be cut to the exact length needed. The polyester construction is intended to handle repeated pulling force, and the included handles add convenience for a cleaner, more complete replacement.
- 10 meters of rope for custom sizing
- 3 included starter handles
- Designed for recoil-start equipment
- Compatible with many major small-engine brands
Drawbacks and Considerations: The main limitation is that fit is not universal in every case, so checking the required diameter before purchase is important. Since the rope is sold as a continuous coil, users must measure, cut, and install it themselves.
Verdict: This kit offers strong value for owners who need a flexible pull-cord replacement for lawn mowers, trimmers, chainsaws, or brush cutters. It is best for shoppers who want a durable rope with multiple handles and are comfortable confirming the correct size before installation.

Pros
- Durable nylon rope and integrated handle support frequent use.
- Broad compatibility across many common small-engine tools and machines.
- Simple installation is suitable for basic DIY repairs.
Cons
- Fit is not guaranteed for every engine, so rope length and diameter should be verified before purchase.
- The product data is inconsistent on length, listing 10 ft in the title and 3 m in the description.
- No extra installation hardware or detailed tool kit is specified.
Overview: The Bopurtotly recoil starter rope is a nylon pull cord replacement for small gas engines such as lawn mowers, chainsaws, generators, and pressure washers. It uses a thick rope and an integrated handle for a straightforward repair-focused design.
Performance: The wear-resistant nylon construction is intended to reduce fraying and support steady pulling force over repeated starts. The non-slip ergonomic handle should make it more comfortable to grip and help reduce hand strain during use.
Drawbacks: Compatibility is broad, but it is still not universal for every engine, so buyers should confirm rope diameter, length, and fit before ordering. The listing also shows a length difference between the title and description, which is worth checking carefully.
Verdict: This is a practical choice for users who need a simple replacement pull cord for common outdoor equipment. It offers the most value to DIY owners looking for a durable, easy-grip starter rope rather than a full repair kit.
When to Replace Your Lawn Mower Pull Rope
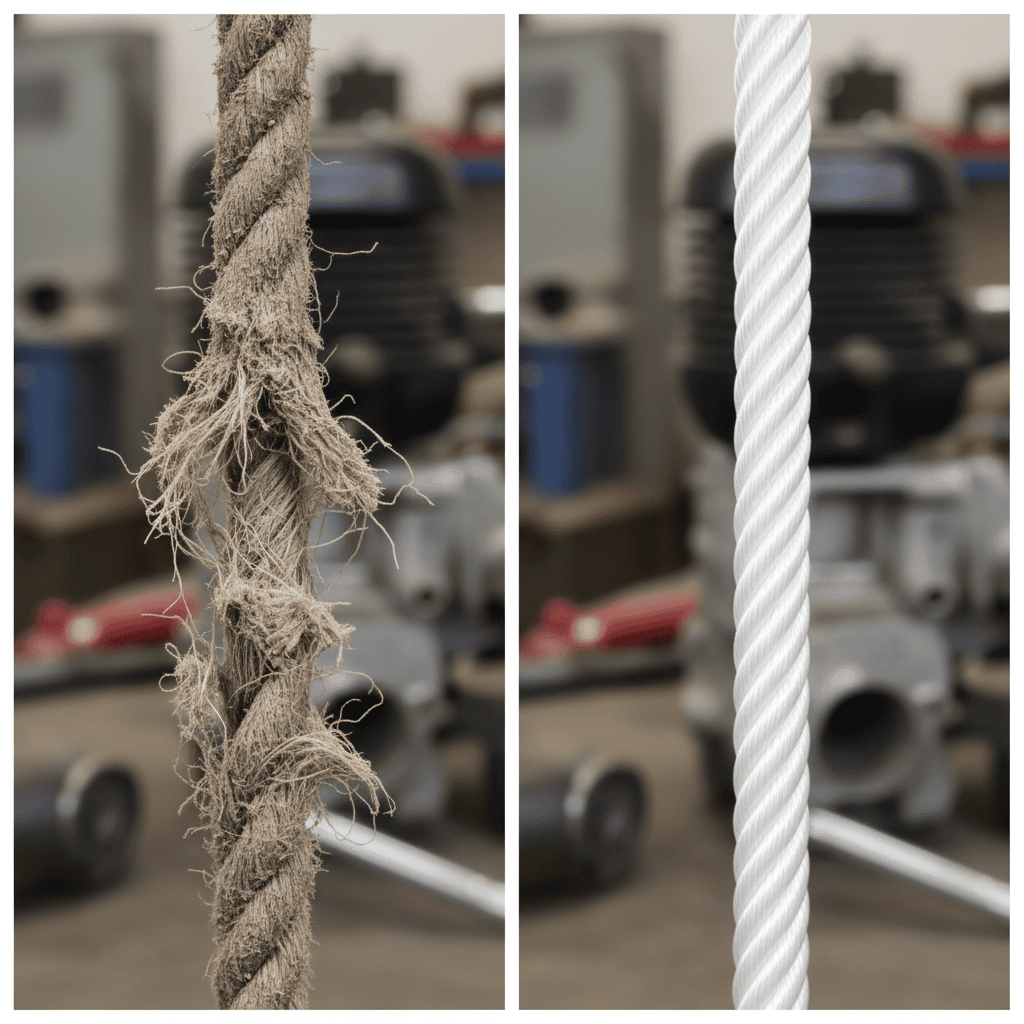
Identifying whether your pull rope needs replacement is the first step. A healthy rope should feel smooth, retract smoothly without kinks, and have a secure grip handle.
Signs Your Pull Rope Needs Replacement
- Fraying or visible damage: Frayed fibers or tears along the rope length indicate wear that will worsen with each use
- Loss of retraction: If the rope doesn’t spring back into the housing after pulling, the internal pulley or rope is compromised
- Difficult pulling: Excessive resistance or jerking suggests the rope is tangled, kinked, or deteriorating inside the starter assembly
- Rope slipping in the handle: When the handle spins without pulling the rope, the knot has failed or the handle is damaged
- Shortened or stuck rope: If the rope no longer extends fully or catches partway through its pull, it may be tangled or broken internally
Can You Repair Instead of Replace?
Minor fraying at the rope’s end can be sealed by carefully melting the nylon fibers with a lighter or by wrapping the area with electrical tape. However, once the rope loses elasticity, develops significant tears, or fails to retract, replacement is the only reliable solution. A compromised rope can snap during starting, leaving you stranded and potentially causing hand injuries from the sudden whip-back.
How Often Do Pull Ropes Need Replacement?
Most lawn mower pull ropes last 5 to 10 years with regular maintenance and proper storage. Ropes degrade faster if the mower is stored in direct sunlight, exposed to extreme temperatures, or used frequently. Seasonal mowers (used April through October in most regions) typically need replacement every 7 to 10 years, while year-round landscaping equipment may require replacement every 3 to 5 years.
Tools and Materials You’ll Need
Essential Tools
- Screwdrivers (Phillips and flathead): For removing the recoil starter assembly cover
- Pliers: To remove old rope segments and handle any stuck knots
- Lighter or match: To melt the cut end of nylon rope (prevents fraying)
- Tape measure: To verify rope length before installation
- Work gloves: To protect hands from sharp edges and rough rope fibers
Replacement Rope Specifications
Selecting the correct replacement rope is critical for proper function. Most lawn mower pull ropes use nylon starter cord in one of three diameters:
| Mower Type | Typical Rope Diameter | Length (approximate) |
|---|---|---|
| Push mowers (small engines) | 3.5 mm | 6 to 8 feet |
| Mid-size riding mowers | 4 mm | 10 to 12 feet |
| Large riding or zero-turn mowers | 5 mm | 12 to 15 feet |
Check your mower’s manual or the existing rope to confirm the correct diameter. Rope that is too thin will break under tension; rope that is too thick may not fit through the pulley or handle. Before finalizing equipment decisions, refer to our comprehensive z890 vs x870e motherboard comparison.
Where to Source Replacement Rope
- Home improvement stores: Home Depot, Lowe’s, and Ace Hardware stock starter cord in multiple diameters, typically $5-$15 per spool
- Lawn mower dealers: Authorized dealers often sell OEM rope kits (including handle and pulley components) for $15-$40
- Online retailers: Amazon and eBay offer bulk starter cord spools and pre-assembled replacement kits
- Hardware stores: Local hardware shops may stock nylon rope suitable for mower repairs
Purchase 5 to 10 extra feet beyond your mower’s requirement to account for mistakes during installation.
How to Remove the Old Pull Rope
Step 1: Prepare Your Workspace
Before beginning, ensure the mower is cool and positioned on a flat, well-lit surface. If the fuel tank is full, consider draining it into a safe container (or running the engine until it stalls) to prevent spills during disassembly. Place the mower on its side only if the manual permits; some designs allow fuel or oil to leak if tilted incorrectly. For broader ecosystem context, read through our operational guide on marshall stanmore iii vs harman kardon onyx studio 8.
Step 2: Locate and Access the Recoil Starter Assembly
The recoil starter is typically a plastic or metal housing mounted on the top or side of the engine. Look for a D-shaped or cylindrical cover with a rope handle extending from it. Once located, use the appropriate screwdriver (usually Phillips) to remove the bolts or screws holding the cover in place. Set these fasteners aside in a small container to avoid losing them. Gently lift the cover away, being careful not to disturb the spring-loaded pulley beneath.
Step 3: Identify How the Rope Is Secured
Inside the housing, you’ll see a pulley (wheel) with the rope wound around it. The rope typically passes through the pulley in one of two ways: For troubleshooting and reliability insights, consult our in-depth dyson v8 cyclone vs bissell featherweight stick report.
- Through-hole method: The rope threads through a hole in the pulley and is knotted on the inner side
- Wrap method: The rope is wound around the pulley post and knotted, with the handle assembly attached separately
Examine how the rope connects to the handle. Usually, the rope is knotted inside the handle grip or secured with a metal ferrule. The other end of the rope is knotted inside the pulley hub.
Step 4: Unwind and Remove the Old Rope
Start by unwinding the rope from around the pulley carefully. If the spring is still compressed, do this slowly to avoid sudden snapping. Once fully unwound, thread the rope backward out of the pulley’s center hole. Working from the handle end, push the rope out of the handle grip or unscrew/unfasten the fastening mechanism holding it in place. Pull the entire old rope free and discard it. Readers comparing setup options can review our technical analysis on bissell crosswave hydrosteam vs shark stainforce.
Step 5: Inspect the Pulley and Spring
With the old rope removed, examine the pulley, spring, and interior housing for damage. Look for cracks in the pulley, rust on the spring, or debris inside. If the spring appears rusted or the pulley is cracked, you may need to replace the entire recoil starter assembly (typically $30-$100 depending on mower brand). If components look intact, proceed with rope installation.
Installing the New Pull Rope
Step 1: Cut and Prepare the New Rope
Measure the length of your old rope (or reference your mower’s manual) and cut the replacement rope to the same length plus 6 inches for knotting. Using a lighter or match, carefully melt the cut end of the nylon rope for 2 to 3 seconds to seal the fibers and prevent fraying. Avoid holding the flame too long, which will cause the rope to blacken or weaken.
Step 2: Thread the Rope Through the Pulley
Hold the recoil starter assembly steady with one hand. Feed the new rope through the center hole of the pulley, starting from the outside (handle side) and pushing it through to the inner chamber. The rope should pass through cleanly without kinks. If the rope resists, check that you’re using the correct diameter.
Step 3: Secure the Rope to the Pulley
Once the rope exits the inner side of the pulley, tie a secure knot to anchor it. A simple overhand knot (wrapping the rope around itself and pulling tight) or a figure-eight knot works well. Test the knot’s strength by pulling hard; it should not slip. Some pulley designs include a dedicated knot hole or channel, consult your mower’s manual if unsure.
Step 4: Wind the Rope Around the Pulley
Carefully wind the rope around the pulley in a counter-clockwise direction (when viewed from above), keeping tension even to avoid overlapping or loose coils. Most pulleys accommodate 3 to 5 wraps. Ensure each wrap sits cleanly against the previous one without crossing. This winding provides the mechanical advantage needed for the starter to function properly.
Step 5: Attach the Rope to the Handle
With the rope wound around the pulley and extending toward the handle opening, feed the free end through the handle grip opening. Inside the handle, tie another secure knot to prevent the rope from slipping back through. Some handles have a small metal ferrule or washer that keeps the knot in place, slide this onto the rope first if included in your replacement kit. Pull the rope tight enough that the handle sits flush against the mower housing but loose enough that it doesn’t strain the spring when fully retracted.
Step 6: Test the Retraction Mechanism
Gently pull the rope handle outward and release. The rope should smoothly extend and snap back into the housing without resistance or kinking. If the rope jerks or catches, stop immediately and check that it’s properly wound and knotted. Repeat this test 5 to 10 times to ensure consistent operation before reassembling the cover.
Reassembling and Final Checks
Once the rope operates smoothly, carefully lower the starter assembly cover back into place, ensuring the rope feeds cleanly through the handle opening. Align the mounting holes and reinstall the bolts or screws, tightening them evenly to avoid warping the cover. Do not over-tighten, which can crack plastic housings.
Before starting the mower, perform a final visual inspection: confirm the rope handle is secure, the rope extends and retracts fully without binding, and all fasteners are tight. Prime the engine according to the manual, then attempt to start the mower. The pull rope should engage smoothly and the engine should start normally.
Tips for Different Mower Types
Push Mowers
Small push mowers typically use 3.5 mm rope and have compact recoil starters easily accessed from the top. The procedure above applies directly. Most push mower starters are spring-loaded but not under extreme tension, so the repair is relatively low-risk.
Riding Mowers
Riding mowers often have the recoil starter mounted on the side of the engine or beneath a fender panel. Accessing the starter may require removing additional covers or tilting the mower carefully. Rope diameter is usually 4 to 5 mm due to larger engines. Follow the same replacement steps but allow extra time for disassembly and reassembly.
Zero-Turn Mowers
Zero-turn mowers may have multiple engines (left and right sides) with separate pull ropes, or they may use electric starting systems with a pull-rope backup. If your zero-turn has pull ropes, they are typically 5 mm in diameter and under greater tension. Replace one side at a time to avoid confusion. If the mower uses electric starting exclusively, consult the manual before attempting to disassemble the starter assembly.
Comparison Table: Rope Requirements by Mower Type
| Feature | Push Mower | Riding Mower | Zero-Turn Mower |
|---|---|---|---|
| Rope Diameter | 3.5 mm | 4 to 5 mm | 5 mm (or electric start) |
| Typical Length | 6 to 8 feet | 10 to 12 feet | 12 to 15 feet (per side) |
| Assembly Complexity | Easy (top-mounted) | Moderate (side or under fender) | Moderate to Complex (multiple units or electric hybrid) |
| Spring Tension | Light | Moderate | Heavy |
| Estimated Time | 15 to 20 minutes | 20 to 30 minutes | 30 to 45 minutes (if multiple) |
Troubleshooting Common Issues
Rope Won’t Retract Properly
Cause: The internal spring is broken, rusty, or the pulley is jammed with debris.
Solution: Remove the starter cover again and inspect the spring for cracks or rust. If rusty, apply a light penetrating oil (WD-40) and work the pulley gently by hand. If the spring is broken, the entire starter assembly must be replaced. Clear any debris from the pulley chamber using compressed air or a small brush.
Rope Gets Stuck During Pulling
Cause: The rope is tangled around the pulley, wound too tightly, or the rope diameter is incorrect.
Solution: Stop pulling immediately to avoid breaking the rope. Remove the starter cover and carefully unwind the rope. Check that each wrap sits cleanly without crossing or binding. If the issue persists, the rope diameter may be too large, verify the correct size and purchase a thinner rope if needed.
Rope Is Too Short or Too Long
Cause: Incorrect length was cut, or the pulley winds the rope more tightly than expected.
Solution: If the rope is too short and doesn’t allow full extension of the handle, unwind the rope, re-knot it further along its length to provide more extension, and re-wind around the pulley. If too long, the excess can bunch inside the housing, cut the rope to the correct length, melt the end, and retie. Reference your manual or measure the original rope before cutting.
New Rope Frays Quickly
Cause: The rope end was not properly sealed, or the rope material is low quality.
Solution: Ensure the cut end is fully melted (hold the lighter flame for 3 to 4 seconds until the nylon is glossy). If fraying occurs despite melting, wrap the affected area tightly with electrical tape. For future replacements, purchase higher-quality nylon starter cord from a lawn mower dealer rather than generic hardware-store rope.
Engine Won’t Start After Rope Replacement
Cause: The rope is not properly engaged with the pulley, the spark plug wire was disconnected during assembly, or fuel was contaminated.
Solution: Verify the rope extends fully and retracts without resistance, a stiff rope may indicate improper winding. Confirm the spark plug wire is firmly connected. If fuel has been sitting in the tank for months, drain and replace it. Try starting 5 to 10 times to ensure the engine is primed. If the engine still won’t start, the issue may be unrelated to the rope replacement (carburetor clog, bad fuel, weak spark plug).
Maintenance Tips to Extend Rope Life
- Store the mower indoors: Keep the mower in a garage or shed to protect the rope from UV exposure and extreme temperatures
- Avoid yanking the rope: Use smooth, controlled pulls rather than jerky motions, which strain the rope and internal spring
- Keep the rope dry: Wipe the rope handle dry after use if the mower has been stored in a damp environment
- Use the engine regularly: If the mower sits unused for months, engage the pull rope every 2 to 3 weeks to keep the spring from seizing
- Inspect the rope seasonally: Before each mowing season, check the rope for fraying, cracks, or loss of elasticity
Buyer FAQs: How To Change Pull Rope On Lawn Mower Solved
How much does it cost to replace a lawn mower pull rope?
Replacement rope typically costs $5-$15 for a spool of starter cord. If you purchase a complete rope-and-handle replacement kit from a lawn mower dealer, the cost is $15-$40. Labor costs at a repair shop range from $50-$150, depending on mower type and local rates. For most homeowners, the DIY approach saves $40-$135.
Can I use any nylon rope as a replacement?
No. You must use nylon starter cord of the correct diameter (3.5, 4, or 5 mm) and sufficient tensile strength to withstand repeated pulling and the spring’s recoil force. Generic nylon rope from a craft store is typically thinner and weaker than starter cord, and will fray, slip, or break prematurely. Always purchase replacement rope from a hardware store, lawn mower dealer, or online retailer that explicitly sells lawn mower starter cord.
Is it safe to replace the pull rope myself?
Yes, the procedure is safe for most homeowners with basic mechanical skills. The recoil spring is under tension, so work carefully and avoid sudden movements during disassembly. Allow the engine to cool before beginning, and never attempt the repair while the engine is running. If you’re uncomfortable working with springs or power tools, consult a professional repair technician.
What should I do if the pull rope breaks while I’m starting the mower?
Stop immediately and allow the engine to cool. Do not attempt to use the broken rope or start the mower again until it is repaired. A broken rope may have left internal segments tangled around the pulley. Remove the starter assembly cover and inspect for damage. In most cases, a full rope replacement is necessary. If the pulley or spring is visibly damaged, the entire recoil starter assembly may need replacement.
Related Maintenance and Operating Guides
To keep your equipment running at peak operating efficiency, explore our related technical walkthroughs and maintenance tutorials:
- Consult our detailed breakdown on residential zero-turn lawn mower guide.
Recoil Starter Safety Notes
Release tension carefully when replacing a pull rope, since the recoil spring can unwind suddenly. Owners wanting a wider look at equipment safety can read American National Standards Institute (ANSI).









