

Direct Answer: Disconnect the spark plug wire, clear debris from the plug well, and unscrew the plug with a spark plug socket wrench. Visually inspect the electrode and ceramic insulator for fouling, cracks, or wear, then measure the gap with a feeler gauge and compare it to your engine manufacturer’s specification. Finally, perform a spark test with an inline spark plug tester to confirm the plug fires correctly — then clean, re-gap, or replace based on what you find.

Pros
- Large-size design named in product title
- Sharpening and balancing functions listed
- Listed as a new upgraded version

Pros
- Adjustable 15-to-45-degree range in title
- Sharpening and balancing functions listed

Pros
- Sharpener and balancer functions in title
- 15-to-45-degree adjustable setting listed
- Built for lawn mower blade maintenance
Pros
- Includes replacement gaskets and a 98079-55846 spark plug
- Matches Honda HRR216 and HRS216 lawn mower models
- Designed around the 16100-Z8B-901 carburetor specification
Cons
- Restricted to select Honda GCV160 mower applications
- Installation requires basic mechanical tools and skills
What You Need Before You Start (Tools & Safety)
Gather everything before touching the engine. Working on a hot engine risks burns, and a running engine risk electrocution from ignition voltage.
Tools Required
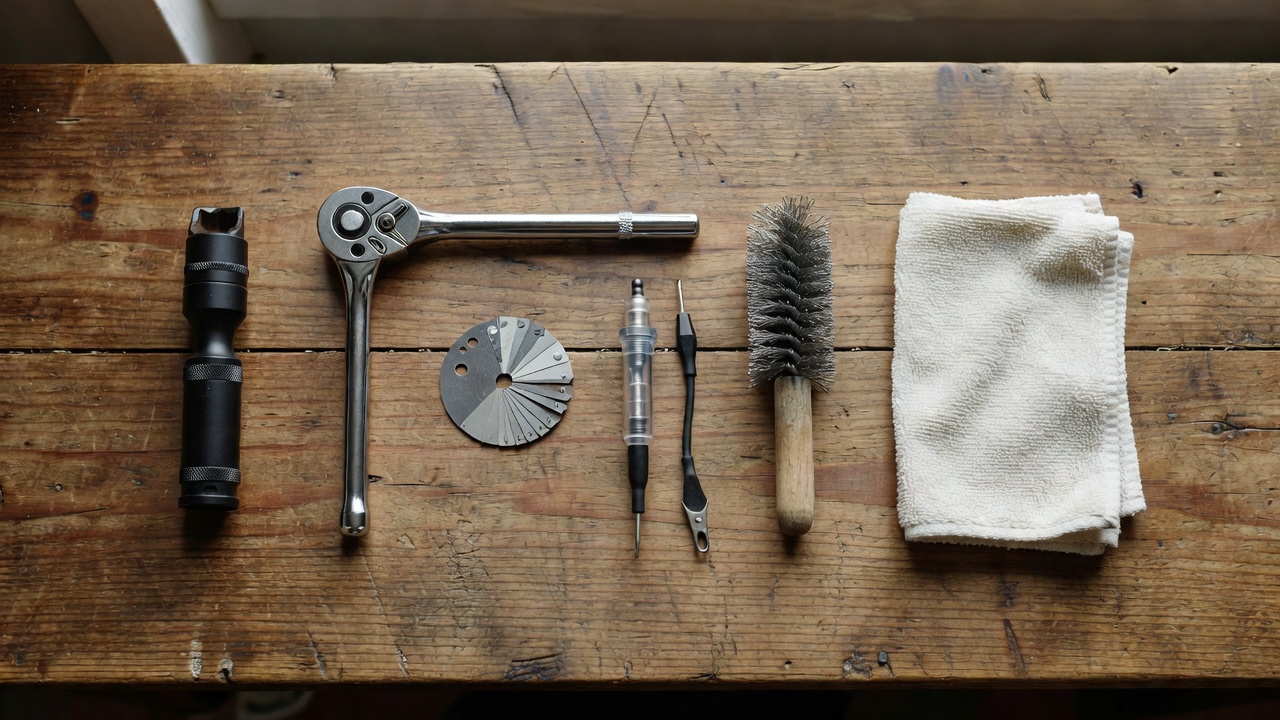
- Spark plug socket wrench — typically 5/8 in (16 mm) for most walk-behind mowers; some engines use 13/16 in (21 mm). Check your owner’s manual.
- Ratchet handle and extension bar — needed for deep plug wells, especially on OHV engines.
- Feeler gauge (spark plug gap tool) — measures electrode gap in thousandths of an inch or millimeters.
- Inline spark plug tester — the safest way to perform a live spark test. Available at hardware stores for under $15.
- Wire brush or plug-cleaning brush — for light cleaning of a reusable plug.
- Compressed air or a clean rag — to clear debris from the plug well before removal.
- Torque wrench (optional but recommended) — for correct reinstallation torque per your engine’s service manual.
Safety Steps — Do These First
- Turn the engine off and let it cool completely — at least 30 minutes after use.
- Disconnect the spark plug wire (ignition boot) and tuck it away from the plug so the engine cannot accidentally start.
- On a walk-behind mower: tip the mower so the air filter faces up (not the carburetor side) to prevent fuel or oil from flooding the combustion chamber.
- On a riding mower: set the parking brake, remove the ignition key, and engage the blade-stop control.
- Work in a ventilated area away from open flames — small-engine fuel vapors are flammable.
You do not need to drain the fuel tank simply to inspect a spark plug, provided you keep the mower level or tipped in the correct direction. Users looking for related component recommendations can explore our jbl partybox club 120 vs sony srs xv500 breakdown.
How to Locate and Remove the Spark Plug
Finding the Plug
Walk-behind (push) mowers: The spark plug sits on the front or side of the engine block, near the top. A rubber ignition boot — the cap at the end of the ignition wire — connects directly to it. It is usually visible without removing any covers. Users looking for related component recommendations can explore our jbl partybox club 120 vs sony srs xv500 breakdown.
Riding mowers: Single-cylinder engines have one plug, usually accessible from the front of the engine deck after opening the hood. V-twin engines have two plugs, one per cylinder, located on opposite sides of the engine block. Consult the owner’s manual diagram if you cannot locate them. Before finalizing equipment decisions, refer to our comprehensive z890 vs x870e motherboard comparison.
Removing the Plug
- Grip the ignition boot — not the wire — and pull it straight off the plug terminal. Twisting gently while pulling reduces the chance of tearing the boot interior.
- Blow or wipe debris from around the plug well. Dirt falling into the cylinder during removal causes internal engine damage.
- Fit the correct spark plug socket over the plug hex and attach the ratchet. Turn counterclockwise to loosen.
- If the plug is very tight, apply steady pressure rather than jerking — forcing it risks snapping the plug or damaging aluminum threads in the head. If it will not break loose after firm pressure, apply a small amount of penetrating oil around the base and wait 10 minutes.
- Once loose, spin the plug out by hand for the last few turns so you can feel if it cross-threads on the way back in during reinstallation.
How to Visually Inspect a Lawn Mower Spark Plug
Hold the removed plug in good light. You are checking the firing end — the electrode tip and ceramic insulator surrounding it. The appearance tells you what has been happening inside the combustion chamber.
Spark Plug Condition Color Guide
| Appearance | What It Indicates | Action |
|---|---|---|
| Light tan or gray deposits, slight wear | Normal combustion — plug is healthy | Re-gap if needed; reinstall or replace on schedule |
| Black, dry, sooty deposits | Carbon fouling — rich fuel mixture, dirty air filter, or excessive choke use | Clean if electrode is intact; address root cause |
| Black, wet, oily deposits | Oil fouling — oil entering combustion chamber (worn rings or valve seals) | Replace plug; have engine inspected for oil consumption |
| White or blistered ceramic, eroded electrode | Overheating — incorrect plug heat range, lean fuel mixture, or cooling problem | Replace plug; investigate cause before restarting |
| Heavy gray or chalky buildup | Coolant or water intrusion (less common in air-cooled small engines) | Replace plug; inspect engine head gasket |
Color diagnostic criteria align with NGK and Champion spark plug diagnostic references for small-engine applications. Before finalizing equipment decisions, refer to our comprehensive z890 vs x870e motherboard comparison.
Additional Visual Checks
- Ceramic insulator: Look for cracks, chips, or fractures along the white porcelain body. A cracked insulator causes voltage to arc to ground before reaching the electrode — replace immediately.
- Center electrode: The tip should be relatively square and defined. A rounded, eroded, or mushroomed electrode indicates the plug is worn past its service life — replace it.
- Ground electrode (the bent arm): Check for burning, pitting, or erosion. Heavy wear here also signals replacement.
- Threads: Look for cross-threading damage or corrosion. Damaged threads mean replacement; do not reinstall a plug with damaged threads.
How to Check the Spark Plug Gap
What the Gap Is and Why It Matters
The spark plug gap is the measured distance between the center electrode and the ground electrode. The ignition system must generate enough voltage to jump that gap and ignite the air-fuel mixture. Too narrow a gap produces a weak spark; too wide a gap may produce no spark at all or cause hard starting and misfires.
How to Measure the Gap
- Select the correct blade or wire on your feeler gauge matching the gap specification for your engine. The correct gap varies by engine make and model — consult your engine manufacturer’s owner’s manual or the spark plug manufacturer’s fitment chart for the exact value. Common small-engine gaps fall between 0.020 in and 0.035 in (0.5 mm – 0.9 mm), but do not assume a universal figure applies to your engine.
- Slide the feeler gauge blade between the electrodes. It should pass through with slight resistance — not loose, not requiring force.
- If the blade slides freely, the gap is too wide. If it will not pass through, the gap is too narrow.
How to Adjust the Gap
- Gap too wide: Gently tap the ground electrode against a hard surface to close it slightly, then recheck.
- Gap too narrow: Use the gap tool’s notched slot (found on most coin-style gap tools) to carefully pry the ground electrode open, then recheck.
- Make small adjustments — the ground electrode bends easily and can crack if manipulated aggressively. If the electrode is already worn or the plug has been re-gapped multiple times, replace it rather than adjusting further.
How to Perform a Spark Test on a Lawn Mower Spark Plug
Method 1: Inline Spark Plug Tester (Recommended)
An inline spark plug tester is a small device with a plug-in socket on one end and a boot connector on the other. It interrupts the ignition circuit and shows the spark visually through a transparent window — without you touching any live ignition component. For broader ecosystem context, read through our operational guide on marshall stanmore iii vs harman kardon onyx studio 8.
- Thread the spark plug back into the engine finger-tight (or use a spare known-good plug of the same type).
- Connect the inline tester between the plug and the ignition boot: push the boot onto the tester’s top terminal, then attach the tester’s lower socket over the spark plug terminal.
- Stand clear of the blade and moving parts. Have a second person pull the starter cord (walk-behind) or briefly crank the engine (riding mower) while you watch the tester window.
- Strong blue spark: The plug and ignition circuit are functioning correctly.
- Weak orange or yellow spark: The plug is misfiring — replace it. A weak spark at a known-good plug may indicate a failing ignition coil.
- No spark: The plug may be dead, but the ignition coil or kill-switch wiring could also be the cause. Swap in a new plug and retest before condemning the coil.
Method 2: Grounded Boot Method (Alternative — Use Caution)
This method works without a tester but exposes you to ignition voltage if done incorrectly. Use only if you do not have a tester available.
- Remove the plug from the engine.
- Reconnect the ignition boot to the plug terminal.
- Hold the plug’s threaded metal body against a bare metal surface on the engine block — a bolt head works. Do not hold the plug or wire with your bare hands.
- Use an insulated tool or heavy gloves to hold the plug body against ground.
- Pull the starter cord and watch the plug gap for a spark.
- A sharp blue spark indicates a functioning plug. A weak spark or no spark indicates a problem with the plug or the ignition system.
Note: Never crank an engine with no plug installed — uncontrolled fuel vapor discharge is a fire hazard. Never perform a grounded spark test near the fuel tank or carburetor. For troubleshooting and reliability insights, consult our in-depth dyson v8 cyclone vs bissell featherweight stick report.
Clean, Re-Gap, or Replace? How to Decide
When to Clean and Reuse
A plug is a candidate for cleaning and reuse when: the ceramic insulator is uncracked, the center electrode is still relatively square (not heavily rounded), the fouling is dry carbon (not oil), and the spark test shows a strong spark after cleaning.
To clean a lightly carbon-fouled plug: use a wire brush to scrub the firing end, blow off residue with compressed air, re-gap to specification, and reinstall. Do not use a wire wheel on a bench grinder — this leaves conductive metallic dust in the plug. Readers comparing setup options can review our technical analysis on bissell crosswave hydrosteam vs shark stainforce.
When to Re-Gap Only
If the plug looks healthy (tan/gray, intact electrode and ceramic) but the measured gap is outside specification, re-gap as described above and reinstall. No cleaning is needed.
When to Replace
Replace the spark plug when any of the following are true:
- Ceramic insulator is cracked or chipped.
- Center or ground electrode is heavily eroded, rounded, or pitted.
- Plug is oil-fouled (black and wet) — cleaning an oil-fouled plug is a temporary fix that recurs until the underlying engine issue is resolved.
- Spark test shows weak or no spark after the plug has been cleaned and re-gapped.
- The plug has reached or exceeded the manufacturer’s recommended replacement interval.
Replacement Interval
Most small-engine manufacturers — including Briggs & Stratton, Honda, and Kohler — recommend replacing the spark plug every season or every 25 hours of operation, whichever comes first, as part of annual tune-up maintenance. Verify the interval in your specific engine’s service documentation, as specifications vary by model.
How to Reinstall the Spark Plug Correctly
- Thread the plug in by hand for the first several turns. If you feel resistance before the plug is fully seated, stop — it is cross-threading. Back it out completely and start again straight.
- Once hand-tight, use the socket wrench to snug the plug. Do not overtighten. Correct torque for small-engine spark plugs varies by engine and plug type — consult your engine manufacturer’s service manual for the specified torque value. As a general practice, taper-seat plugs typically receive a partial additional turn after finger-tight, but the exact specification from the manufacturer overrides any generic guideline.
- If you choose to use anti-seize compound on the threads, be aware that it changes the effective clamp torque — reduce the torque value accordingly, or follow the spark plug manufacturer’s instructions. Many small-engine OEMs recommend installing plugs dry.
- Push the ignition boot firmly back onto the plug terminal until you feel or hear it click into place. A loose boot causes intermittent no-spark conditions.
- Start the mower and confirm normal operation.
Lawn Mower Still Won’t Start After Checking the Spark Plug?
If the spark plug tests healthy — strong blue spark, correct gap, clean condition — and the mower still fails to start, the plug is not the cause. Check these systems next:
- Fuel: Stale gasoline (older than 30 days without stabilizer) gums up the carburetor and prevents starting. Drain old fuel and refill with fresh gas.
- Air filter: A clogged foam or paper filter starves the engine of air, causing a rich condition. Remove and inspect — clean or replace if dirty.
- Carburetor: A partially clogged carburetor pilot jet is one of the most common causes of hard starting on small engines that have sat unused. A carburetor cleaner spray can sometimes clear light blockages; a full rebuild kit may be needed for severe clogging.
- Ignition coil: If a new plug also produces no spark during the tester test, the ignition coil (armature) is the next component to test. A failed coil produces no spark regardless of plug condition. Coil-to-flywheel air gap misadjustment also causes weak or no spark.
- Safety interlock switches: Riding mowers have seat, blade-engagement, and brake interlock switches. A failed switch prevents the engine from cranking or running even with a perfect ignition system.
Common Questions on How To Check A Spark Plug On A Lawn Mower Answered
How often should I check the spark plug on my lawn mower?
Inspect the spark plug at the start of every mowing season and replace it annually or every 25 hours of engine operation — whichever comes first. This interval is consistent with maintenance schedules published by major small-engine manufacturers including Briggs & Stratton, Honda Power Equipment, and Kohler Engines. If the mower starts hard, runs rough, or loses power mid-season, check the plug immediately regardless of hours logged.
What does a black spark plug on a lawn mower mean?
Dry black, sooty deposits indicate carbon fouling — the engine is running a rich fuel mixture (too much fuel relative to air), often caused by a dirty air filter, a stuck choke, or an overly rich carburetor setting. A wet, oily black plug means engine oil is entering the combustion chamber, which points to worn piston rings or valve seals — a mechanical issue that requires more than a plug replacement to fix.
Can I test a lawn mower spark plug without a spark plug tester?
Yes — use the grounded boot method: reconnect the ignition boot to the removed plug, hold the plug’s metal threads firmly against a bare metal part of the engine block using an insulated grip, and pull the starter cord. A sharp blue spark at the gap confirms the plug fires. This method works but exposes you to ignition voltage if your grip slips; an inline spark plug tester ($10–$15 at any hardware store) is the safer and more readable alternative.
Will a bad spark plug always prevent a lawn mower from starting?
Not always. A severely fouled, cracked, or dead plug typically causes a no-start condition. A marginally worn plug may allow the engine to start but produce symptoms like rough idle, loss of power, excessive fuel consumption, or difficulty starting when hot. A plug with an incorrect gap causes similar intermittent symptoms. This is why a spark test paired with a visual inspection — rather than a visual inspection alone — gives you a complete diagnosis.
For more hands-on benchmarks and buying recommendations, consult our guides on heavy-duty chainsaw buyer guide, as well as high-CFM commercial leaf blower guide, as well as durable ride-on lawn tractor guide.
Mechanical safety standards, operational tolerances, and protective gear guidelines align with benchmark specifications established by the American National Standards Institute (ANSI).









