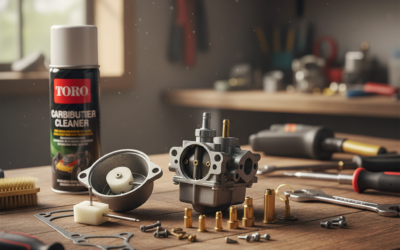
Direct Answer: How to Clean a Honda Lawn Mower Carburetor
To clean a Honda lawn mower carburetor, drain the fuel tank completely, remove the carburetor from the engine by unbolting it and disconnecting fuel lines, then disassemble it by removing the bowl, float, and jets. Soak all metal components in carburetor cleaner for 15–30 minutes, scrub jets and passages gently with a soft brass brush, rinse with fresh cleaner, and reassemble in reverse order. Most Honda mower carburetors can be cleaned successfully in 30–90 minutes using basic hand tools, carburetor cleaner, and wire brushes—without replacing parts or calling a technician.
Why Your Honda Lawn Mower Carburetor Needs Cleaning
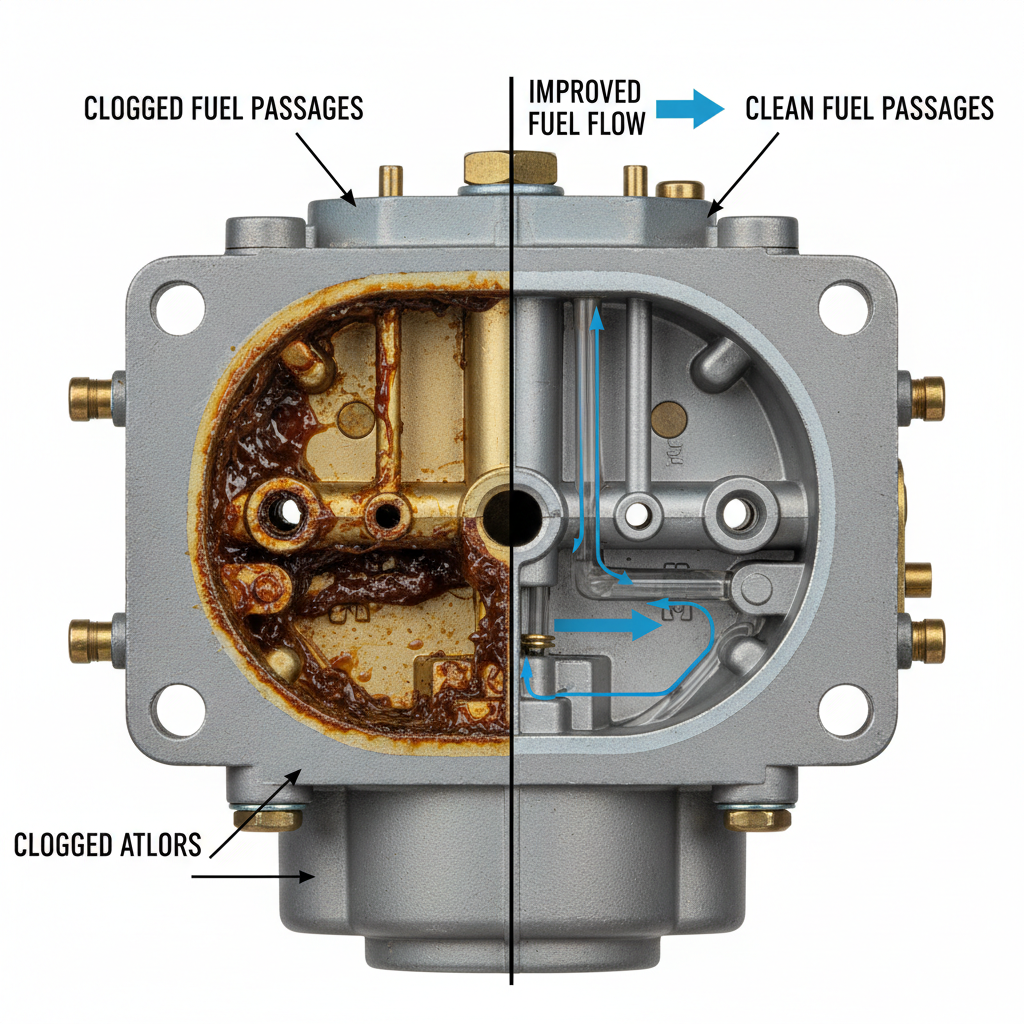
Over time, fuel left sitting in your mower’s carburetor oxidizes and leaves behind a sticky varnish that clogs jets and passages. This buildup restricts fuel flow, starves the engine of the correct fuel mixture, and causes your mower to run rough, start hard, or stall under load. Honda walk-behind and riding mowers are especially prone to this problem if the mower sits unused for several months or if you use old fuel.
Signs your carburetor needs cleaning include:
- Engine won’t start even after repeated pulls
- Mower starts but dies after a few seconds
- Rough idle or uneven engine speed
- Loss of power under cutting load
- Black smoke or excessive exhaust odor
- Fuel leaking from the carburetor bowl
Cleaning alone resolves most of these issues. However, if internal damage, a worn needle seat, or corroded jets exist, you may need to replace the carburetor or individual parts.
Tools and Materials You’ll Need
Gather these items before you start:
- Hand tools: Socket set (usually 8mm, 10mm, 12mm), screwdrivers (Phillips and flathead), adjustable wrench, needle-nose pliers
- Cleaning supplies: Carburetor cleaner (aerosol or liquid), soft brass brush or small brass wire brush, clean rags or lint-free cloth
- Containers: Small bowl or shallow pan for soaking, fuel storage container (approved gas can)
- Safety gear: Safety glasses, work gloves, well-ventilated work area
- Documentation: Camera or smartphone to photograph connections before removal
- Optional: Gasket scraper (plastic or soft metal), new gasket set if old seals appear damaged
Do not use wire wheels, sandpaper, or harsh chemicals that can damage carburetor passages or gasket surfaces.
Safety Precautions Before You Begin
Fuel and carburetor cleaner are flammable and can cause injury if mishandled:
- Drain fuel safely: Run the engine until the tank is empty, or siphon old fuel into an approved fuel container. Store fuel outdoors or in a shed, away from heat and ignition sources.
- Work in ventilation: Carburetor cleaner fumes are strong. Work outdoors or in a garage with open doors and windows. Do not smoke or use power tools nearby.
- Wear protective gear: Use safety glasses to protect eyes from cleaner spray and small springs. Wear gloves to protect skin from harsh chemicals.
- Cool the engine: Wait at least 30 minutes after the last run before touching the carburetor. Hot metal causes burns.
- Disconnect the spark plug: Remove the spark plug wire to prevent accidental engine starting while you work.
How to Remove the Carburetor from Your Honda Mower
Carburetor location varies slightly between Honda push mowers and riding models, but the removal process is similar:
Step 1: Document Fuel Line and Control Connections
Before disconnecting anything, take photos of the fuel inlet, return line (if present), and throttle or choke cable connections. This prevents confusion during reassembly.
Step 2: Disconnect Fuel Lines
Use needle-nose pliers to gently squeeze the fuel line clamp and slide the line off the carburetor inlet. Have a small rag ready to catch any remaining fuel. If a return line exists, disconnect it the same way.
Step 3: Disconnect Control Cables
The throttle cable connects to a lever on the carburetor body. Note which hole it enters, then use a flathead screwdriver to pry the cable fitting out. On some models, the choke cable also connects here. Unbolt or unclip these carefully.
Step 4: Remove Mounting Bolts
Most Honda carburetors are held by two or three bolts that connect to a rubber or plastic flange on the intake manifold. Using the correct socket size (typically 10mm or 12mm), unbolt these fasteners. Keep bolts in a small container so you don’t lose them.
Step 5: Gently Pull the Carburetor Free
Rock the carburetor gently side to side as you pull it away from the engine. Do not force it; if it’s stuck, check that all bolts and cables are truly disconnected. Once free, place the carburetor on a clean work surface.
Disassembling the Carburetor
Honda lawn mower carburetors typically have a main body, float bowl, float arm, needle valve, and multiple jets. Disassembly should be methodical:
Step 1: Remove the Float Bowl
The bowl is secured by 2–4 screws around its perimeter. Using a Phillips screwdriver, remove these screws slowly and set them aside. The bowl may stick due to varnish; tap it gently with a plastic hammer or tap it against your palm to free it. Drain any remaining fuel or sludge into a rag.
Step 2: Remove the Float and Needle Valve
Inside the bowl, a metal float (often aluminum or brass) is hinged on a pin. The needle valve sits beneath it. Gently push the hinge pin out using a small punch or straightened paper clip. The float and needle valve will come free. Do not force the needle valve; it has a small o-ring or seat that can be damaged.
Step 3: Remove Main and Pilot Jets
Jets are small brass fittings that screw into the carburetor body. Using a small socket or jet wrench (if available), carefully unscrew the main jet (usually on the bowl mounting surface) and pilot jet (typically on the lower body). Turn slowly to avoid stripping the soft brass. Place jets on a clean cloth in the order removed.
Step 4: Remove the Needle Seat (if accessible)
Some Honda carburetors allow you to remove the needle seat. This brass fitting houses the needle valve opening. If yours unscrews, do so gently. If it’s pressed in, leave it in place and soak the entire carburetor body to clean around it.
Step 5: Clean Any Gaskets and Seals
Carefully peel away old gaskets from the carburetor body and bowl. Use a plastic gasket scraper to avoid scratching aluminum. Discard old gaskets; you may replace them with new ones from a gasket kit if the old ones appear cracked or hardened.
Cleaning Carburetor Jets, Passages, and Components
Jet and Small Part Cleaning
Place all metal parts—jets, float, needle valve, and needle seat—into a small bowl of carburetor cleaner. Soak for 15–30 minutes. The cleaner dissolves varnish and oxidation. Do not let jets soak for more than an hour, as prolonged exposure can damage soft brass.
After soaking, use a soft brass brush or old toothbrush to gently scrub each jet. Pay special attention to the small opening (orifice) in the jet tip. If buildup is stubborn, use a fine brass wire or paper clip to gently probe the opening—never use steel wire or a needle, which can enlarge or damage the precise hole.
Main Carburetor Body Cleaning
Spray the interior passages of the carburetor body with carburetor cleaner. Use short bursts to dislodge varnish from passages, float bowl mounting surface, and around the needle seat. Wipe the exterior with a clean rag. Repeat spraying and wiping until the cleaner runs clear.
For stubborn buildup inside passages, use a thin brass wire or carburetor cleaning brush set. Work gently to avoid enlarging passages or damaging the carburetor body’s aluminum or zinc casting.
Rinsing and Drying
After cleaning, rinse all parts with fresh carburetor cleaner to remove loosened varnish particles. Shake off excess cleaner and allow parts to air-dry on a clean cloth for 10–15 minutes. Do not use compressed air, which can blow moisture into small passages. Ensure no cleaner residue remains before reassembly.
Reassembling Your Honda Carburetor
Reassemble in reverse order, paying attention to gasket and seal placement:
Step 1: Install the Needle Seat and Needle Valve
If you removed the needle seat, reinstall it hand-tight. Place the needle valve back into its opening. The rubber o-ring on the needle valve should sit freely; do not force it.
Step 2: Install the Float and Hinge Pin
Insert the metal float into the bowl, then slide the hinge pin through its mounting holes. The float should move freely up and down. If it binds, the pin may be slightly bent; straighten it carefully or replace it if damaged.
Step 3: Reinstall Jets
Screw the pilot jet and main jet back into their ports, turning by hand first to ensure threads are aligned, then tighten gently with a socket. Do not over-tighten; you should hear a faint click as the jet seats. Over-tightening strips soft brass and damages the carburetor.
Step 4: Replace Gaskets
If using a gasket kit, install the new float bowl gasket. If reusing old gaskets and they appear intact, you may reinstall them—however, new gaskets are inexpensive and reduce the risk of leaks.
Step 5: Reattach the Float Bowl
Position the float bowl below the carburetor body, align the screw holes, and insert bolts. Tighten screws in a crisscross pattern (like tightening a wheel) to ensure even pressure. Screws should be snug but not stripped; stop tightening once you feel firm resistance.
Reinstalling the Carburetor on Your Engine
Step 1: Inspect the Engine Mounting Surface
Wipe the intake manifold or engine carburetor flange with a clean rag to remove old gasket material and debris.
Step 2: Install a New Mounting Gasket
Place a fresh gasket (from your gasket kit) over the engine studs or bolt holes. This prevents air leaks that cause rough idle or poor performance.
Step 3: Position and Bolt the Carburetor
Align the carburetor flange over the mounting gasket and thread bolts by hand. Once all bolts are started, tighten them gradually in an alternating pattern to seat the gasket evenly. Use moderate pressure; bolts should be snug, not crushed.
Step 4: Reconnect Fuel Lines
Using your photos as reference, attach the fuel inlet line to the carburetor inlet port. Slide the line onto the fitting and secure it with the fuel line clamp. If a return line exists, connect it to the return fitting. Check that clamps are tight by gently tugging the lines.
Step 5: Reconnect Control Cables
Reattach the throttle cable, routing it through the same path as before. Secure the cable fitting into the throttle lever hole. If a choke cable exists, connect it the same way. Test cable movement by hand; the throttle lever should move freely from idle to full throttle.
Step 6: Prime the Carburetor
Before starting the engine, turn the fuel valve (if present) to ON and wait 30 seconds to allow fuel to flow into the carburetor bowl. Reconnect the spark plug wire. The carburetor is now ready for initial testing.
Testing and Troubleshooting After Cleaning
First Start Checklist
- Check for fuel leaks around the bowl bolts, fuel line connections, and carburetor body. Stop the engine immediately if you see fuel dripping.
- Listen for a smooth idle and normal engine sound. The mower should start within 2–3 pulls.
- Run the engine at full throttle and verify smooth acceleration without hesitation or sputtering.
- Cut grass or run the mower under load for 10–15 minutes. Performance should be normal.
If the Mower Still Won’t Start
Check fuel flow: Verify the fuel valve is open and fuel is reaching the carburetor bowl. If the bowl is dry, the fuel line may be kinked or clogged. Remove the fuel line and blow gently to test flow.
Verify correct reassembly: Double-check that jets are installed and tightened, the float moves freely, and the needle valve is seated. Missing or improperly installed jets prevent fuel delivery.
Clean the fuel filter: If your mower has an inline fuel filter, remove and clean it or replace it with a new one.
If the Mower Runs but Performs Poorly
Rough idle or stalling: This often indicates an air leak at the carburetor-to-engine gasket. Ensure the mounting gasket is new and all bolts are tight. If the problem persists, the carburetor gasket surface may be warped; have it inspected by a technician.
Black smoke or fouled spark plug: This suggests an overly rich fuel mixture, often caused by a stuck float or improper float height. Remove the carburetor again and verify the float moves freely and the needle valve seats correctly.
Hesitation under load: Check that the main jet is installed and tight. A loose or missing main jet starves the engine of fuel at high speed.
When Cleaning Alone Won’t Fix the Problem
If cleaning and reassembly don’t restore performance, the carburetor may have internal damage that cleaning cannot solve:
- Corroded or enlarged jet orifices: Corrosion widens the precise hole, changing the fuel mixture beyond adjustment. The jet or carburetor must be replaced.
- Worn needle seat: A pitted or corroded seat allows fuel to leak past the needle, flooding the engine. Replacement is required.
- Cracked carburetor body: Internal cracks allow fuel and air to leak unpredictably. The carburetor cannot be repaired and must be replaced.
- Damaged float: If the float has cracks or holes, fuel enters it and it loses buoyancy, preventing proper fuel level control. Replacement is necessary.
In these cases, you can purchase a replacement carburetor (typically $30–$80 for Honda walk-behind mowers) or have a technician service the unit.
Model-Specific Considerations for Honda Lawn Mowers
Honda GCV Push Mower Carburetors
Honda GCV series walk-behind mowers (models GCV135, GCV160, GCV190) use a compact slide-choke carburetor. These are relatively simple to disassemble and clean. The main jet and pilot jet are easily accessible, and the float bowl is small. Cleaning typically takes 45–60 minutes.
Honda GXV Riding Mower Carburetors
Honda GXV series riding mowers (models GXV620, GXV630) use slightly larger carburetors with similar internal layouts. The main difference is accessibility; carburetors on riding mowers may be more difficult to reach, requiring removal of panels or the gas tank. Once removed, cleaning steps are identical to walk-behind models. Plan 60–90 minutes.
Honda Horizontal Shaft Engines
Carburetors on horizontal-shaft Honda engines (common on generators and pumps) are mounted on the side. Removal is similar, but fuel line routing may differ. Take extra care when documenting connections before removal.
Fuel Bowl and Overflow Tubes
Newer Honda models include overflow tubes to prevent fuel from spilling during storage or tipping. When cleaning, ensure these tubes are clear and reinstalled correctly. A blocked overflow tube causes fuel to leak from the bottom of the carburetor.
Preventive Maintenance to Avoid Future Carburetor Problems
- Use fresh fuel: Fill the tank with fuel less than 30 days old. Old fuel oxidizes and leaves varnish.
- Add fuel stabilizer: If storing the mower for winter, add a fuel stabilizer (such as Sta-Bil) to the tank before the last run of the season. This prevents varnish formation during storage.
- Run the mower regularly: Use your mower at least once a month during the off-season to keep fuel circulating and prevent buildup.
- Drain the tank before long storage: For storage longer than two months, drain all fuel from the tank and carburetor. Run the mower until it stops to empty the carburetor bowl.
- Replace the air filter annually: A clogged air filter forces the engine to run rich, increasing varnish formation. Clean or replace the filter each season.
Frequently Asked Questions
How long does it take to clean a Honda lawn mower carburetor?
For an experienced person, 30–45 minutes. If you are new to small engine repair, allow 60–90 minutes to carefully document connections, disassemble, clean, and reassemble. The actual soaking and scrubbing takes only 20 minutes; the rest is careful work to avoid mistakes.
Can I clean the carburetor without removing it from the engine?
Partial cleaning is possible using carburetor cleaner spray and a brush, but it is less effective than full disassembly. Removing the carburetor allows you to access internal passages, jets, and the float bowl that you cannot reach in place. For best results, removal is recommended.
What type of carburetor cleaner should I use?
Use a dedicated carburetor cleaner designed for small engines, available in aerosol spray or liquid form at most hardware stores and online retailers. Common brands include Gumout, Berryman, and Chevron. Avoid using gasoline or mineral spirits, which do not dissolve varnish as effectively and can damage rubber seals.
Do I need to replace the gaskets after cleaning?
If the old gaskets appear intact and slightly flexible, you can reuse them. However, old gaskets are often hardened or cracked after months of fuel and heat exposure. Purchasing a gasket kit (typically $5–$15) and installing new gaskets ensures a good seal and prevents air or fuel leaks. This is a low-cost insurance policy for success.
What should I do if the carburetor still leaks fuel after reassembly?
Check that the float bowl bolts are tight and evenly tightened. Leaks usually mean the gasket is not seating uniformly. Unbolt the bowl, inspect the gasket surface on both the carburetor body and bowl for warping or debris, clean with a rag, then reinstall with firm but not crushing pressure. If leaking continues, the gasket surface may be warped and require professional attention or carburetor replacement.