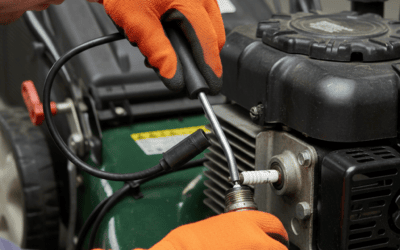
Direct Answer: How to Clean a Lawn Mower Carburetor
To clean your lawn mower carburetor, disconnect the spark plug wire, drain the fuel tank, and remove the carburetor from the engine. Disassemble the carburetor carefully, soak the main components in carburetor cleaner to remove varnish and debris, clean small passages with a wire brush or compressed air, and reassemble using new gaskets. This restores proper fuel flow and engine performance in most cases.
Why Clean Your Lawn Mower Carburetor?
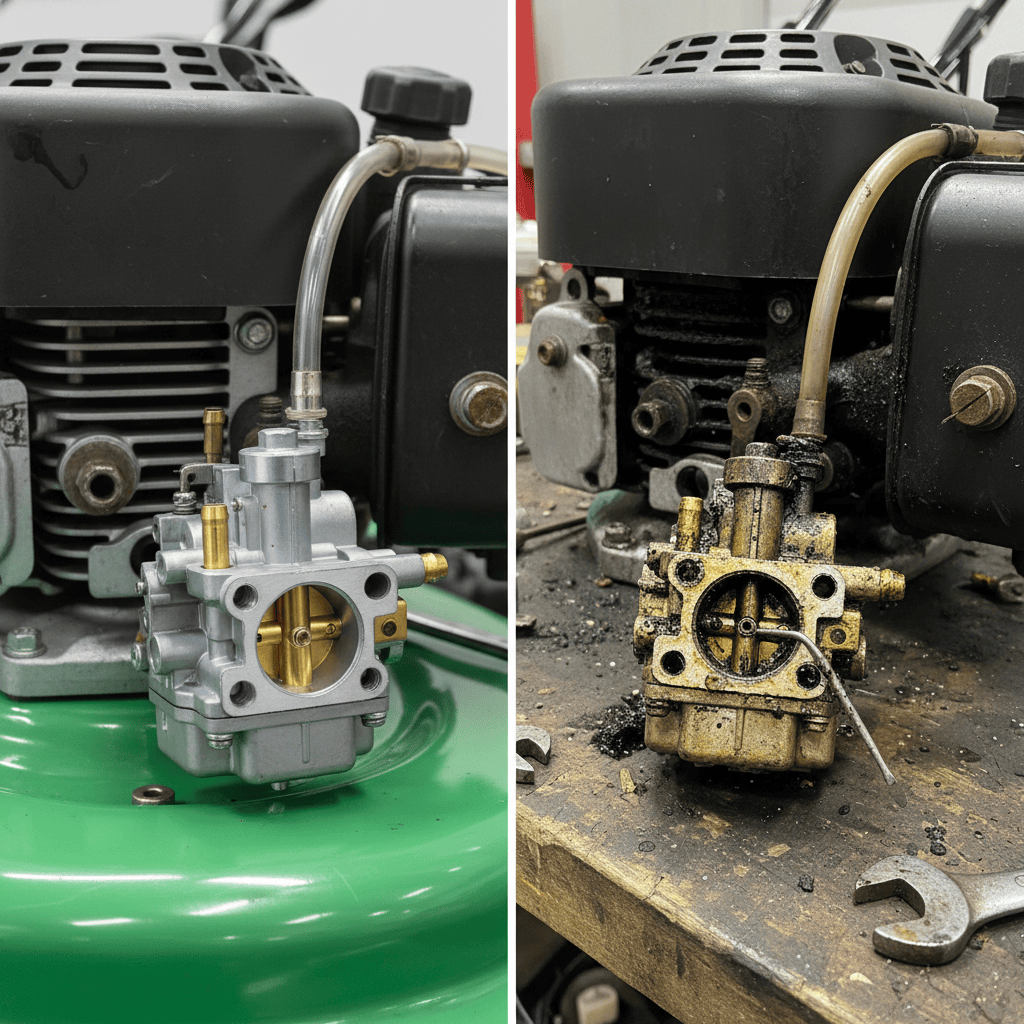
A dirty carburetor is one of the most common reasons lawn mowers fail to start, run rough, or stall during operation. The carburetor regulates the fuel-air mixture that enters the engine, and over time, old fuel leaves varnish and sediment inside the fuel passages and jets. This buildup restricts fuel flow and prevents the engine from receiving the correct mixture needed for combustion.
Several symptoms indicate your carburetor needs cleaning:
- Difficulty starting – The mower cranks but won’t turn over, or starts only after multiple attempts
- Rough idling – The engine runs unevenly or at inconsistent speeds at rest
- Stalling under load – The mower stops when you engage the blade or push it uphill
- Poor fuel economy – The mower consumes more fuel than usual for the same cutting area
- Black smoke from the exhaust – Indicates an overly rich fuel mixture due to jet blockage
- Fuel leaking from the carburetor – Suggests a worn gasket or stuck float valve
Old fuel is the primary culprit. Gasoline begins to degrade within 30days of sitting in a tank, especially during winter storage. Ethanol-blended fuels oxidize more quickly, leaving sticky varnish deposits. If a mower sits unused for more than a season without fuel stabilizer, carburetor cleaning becomes almost inevitable.
Neglecting a dirty carburetor can lead to more serious engine damage. Prolonged running with an incorrect fuel mixture causes incomplete combustion, which deposits carbon on the spark plug and cylinder walls. In extreme cases, the engine may seize entirely, requiring professional repair or engine replacement.
Tools and Materials Needed for Carburetor Cleaning
Before starting, gather the correct tools and safety equipment. Working without proper gear increases the risk of injury from sharp carburetor edges, fuel vapors, and chemical cleaners.
Safety Equipment:
- Safety glasses or face shield
- Nitrile or latex gloves (carburetor cleaner dissolves some plastics)
- Respiratory mask or respirator (carburetor cleaner produces harmful fumes)
- Work in a well-ventilated area, preferably outdoors or in a shop with exhaust ventilation
Tools for Removal and Disassembly:
- Socket set and wrenches (sizes vary by mower model, typically 8mm to 14mm)
- Screwdrivers (Phillips and flathead)
- Needle-nose pliers for removing small springs and clips
- Small container or egg carton to organize small parts during disassembly
- Gasket scraper or old credit card (never use sharp metal that damages surfaces)
- Clean rags or shop towels
Cleaning Materials:
- Carburetor cleaner (aerosol or liquid; ensure it’s designed for fuel system use)
- Wire brush with soft bristles
- Compressed air source (air compressor with regulator, or canned air)
- Small brush for tight spaces (old toothbrush works well)
- Clean container for soaking small parts
- Fuel line clamps (if original clamps are damaged during removal)
- New gasket set and O-rings (purchase model-specific kits to avoid leaks)
- Fresh two-cycle or four-cycle oil, depending on your mower type
Step-by-Step Guide to Cleaning the Carburetor
Step 1: Prepare the Lawn Mower
Safety preparation prevents fuel spills, injuries, and unintended engine starting during the procedure.
- Disconnect the spark plug wire – Pull the wire boot firmly off the spark plug. This prevents accidental engine ignition if someone pulls the recoil cord.
- Allow the engine to cool – Wait at least 30 minutes after the last use. Hot engines and carburetor cleaner are a fire hazard.
- Drain the fuel tank – Locate the fuel drain plug (usually at the bottom of the tank) and open it over a drain pan. Alternatively, siphon fuel into an approved container using a fuel hand pump. Store old fuel safely in a labeled container for proper disposal.
- Remove the air filter housing – This typically involves 2-3 bolts. Set it aside; you’ll reinstall it after carburetor cleaning.
Step 2: Remove the Carburetor
Careful removal prevents damage to mounting surfaces and fuel lines.
- Locate the fuel line connection – The rubber hose connects the fuel tank to the carburetor inlet. Losen the hose clamp with a screwdriver and gently pull the hose free. A small amount of fuel may drip; use a rag to catch it.
- Note the throttle and choke linkages – Take a photo or sketch how the control cables attach to the carburetor. This reference prevents reassembly confusion.
- Disconnect throttle and choke cables – These typically clip into the carburetor body. Carefully unhook them; they should not require tools.
- Remove mounting bolts – The carburetor is usually held by 2-4 bolts. Remove them with appropriate wrench and place them in a labeled container.
- Lift the carburetor away from the engine – Pull straight up to avoid damaging the rubber intake gasket beneath it.
Step 3: Disassemble the Carburetor
Organization during disassembly ensures you don’t lose small, critical parts. Many carburetors have 15-20 individual components.
- Place a cleanrag on your work surface – This prevents small parts from rolling away.
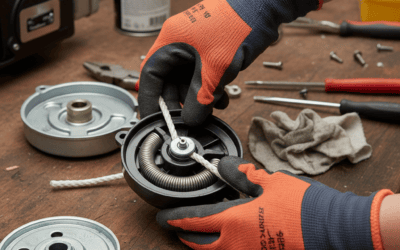
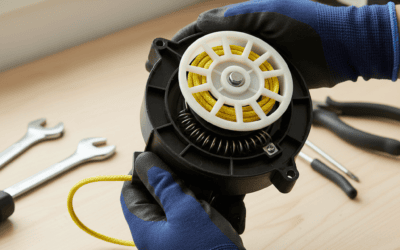
- Remove the float bowl – This is the lower cup-shaped section. It’s held by 4-6 bolts. Carefully unscrew them and set them aside. Once removed, the bowl and internal float mechanism become visible.
- Remove the float assembly – Note how the float pivots; it should move freely up and down. The float controls needle valve that regulates fuel level in the carburetor.
- Remove the main jet – This small brass component screws out from the center of the carburetor body. Use a small wrench or jet removal tool. Do not force it; apply steady pressure.
- Remove the idle jet and needle valve – These also screw out, but are smaller and more delicate than the main jet. Handle them with care to avoid stripping threads.
- Extract internal o-rings and gaskets – These are rubber seals. Note their positions before removal; damaged seals cause fuel leaks during reassembly.
- Remove the air intake cover – Some carburetors have a removable top section held by 2-3 bolts.
Step 4: Clean the Carburetor Components
Thorough cleaning removes varnish and debris that block fuel passages.
- Soak large components in carburetor cleaner – Place the float bowl, body, and cover in a shallow pan of carburetor cleaner for 15-30 minutes. This softens varnish for easy removal.
- Scrub with a soft wire brush – After soaking, use a soft-bristled brush to gently remove varnish from all surfaces. Never use steel wool or hard brushes; these scratch precision surfaces.
- Clean the main jet, idle jet, and needle valve – These are the most critical components. Soak them separately in carburetor cleaner. Use a small wire or compressed air to clear the passages inside each jet. Never use a metal wire that’s thicker than the jet passage; you risk enlarging the opening and disrupting the fuel-air ratio.
- Clean carburetor passages with compressed air – Once components are brushed clean, apply compressed air (at 30-60 PSI) to all fuel passages, galleries, and internal channels. Fuel cannot flow through blocked passages, so thorough air cleaning is essential.
- Dry all components thoroughly – Use compressed air to blow out remaining cleaner and moisture. Any carburetor cleaner or water left inside will cause performance issues.
- Inspect the float for damage – Float failure is common with old carburetors. If the float looks cracked or waterlogged (feels heavy or sinks in water), it must be replaced. A failing float prevents proper fuel level regulation.
- Check the needle valve seat – Inside the carburetor body, the needle valve sits in a small brass seat. Inspect it for pitting or corosion. If damaged, the seat may need professional replacement, as it controls fuel shutoff.
Step 5: Replace Gaskets and O-Rings
Old gaskets deteriorate and cause fuel leaks. Always replace them with a new gasket kit designed for your carburetor model.
- Remove old gaskets carefully – Use a gasket scraper or old credit card to gently lift away the old rubber. Do not scratch the metal surface beneath.
- Clean the gasket surface – Wipe away any remaining gasket material with a clean rag. The surface must be smooth and dry for the new gasket to seal properly.
- Position new gaskets – Align the new gasket holes with the bolt holes on the carburetor body. Use the old gasket as a reference if positions are unclear.
- Install new o-rings – Slide new o-rings onto fuel inlet tubes and internal channels. Ensure they sit evenly in their grooves.
Step 6: Reassemble and Reinstall the Carburetor
Reassembly is largely the reverse of disassembly, but attention to detail prevents leaks and performance issues.
- Reinstall internal jets and needle valve – Screw the main jet, idle jet, and needle valve back into their passages. Tighten them firmly but do not over-tighten; carburetors are made of aluminum, and stripped threads are difficult to repair.
- Reinstall the float assembly – Ensure the float pivots freely and the needle valve makes contact with the seat when the float rises. The float should not be bent or stuck.
- Reattach the float bowl – Align the new gasket and bolt the bowl back on. Tighten bolts in a crisscross pattern (like tightening car wheel lugs) to ensure even compression and prevent leaks.
- Reattach the carburetor to the engine – Position the carburetor on the intake manifold, align the mounting bolts, and tighten them securely. The rubber intake gasket beneath must be replaced if it’s cracked or compressed.
- Reconnect the fuel line – Reattach the fuel line to the carburetor inlet and tighten the hose clamp. Ensure the connection is tight to prevent fuel leaks.
- Reconnect throttle and choke cables – Use your reference photo or sketch to reattach these in the correct positions. Test that they move freely through their full range.
- Reinstall the air filter housing – Bolt it back in place with a clean or new air filter inside.
- Reconnect the spark plug wire – Push the wire boot firmly onto the spark plug until it clicks into place.
Step 7: Test the Lawn Mower
Proper testing reveals whether the cleaning was successful and whether any leaks or performance issues remain.
- Fill the fuel tank – Use fresh, clean fuel. Old fuel in the tank may contribute to ongoing issues.
- Prime the carburetor – If your mower has a fuel pump, let it run for 30 seconds before pulling the start cord. If not, activate the manual primer bulb if equipped.
- Start the engine – Pull the recoil cord or press the electric start button. The engine should start within 3-4 pulls. If it cranks but doesn’t turn over, wait a few minutes and try again; air in the fuel line takes time to clear.
- Check for fuel leaks – Inspect the float bowl, fuel line connection, and carburetor mounting area. Any visible fuel dripping indicates a loose connection or damaged gasket.
- Allow the engine to warm up – Let it run at idle for 2-3 minutes. Rough idling initially is normal as old deposits clear. If roughness persists, the carburetor may need a second cleaning or professional adjustment.
- Test under load – Engage the mower blade and cut test area. The engine should maintain consistent speed and not stall. If stalling occurs, the carburetor adjustment may require professional tuning.
Tips for Preventing Future Carburetor Issues
Use Fuel Stabilizer During Storage – Ad fuel stabilizer to the tank before storing the mower for winter or extended periods. Stabilizer slows fuel oxidation and prevents varnish formation. Follow product instructions for the correct dosage based on tank size.
Drain the Carburetor Before Long Storage – Some experts recommend turning off the fuel valve and running the engine until the carburetor empties of fuel. This prevents varnish from forming inside the carburetor during months of storage. Alternatively, drain the entire fuel tank and carburetor.
Run Fresh Fuel Regularly – If the mower sits for more than a month, start it and let it run for 10-15 minutes monthly. This circulates fresh fuel through the carburetor and prevents fuel from stagnating.
Avoid Ethanol-Blended Fuels When Possible – E10 fuel (10% ethanol) is more corrosive and oxidizes faster than pure gasoline. If available, use pure gasoline for small engines, especially if the mower will be stored for winter. Check your mower’s manual for fuel recommendations.
Know When to Replace Instead of Clean – If you’ve cleaned the carburetor twice and the mower still runs poorly, the issue may lie elsewhere (spark plug, fuel filter, air filter, or ignition coil). Alternatively, the carburetor may have internal damage beyond cleaning. Modern carburetors are often inexpensive enough to replace rather than repair repeatedly. Consult your mower’s manual for replacement costs and compatibility.
Frequently Asked Questions
Q: How long does it take to clean a lawn mower carburetor?
A: For someone with mechanical experience, the entire process takes 1-2 hours. Disassembly and reassembly each take about 15-20 minutes, while soaking and cleaning components takes 45minutes to an hour. Your first attempt may take longer; subsequent cleanings are faster once you’re familiar with your mower’s carburetor layout.
Q: Can I clean the carburetor without removing it?
A: Partial cleaning is possible by spraying carburetor cleaner directly into the fuel inlet and intake, but it’s much less effective than complete disassembly. Complete removal allows you to access jets, passages, and the float bowl, which are the main sources of varnish buildup. Professional shops rarely skip removal because the results are significantly better.
Q: What is the difference between carburetor cleaner and other solvents?
A: Carburetor cleaner is formulated to dissolve varnish and fuel deposits safely without damaging rubber gaskets, plastic, or fuel system seals. General solvents like acetone or brake cleaner can damage these components. Always use a product labeled specifically for carburetor cleaning.
Q: Do I need to replace the spark plug after cleaning the carburetor?
A: You don’t have to, but it’s a good opportunity. Carbon buildup on the spark plug is often caused by a dirty carburetor, so cleaning the carburetor alone may improve spark plug condition. If the spark plug is cracked, heavily fouled, or more than 1-2 years old, replacement (typically $5-15) ensures optimal ignition and performance.