

Quick Answer: How To Clean Spark Plug Lawn Mower?
To clean a lawn mower spark plug, remove it from the engine, use a wire brush to scrub the electrode and threads, apply brake cleaner or solvent to dissolve carbon deposits, dry it completely, check and adjust the gap with a gapping tool if needed, and reinstall it. However, if the spark plug shows severe wear, cracks, or heavy fouling…

Pros
- Large-size design named in product title
- Sharpening and balancing functions listed
- Listed as a new upgraded version

Pros
- Adjustable 15-to-45-degree range in title
- Sharpening and balancing functions listed
Pros
- Includes replacement gaskets and a 98079-55846 spark plug
- Matches Honda HRR216 and HRS216 lawn mower models
- Designed around the 16100-Z8B-901 carburetor specification
Cons
- Restricted to select Honda GCV160 mower applications
- Installation requires basic mechanical tools and skills
When to Clean vs. Replace a Spark Plug
Deciding whether to clean or replace a spark plug depends on its condition and age. A spark plug that has accumulated light to moderate carbon deposits and shows no visible damage is a good candidate for cleaning. If the plug fires consistently but the engine runs rough or starts slowly, cleaning may restore performance without the cost of replacement.
However, certain conditions warrant replacement instead. A spark plug with a cracked porcelain insulator, a severely eroded electrode, or corrosion that won’t brush away should be replaced. Similarly, plugs that have been in service for several years, typically 3 to 5 years depending on the mower’s usage, may have reached the end of their useful life. A heavily fouled plug covered in thick, stubborn deposits that don’t respond to brushing and solvent is often easier and more cost-effective to replace than to restore.
Age matters too. Even if a spark plug appears clean, its internal components degrade over time. Older plugs lose their ability to maintain proper gap and fire reliably. For lawn mowers that see regular seasonal use, inspecting the spark plug annually and replacing it every 2 to 3 years is a standard maintenance approach, even if cleaning might temporarily restore function.
Tools and Materials Needed
Gathering the right tools before starting ensures you can clean the spark plug effectively and safely. A wire brush, either a dedicated spark plug brush or a small handheld wire brush, is essential for removing loose carbon deposits from the electrode and threads. A spark plug socket, which has a rubber insert to grip the porcelain, helps you remove and reinstall the plug without cracking it.
For dissolving stubborn deposits, brake cleaner or carburetor cleaner works well and evaporates quickly, leaving no residue. Some people use electrical contact cleaner or mineral spirits as alternatives. Avoid gasoline or other fuels for cleaning, as they’re flammable and less effective at breaking down carbon buildup.
A spark plug gapping tool, a simple gauge with wire or a feeler gauge, allows you to measure and adjust the gap between the center and side electrodes. Most hardware stores and automotive suppliers stock these inexpensively. You’ll also need a soft rag or paper towels to dry the plug after cleaning, and safety glasses or goggles to protect your eyes from debris and aerosol spray.
Finally, have your lawn mower‘s manual or the spark plug specifications readily available. Knowing the correct gap distance for your mower’s engine ensures the plug will fire properly once reinstalled.
Step-by-Step Cleaning Process
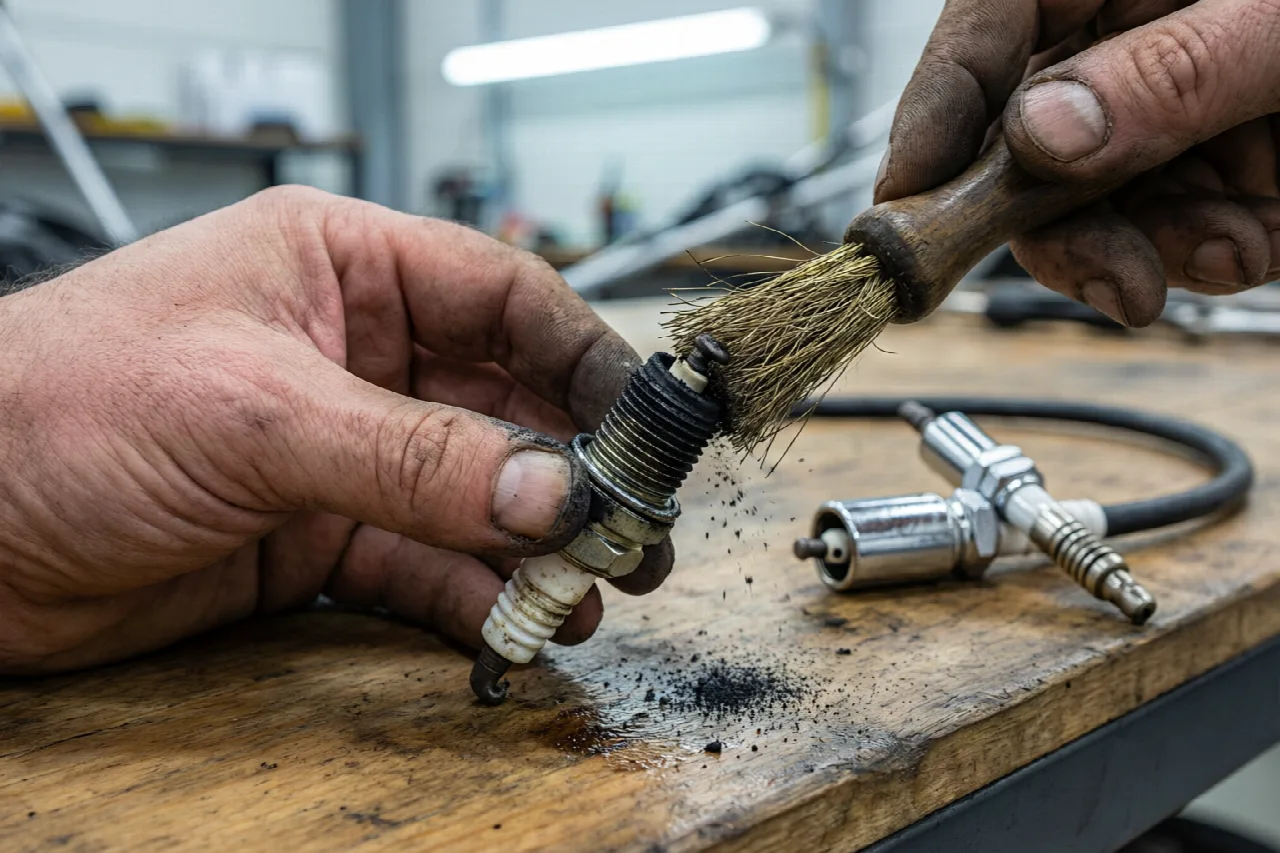
Begin by disconnecting the spark plug wire from the mower’s spark plug. This prevents accidental engine starting while you work. If the wire is stuck, gently twist it side to side while pulling to avoid damaging the connection. On some mowers, the wire sits on a ceramic boot; handle it carefully.
Use the spark plug socket and ratchet or socket wrench to remove the spark plug by turning it counterclockwise. Keep track of any washers or gaskets that come off with it, as you’ll need to reinstall them. Inspect the plug immediately: look at the color of the deposits and the overall condition of the electrode and insulator.
Hold the spark plug firmly and use a wire brush to scrub the electrode, side electrode, and the threaded portion. Brush away loose carbon and buildup with firm, deliberate strokes. Work around all sides of the electrode carefully to avoid damaging the delicate center rod. To evaluate matched hardware tolerances, consult our detailed overview of marshall stanmore iii vs harman kardon onyx studio 8.
Once you’ve brushed away the loose deposits, spray the spark plug’s tip with brake cleaner, holding it upright so the solvent flows away from the threads and center electrode. Let the cleaner evaporate or wipe away the excess with a clean, lint-free rag. For heavy deposits, repeat the brushing and spraying cycle until the plug looks significantly cleaner.
After cleaning, dry the spark plug thoroughly. Let it air-dry or use a clean rag to remove moisture. Ensure no solvent residue or water remains, particularly around the threads and the ceramic insulator. A completely dry plug is essential for reliable firing. When planning workspace deployment, consider the engineering criteria outlined in our dyson v8 cyclone vs bissell featherweight stick guide.
Inspecting the Spark Plug After Cleaning
Once the spark plug is clean and dry, examine it closely under good lighting. The ceramic insulator should be white or light tan with no cracks, black streaks, or damage. The center electrode should appear intact, with a sharp corner at the tip rather than rounded or pitted. The side electrode should also show no signs of burn-through or excessive erosion.
If you notice a cracked insulator, a severely eroded center electrode, or deposits that didn’t respond to cleaning, the plug is no longer reliable and should be replaced. A spark plug that continues to fail after cleaning has likely reached the end of its service life. For additional operational safety benchmarks, see our published testing notes on bissell crosswave hydrosteam vs shark stainforce.
If the plug passes inspection, check the gap next. The gap is the distance between the center electrode and the side electrode, typically between 0.028 and 0.040 inches for lawn mowers, though your mower’s manual will specify the exact measurement. Use a spark plug gapping tool or a wire feeler gauge to measure the gap. Place the tool between the electrodes and check whether it slides through easily or requires slight resistance.
If the gap is too wide, carefully bend the side electrode closer to the center electrode using a gap adjusting tool or a small screwdriver. If the gap is too narrow, gently bend the side electrode away from the center. Adjust incrementally and recheck with the gauge. The correct gap ensures the spark jumps reliably between the electrodes, which is critical for engine performance.
Reinstallation and Preventative Maintenance
With the spark plug clean, dry, gapped correctly, and inspected, it’s ready to reinstall. Thread it back into the engine by hand first to avoid cross-threading. Once hand-tight, use the spark plug socket and ratchet to seat it firmly, but do not over-tighten, as this can crack the ceramic or strip the threads. A snug fit is sufficient.
Reconnect the spark plug wire by pushing it firmly onto the ceramic boot until you feel or hear a click. The connection should be secure and not wiggle when gently pulled. Start the mower and listen for smooth idling and responsive throttle response. If the engine still runs rough or hesitates, the problem may lie elsewhere, or the spark plug may need replacement after all.
To extend the life of your cleaned spark plug and prevent fouling, maintain the mower’s air filter, keep the fuel fresh and properly mixed (for 2-stroke engines), and run the engine at full throttle for a few minutes before shutting it down. These practices reduce carbon buildup and keep the spark plug firing cleanly.
Inspect the spark plug visually at the start of each mowing season. If it looks dirty, clean it using the method described above. Plan to replace the spark plug every 2 to 3 years or after 100 to 200 hours of operation, even if it still appears functional. Regular replacement prevents unexpected starting problems mid-season and ensures consistent engine performance. Keeping a spare spark plug on hand is also practical, as a failed plug during use leaves you unable to run the mower until you can acquire a replacement.
Technical Standards and Compliance
Mechanical safety standards, operational tolerances, and protective gear guidelines align with benchmark specifications established by the American National Standards Institute (ANSI).









