

Quick Answer: How To Extend Weed Wacker Line?
On a typical bump-feed weed wacker, leftover trimmer line is extended by bringing the head up to speed and tapping it lightly on the ground so more string feeds through the eyelets. If the spool is empty or the line will not advance, stop the tool, disconnect its power source, then open the head and rewind or replace the line…

Pros
- Six-pack bundle listed in the product title
- Square profile line named in the product title
- Commercial 5 lb size listed for heavier use
Cons
- Trimmer compatibility is not verified in supplied data

Pros
- Six-pack bundle listed in the product title
- Star profile line named in the product title
- Commercial 5 lb size listed for heavier use
Cons
- Line length and trimmer fit are not stated in supplied data

Pros
- Title lists 1280 feet of line length
- Square profile named in the product title
- Lists a 5 lb line rating
- Title describes it as commercial-style line

Pros
- Title lists .095-inch square nylon line
- Lists 1280 feet of line length
- Manufacturer states fit with most string trimmers
- Lists a 5 lb line rating
A weed wacker, also called a string trimmer, cuts with nylon trimmer line that shortens as it wears, snaps, or melts from heat and friction. Most consumer heads store that line on a spool. Extending the line can mean two different jobs: feeding out what is already wound inside, or opening the trimmer head and installing new line. Those jobs are not the same, and treating every head like a bump-feed design is a common reason the string still will not come out.
This guide covers general consumer string-trimmer heads. It separates leftover-line feeding from a full reload, explains how bump-feed, automatic-feed, and fixed-line heads differ, and stays at a high level because brand, model, and aftermarket parts change the exact hardware. When a marking on the spool or the owner’s manual disagrees with a generic step, follow the marking or the manual. For additional operational safety benchmarks, see our published testing notes on jbl partybox club 120 vs sony srs xv500.
Safety steps before you touch the head
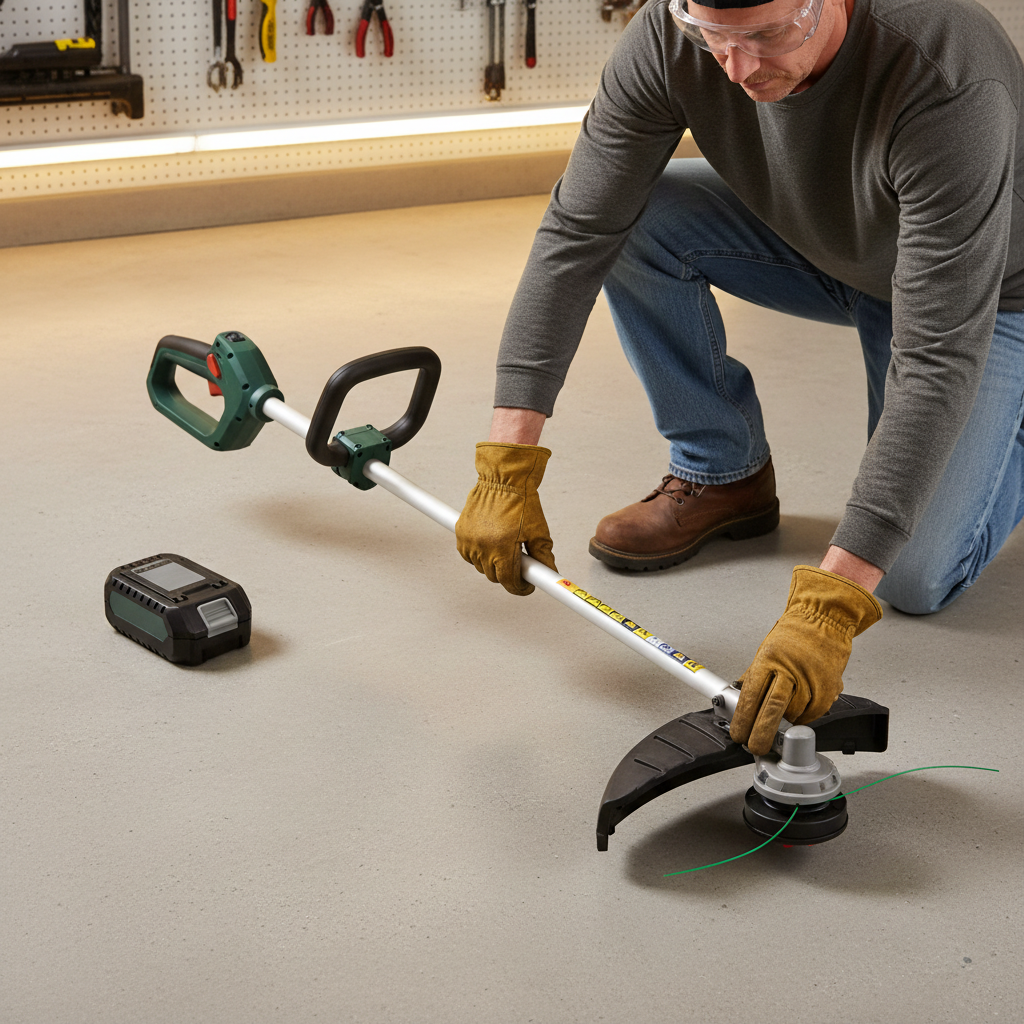
The cutting head is the most hazardous part of the tool to handle. Line can still be under spring tension, a bump knob can hide a sharp broken stub, and a motor or engine that can start will spin the head faster than you can pull your hand away. Do the safety steps first whether you only need to pull a jammed tail through an eyelet or you plan to take the cap off. For additional operational safety benchmarks, see our published testing notes on jbl partybox club 120 vs sony srs xv500.
Stop the tool and wait for the head to stand still
Release the trigger or throttle and wait until the trimmer head has fully stopped. Do not grab the line, bump knob, or guard while anything is still turning. Broken line and yard debris can leave the head at high speed, so eye protection matters even for a quick bump-and-go trim, and it matters more when you are inspecting or clearing the head. Long pants, sturdy shoes, and gloves reduce cuts from line stubs and from the edge of the cutting guard. Local rules and the owner’s manual override this general advice if they are stricter.
Disconnect the energy source for the power type you have
Shutdown is not finished when the head stops spinning. Before you open the head, pull line by hand, or pick grass out of an eyelet, disconnect the tool so it cannot start:
- On a gasoline model, switch the tool off, then disconnect the spark-plug wire so the engine cannot fire if the shaft is turned or a switch is bumped.
- On a battery model, remove the battery pack. Do not leave a pack clicked in while you service the head.
- On a corded electric model, unplug the power cord from the outlet, not just from an extension-cord junction that might still be live if someone reconnects it.
Set the tool on a stable surface with the head where you can see it. If the trimmer was just used hard, the housing and line can be hot; give metal and plastic a moment to cool enough to handle. Do not remove the cutting guard to make the head easier to reach, and do not run the tool with the guard off. The guard is part of line-length control as well as debris control. To compare alternative configurations, check our hands-on review of z890 vs x870e motherboard.
What you are protecting against
A spinning head can throw line fragments, stones, and cut vegetation. Hands and eyes are the usual contact points when someone tries to tug line while the tool is still able to start. If the work involves a cracked housing, a missing spring, or a head design you cannot identify, stop and use the manual or a qualified shop rather than improvising a repair.
How to advance leftover line on a bump-feed head
On many consumer weed wackers, leftover line is meant to come out without opening anything. A bump-feed head holds wound trimmer line on a spool and uses a bump knob or button on the bottom of the head. When the head is spinning and that knob is tapped, a short length of line can slip out through the eyelets. That is the usual way to extend string during a job, provided usable line is still on the spool and the path through the eyelets is clear. Users looking for related component recommendations can explore our marshall stanmore iii vs harman kardon onyx studio 8 breakdown.
How a bump-feed release works in practice
Bring the trimmer up to its normal operating speed with the cutting guard in place and the head a safe distance from people, glass, and hard masonry. Lower the spinning head and tap the bump knob lightly on soil or turf. A light tap is enough on a healthy head; slamming the tool into hard ground or pavement can crack the knob, flatten the housing, or drive dirt into the eyelets. There is no single correct tap force or guaranteed feed length that applies to every brand, so stop after a tap and look at the line rather than hammering the head until something gives.
If line remains and the mechanism is free, a short additional length should appear at one or both eyelets. Repeat a light tap only if you still need more reach and you can see that line is actually moving. If nothing comes out after a couple of careful attempts, more bumping will not invent line that is fused, too short, or jammed. That is the point to shut the tool down and inspect instead of forcing the head. Before finalizing equipment decisions, refer to our comprehensive dyson v8 cyclone vs bissell featherweight stick comparison.
When to bump, and what extra-long line means
Bump when the cut has become weak because the exposed line is short, not as a constant drumbeat on every pass. Continuous hard bumping wears the knob and can dump more line than the head can support. Some cutting guards include a cutoff knife that trims line that is too long once the head is spinning. Not every guard has that knife. If extra line comes out longer than the guard can safely contain, stop the tool, disconnect power as described above, and shorten the tails only after the head is still. Do not reach toward a spinning cutoff knife or try to break line off by hand while the motor or engine can start.
Bump-feed is not a universal gesture. An automatic-feed head is designed to advance line without a ground tap. A fixed-line head uses short pre-cut pieces locked into slots and has nothing useful to bump. Tapping those designs as if they were bump-feed heads wastes time and can damage parts that were never meant to strike the ground. For broader ecosystem context, read through our operational guide on bissell crosswave hydrosteam vs shark stainforce.
When leftover line is not enough: identify the head type
If the spool is empty, the remaining tails are too short to reach the eyelets, or bumping does nothing, you need a reload rather than another tap. Pause long enough to identify the head. Head type and line diameter change the method. Forcing a wound-spool procedure onto a fixed-line head, or stuffing oversized line into a small eyelet, is how housings crack and how new line welds itself into a useless lump.
Visible cues that stay general
You can often sort a consumer head into one of three families by looking, without taking it apart:
- A bump knob or flexible button on the bottom of the head, plus line exiting through side eyelets from a hidden spool, usually means bump-feed.
- A head that advances line while running without a ground tap, still feeding from an internal spool, is often an automatic-feed design. The outside may look similar to a bump head, so the manual or the original product description is the safer identifier if there is no knob.
- Short, separate pieces of line locked into slots, holes, or clamps around the rim usually mean a fixed-line head. Those pieces are replaced one by one; they are not wound onto a spool.
Aftermarket heads, dual-line versus single-line layouts, and split-spool designs add more variation. A cracked, incomplete, or mixed set of parts may not match any generic sequence. If the cap, spring, or spool does not look like a simple consumer cassette, stop improvising and check the owner’s manual or the markings molded into the head.
Why line diameter belongs in the identification step
The accepted line diameter is often printed on the spool, the head, or in the manual. That number is not decoration. The eyelets, the slots in a fixed-line head, and the amount of line a spool can hold are all built around a size range. Diameter also affects stiffness, so the wrong size can refuse to feed even when you wind it neatly. Read the marking before you buy or cut replacement line. Do not guess a size from memory of another trimmer, and do not assume that a thicker commercial-looking string is automatically an upgrade.
If the head is unlabeled, the tool is borrowed, or the previous owner already mixed parts, the manual for that model is the right next document. A general article cannot supply model-by-model disassembly, spring order, or a compatibility list.
How to open the head and rewind or replace the line
Once the tool is stopped and disconnected, a typical consumer spool head follows a similar high-level sequence: remove the cap, lift out the spool, load the correct line, route short tails through the eyelets, and close the head so it can feed. The details of tabs, threads, and springs are not universal. Work slowly, and if the head contains a spring, washers, or a multi-piece spool, photograph or note the order before anything jumps free.
Remove the cap and see how the parts sit
Turn the trimmer so you have a clear view of the head. Many caps release by pressing tabs, squeezing latches, or turning the cover. Some unscrew; the thread direction is not the same on every brand, so apply steady pressure rather than forcing a cover that has not released. Hold the housing so a hidden spring cannot launch the bump knob across the yard. Lift the spool straight out and set the parts in the order they came off. If grass has packed around the cap, clean it after the parts are in a tray, not by prying harder on a latch you cannot see.
Look at the old line before you throw anything away. Fused, melted, or brittle string should be discarded. A tail that is too short to reach both eyelets will not feed no matter how carefully you coil what is left. If the plastic spool itself is cracked, warped, or missing the notches that hold the line, replace the spool rather than wrapping new line onto a broken core.
Rewind a reusable spool or drop in a matching prewound spool
You generally have two legitimate options on a spool-type head. You can rewind the existing spool with bulk trimmer line of the marked diameter, or you can install a prewound replacement spool that matches that head and the specified line size. Neither option is universally better. Rewinding is common when the spool is intact and you already have the right line. A prewound spool is useful when the old winding is a fused mess or you want to avoid hand-winding. The replacement still has to fit the housing and follow the same wind direction and eyelet path.
For a rewind, cut a manageable length from the bulk coil rather than trying to stuff an entire unused pound of line into a small consumer spool. There is no single correct footage that fits every head, so use the capacity cues on the spool: fill the chambers without forcing a mound that will rub the cover. If the spool is split for two lines, treat each half as its own winding job and keep the lines in their own paths. If it is a single-line spool, do not invent a second circuit the head was not built to use.
Wind in the direction marked on the spool. Arrows or molded text are there because the bump or auto-feed mechanism only releases line that is coiled the way the cam or notches expect. Keep the winds snug and stacked, not loose and overlapping. Leave short tails, and park those tails in the holding notches or slots if the spool has them. Those notches keep the line from unraveling while you get the spool back into the housing.
Route the tails and close the head
Align the spool with the housing so any drive features, spring seat, or keyways match the position you noted on the way out. Feed each tail through the matching eyelet, then release the line from the holding notches so the tails can slide. The exposed ends only need to be long enough to stay in the eyelets while you refit the cap; extra length can be trimmed after the head is closed and the tool is still disconnected, or it may be shortened later by a guard knife if your guard has one.
Reassemble until the cap is fully seated and latched or threaded home. A cover that is only partly on will let the spool tilt, and a tilted spool is a frequent reason a freshly loaded head will not bump. Confirm that the bump knob, if present, moves the way it did before disassembly and that no spring is sitting crooked. Do not tape a cracked cover closed.
Fixed-line heads are a different job
If you identified a fixed-line head, stop the winding process. Those heads take pre-cut pieces inserted into slots, holes, or clamps. Use pieces of the diameter and approximate length the head is built for, seat them fully, and confirm they cannot fly out under spin. There is no spool to rewind. If the slots are worn egg-shaped or the locking features are broken, replace the head rather than hoping a thicker scrap of line will wedge in place.
Line size, winding direction, and mistakes that stop the feed
Most “I just put new line in and it still will not extend” problems are mechanical, not mysterious. The head can only release string that is the right diameter, coiled in the right direction, free to slip, and not welded to itself.
Diameter that does not match the head
Line that is much too thick may not pass the eyelets, may not sit in the holding notches, or may load the spool so tightly that a bump cannot release it. It can also stress a consumer housing that was never designed for that stiffness. Line that is much too thin may break as soon as it hits grass, slip through notches, or feed in uneven bursts. Round, twisted, and other shapes all exist, but shape does not override diameter. Use the size marked on the spool, head, or manual. If that marking is gone, treat diameter as unknown and identify the tool before buying a random bulk coil.
Winding against the arrows, or winding in a heap
Wind direction is not a preference. On a bump-feed or automatic-feed spool, the release mechanism expects line to pay out one way. Winding against the arrows can lock the spool so a bump does nothing, or it can cause the line to bind after the first inch. Loose, overlapping winds create the same bind: the top coil cinches a lower coil, heat from use welds the crossing point, and the eyelet never sees fresh line.
Keep each revolution next to the last one, under light tension from your fingers. Do not stretch nylon so hard that it necks down, and do not leave it so slack that the coil slumps when you set the spool down. If the spool has two chambers, do not let one line cross into the other chamber.
Old line that should not be reused
Nylon that has sat in sun, heat, or a hot head can become brittle. Line that has already melted together inside the spool will not become a smooth coil because you tugged it. If the remaining string is discolored, stiff, fused, or too short to reach the eyelets with a little extra for notches, discard it. Forcing welded line through an eyelet can flare the hole or break the tail off flush, which is harder to clear than starting over.
What to check if the line will not feed
When a bump-feed head refuses to release line even though you can see string on the spool, inspect the obvious path before you assume the whole head is finished. Stay inside consumer checks: look, clear debris, reseat parts. Do not turn a feeding problem into engine, clutch, or electrical diagnosis, and do not invent a spring-replacement procedure for a design you cannot identify.
Common, visible causes
With power still disconnected, work through what you can actually see:
- The spool is empty, or the remaining line is too short to reach the eyelets.
- Line has welded into a solid ring from heat and overlapping winds.
- Grass, mud, or broken line is packed in an eyelet so the tail cannot slide.
- The tails were never seated in the holding notches, so the coil unwound into a tangle inside the housing.
- The cap is not fully latched, so the spool tilts or the bump knob cannot travel.
- The spool was installed upside down or rotated off its drive features.
- A head that uses a feed spring has a missing, bent, or unseated spring.
Clear packed debris from the eyelets and the underside of the cap with a stick or brush, not with the tool running. If an eyelet is worn into a sharp groove, it will keep cutting new line; that is a replace-the-head or replace-the-eyelet situation if the manufacturer offers inserts, not something to file aggressively until the housing is thin.
When to stop do-it-yourself work
Cleaning and a correct rewind restore many jammed consumer heads. They do not restore every head. If the housing is cracked, the bump knob is broken off, the spool is shattered, or parts do not match any arrangement you can document, continued DIY is no longer appropriate. Use the owner’s manual or a qualified shop. Do not keep operating a head held together with tape, and do not assume that any “universal” aftermarket head will bolt on without checking fitment for that shaft and guard.
Mechanical safety standards, operational tolerances, and protective gear guidelines align with benchmark specifications established by the American National Standards Institute (ANSI).
Limits, damage, and when to replace the head
Extending weed wacker line is a feeding and loading task. It is not a reason to ignore damage that has become a safety issue. A spinning head can throw line and debris. A missing or broken cutting guard can leave line too long, which raises the chance of breakage, kick against solid objects, and fragments leaving the work area. The guard should stay installed during use, including after you reload the spool.
Treat these as stop-using-the-head conditions rather than feeding nuisances:
- A cracked or split housing that can open under spin.
- A bent, missing, or shattered bump knob that no longer supports the spool.
- A spool that is broken so line can exit in an uncontrolled burst.
- A guard that is missing, bent into the line path, or stripped of its mounting.
- Internal parts such as a feed spring that are missing on a design that needs them.
Wrong line size starts as a feeding issue and becomes a safety issue when it overloads the head or sheds pieces. Worn eyelets that slice every new tail are the same kind of problem. Replacement heads exist for many consumer trimmers, but fit, line capacity, and guard clearance are model-specific. This article cannot promise that an aftermarket head will fit, will last, or will keep a warranty intact.
Manufacturer line size, winding marks, and head instructions override these general steps. If you only needed more leftover line, a light bump on a healthy bump-feed head is still the first move. If the spool was empty or the path was jammed, a disconnected, correctly identified reload is the next one. If the plastic is broken or the head type is unclear, replacing or professionally servicing the head is the safe end of the job.
For more hands-on benchmarks and buying recommendations, consult our guides on residential zero-turn lawn mower guide, as well as heavy-duty chainsaw buyer guide, as well as automated robotic lawn mower guide.









