

How to Get a Lawn Mower to Start: Quick Answer
To start a lawn mower, first verify fuel presence and freshness (stale fuel from storage prevents ignition), check that the spark plug is clean and properly seated, confirm oil level meets the minimum mark, and ensure the air filter is clear. For gas mowers, prime the engine per your manual and use firm, steady pull-cord motions. For electric models, verify the battery is fully charged. If the mower cranks but won’t fire, the issue is typically spark or fuel delivery; if it won’t turn over at all, suspect fuel quality, battery charge, or oil problems.
Understanding Your Mower Type: Gas Push, Riding, or Electric
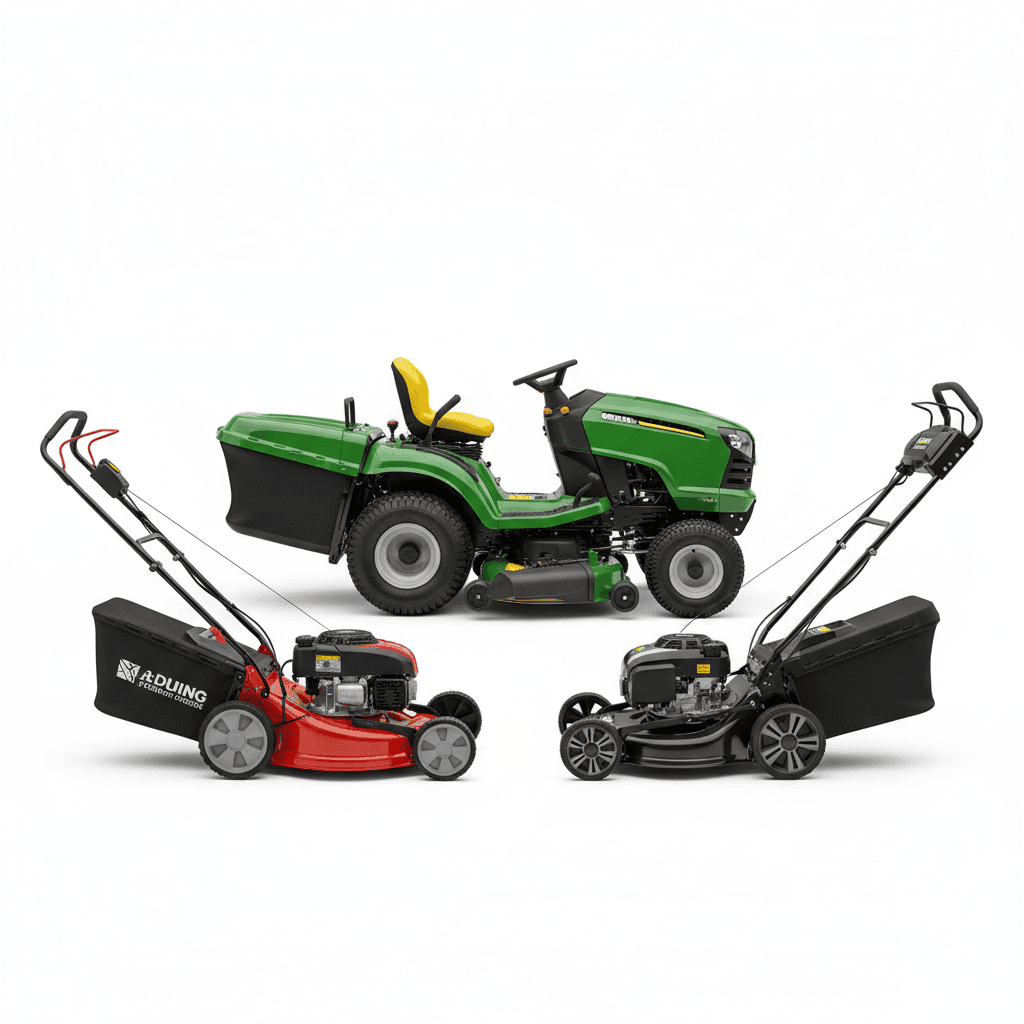
Lawn mower starting problems vary significantly by power source and design. Gas-powered push mowers rely on pull-cord ignition and carburetor fuel delivery, while riding mowers use electrical starters and battery systems. Electric mowers depend entirely on battery charge and power connections. The diagnostic path you take depends on your mower’s type, so identify yours first:
- Gas push mower: Hand-crank starter, carburetor-based fuel system, manual choke
- Gas riding mower: Electric starter, battery system, safety interlocks (seat switch, blade engagement)
- Battery-powered or corded electric mower: No spark plug, fuel system, or carburetor to troubleshoot
Additionally, whether the mower is experiencing mid-season failure or emerging from winter storage changes your diagnostic priorities. Storage-related issues—stale fuel, degraded gaskets, hardened carburetor deposits—require different recovery steps than sudden summer failure.
Universal Quick-Start Checklist for All Mower Types
Before pursuing type-specific troubleshooting, eliminate these common failure points that affect gas and electric mowers alike: When planning workspace deployment, consider the engineering criteria outlined in our jbl partybox club 120 vs sony srs xv500 guide.
1. Fuel Presence and Quality (Gas Mowers Only)
Fuel older than one season typically degrades and loses ignition properties, preventing the engine from firing even if the spark plug and carburetor function correctly. If your mower has been idle for more than 30 days, suspect fuel degradation: When planning workspace deployment, consider the engineering criteria outlined in our jbl partybox club 120 vs sony srs xv500 guide.
- Check the fuel tank visually; fuel should appear clear or light amber, not dark or separated
- Smell the fuel; stale fuel has a sour, rotten odor
- If fuel appears old, drain the tank and replace it with fresh fuel containing a fuel stabilizer
- Never mix old and new fuel; flush the tank and fuel lines completely
2. Spark Plug Condition (Gas Mowers Only)
Spark plugs should be checked and cleaned as part of regular mower maintenance; a fouled or loose spark plug is one of the most common startup failures. To inspect: For additional operational safety benchmarks, see our published testing notes on z890 vs x870e motherboard.
- Remove the spark plug wire by twisting it counterclockwise
- Unscrew the spark plug and examine the electrode; it should be dry and have a light tan or gray color
- If the plug is wet, black, or covered in oil, replace it with a new plug of the same type and gap
- Check the gap (the space between the electrodes) against your mower’s manual; re-gap if necessary using a gap tool
- Reinstall the plug and reconnect the wire firmly until it clicks
3. Oil Level
Oil level below the minimum mark can prevent engine startup or cause damage to internal components. Most mowers have a dipstick or sight glass on the crankcase:
- Place the mower on level ground
- Locate the oil dipstick or sight glass (check your manual for location)
- If using a dipstick, remove it, wipe it clean, reinsert it fully, and then remove again to read the level
- The oil should reach the minimum or full mark; if low, add the recommended oil type per your manual
- Do not overfill; excess oil can foul the spark plug and prevent starting
4. Air Filter Condition
Clogged air filters reduce engine performance and can prevent starting entirely. The air filter is typically housed in a plastic or metal canister on top of or beside the engine: For additional operational safety benchmarks, see our published testing notes on z890 vs x870e motherboard.
- Locate the air filter cover and remove it (usually held by clips or a single bolt)
- Inspect the filter element; it should be white or light yellow
- If the filter is dark, thick with dirt, or visibly blocked, replace it with a new filter or clean a reusable foam filter by tapping it gently and rinsing with water
- Do not operate the mower without an air filter installed
5. Battery Status (Electric and Battery-Powered Mowers)
Electric mower batteries require a full charge before use, especially after long storage. Battery-powered mowers will not start if the battery is depleted:
- Connect the mower to its charger and allow it to charge fully (typically 1–2 hours depending on battery capacity)
- For corded electric mowers, verify that the outlet is functioning and the cord is not damaged
- Check that the power switch is in the ON or START position
Gas Push Mower: Step-by-Step Starting Procedure
Once you have confirmed fuel freshness, spark plug condition, oil level, and air filter status, follow this sequence to start a gas push mower: To compare alternative configurations, check our hands-on review of marshall stanmore iii vs harman kardon onyx studio 8.
Step 1: Set the Choke
The choke restricts air intake to enrich the fuel mixture for cold starts:
- Locate the choke lever on the side or top of the engine; it is usually labeled CHOKE or has a snowflake symbol for cold start
- For a cold start (mower has not run in hours), move the choke to the COLD or CLOSED position
- For a warm start (engine was recently running), move the choke to the WARM or OPEN position
Step 2: Prime the Fuel Line (If Equipped)
Priming the fuel line is necessary for cold starts on gas mowers and pushes fresh fuel into the carburetor, making ignition easier: Users looking for related component recommendations can explore our dyson v8 cyclone vs bissell featherweight stick breakdown.
- Locate the primer button on the engine (a small rubber bulb, usually red or black)
- Press the primer button 3–5 times slowly until you feel resistance; do not over-prime, as this can flood the carburetor
- If your mower has no primer, skip this step
Step 3: Pull the Cord
Use firm, continuous pull-cord motions to crank the engine:
- Stand behind or to the side of the mower (never directly in line with the discharge chute)
- Grip the pull-cord handle firmly with one hand
- Using a quick, forceful motion, pull the cord straight out and slightly upward until it reaches full extension
- Release the cord and allow it to retract; do not hold it or resist its return
- Repeat this motion 4–6 times; the engine should begin to fire or turn over
Step 4: Transition the Choke to Warm
Once the engine fires or begins turning over, move the choke back to the WARM or OPEN position to allow normal air intake: Before finalizing equipment decisions, refer to our comprehensive bissell crosswave hydrosteam vs shark stainforce comparison.
- Pull the choke lever to the warm position gradually as the engine runs
- If the engine stalls, move the choke back to cold and pull the cord again
Step 5: Engage the Blade and Mow
Once the engine is running steadily, engage the blade or cutting deck per your mower’s design and begin mowing. The engine should maintain steady idle speed and not stall during operation.
Riding Mower and Battery-Powered Mowers: Electrical Checks
Riding mowers add complexity with electrical starting systems and safety interlocks. If your riding mower won’t start, verify the following:
Battery and Terminals
- Locate the battery (typically under the seat or near the engine compartment)
- Check that battery terminals are clean and free of corrosion (white or blue-green crusty buildup)
- If corroded, disconnect the negative terminal first, then the positive terminal
- Clean the terminals with a wire brush and reconnect positive first, then negative
- Verify the battery voltage with a multimeter (should read 12 volts or higher for a 12V system)
- If the battery reads below 12 volts, charge it with a battery charger for several hours
Starter Motor and Ignition Switch
- Turn the ignition key to the START position and listen for a clicking sound
- A single loud click indicates a starter motor issue or low battery; a rapid clicking indicates insufficient battery charge
- No click at all suggests a faulty ignition switch or broken connection
Safety Interlocks
Riding mowers include safety switches that prevent engine start if safety conditions are not met:
- Ensure you are seated fully on the mower seat; the seat switch must be engaged
- Verify the parking brake is engaged or the blade is disengaged (depending on your mower model)
- Confirm that the mower deck is in the neutral or parked position if your model requires this
- Check your manual for all safety interlocks specific to your mower
Fuel Delivery to Carburetor
- Locate the fuel line running from the tank to the carburetor (a small metal cylinder on the engine)
- Verify the fuel line is not cracked or disconnected
- If the engine cranks but won’t fire, fuel may not be reaching the carburetor due to a clogged fuel filter or faulty fuel pump
- Replace the fuel filter if it appears dark or clogged
Seasonal Storage Recovery: Addressing Stale Fuel and Winter Issues
Mowers in off-season storage often fail to start due to fuel degradation and carburetor gum buildup. If your mower has sat idle for more than 30 days, follow this recovery sequence:
Drain and Replace Fuel
- Locate the fuel drain bolt at the bottom of the fuel tank or carburetor (check your manual)
- Place a container beneath and carefully open the drain to remove all old fuel
- Close the drain bolt once emptied
- Fill the tank with fresh gasoline containing a fuel stabilizer additive (stabilizers help prevent re-degradation)
- Allow the new fuel to circulate through the carburetor by priming the fuel line
Clean or Replace the Air Filter
- A filter that has sat through winter may be clogged with dust and debris
- Remove and inspect the air filter as described in the universal checklist above
- If cleaning does not restore airflow, replace the filter with a new one
Carburetor Cleaning (If Engine Still Won’t Fire)
- If the engine cranks but won’t fire after fuel and air filter replacement, the carburetor may have hardened deposits from old fuel
- This typically requires carburetor removal and cleaning with a specialized carburetor cleaner and small brushes
- For most homeowners, this is best left to a professional service; attempting carburetor work requires technical skill and the right tools
Spark Plug Inspection
- Remove and inspect the spark plug as described above; storage can cause plugs to foul or corrode
- Replace the plug if it appears damaged, wet, or fouled by oil or carbon
Diagnosing Crank-But-Won’t-Fire Problems
If your mower cranks (the engine turns over) but the engine does not ignite, the issue is typically spark or fuel delivery rather than a no-crank problem:
Test for Spark
- Remove the spark plug and reconnect the wire to the plug
- Hold the plug against the engine block (metal part) or place it in a spark plug tester tool
- Have someone pull the cord (or turn the ignition key on a riding mower) while you observe the spark plug electrode
- A healthy spark appears as a blue or white flash between the electrode gaps
- No spark indicates a faulty plug, ignition coil, or magneto (the device that generates spark)
- If there is no spark, replace the spark plug first; if spark is still absent, the ignition coil likely requires professional replacement
Verify Fuel Reach
- Remove the spark plug and look inside the plug hole with a flashlight
- Pull the cord a few times (without the plug installed) and watch for fuel spray or mist entering the cylinder
- If you see fuel, the carburetor is delivering fuel; if you see none, the fuel line, filter, or pump is blocked
- Also observe whether the removed spark plug smells of fuel (a strong gas smell indicates fuel is reaching the plug; no smell suggests fuel system blockage)
Check Ignition Timing and Coil
- If spark is present and fuel is reaching the carburetor, the problem may be ignition timing or a faulty ignition coil
- These issues typically require professional diagnosis with testing equipment
When to Seek Professional Service
If you have completed all basic checks and the mower still will not start, or if you encounter any of the following, professional repair is warranted:
- No spark after replacing the spark plug and verifying the wire connection
- The engine makes grinding, squealing, or unusual mechanical sounds
- Fuel leaks from the carburetor, fuel line, or tank
- The engine floods excessively (excessive fuel in the cylinder causing a wet plug and fuel smell)
- Carburetor gum or rust damage visible in the fuel system
- The mower is more than 10 years old and requires major repair (cost may exceed replacement value)
A certified small engine technician can perform carburetor cleaning, ignition coil replacement, and complex fuel system repairs beyond homeowner capability. Request a diagnostic fee estimate before authorizing repairs to confirm the fix is cost-effective.
Frequently Asked Questions About How To Get A Lawn Mower To Start
Why won’t my mower start after sitting all winter?
Winter storage causes fuel to degrade, especially if the mower was not run during the off-season or fuel stabilizer was not added. Stale fuel loses combustibility and leaves varnish deposits in the carburetor. Old fuel also allows water absorption, corroding internal carburetor components. To recover a mower after winter, drain all old fuel, replace it with fresh fuel containing stabilizer, inspect and clean or replace the air filter, check the spark plug for fouling, and verify oil level. If the engine still cranks but won’t fire, carburetor cleaning by a professional is often necessary.
What does it mean if my mower cranks but won’t start?
Cranking (the engine turns over but does not ignite) indicates spark plug or fuel system failure. Test for spark using a spark plug tester or by observing the plug electrode under the wire during cranking; a blue or white flash indicates healthy spark. If spark is present, verify fuel is reaching the carburetor by looking for fuel mist in the cylinder hole during cranking or by checking the removed spark plug for a fuel smell. If spark is absent, replace the spark plug; if spark remains absent, the ignition coil has likely failed. If fuel is absent, check the fuel line for blockages, replace the fuel filter, and verify the tank contains fresh fuel.
Can I use old fuel to start my mower?
Fuel older than one season should not be used in lawn mowers. Old fuel degrades chemically, losing its combustible properties and leaving varnish deposits in the carburetor that block fuel flow and prevent ignition. If your mower’s fuel tank contains fuel stored for more than one season, drain it completely and replace it with fresh gasoline. Adding fresh fuel to old fuel does not resolve degradation; you must empty the tank entirely. For future storage, add a fuel stabilizer to the tank before the off-season to extend fuel life and prevent carburetor gum buildup.
What should I check first if my riding mower won’t start?
For a riding mower, first verify that the battery is charged (at least 12 volts using a multimeter) and that battery terminals are clean and tight. Next, confirm all safety interlocks are satisfied: you must be seated on the mower, the parking brake must be engaged, and the blade must be disengaged. Then check fuel presence and freshness, inspect the spark plug for fouling or looseness, and verify oil level is adequate. Listen when turning the ignition key to START: a loud click indicates a battery or starter issue; rapid clicking indicates low battery charge; no click suggests an ignition switch failure. If the engine cranks but won’t fire, follow the spark and fuel verification steps outlined above.

Pros
- Large-size design named in product title
- Sharpening and balancing functions listed
- Listed as a new upgraded version

Pros
- Adjustable 15-to-45-degree range in title
- Sharpening and balancing functions listed

Pros
- Sharpener and balancer functions in title
- 15-to-45-degree adjustable setting listed
- Built for lawn mower blade maintenance
Pros
- Includes replacement gaskets and a 98079-55846 spark plug
- Matches Honda HRR216 and HRS216 lawn mower models
- Designed around the 16100-Z8B-901 carburetor specification
Cons
- Restricted to select Honda GCV160 mower applications
- Installation requires basic mechanical tools and skills
For more hands-on benchmarks and buying recommendations, consult our guides on heavy-duty chainsaw buyer guide, as well as high-CFM commercial leaf blower guide.
Mechanical safety standards, operational tolerances, and protective gear guidelines align with benchmark specifications established by the American National Standards Institute (ANSI).









